-
-
Open the Excel template, that is attached to this guide. (Scroll down to the end of the guide to see attached files)
-
Sheet with explanation
-
Actual template for the Slidescanner
-
Headers of the columns that you have in the template.
-
Example how the template should look, if there is a name and profile assigned.
-
In this example only the first two slides of tray 1 are defined.
-
The scan profile has to have the exact same name as in ZEN and they have to be available in your own scan profile folder on the slidescanner.
-
-
-
With your naming sheet active, go to "save as" in Excel.
-
Choose a storage location (preferably your home drive, as you will have access from the Slidescanner); Define a name.
-
Choose CSV as the saving format.
-
Accept the warning, that it will only save the current active sheet.
-
Open the file in an editor and check, if Excel chooses Semicolon or coma as a separator (This depends on your Region settings in Windows).
-
-
-
Go to the Slidescanner, that you booked.
-
Follow the Startup Guide: Slidescanner - Zeiss Z1 - Part1: Start Up
-
Load your slides in the exact same order, as you wrote your naming list.
-
The trays have small numbers from 1 to 4 on it.
-
-
-
This step is only needed, when you use the profile for the first time.
-
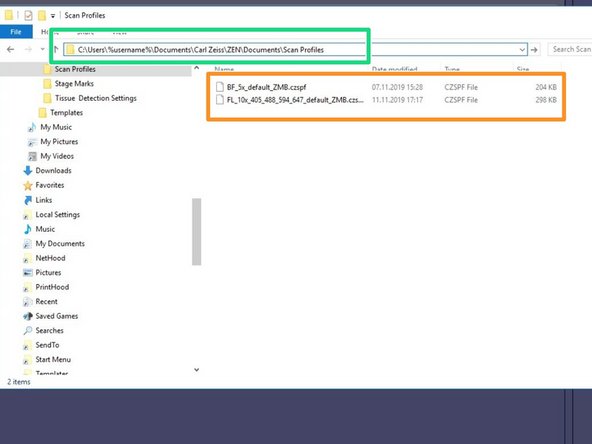
Make sure your scan profiles, that you assigned in the csv file are in this location on the slidescanner.
-
You can copy "C:\Users\%username%\Documents\Carl Zeiss\ZEN\Documents\Scan Profiles" into the Windows file explorer to get to the location
-
These are the profiles from the example in the Excel sheet.
-
-
-
This step is also only needed the first time ZEN is set up with a csv file.
-
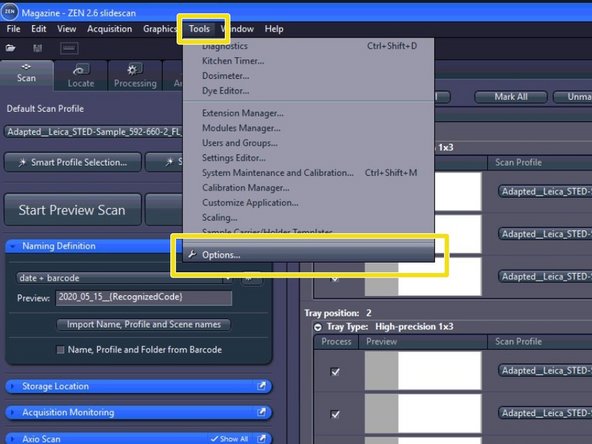
Go to "Tools" -> "Options"
-
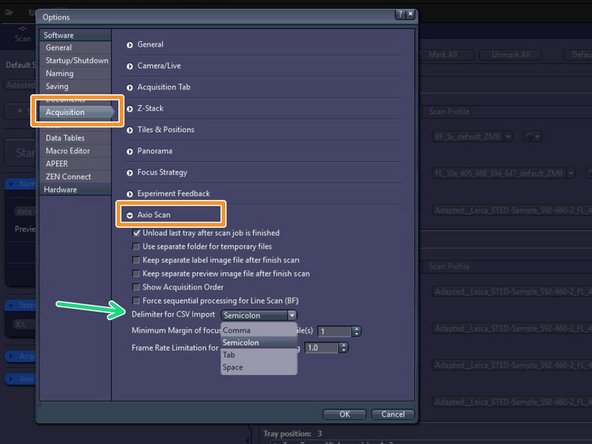
Go to " Acquisition" -> "Axio Scan"
-
Choose "Semicolon" as "Delimiter for csv import"
-
-
-
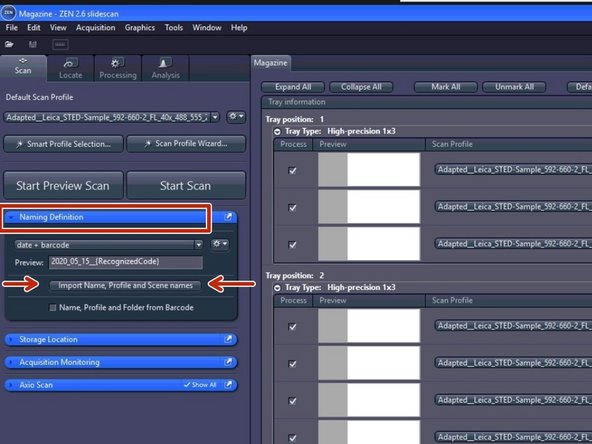
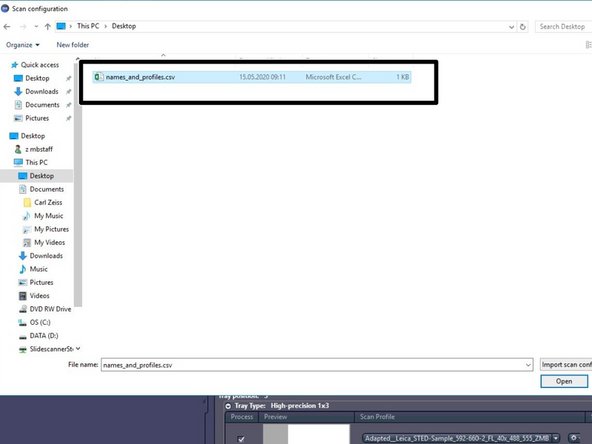
Click on "Import Name,..." in the "Naming definition" tab of ZEN.
-
Choose your csv file.
-
-
-
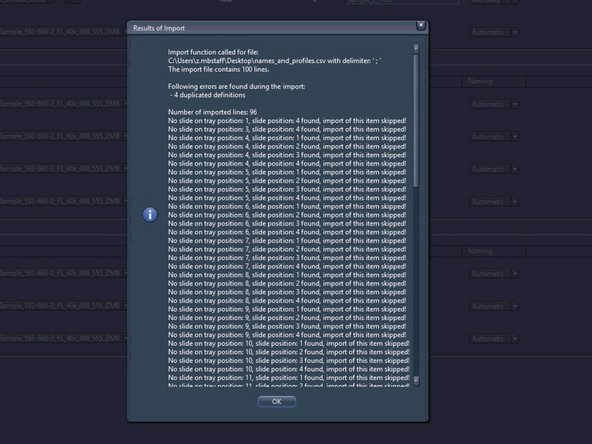
ZEN gives you a feedback about the import of the settings. It skips the positions, where no slide is present.
-
-
-
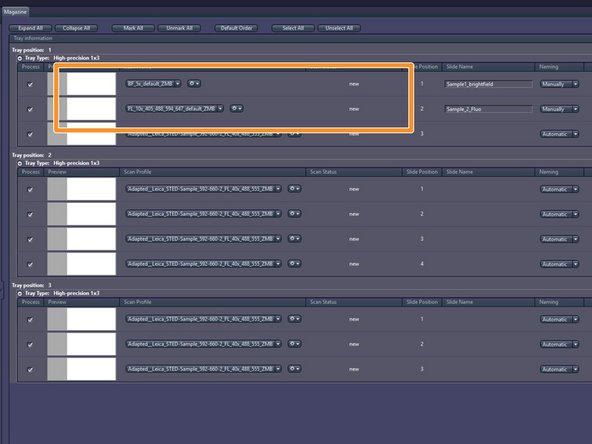
Check if your scan profiles and names were assigned correctly.
-
Positions that are not further defined in the Excel sheet / csv are scanned with default settings. before clicking on "Scan" the slides you did not further define should be excluded by unmarking.
-
-
-
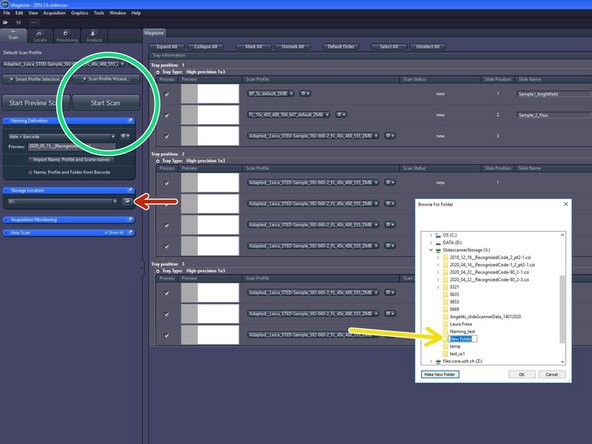
Choose "X:\ " as the storage location.
-
Make a new folder and rename it with the experiment number from the Filemaker.
-
Cick on "Start Scan"
-
Let the machine run.
-
-
-
Once the acquisition is finished, make sure all the trays are unloaded.
-
Then open the Slidescanner door and remove all your slides again. Then close the door, close the ZEN software and sign out your account from the computer.
-
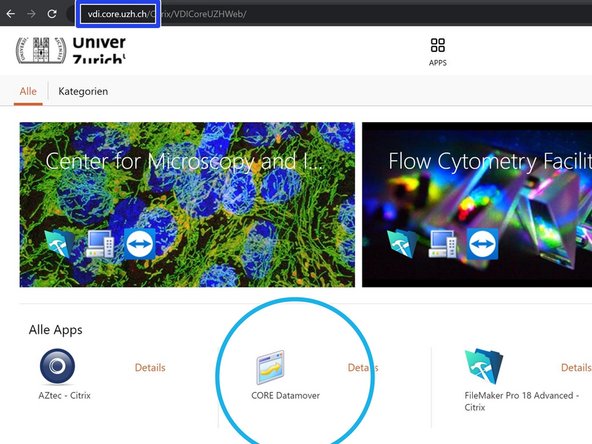
Go to Citrix and login with your core account.
-
Click on the "CORE Datamover"
-
Choose the "Slidescanner"
-
Type in the project number of your acquisition
-
Click on "Request" to start the data transfer.
-
You will get an Email, when the data transer is finished.
-