
Introduction
In this tutorial, you will receive step-by-step guidance for independently introducing yourself to the usage of the Zeiss Axio ScanZ.1 Slidescanner.
The slidescanner is a high-throughput wide-field microscope capable of imaging 100 standard slides in a session. It offers up to 40x magnification and has a pixel size of 0.12 microns (x & y)
The main characteristic of this microscope is the automatic production of high-quality images. This is achieved through customizing imaging profiles specifically suited to your samples. It requires an initial time investment in profile setup to reap the benefits of automation.
The tutorial will walk you through the process of setting up an imaging profile, and capturing a 5 steps 3-color Z-stack of images of our standard brain slice sample.
The tutorial is divided into the following main sections:
- ZMB Infrastructure.
- Understanding the slidescanner's hardware.
- Starting up the microscope and loading samples.
- Configuring settings for naming and saving your data.
- Establishing imaging profiles.
- Concluding your imaging session.
- Troubleshooting tips.
-
-
Ensure that your UZH batch is validated after registration with the ZMB.
-
Go to room Y24 F14 at the Irchel Campus of the UZH.
-
Open the locked door with your UZH batch by placing your card in front of the electronic knob and turning it to the left.
-
Find the Slidescanner that you booked: Slidescanner 2 is in the last booth and Slidescanner 1 is located in the second to last booth
-
-
-
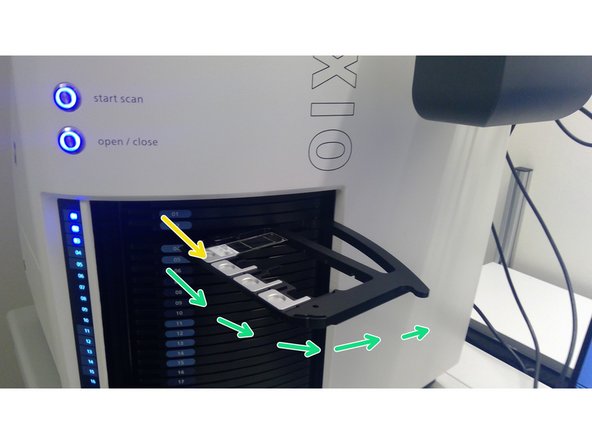
Slidescanner. This large white box contains a tower for loading the trays that hold your slides, a camera that makes an overview of each slide, and the microscope, which has 5x, 10x, 20x, and 40x objectives
-
Slide loader. This mechanical device allows you to load your slides onto the holding trays that are placed inside the microscope
-
Loading tower. This compartment stores up to a 100 trays inside of the slidescanner
-
Illumination LED
-
On-Off button
-
Status LED (becomes red when there is a problem)
-
Window to look inside of the slidescanner
-
Main power switch
-
-
-
Switch on the microscope and log in its control PC as described in the start up guide. Follow the start-up guide to Step 3 (opening the software). You do not need to load a sample, as the sample is already loaded.
-
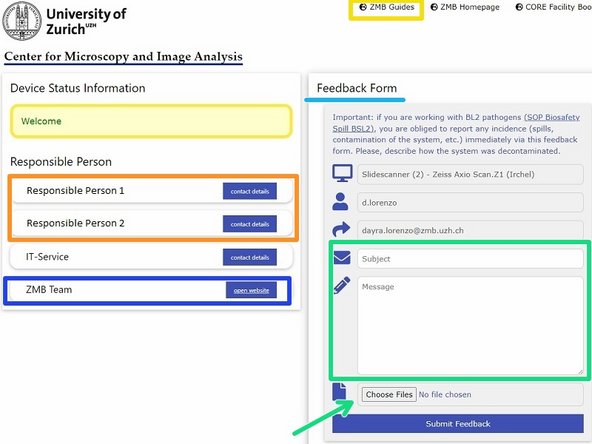
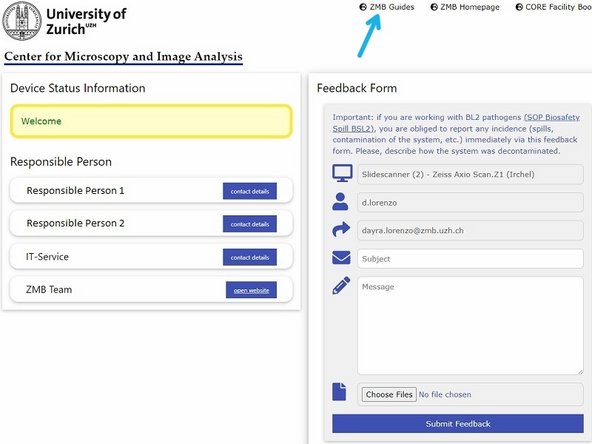
After login the feedback form will automatically open up
-
You can find contact information for the responsible persons in the feedback form
-
Reach out to us via phone, if you need immediate support
-
If you have feedback, or you can not reach us: use the text field to leave us a message
-
It is useful to add screenshots of error messages, but attaching the original files of faulty images is best when possible. You can also place faulty image files in the transfer folder
-
If you are unable to reach the responsible persons, feel free to contact other ZMB staff
-
Here you can access all guides for operating the microscope, as well other ZMB equipment, and IT infrastructure
-
-
-
The slidescanner is meant to maximize productivity by setting up imaging profiles that be used across as many samples as possible. This means that you can use the same imaging settings for a group of slides that have approximately the same:
-
thickness, tissue, and staining
-
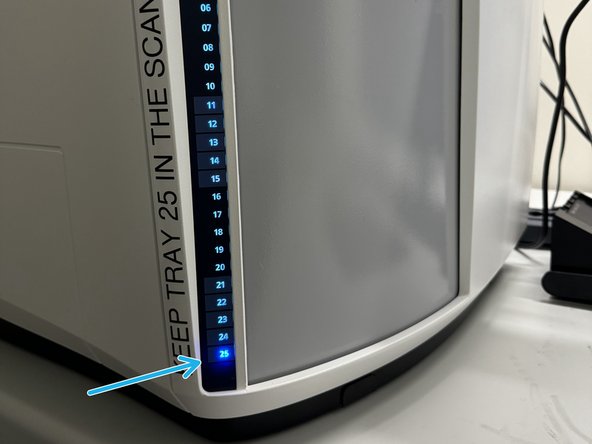
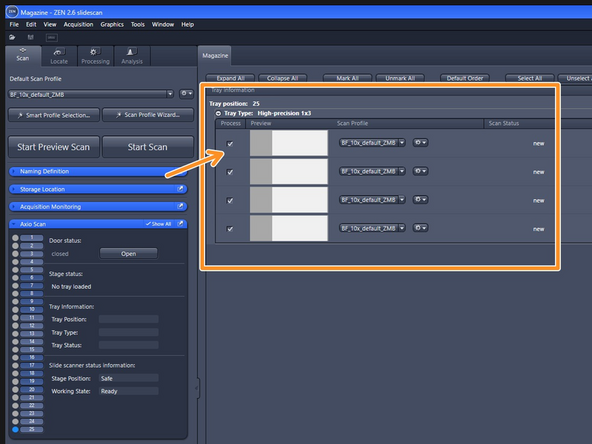
On this step you will use THIS guide to create a z-stack of a whole brain slice of our training sample, which is already loaded in tray 25
-
Stop at Step 18
-
With the software open, the already loaded sample will show in tray 25, position 1. Follow the guide for setting up a fluorescent profile and create an image of the following characteristics:
-
20x magnification
-
3 fluorescent colors: DAPI, Alexa 488, Alexa 555
-
z-stack of 5 steps, 5 microns appart
-
-
-
If there is left-over time, you can load your own sample and use your newly gained knowledge to take some data home - see step below to load/unload a new sample. Otherwise, to conlcude your session you will:
-
Take your data: Follow THIS GUIDE to automatically transfer your data
-
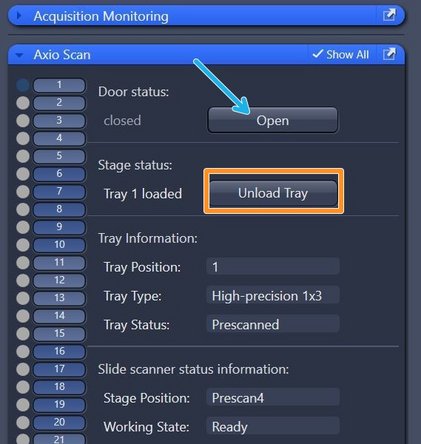
Load/unaload your sample: Make sure that all trays are unloaded and take out your slides
-
Open the door
-
Gently pull the tray out
-
Gently take out the sample holder (it sits on the tray wihtout locks)
-
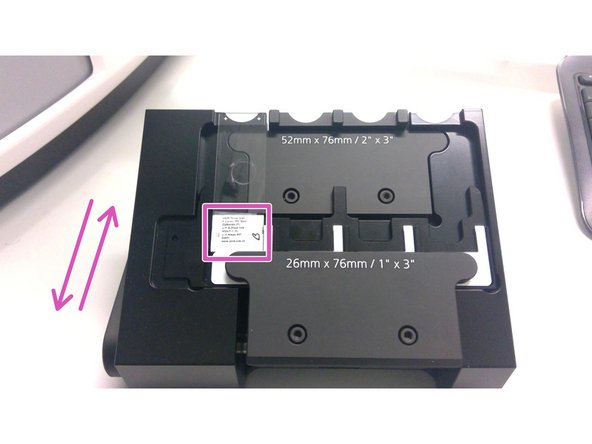
Use the tray loader on the desk to load and unload slides onto the tray. You can watch the video in this guide, STEP 4 for clarity on how to operate the loader. Note that the slides are loaded with the coverslip facing upwards and the label oriented towards the edge of the tray with the silver clamps. Then place the tray back in the scanner in traz 25
-
Fully reboot the system: We keep the scanner ON, and reboot it for the next user. See next step for full reboot.
-
-
-
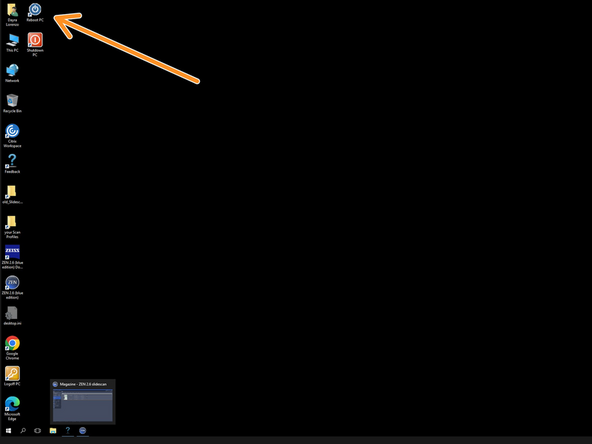
The scanner's memory requires reseting after an imaging job. After you finish your session, please reboot the PC for the next user
-
1. First close the software
-
2. Double click the reboot icon on the desktop, which will reboot the PC
-
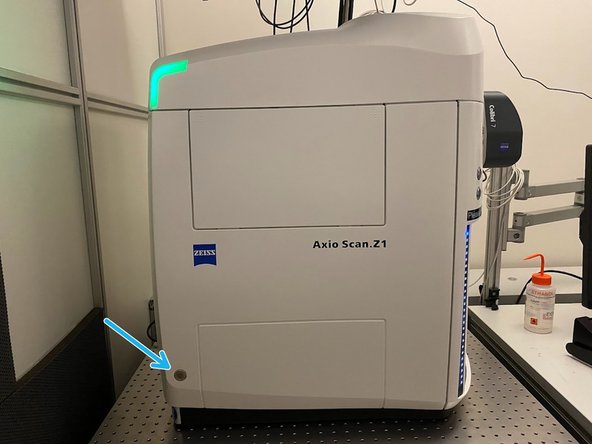
3. Turn of the microscope pressing the ON/OFF button on the body of the machine
-
4. Turn off the whole system with the main power button that is on the desk
-
Wait at least 3 minutes- This critical to have the memory fully rebooted and avoidmemory problems
-
Turn everything back on, first step 4, then 3, then 2
-
Turning the system off is not an option as the PC is high above the system, and might be unreachable for some users
-
-
-
The most effective way to troubleshoot the system is by doing a FULL restart of the system. This means to restart both, the microscope and the PC.
-
-
-
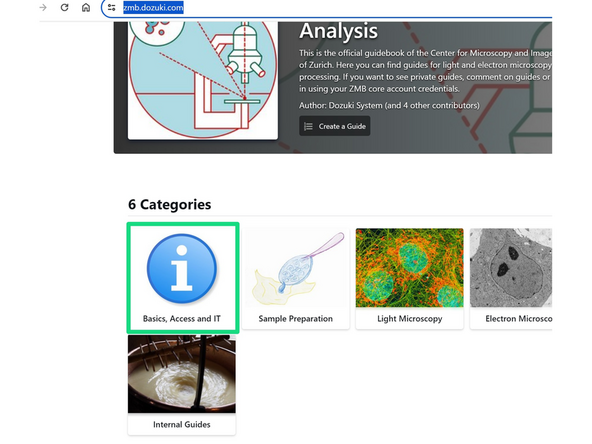
Open the ZMB guides from the feedback form, from our website, or on this link: https://zmb.dozuki.com/
-
Click on "Basic Access and it", then click on IT
-
Understand how much storage space and for how long you have
-
Learn about access with your card, your account and password
-
How to access your data storage space from your preferred PC or even from your web browser
-
Understand the booking system
-


Cancel: I did not complete this guide.
One other person completed this guide.