
-
-
The temperature can be controlled for three items.
-
H Insert P = the stage incubator
-
H Dev Humid = the water bottle for humidifying the CO2 perfusion gas mixture
-
H Unit XL = the box around the microscope
-
Heating just the stage incubator is sufficient for short-term time-lapse imaging (min-1h). For long-term live imaging it is highly recommended to additionally heat the box around the microscope to minimize drifts because of temperature changes in the room.
-
The Unit XL requires a minimum of 1h pre-heating to reach a stable temperature. Ensure you have closed all doors and sliders!
-
-
-
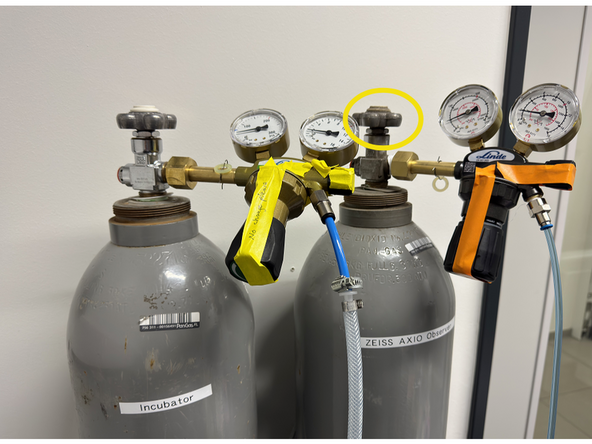
Open the main valves of the right CO2 bottle.
-
The pressure has been preset—do not adjust.
-
-
-
Check water in bottle and refill with distilled water if level is low.
-
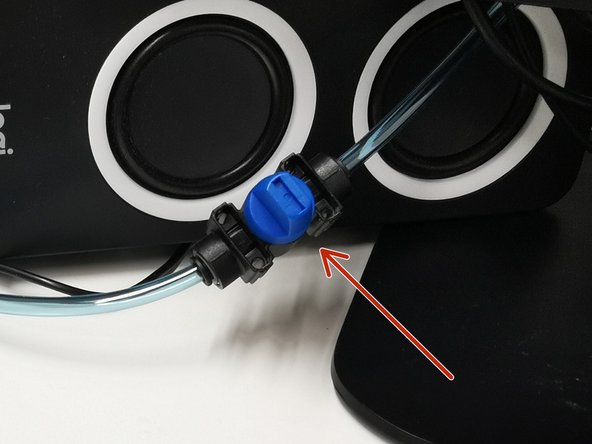
Open the valve for CO2 supply (the images displays the OPEN position)
-
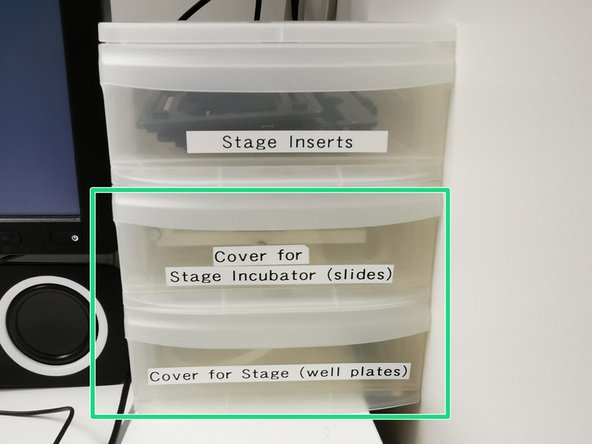
Find the right lid to cover your sample. The stage incubator uses a different lid than well plates.
-
-
-
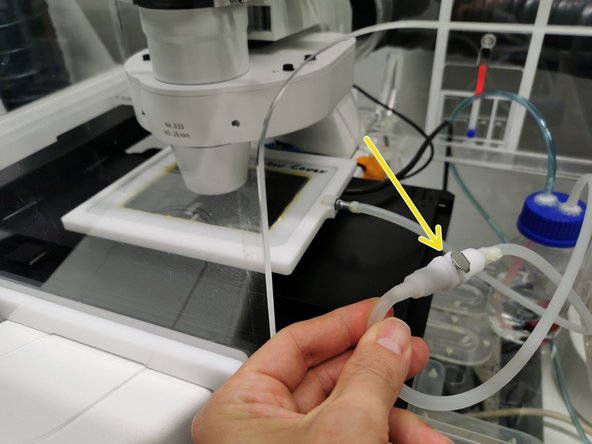
Put the lid over your sample and connect the air supply of the lid with the water bottle inside the incubator box. Check that the air supply tube cannot get stuck while the motorized table is moving.
-
Carefully move down the condensor and make sure there is a distance between the glas of the lid and the condensor.
-
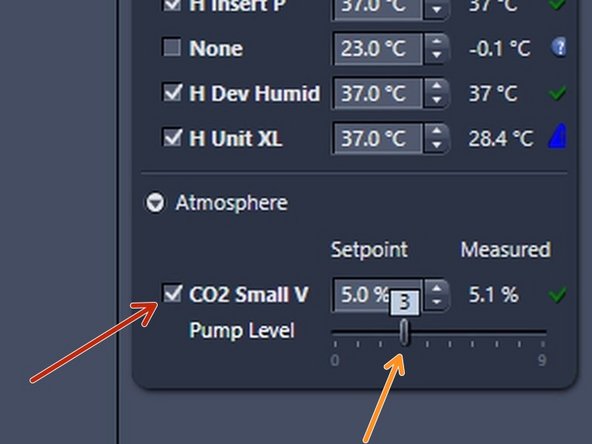
Activate CO2 perfusion
-
A Pump Level of 3 is sufficient (higher values will speed up evaporation of your culture medium)
-
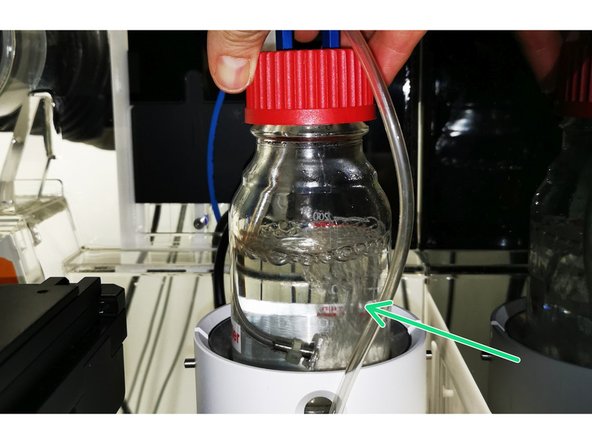
Lift up the bottle. You should see air bubbles when gas perfusion is working.
-
-
-
Close valve for CO2 supply (current image is in CLOSE position)
-
Switch off heating units and CO2 (via software or touch panel).
-
Remove CO2 lid and return to storage drawer
-
Close the main valve of the CO2 bottle.
-


Cancel: I did not complete this guide.
One other person completed this guide.