Introduction
In this guide from the Center for Microscopy and Image Analysis (UZH, Zurich, Switzerland) you will learn how to set up a fluorescence imaging protocol on the Akoya Vectra Polaris widefield fluorescence microscope. For more information please check the instrument's webpage.
-
-
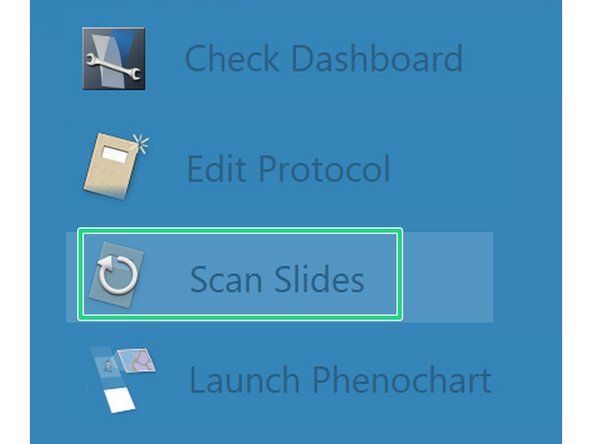
Click on Edit Protocol
-
If you have already generated a protocol template you can proceed with Step 4 and adjust exposure times for your new set of samples.
-
-
-
Define a "Protocol Name".
-
You will need to generate a "Study Name" if you are using the instrument for the first time. Important: Use your core account login name as the "Study Name"!
-
In case you have worked before with the Vectra you will find your login name under "Available Studies". Click on it to select.
-
Make sure you have chosen "Fluorescence" as "Imaging Mode" and select Multispectral Slide Scan and the "Opal Polaris 5, 6 and 7 color" option.
-
This will allow you to image the standard dyes with excitation ranging from 403 nm to 715 nm. For more info please check the instrument's webpage.
-
Finally click on "Create Protocol".
-
-
-
Define a channel for overview image.
-
Choose "Pixel Resolution" (=objective) that will be used.
-
Click on "Select Scan Bands". Deselect all channels you do not require in the new dialog. In this example we want to record DAPI, GFP and Alexa 647.
-
Click on "Scan Exposures" to define exposure times for each channel.
-
-
-
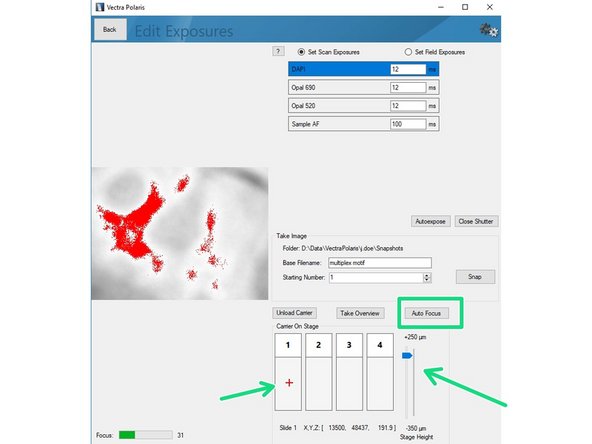
Click on"Load Carrier" and wait until sample is loaded.
-
Use the "Stage Height" slider to bring your sample in focus. Do the fine adjustments by clicking the "Auto Focus" button. You can navigate on the sample by clicking within the slide (it will move the red cross).
-
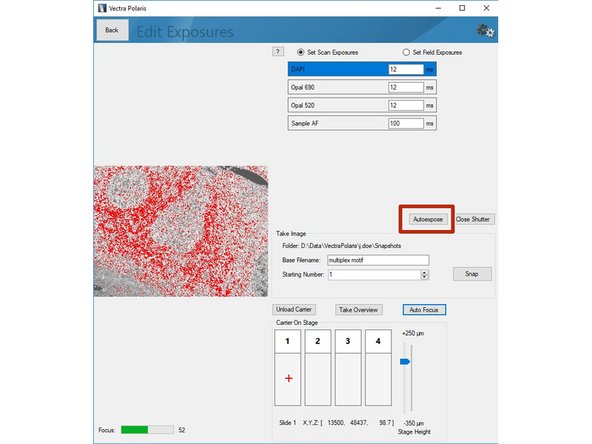
Click on "Autoexpose". You should try to record the brightest region for this marker within your sample. Further, we recommend to manually reduce the suggested exposure time by ~10% to ensure the image is not saturated.
-
Saturated signals will complicate further analysis and may even result in acquisition of a useless dataset.
-
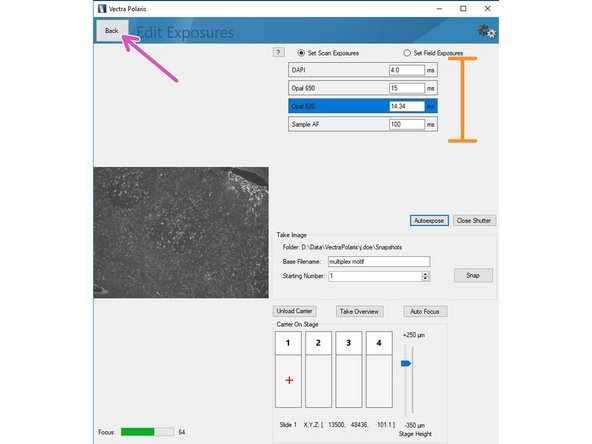
Repeat the procedure for the remaining channels of your panel including the autofluorescence channel.
-
Return to the previous menu by clicking "Back" button once you are done.
-
-
-
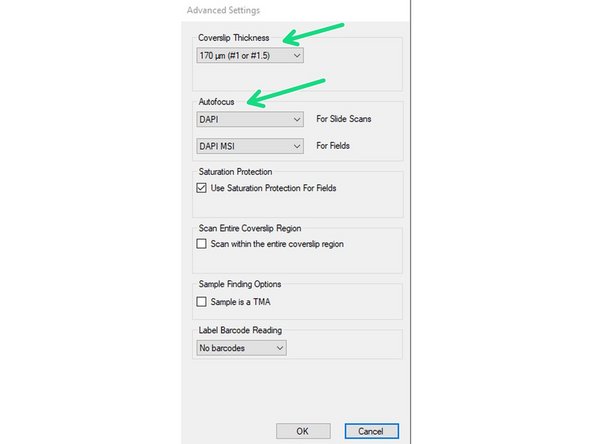
You may open the "Advanced Settings" to change parameters like the Coverslip thickness of your sample or the channel used for the Autofocus (DAPI = default).
-
Finally click on the "Save" button and select the study folder with your core name as the target destination.
-
-
-
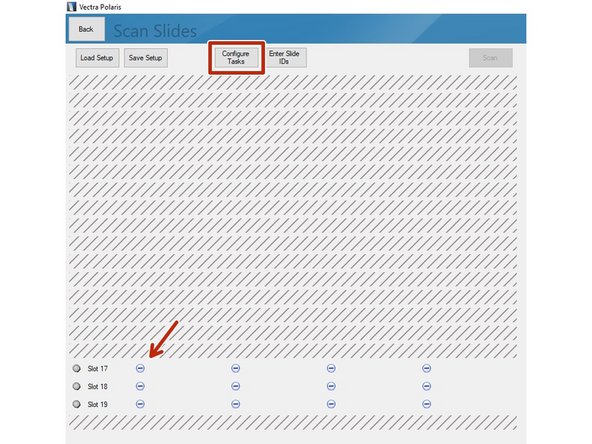
Proceed by clicking on "Scan Slides".
-
Select the slides you want to image. Click on "Configure Tasks" and define how you want to configure the slides. You may also click on the minus icons (arrow) if you want to scan only individual slides.
-
Define Task :
-
Scan Slides = Regular Imaging,
-
Acquire Fields = Spectral Imaging - please consult ZMB staff for more information on how to set it up!
-
Define Study => your save location.
-
Define Protocol => you can only apply a single protocol per slide but they may differ between slides on the carrier.
-
-
-
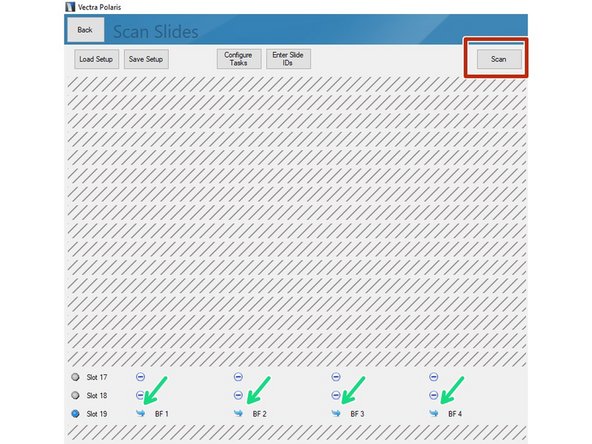
All slides included in the imaging session are indicated by a blue symbol.
-
Click on "Scan" to start acquisition.
-
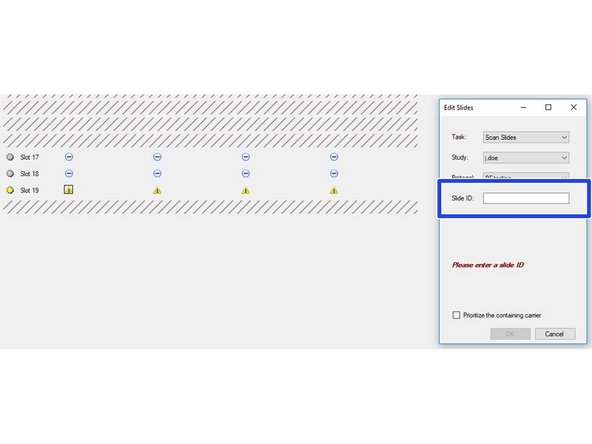
If you are getting a yellow warning icon you are most likely missing the Slide ID. You can add this by clicking on the individual slides (you may want to recap Part 1 guide on how to add the Slide ID while loading the slides to the instrument).
-
Optional: Save scan setup when asked for.
-
All done! Check the appropriate guide to learn how to "Save and automatically transfer your data ".
-