Introduction
In this guide we describe the major steps/aspects required for image acquisition on Nikon spinning disk confocal microscope.
It introduces you to the "NIS-elements" software for acquiring an image in 2D as well as 3D. For start-up of the system, mounting and focusing a sample, as well as finishing your session please check corresponding guides.
-
-
Check this guide, how to create a set of OCs for your experiment
-
-
-
Choose OC for Overview and low mag objective
-
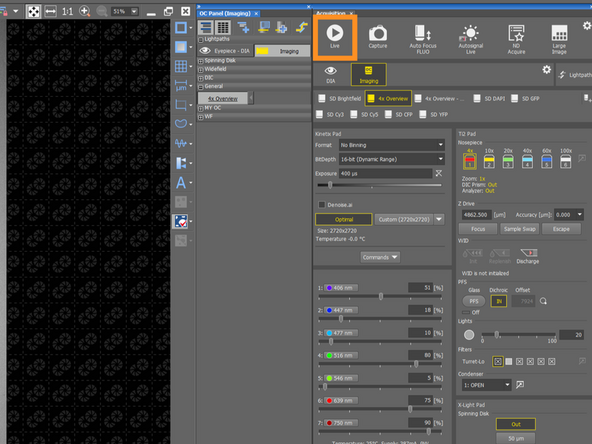
Go live and focus on the sample
-
Choose from the sample holder - if you cannot find the exact same one, choose from the most similar one.
-
Choose Current settings and Current Z position - this will use the last used OC, which you used for focusing
-
Click on Preview
-
Microscope will acquire a tilescan, which you can use later for the navigation in the sample
-
By clicking on Set you can update your focus position.
-
-
-
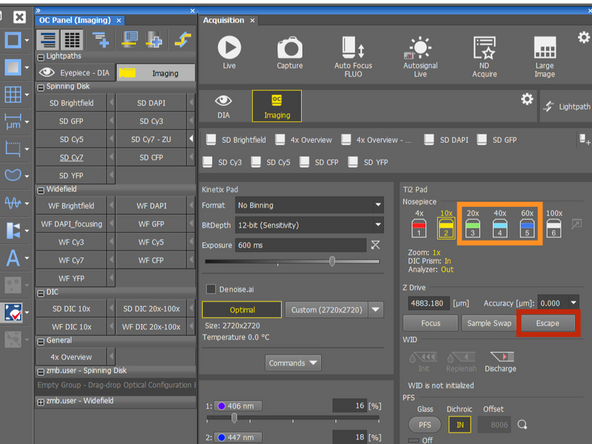
Click on the Escape, this will lower objective to the load position. You can check that the Z-drive value should decrease to 499/500.
-
Change to water immersion objective
-
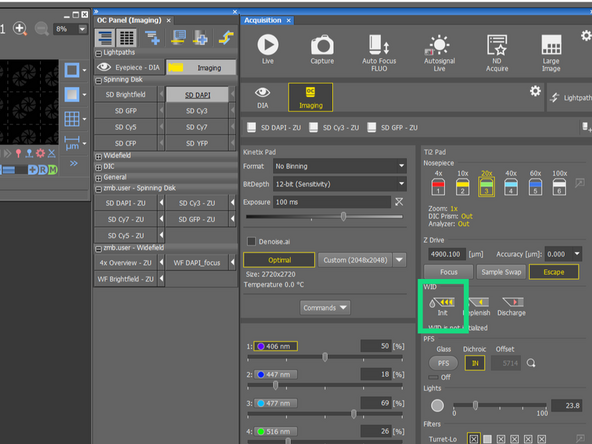
Initialize water dispenser - this will take few minutes, as the tubes has to be filled with water
-
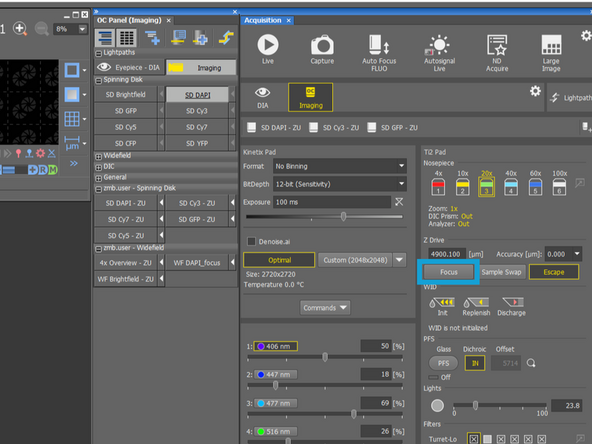
Now you can release the objective by clicking on Focus. Continue to manually focus on your sample in Live mode.
-
It is good practice to visually check that there is a drop of water on the objective.
-
If, for some reason, you don't need to use automatic dispensing system you can put manually a drop of water on the objective (bottle on the table).
-
-
-
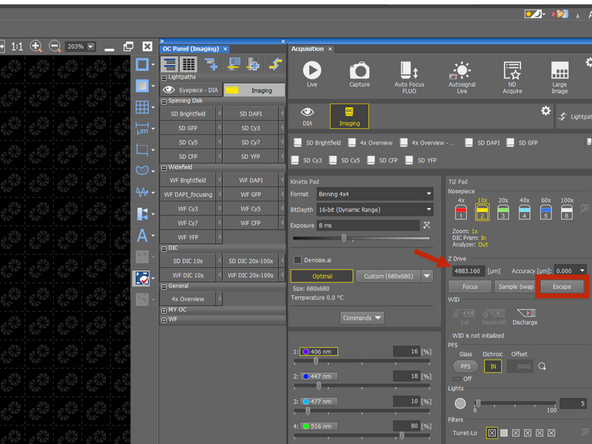
Lower the objective with the escape button. You can check that the Z-drive value should decrease to 499/500.
-
Take the frame with your sample out from the microscope.
-
-
-
Take out the water dispensing system (it holds there with magnet) and carefully go below the stage to place it onto the magnet next to the stage.
-
This is important step, so the needle wont be contaminated by silicon oil. BE CAREFUL WHEN HANDLING THE NEEDLE. ALWAYS GO WITH THE NEEDLE POINTING BACKWARDS. So, in the case of crash you won't bend the needle
-
Bending of the needle, will result in damaging the water dispensing system
-
-
-
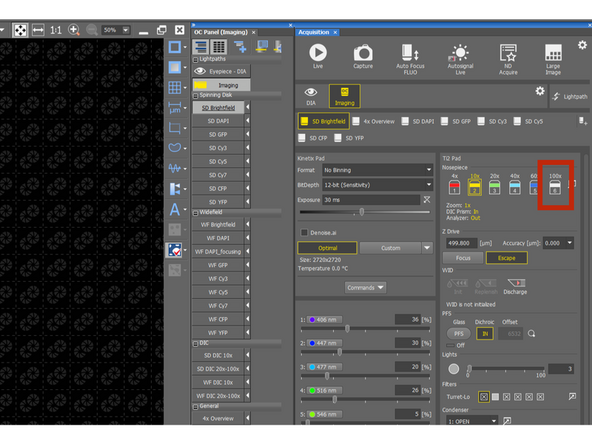
Change the objective for 100x Silicon oil
-
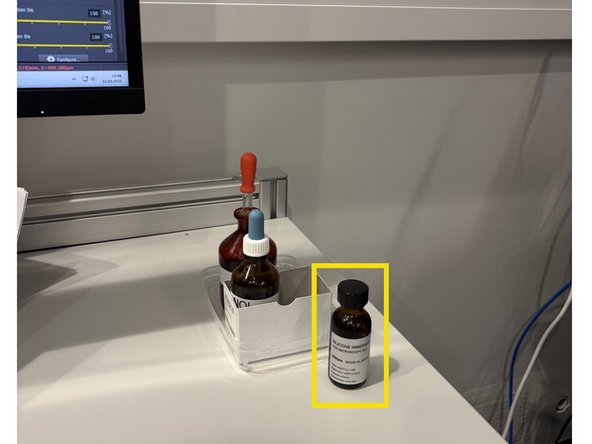
Put a drop of the immersion on the objective/sample (bottle on the table).
-
The sillicon oil is very liquid!!! Please handle the oil carefully and go with the bottle closer to the objective or put a small drop on the sample handling it on the table
-
Put the sample/frame back on the stage and Release the objective from escaped position
-
Fine focus in live mode with mouse wheel or on the joystick (change the speed to 1 arrow!)
-
-
-
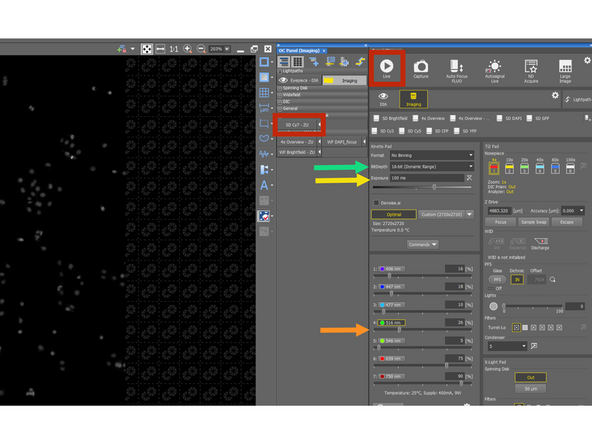
You can choose the OC and go Live
-
Adjust the laser power
-
Adjust the exposure time
-
Make sure that the bit dept and ROI is the same for all the OCs (channels) that needs to be imaged
-
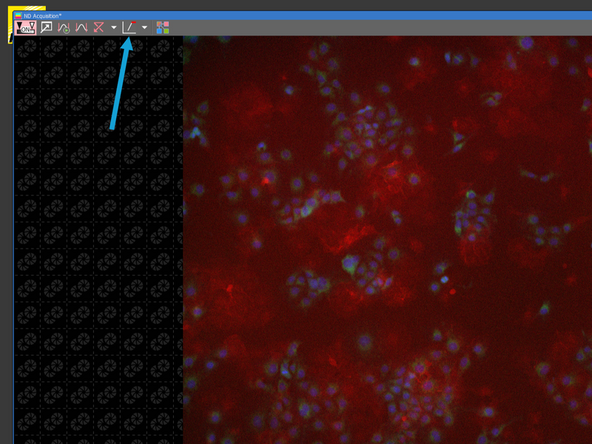
You can turn on the saturation control to monitor image saturation
-
Continue setting up the other channels
-
-
-
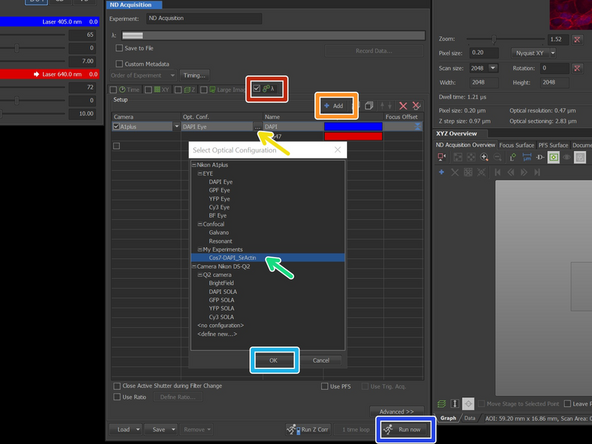
Tick the λ for multichannel image
-
Add a new line.
-
Click on ... to select the OC
-
Choose the OC
-
Confirm with OK
-
Click on Run now
-
If you want to save the image automatically, click on the Save to file and specify the path and file name
-
-
-
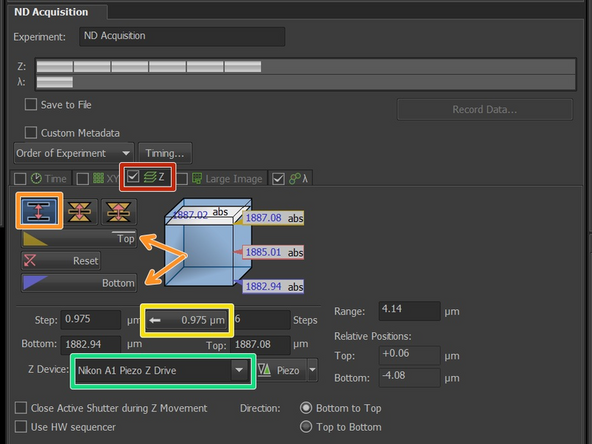
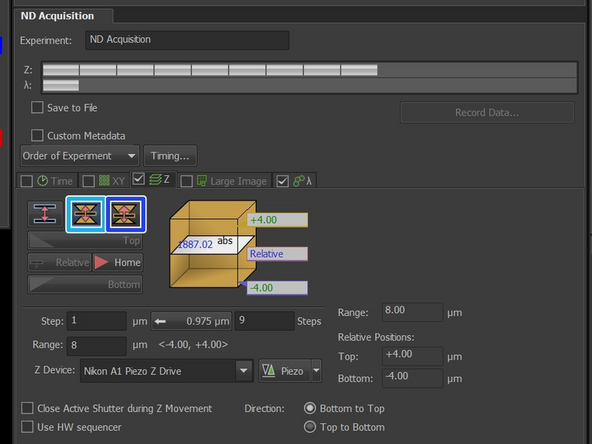
To acquire Z-stack tick the Z. Make sure that λ is pre-selected from previous step.
-
You can go Live and focus through your sample to set/adjust the z-stack boundaries ("Bottom" and "Top").
-
Click on the value in the box for automatically optimizing the z sampling.
-
Depending on your experiment and acquisition needs, you might increase the step to speed up the acquisition or decrease the step if you will deconvolve the data later. Nyquist calculator
-
Make sure that Nikon A1 Piezo Z drive is selected, as this allow move faster and more precise movement in Z.
-
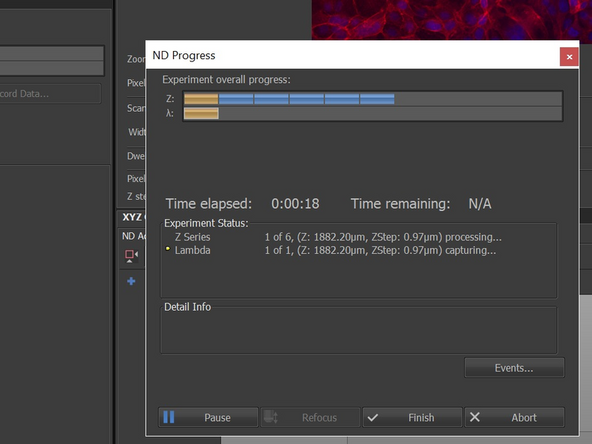
Click on Run now in the ND acquisition tab and see the progress of the acquisition in new pop-up window
-
In this Symmetric mode, you can set the Z-stack relative to the current focus position (Home position). You define the range above and below the current focus point (e.g., +4 µm above and -4 µm below).
-
In this Asymmetric mode you define the range above and below the current focus point (e.g., +8 µm above and -3 µm below).
-
-
-
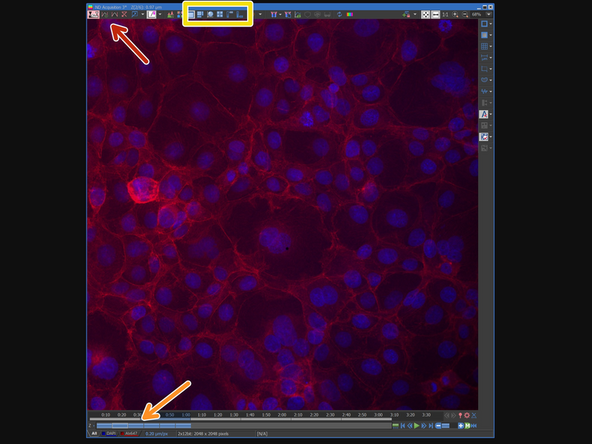
Click on the Autoscale button to enhance the contrast
-
You can toggle between the Z-steps
-
You can preview the Z-stack also in a 3D viewer or as MIP (=Maximum Intensity Projection)
-
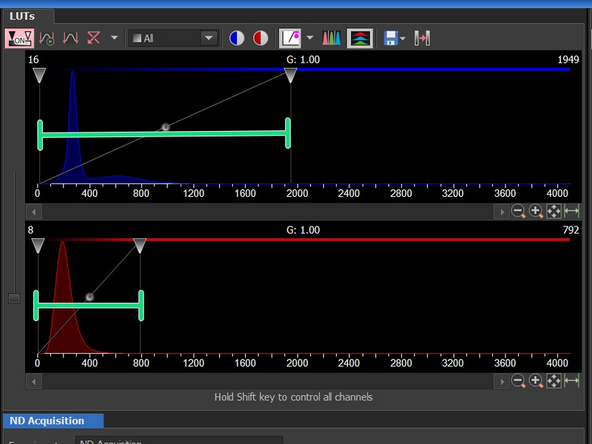
If the autoscale button does not help to see the structure of interest (e.g., due to some much brighter debris) you can also adjust the contrast in the LUTs tab.
-


