Introduction
In this guide we describe the major steps/aspects required for image acquisition on Nikon A1r+ confocal microscope
It introduces you to the "NIS-elements" software for acquiring an image in 2D as well as 3D. For start-up of the system, mounting and focusing a sample, as well as finishing your session please check corresponding guides.
-
-
Right-click on of the default OC (Resonant or Galvano) and duplicate the OC. The scanner can be changed also later in the settings.
-
Galvano scanner is more flexible in terms of image format
-
Resonant scanner is very fast, suitable ,e.g., live cell imaging
-
Rename your OC and click OK
-
The naming depends on you. We recommend to create new OC for each type of experiment. This can be can be helpful especially when you need to go back (e.g. during paper revisions) and record more data. This will save you time by allowing you to quickly reapply the previous acquisition settings instead of setting them up from scratch.
-
Drag and drop the OC to the sub-list My Experiments.
-
-
-
Click on the Dye Assistent
-
Choose in the setting mode "Auto"
-
You can choose the number of channels you need
-
And choose from the menu dye
-
If you can't find your dye, choose the one with a similar excitation and emission spectrum.
-
Confirm with OK
-
-
-
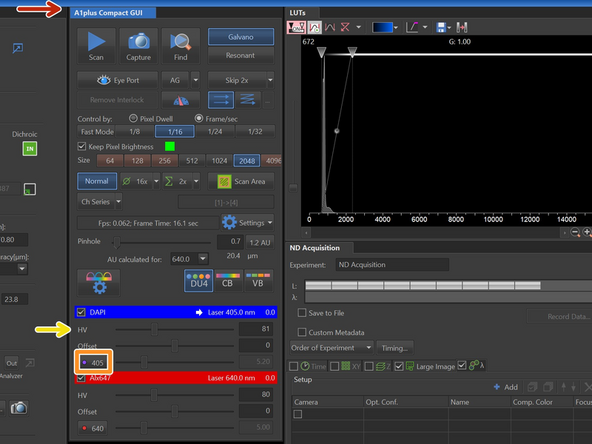
In the A1plus Compact GUI Pad you can now see selected channels
-
Click on the wavelength to activate laser and change the laser power.
-
Rather start with low laser power
-
Adjust a voltage on detector
-
Avoid adjusting the Offset setting because it artificially alters the baseline signal of the detector.
-
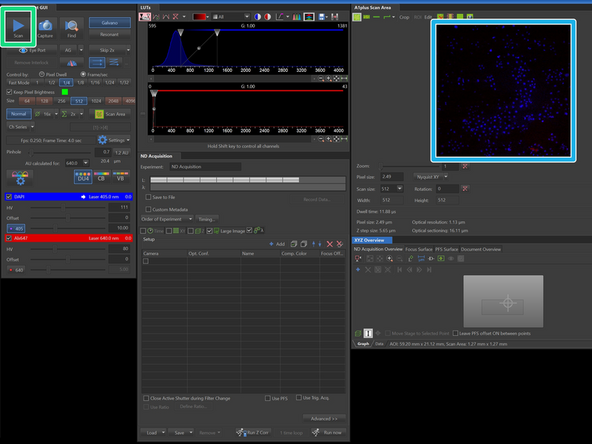
Start Scan to create an live image
-
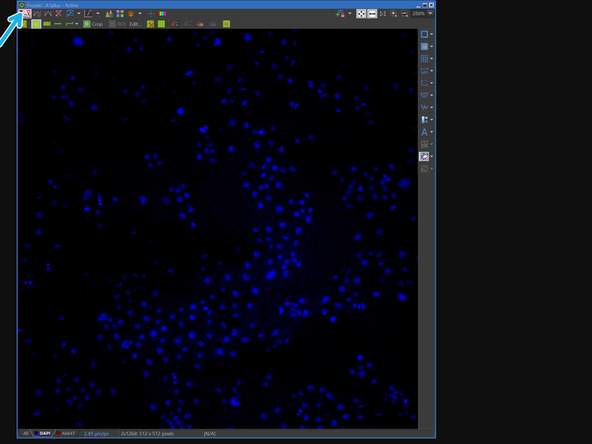
You can see the preview image in A1plus Scan Area window as well as in the Frozen pop-up window
-
Continue setting up the other channel
-
-
-
If you do not see any signal, you may be slightly out of focus or you need to scale the histogram.
-
Activate the navigation with mouse, so you can use mouse to move in XY and mouse wheel in Z.
-
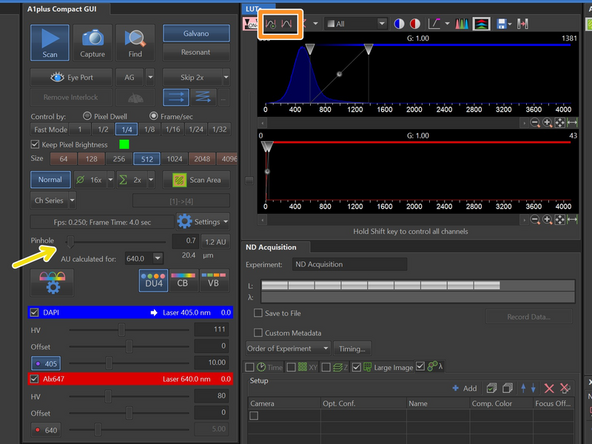
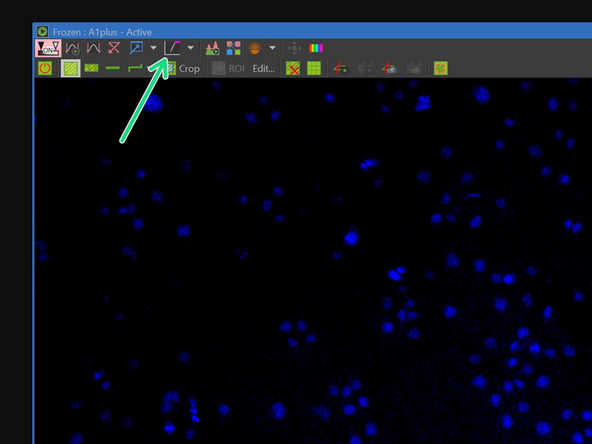
Click on the Autoscale button to enhance the contrast
-
If you start to see something in the backgroung you can move up or down with an objective to focus on the cell
-
Do not forget to change the speed on the joystick to one arrow as your sample must me close, if you used the initial navigation in WF mode.
-
(Optional) Open the pinhole to have a thicker focal plane. Remember to set it back to 1 AU afterwards.
-
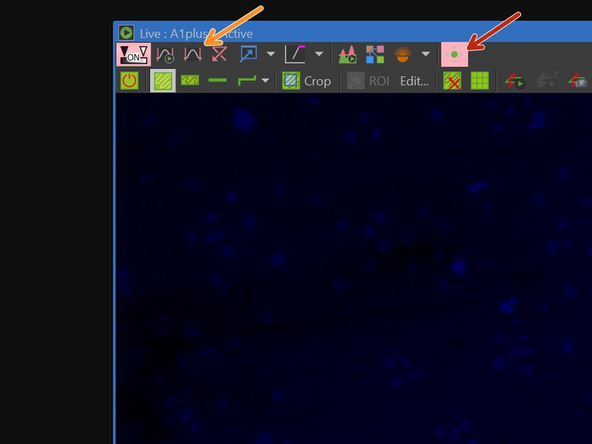
Turn ON the saturation control
-
(Pixel that has intensity higher then 4094 = 12bit image, will be displayed in chosen color)
-
-
-
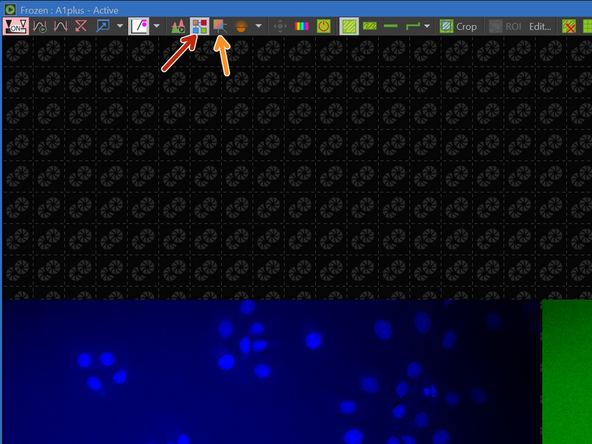
You can split the view of the channels
-
Or see the split view and overlay.
-
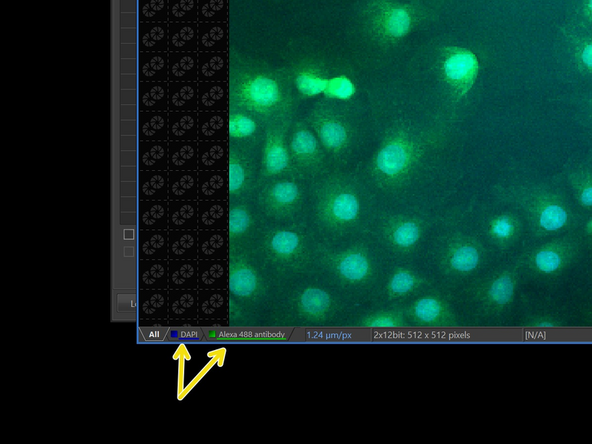
Or keep an overlay and toggle between displaying single channels.
-
-
-
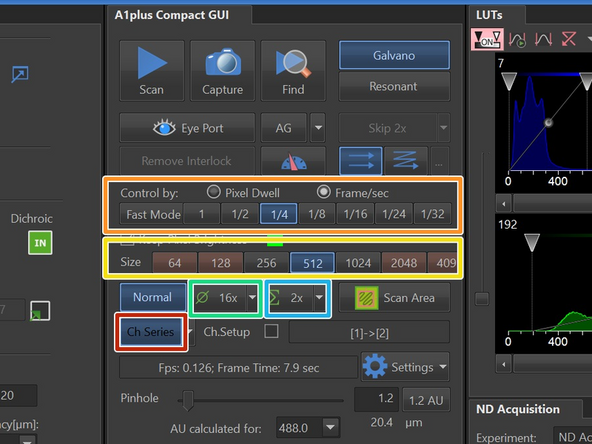
In the A1plus Compact GUI pad you can control more scanning settings
-
You can set up the sequential scan to avoid bleedthrough of channels.
-
You can explore sequential scan for multiple channels in the drop down menu.
-
Scanning speed - either displayed in Frame/sec or Pixel Dwell time
-
The dimensions of the image in pixels.
-
You can use an line averaging of the signal. Advisable when you have weak signal but high background (bad S/N ratio).
-
And line accumulations (=sum of the signal). Advisable when you have low signal, but also low background.
-
There is no universal settings that can be used for all samples and users. You need to optimize these setting for your sample, based on the signal and resolution you need to achieve. If you are not sure about setiings, feel free to consult with ZMB staff.
-
-
-
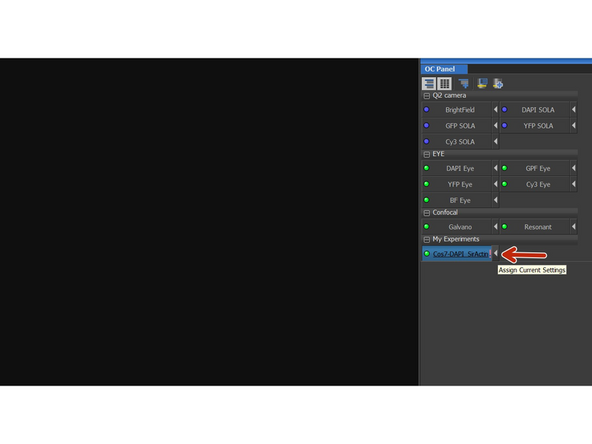
To save the acquisition parameters, click on the arrow at your OC.
-
Whenever you will change some of the acquisition parameters there will appear an exclamation mark (!) in you OC, indicating unsaved changes.
-
Saving your settings is useful if you want to maintain consistent settings and format across multiple images. However, when using Live View mode, you can adjust the setting without saving to speed up the scanning.
-
-
-
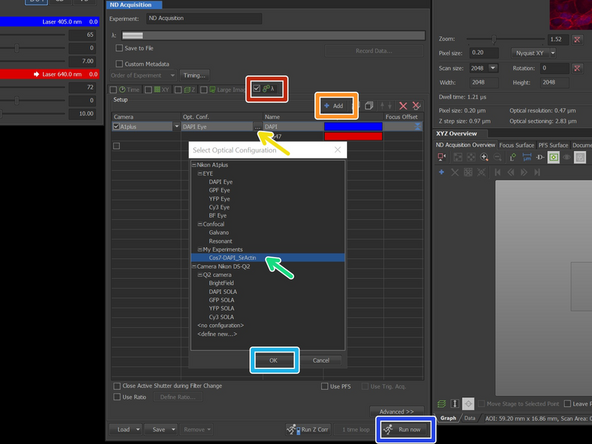
Check if the sample is in the focus.
-
Tick the λ to specify which settings should be use for acquistion.
-
Add a new line.
-
Click on ... to select the OC
-
Choose the OC from your experiments
-
Confirm with OK
-
Click on Run now
-
The other way how to acquire a 2D image is in the A1plus Compact GUI tab with Capture button.
-
-
-
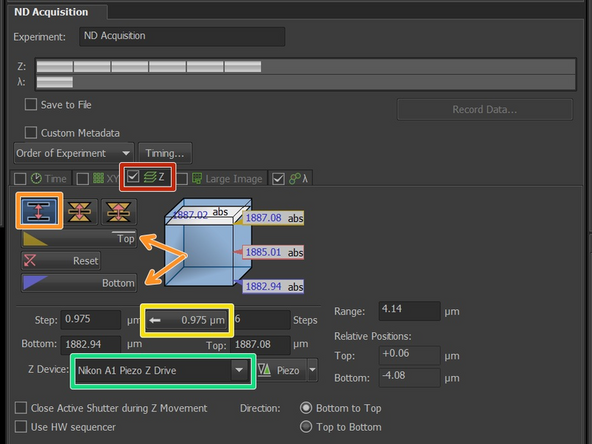
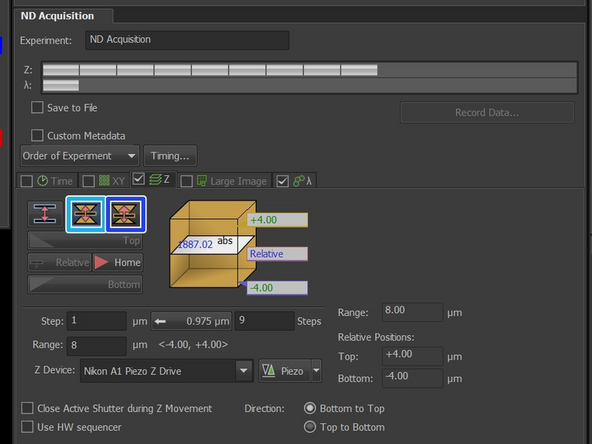
To acquire Z-stack tick the Z. Make sure that λ is pre-selected from previous step.
-
You can go Live and focus through your sample to set/adjust the z-stack boundaries ("Bottom" and "Top").
-
Click on the value in the box for automatically optimizing the z sampling.
-
Depending on your experiment and acquisition needs, you might increase the step to speed up the acquisition or decrease the step if you will deconvolve the data later. Nyquist calculator
-
Make sure that Nikon A1 Piezo Z drive is selected, as this allow move faster and more precise movement in Z.
-
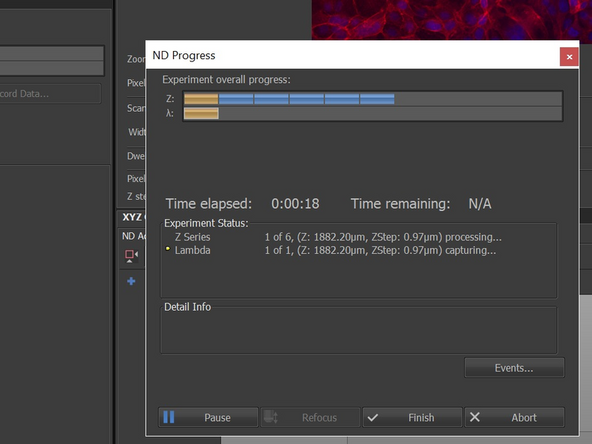
Click on Run now in the ND acquisition tab and see the progress of the acquisition in new pop-up window
-
In this Symmetric mode, you can set the Z-stack relative to the current focus position (Home position). You define the range above and below the current focus point (e.g., +4 µm above and -4 µm below).
-
In this Asymmetric mode you define the range above and below the current focus point (e.g., +8 µm above and -3 µm below).
-
-
-
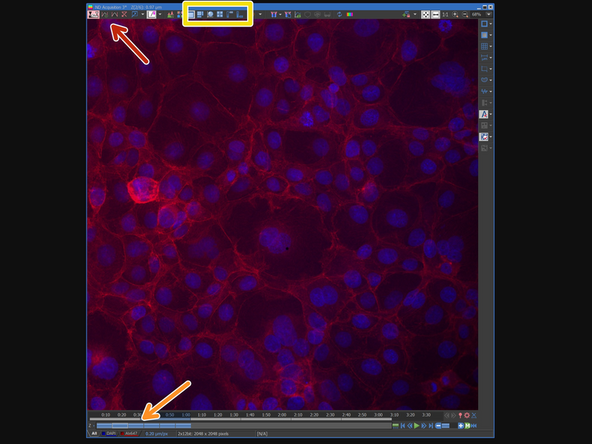
Click on the Autoscale button to enhance the contrast
-
You can toggle between the Z-steps
-
You can preview the Z-stack also in a 3D viewer or as MIP (=Maximum Intensity Projection)
-
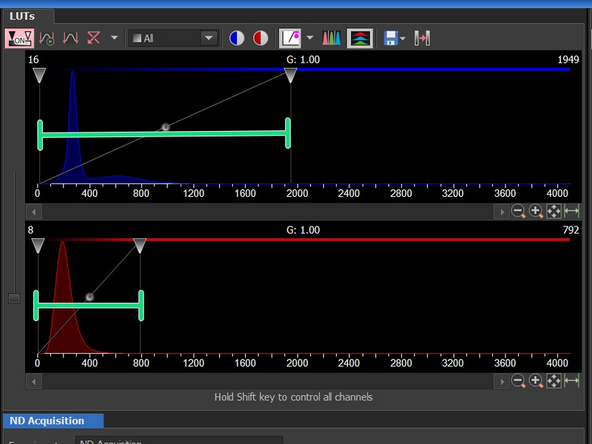
If the autoscale button does not help to see the structure of interest (e.g., due to some much brighter debris) you can also adjust the contrast in the LUTs tab.
-
Save your image ctrl+S
-


