
Introduction
This guide explains how to stitch tiled datasets from the ZMB mesoSPIM using the BigStitcher Fiji plugin. The only thing needed is a lot of computer RAM and depending on the amount of data, 1-2 days of time. This guide only covers stitching and not multiview registration.
Most steps in this guide also apply to other regular volumetric datasets such as from confocal microscopes.
Video Overview
-
-
Useful information concerning this workflow can be found on the BigStitcher webpage!
-
This guide covers the multi-tile stitching workflow of BigStitcher without Multiview registration (different angles).
-
Be aware that there are two plugins from Preibish "BigStitcher" and "Multiview Reconstruction". Since they also work together, that can be a bit confusing. Here we work with the "BigStitcher" in the "Stitching" mode.
-
-
-
Open FiJI > Plugins > BigStitcher > BigStitcher
-
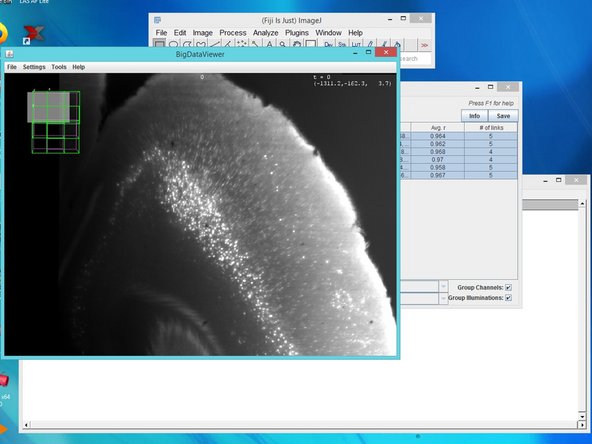
Drag and drop the .xml file from your MesoSPIM data. A "BigDataViewer" window will appear with your data.
-
-
-
For visualization, BigStitcher uses the BigData Viewer. Select all views using shift, right click and "Display in BigData Viewer (on/off)" for visualization of your views and later for the stitching progress.
-
For learning about how to use the BigData viewer press help in the BigData viewer window.
-
If you get lost in the BigData viewer 3D space, just close the window and open it again by the above strategy.
-
-
-
The BigStitcher workflow does not merge/average/register multiple illuminations from single tiles (e.g. left/right).
-
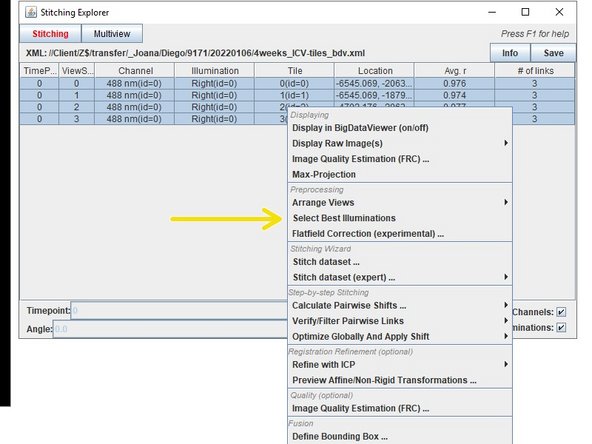
Press right click over your selected data and choose "select best illuminations".
-
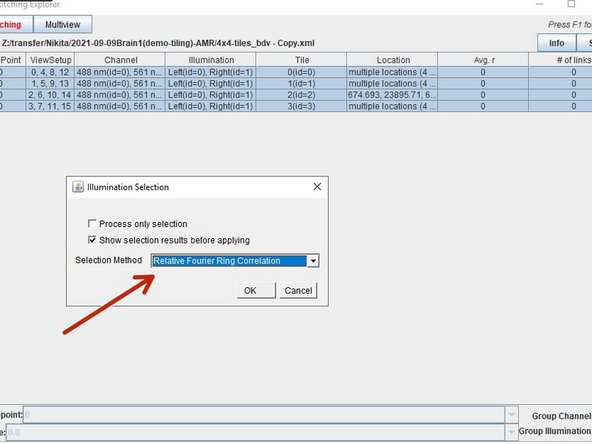
Then select the "Relative Fourier Ring Correlation method". All three methods provide similar results, with gradient magnitude and FRC providing more differentiation power in close cases.
-
When views have more than one illumination, you can automatically select the best for stitching by right click, Preprocessing/Select Best Illuminations.
-
-
-
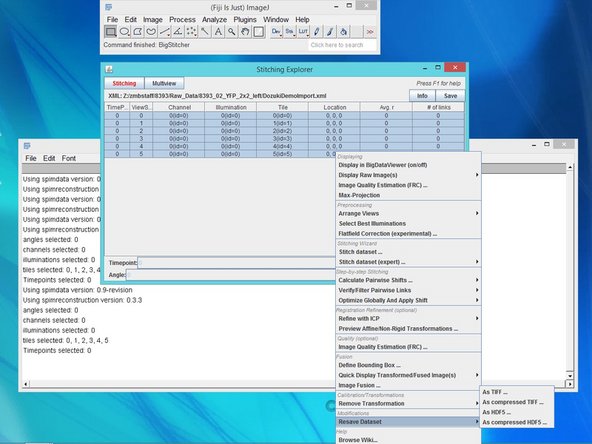
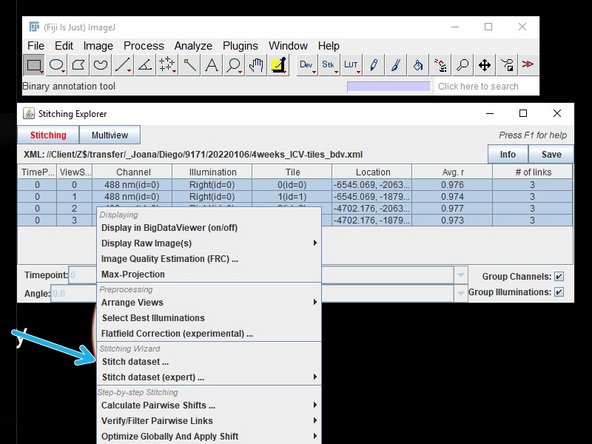
To stitch your data together, right click on the data you want to stitch and select "stitch dataset".
-
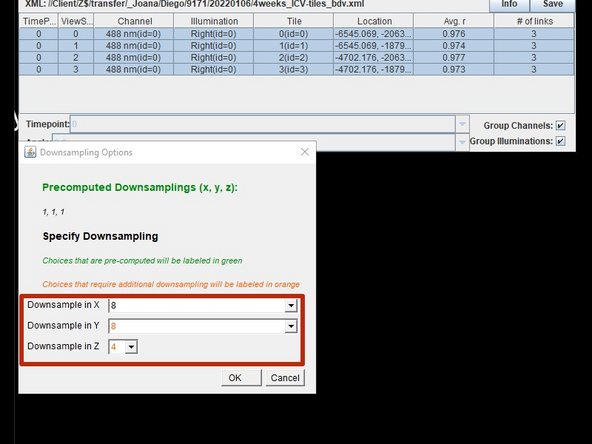
Down sample your data, this will be faster and have better quality than running it at full resolution.
-
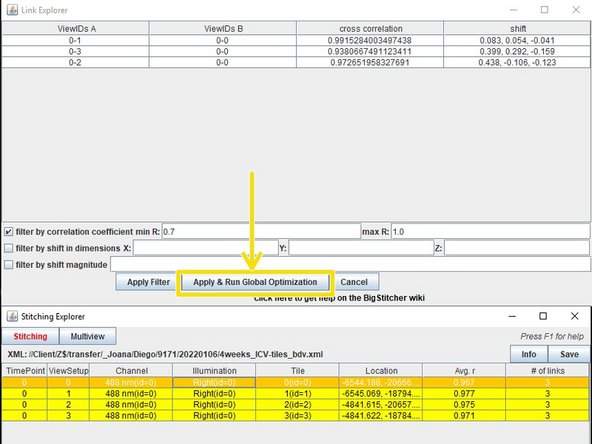
After the the data is done stitching a window will open saying "Pairwise shift calculation done" press yes.
-
Another window opens, this time press "Apply & Run global optimization"
-
-
-
The process of creating single image stacks from multiple transformed/aligned input images is called Image Fusion.
-
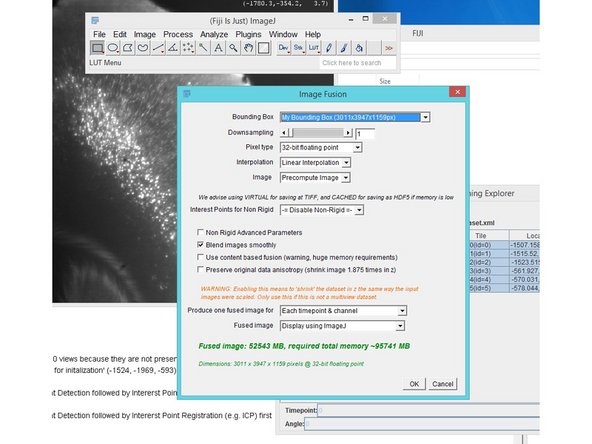
Select your data, right click Image Fusion.
-
Selecting 16-bit output will round the output down to the next whole number (integer) and reduce the files size (and memory requuirenment) by a factor of two.
-
In our tests we used "Linear Interpolation", "Precompute Image", "Blend images smoothly"
-
Fusion and export also will take a considerable amount of time.
-
For fusion roughly twice the memory than the resulting image size is needed. The amount needed can be seen in the "Image Fusion" window.
-
-
-
In Fiji save your resulting stack as .tif image sequence Save As/Image Sequence.
-
Again be sure to save your .xml file.
-
Delete all files not necessary (e.g. tiffs).
-
By opening the .xml file again all steps of the workflow can be accessed again and rerun.
-
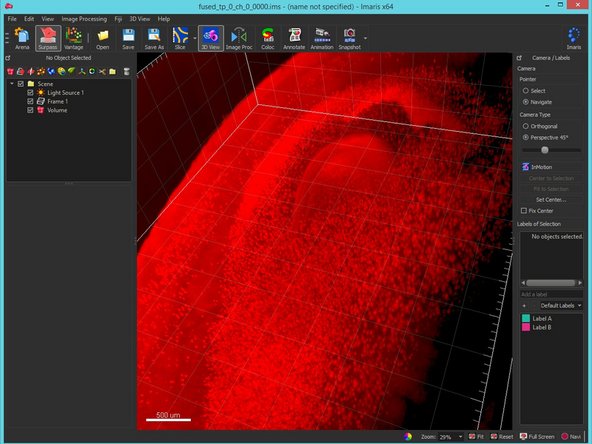
Import and visualize the results in a 3D visualization application such as Imaris.
-


One Comment
I would recommend saving the XML file after Stitching and before fusion. Additionally Big Stitcher tends to crash, when you wan to display a big project directly after fusing it. I would instead recommend saving it (e.g. as a TIF) and the opening it separately in Fiji otherwise all of your data calculated can be lost in either of both steps.
Additionally, if you have files of about 500 GB (or more) for stitching, you will need access to the high performance VM or a very, very powerful machine or otherwise be prepared to run it for several days.
Johanna Nieweler - Open Reply