Introduction
This guide shows how to transfer data acquired on the MD ImageXpress Confocal HT.ai (Irchel) instrument to your CORE data folder, and how to convert the data from individual .tiff files to .ome.tiff stacks for easier viewing & processing.
-
-
During acquisition setup, you MUST put your username in the 'Folder Name' field. This is the same username as is needed to log into the MetaXpress software, i.e. your core username without the dot (e.g. dduck).
-
This is required, otherwise the data can't be transferred to your CORE "data" folder.
-
-
-
After your acquisition is finished, open "Citrix Receiver" directly on the computer and log on.
-
Optional - You can also access Citrix from your own computer provided you have installed the Citrix client. Check out this guide for more info.
-
Select the "CORE Datamover" application.
-
-
-
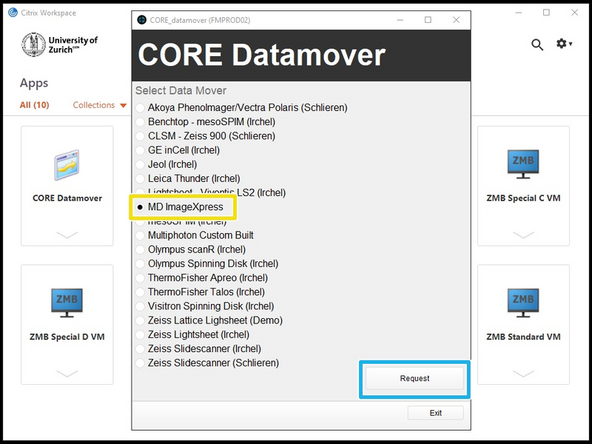
Select desired "Data Mover", in this case "MD ImageXpress".
-
Press "Request".
-
Never start moving data while you are still acquiring a plate. Half the data will be transferred, and your acquisition will be "broken".
-
You will receive a confirmation email within 15 min.
-
Additionally you will receive an email once the transfer has started and another one once it is finished.
-
Finally your data will be available in your CORE "data" folder.
-
If you do not receive an email after your request or if you need further support, please contact us at it@zmb.uzh.ch
-
After data transfer, your plates will no longer be available to view through the MetaXpress software.
-
-
-
The raw data are saved as individual .tif files for each image. To better manage your images, you can combine them into .tif stacks.
-
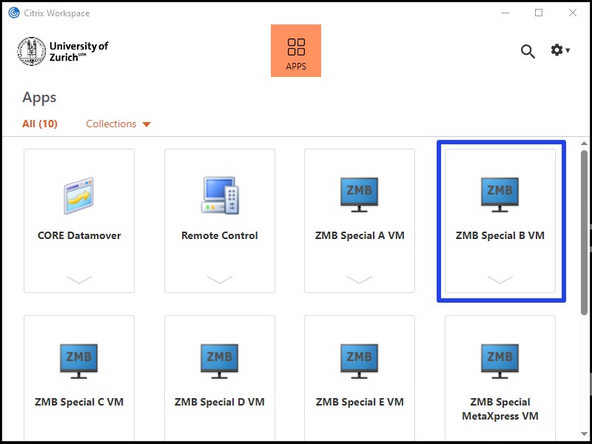
Open ZMB Special B VM
-
Make sure you have a booking for the virtual machine.
-
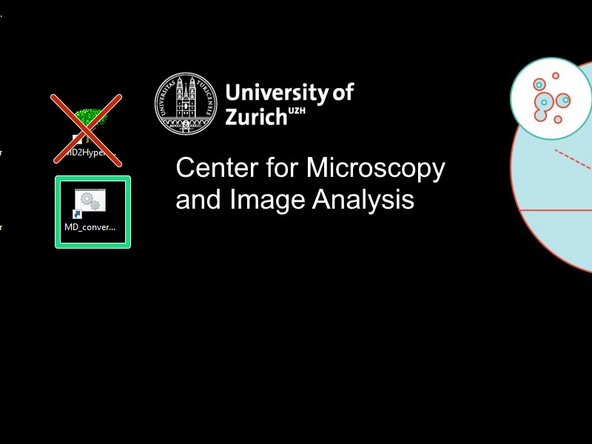
Open the 'MD_converter' app.
-
Currently, the 'MD_converter' app is only available on the 'Special B VM'.
-
This replaces the old 'MD2Hyperstack' app.
-
Wait until the app is open.
-
Do not close the terminal window until you are finished with converting files.
-
-
-
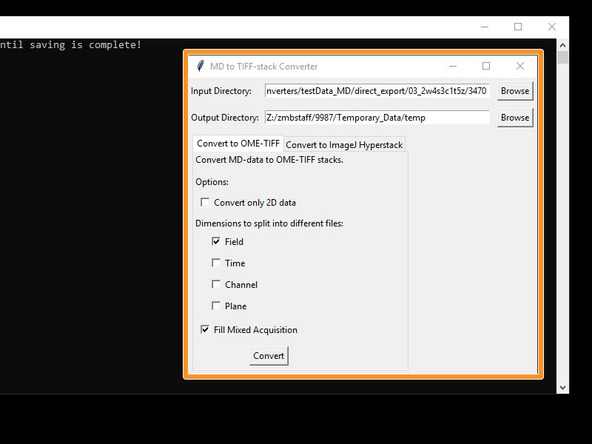
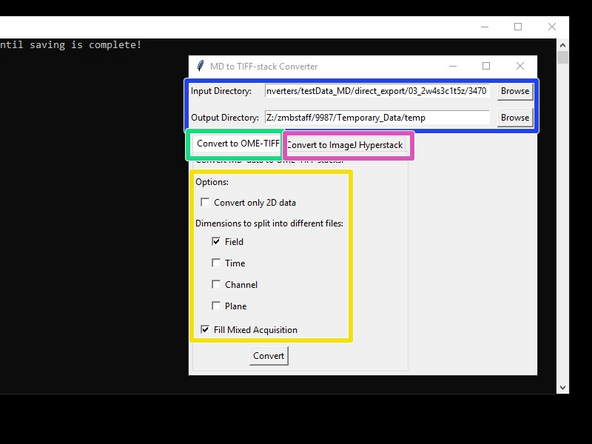
Choose Input- and Output-Directories
-
The input directory is the transferred folder and should have a 4-digit plate number as its name.
-
The output directory needs to be outside the input directory.
-
Option 1: Convert to OME-TIFF (preferred option)
-
Some advanced options are available. Usually the default settings can be used.
-
Option 2: Convert to ImageJ Hyperstack
-
This mode is to reproduce the old behavior of the 'MD2Hyperstack' app.
-
In this mode, the additional options are unavailable.
-
-
-
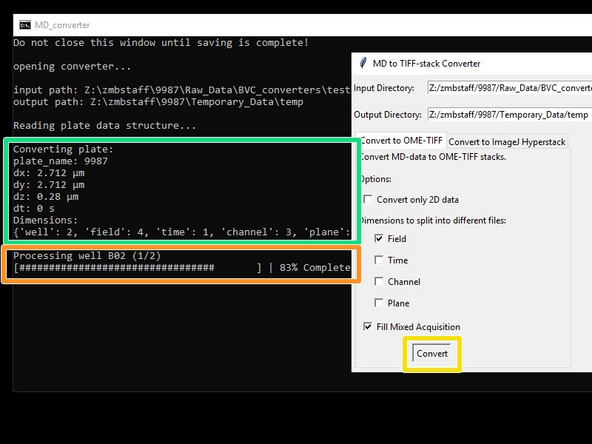
Start the conversion by pressing 'Convert'
-
The terminal will show information about the data to be converted...
-
...and a progress bar.
-
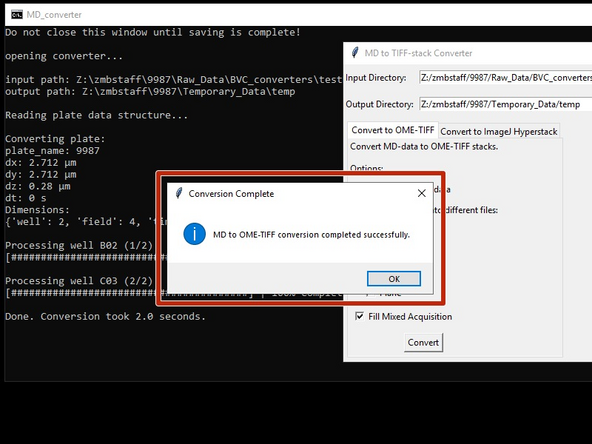
When finished, a pop-up window will tell you that the conversion is done.
-
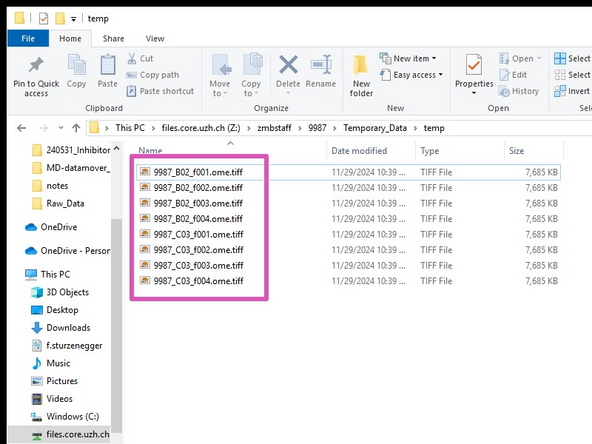
The converted stacks will be available in the output folder and can be opened in e.g. Fiji.
-
You can now continue to convert other folders, or close all windows if you are finished.
-


