
Introduction
In this guide of the Center for Microscopy and Image Analysis we show how to start up and mount a sample on the Leica SP8 STED confocal laser scanning and super resolution microscope.
This guide is valid for both, confocal and super resolution (STED) imaging on this microscope.
Please find more information about the system here.
-
-
Switch ON the fluorescence lamp.
-
Once turned on, the lamp should remain on for a minimum of 30 min.
-
On the right hand side of the table (main switch board):
-
Switch ON the "PC /Microscope", "Scanner Power" and "Laser Power".
-
Turn the "Laser Emission" key to "On-1"
-
If STED is needed, follow the next step, otherwise go directly to Step 3.
-
-
-
ONLY follow this step if you like to use STED in your imaging, otherwise jump to next step.
-
Locate the 592 nm and 660 nm lasers in the STED laser rack (left hand side of microscope).
-
Check if the the laser switches are "ON". They should always be ON.
-
The LEDs ("SHG Ready") of the 592 nm and 660 nm STED lasers light shortly up in green and then turn orange.
-
Once continuously green, turn laser keys to "LASER ON".
-
Do not turn keys while LEDs are still orange!
-
-
-
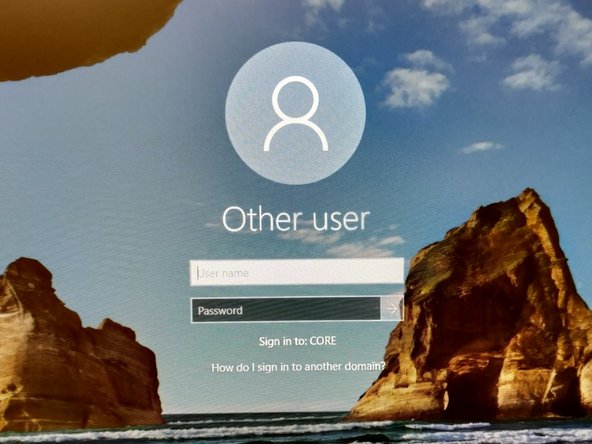
Sign-in with your ZMB core credentials.
-
-
-
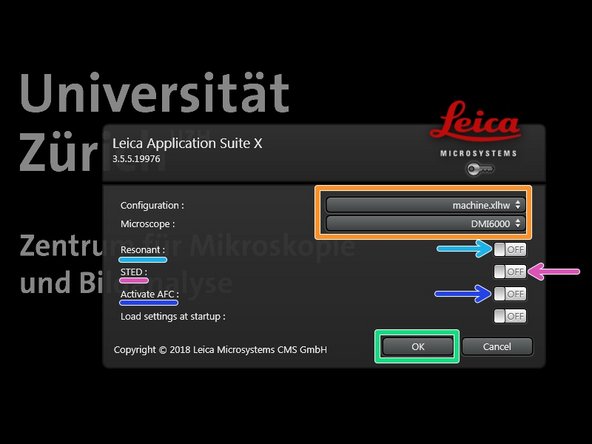
Start the "LAS X" software.
-
Select "machine.xlhw" as "Configuration", and "DMI6000" as "Microscope".
-
Select either "Resonant" (ON) or non-"Resonant" (OFF) mode.
-
Activate "STED" (ON) in case STED imaging is needed.
-
Activate "AFC" (ON), if applicable, in order to use the hardware autofocus during imaging. Not applicable when STED is used!
-
Click "OK".
-
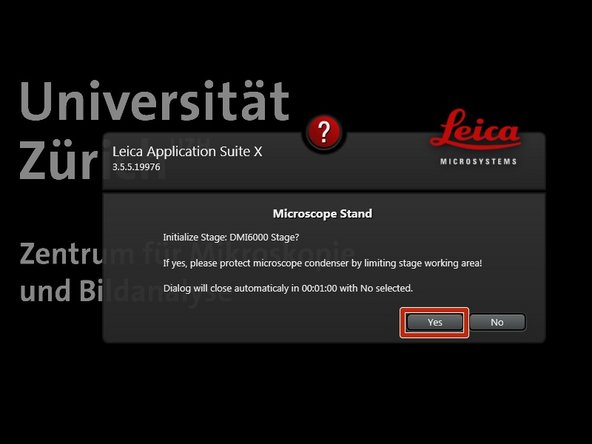
Ensure that no sample is mounted on the stage and Click "YES" to initialize the x/y stage.
-
x/y stage initialization is necessary to be able to use the LAS X Navigator function.
-
-
-
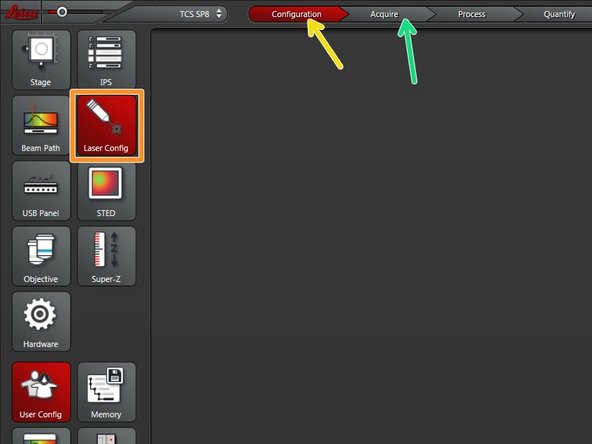
Go to "Configuration" tab.
-
Select "Laser Config".
-
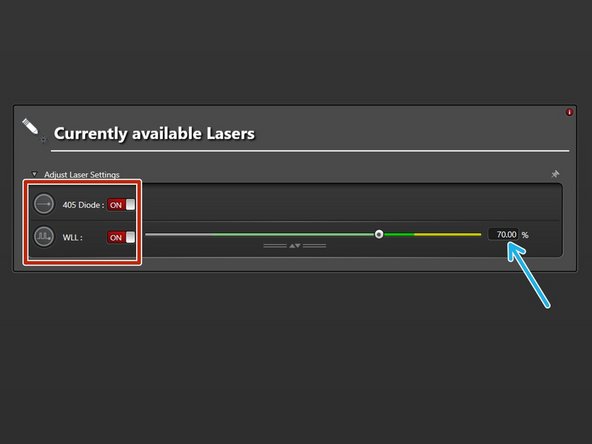
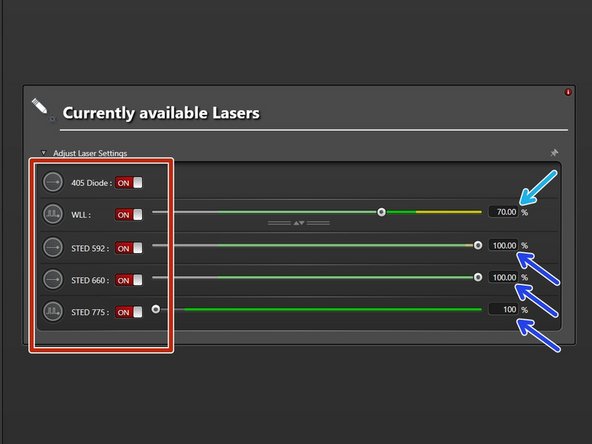
Switch "ON" the needed lasers.
-
WLL (covers the excitation range from 470 nm to 670 nm). Set power to 70% by default).
-
STED lasers (only visible if STED has been activated at Start-up). Set power to 100%.
-
The 592 nm STED laser line has to be ALWAYS switched ON. Used for internal STED beam alignment.
-
Go back to the "Acquire" tab.
-
-
-
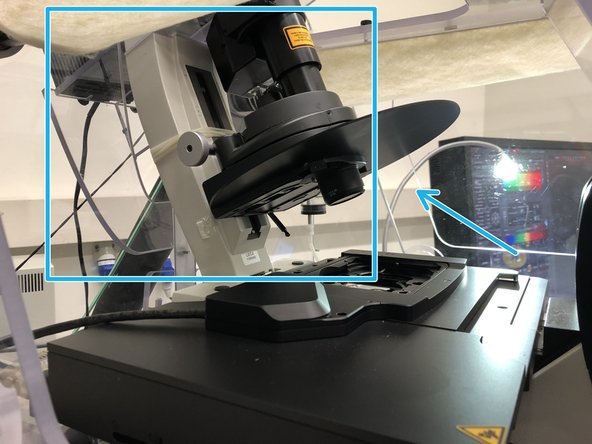
Lower the objective turret by pressing the "Z downwards" button on the right side of the microscope.
-
Select the 10x dry objective via the "LAS X" software for easy sample navigation and focusing.
-
-
-
Push back the condenser arm.
-
Place your sample with the coverslip facing down and fix it with the two springs.
-
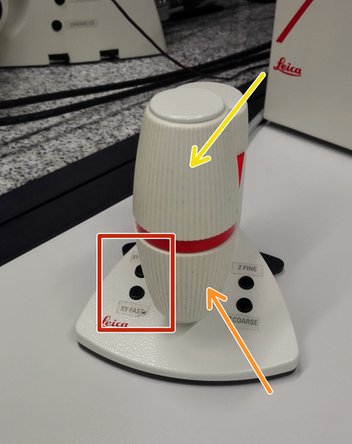
Navigate your sample using the controller.
-
Movement in y-direction.
-
Movement in x-direction.
-
Toggle between coarse movement "XY Fast" and slow movement "XY Precise".
-
Pull back the condenser arm.
-
-
-
On the front panel of the microscope select an appropriate fluorescence filter:
-
Filter for UV dyes like DAPI e.g.,
-
Filter for green emitting dyes like FITC, Alexa 488 e.g.,
-
Filter for orange/red emitting dyes like TRITC, Alexa 568 e.g..
-
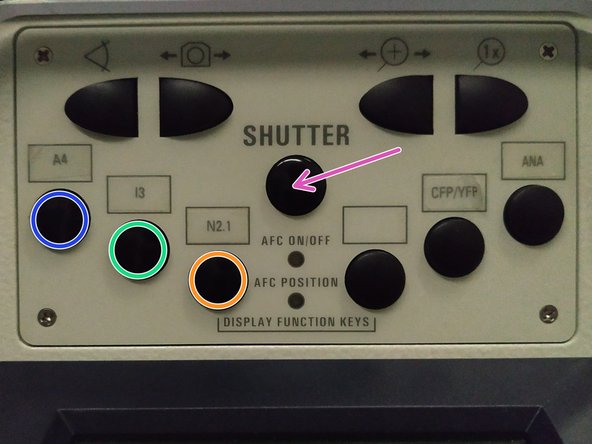
Press "SHUTTER" to illuminate your sample.
-
Use the ocular and focus on your sample using the focus wheel on the microscope stand or on the external controller.
-
Clockwise: Up/towards sample. Counter-clockwise: Down/away from sample.
-
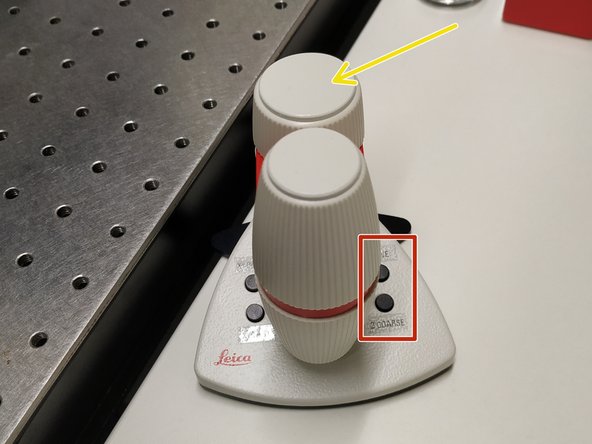
On the controller toggle between "Z FINE" and "Z COARSE" for changing the focusing speed.
-
-
-
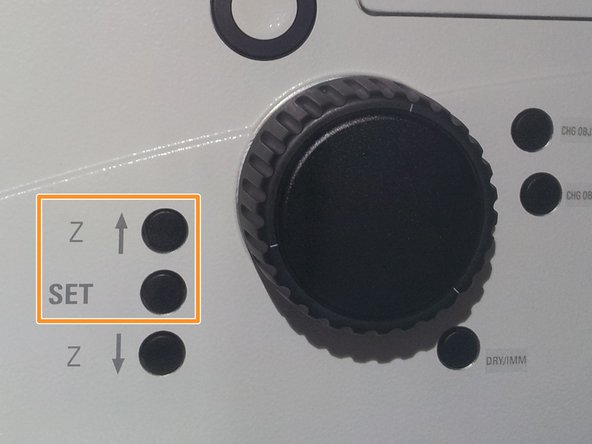
Storing the focus position can be helpful to find back the focus if the sample or objective has to be changed.
-
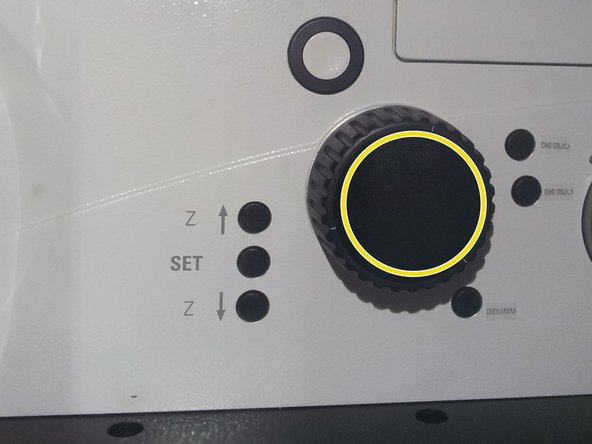
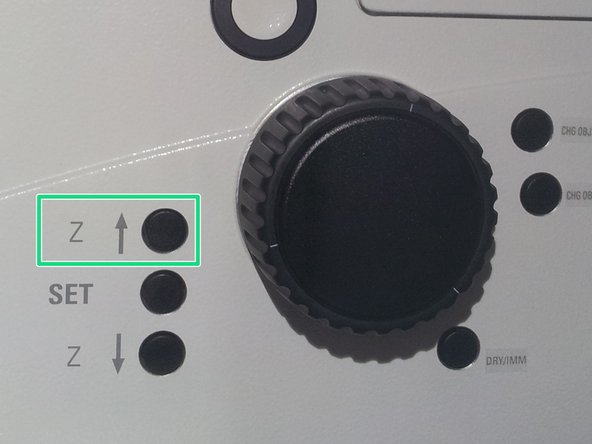
Jointly press the "SET" and upper " Z" button (right side of the microscope stand) to set the current z-position to zero.
-
''If a focus position was saved by a previous user, you have to repeat that "twice" to delete first the old saved position.
-
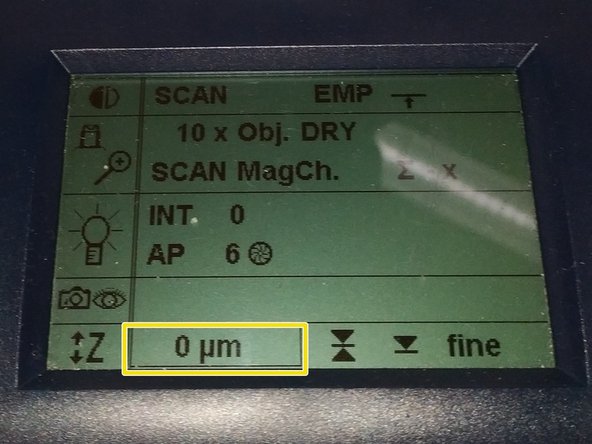
The "Z"-position on the display should now show "0 um".
-
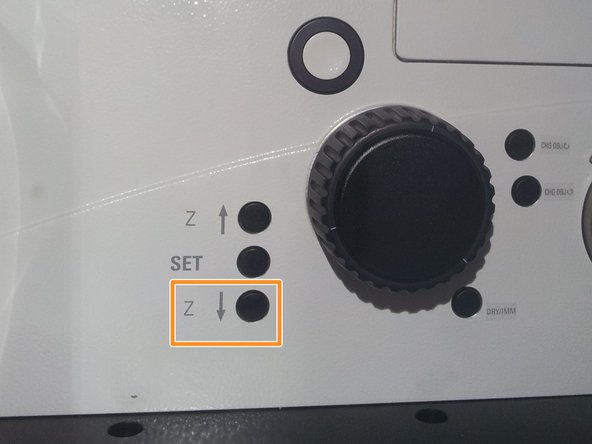
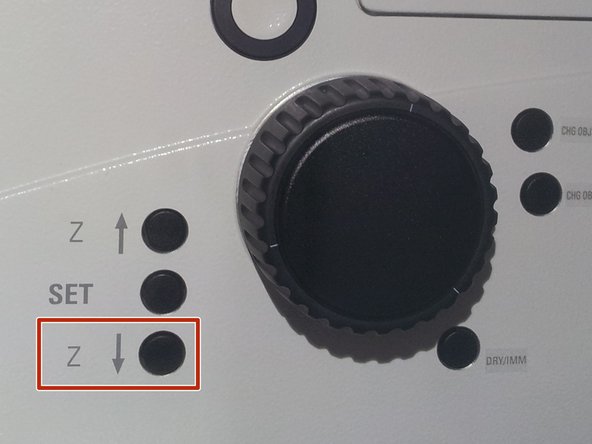
Press the lower "Z" to move down (for safe change of the objective or the sample).
-
-
-
Remove your sample and select the objective of choice.
-
Depending on the objective different immersion media have to be used. Apply it either on the sample or directly on to the objective.
-
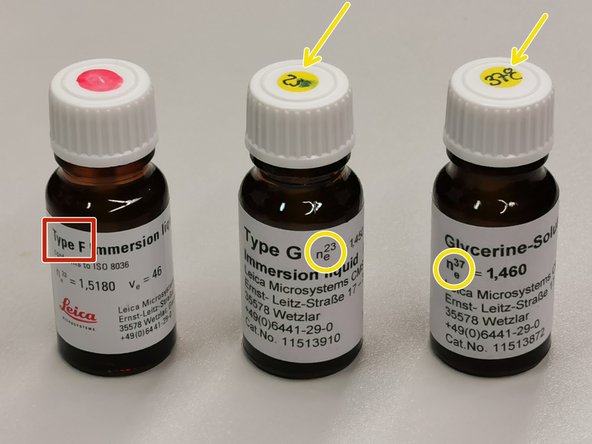
For Oil objectives: "Type-F" immersion liquid.
-
For "Glycerin" objectives: either "Type-G" immersion liquid (for RT measurements) or "Glycerin" immersion liquid (for measurements at 37°C).
-
For "Water" objectives: fresh ddH2O.
-
Mount your sample and press the upper "Z" button.
-
Focus on your sample as described previously.
-
-
-
For optimal imaging performance on some objectives the correction collar has to be adjusted:
-
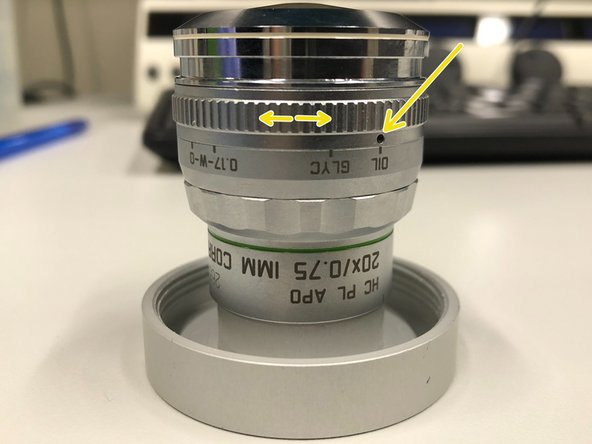
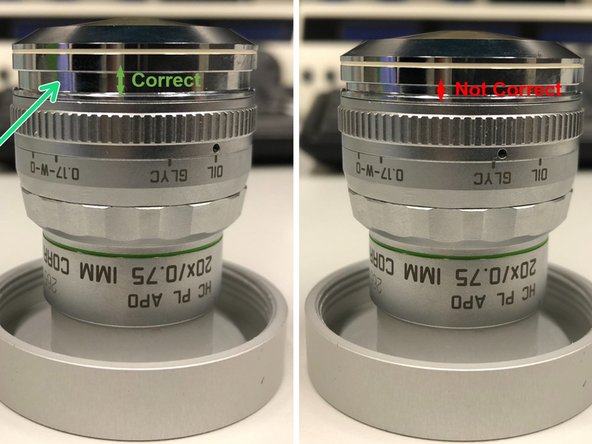
20x IMM (multi-immersion - Oil, Glycerin or Water) needs to be set to the corresponding immersion media ("OIL", "GLYC" or "0.17-W" (with cover glass) or "W-0" (without cover glass)).
-
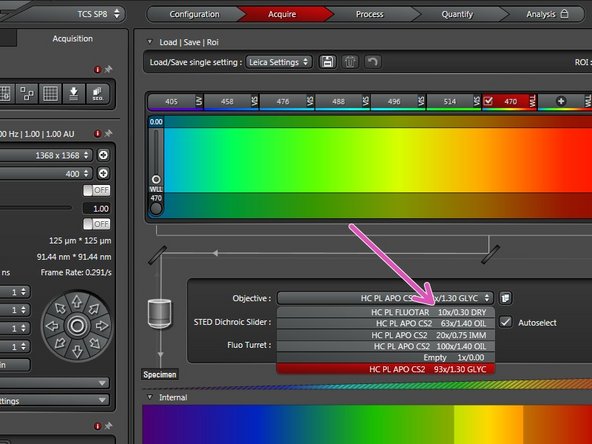
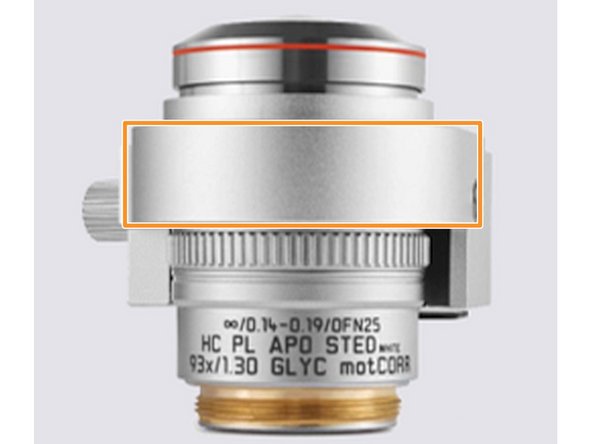
93x GLYC is equipped with a motorized correction collar (motCORR) which can be adjusted via the "LAS X" software.
-
Ensure that the top part of the spring-loaded front lens is released (working position). Mandatory for all immersion objectives.
-
Do Not remove the objectives for adjustments. They can be accessed on the microscope.
-


Cancel: I did not complete this guide.
One other person completed this guide.
