Introduction
The Thermo Fisher Hydra Bio CX is a sophisticated imaging system that integrates multiple imaging modalities, offering advanced functionality for a wide range of applications. Due to the system’s complexity, users may occasionally encounter operational issues. Many of these issues are common and can be quickly resolved through basic troubleshooting.
This guide serves is regularly updated with frequently encountered problems and their solutions. It is intended to support users in identifying and resolving minor issues independently, helping to minimize downtime and ensure efficient use of the instrument.
Before reaching out for assistance, please consult this guide to see if your issue is addressed. If the problem is not listed here, or if you are unable to resolve it on your own, please report it using the session feedback form. For time-sensitive or critical issues, contact the responsible facility staff directly via phone.
-
-
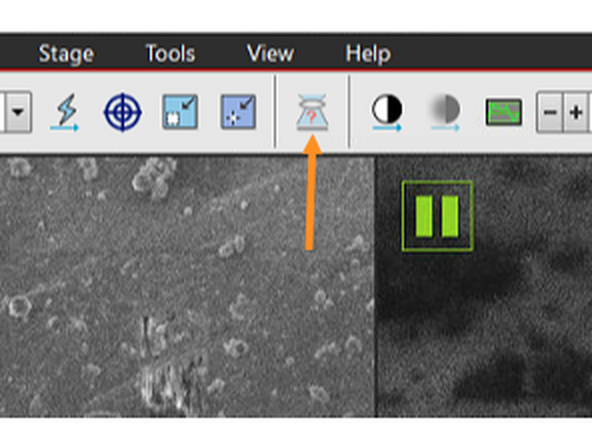
Microsputtering requires the insertion of a platinum rod close to the sample. To avoid collision with the sample, the working distance has to be linked to the Z-height.
-
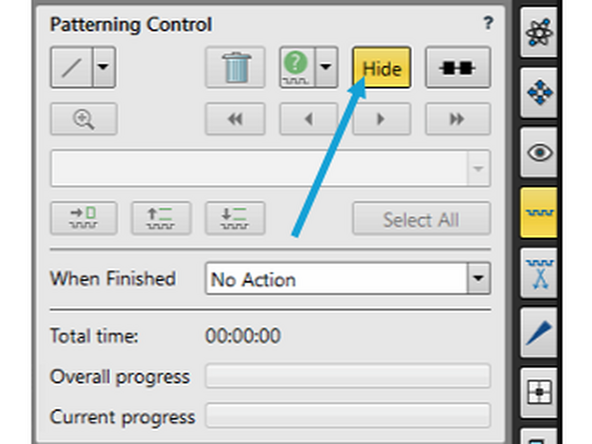
The platinum is sputtered by the pFIB, thus make sure there is no other pattern in the FIB view. Check for and delete also the hidden patterns and try sputtering again.
-
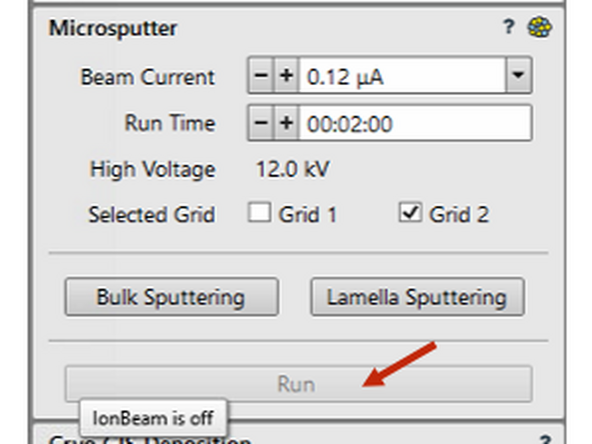
Check if pFIB beam is ON.
-
-
-
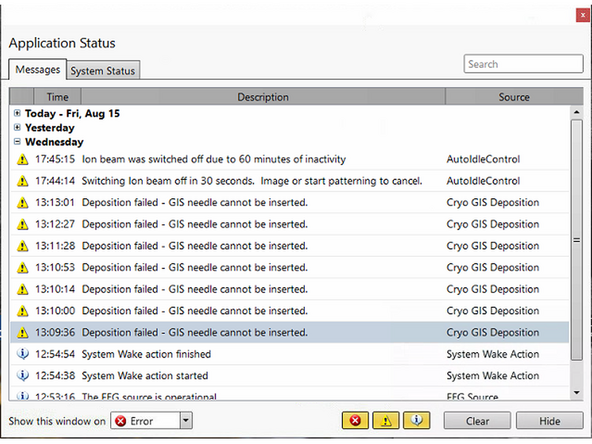
The GIS needle has to be inserted in close proximity to the sample, thus it is necessary to link the working distance to the Z-height before you start the GIS.
-
Make sure the FWD is linked to Z-height. If already linked, re-link it by focusing on the surface of the grid that you wish to coat. Use mapping position and active SEM view to link it.
-
Try GIS needle insertion again.
-
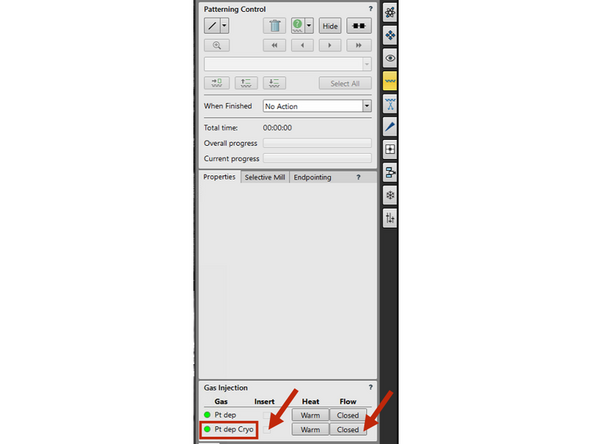
Manual coating: i) go to deposition position on your grid, ii) go to Patterning module -> Gas Injection -> Pt dep Cryo, iii) tick insert boy to insert needle and click "Closed" button to open gas flow, iv) make sure to measure the time of the gas flow and click the same button again to stop gas flow, v) untick insert box to retract needle.
-
-
-
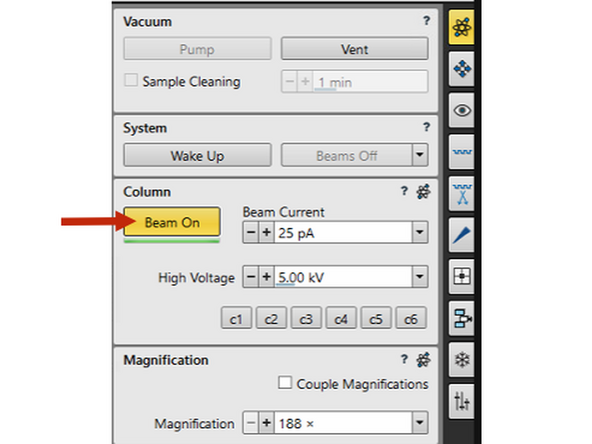
Check if the beams are switched on. If the button is yellow, it is ON.
-
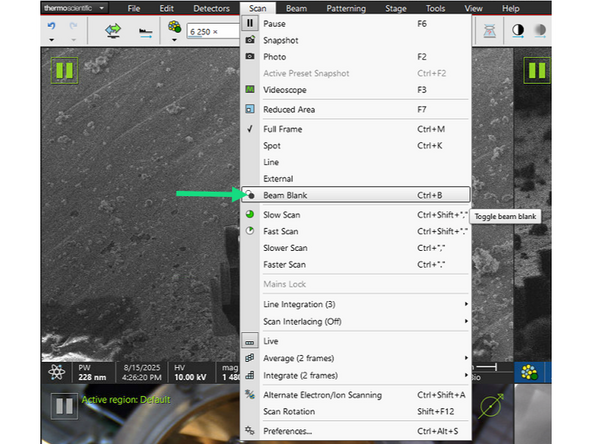
If the beams are on, check if the beam blanker is inserted.
-
Make sure you waited long enough until the microscope optics could change. pFIB aperture change can take 5-10 seconds!
-
-
-
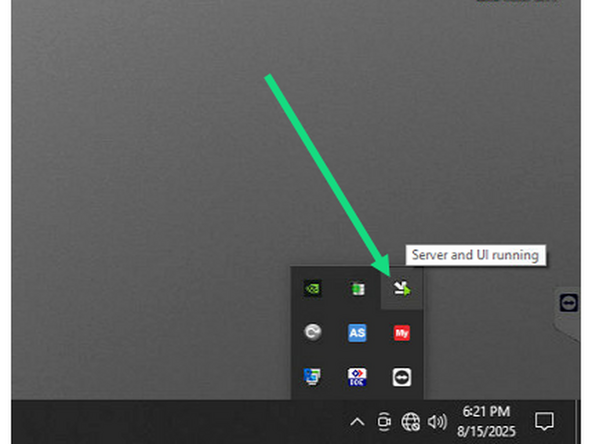
Open system tray and double-click on the miniature xTUI icon.
-
-
-
First, stop xTUI.
-
Second, stop microscope.
-
Third, stop FlowView
-
Fourth, stop FlowDDE server.
-
Finally, go to Start menu -> Power -> Restart Microscope PC.
-
When microscope PC restarted use these credentials within the quotation marks: username="User", password="user"
-
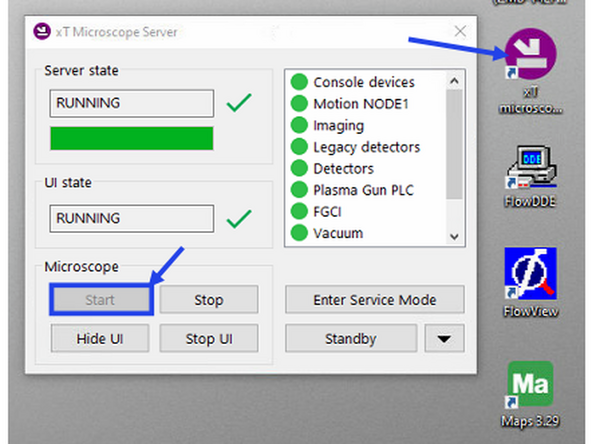
Double-click xT microscope server -> Start microscope -> Start UI (started automatically). username="Supervisor", password="Supervisor"
-
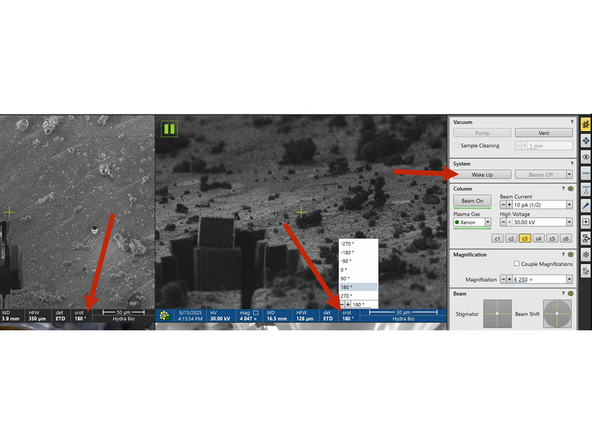
In the xTUI follow these steps: i) apply 180° scan rotation for SEM and FIB views, ii) home the stage (Shift + F3) and iii) wake up the system.
-
-
-
If the microscope PC restart didn't work, you may power-cycle the microscope hardware. In any case, please inform the responsible persons before proceeding with this step.
-
Unload your sample, as the stage may warm above -150°C.
-
First stop UI and then stop Microscope as in the previous Issue #5.
-
Bring the stage to 0° tilt in Stage -> Tilt 0°. (Ctrl+E)
-
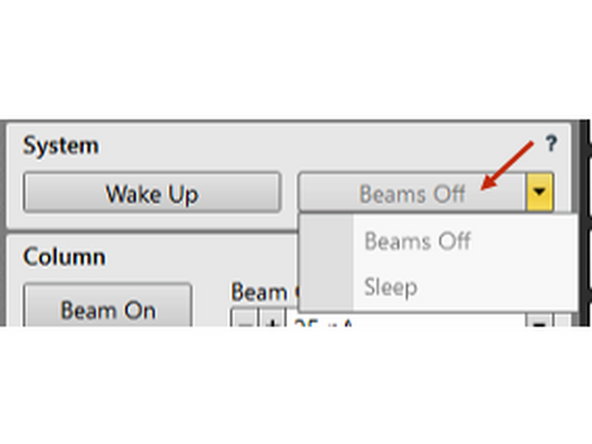
Switch off beams or put them to sleep.
-
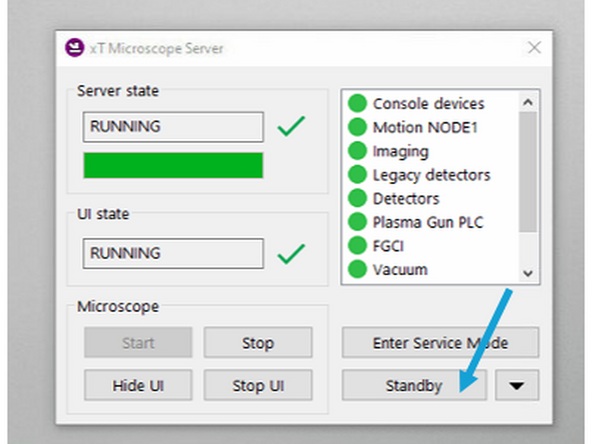
Click Standby button and confirm the following pop-up messages. Wait 30 seconds and start up the system again.
-
Double-click xT microscope server -> Start microscope -> Start UI (started automatically). Use login credentials from Issue #5. In the xTUI follow these steps: i) Home stage when promted, ii) apply 180° scan rotation for SEM and FIB views, iii) home the stage (Shift + F3) and iv) wake up the system.
-
-
-
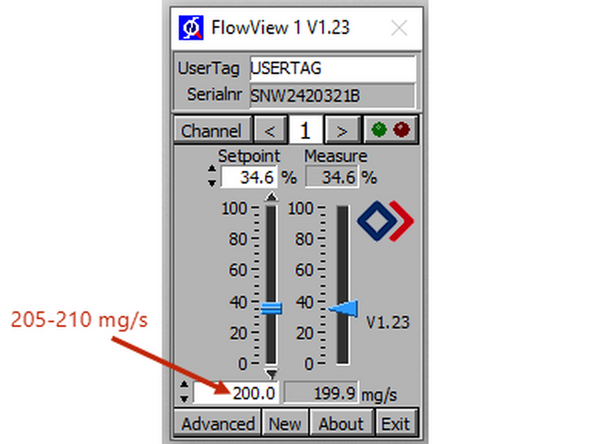
The latest software update (xTUI v17.42) has integrated the cryo-Nitrogen flow control. This new feature set flow between 0 mg/s and 200mg/s. If you are concerned about the flow rate, please contact the responsible persons.
-
Due to the stage cooling solution, the level of nitrogen in the heat exchanger dewar affects the cooling efficiency of the stage. As the N2 level lowers, the cooled nitrogen gas warms up slightly in the upper part of the dewar, thus the stage temperature elevates. Once the dewar is full, the temperature sinks again.
-
The default nitrogen flow rate is 200 mg/s.
-
First, check if the nitrogen dewar is filled. If needed, initiate dewar filling based on Step #7 of the automated nitrogen filler protocol.
-
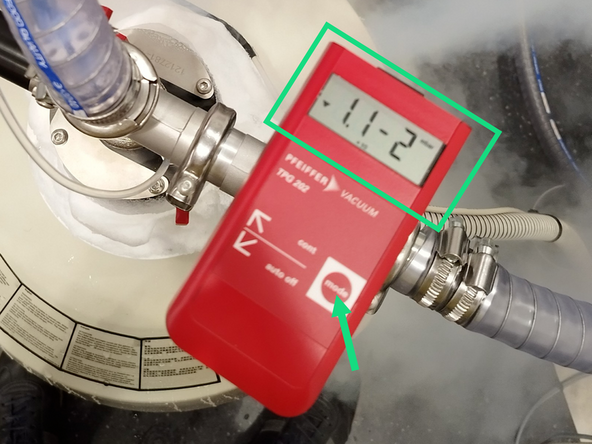
Check if the pressure is below 2*10^-2 mbar in the vacuum protection tube by pressing Mode button once. If the pressure is higher, it may be a sign of ruptured tubing.
-
Increase gas flow in the FlowView window 205-210 mg/s.
-
If the temperature doesn't decrease in the next minute, it may be a sign of an ice clog. Try to remove it by increasing flow to 250mg/s. If temperature still doesn't decrease, evacuate your sample and cryo-cycle the instrument (ca. 2 hours).
-