Introduction
This guide describes a simple cryogenic correlative light- and electron microscopy workflow (cryo-CLEM), that utilizes the iFLM module for in situ correlation. It works with the default software provided by Thermo Fisher Scientific with the Hydra Bio CX instrument.
-
-
Ideally, you collect information about your grids before your milling session, to use the instrument efficiently.
-
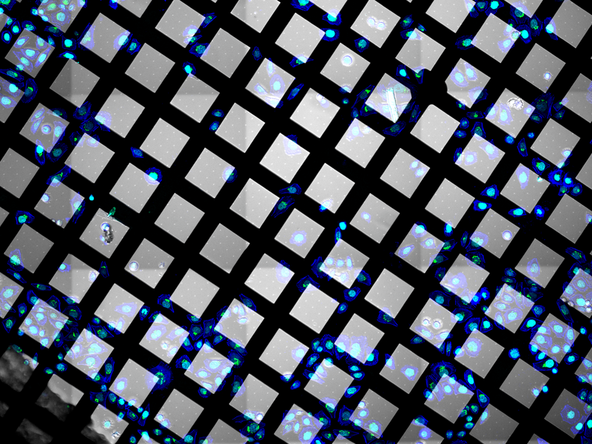
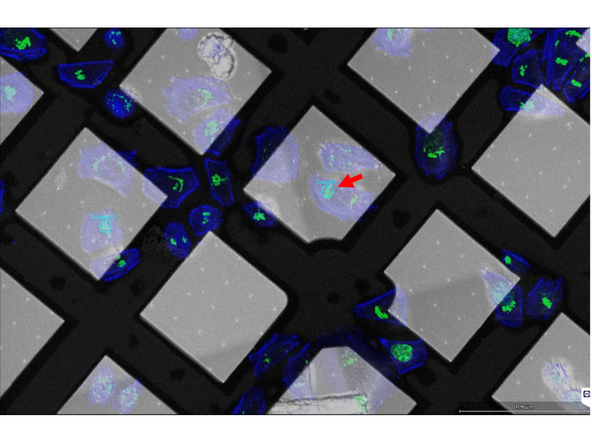
One example, is a fluorescent atlas overview of our sample.
-
-
-
Load your sample in the Hydra.
-
-
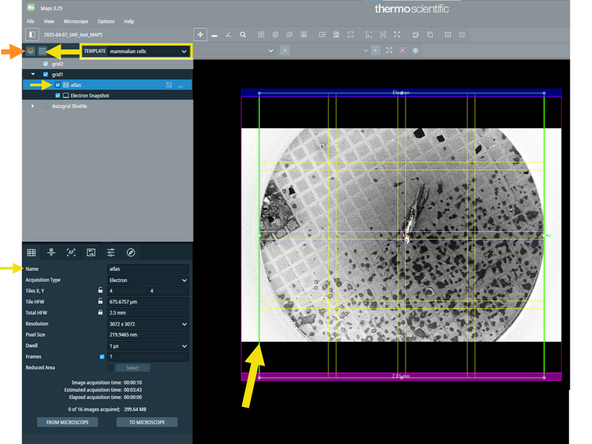
Briefly: i) open Maps, ii) create a new project, iii) take SEM snapshot of your grid, iv) add and acquire atlas tileset
-
-
-
Import previously acquired fluorescent atlas of your grid.
-
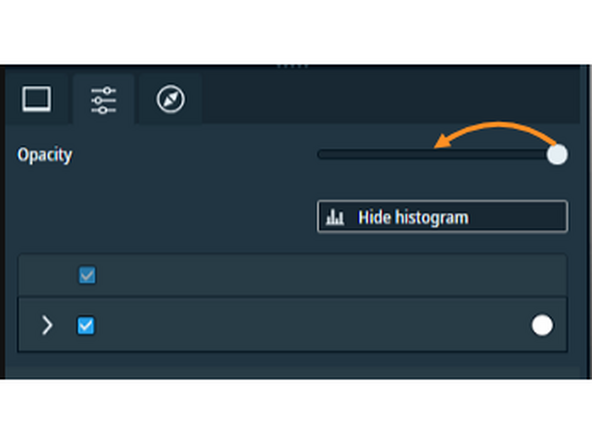
Adjust opacity of this image to 50%.
-
If Alignment Wizard doesn't appear automatically, right-click on the imported image -> Alignement -> Fine Alignment
-
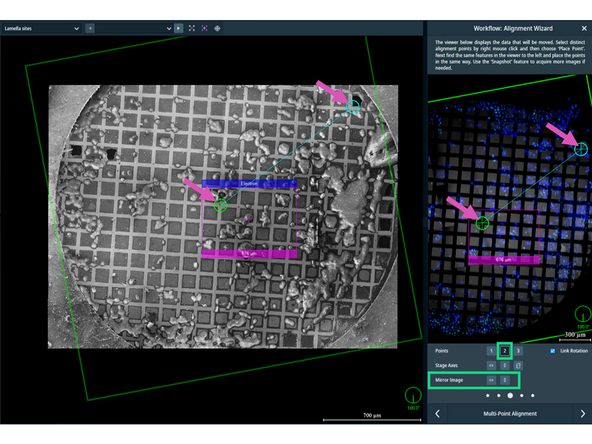
Use 2-point alignment, if necessary apply mirroring/flipping to your fluorescent atlas.
-
To select matching features between SEM atlas and imported image, right-click -> Place Point. Select the same feature on both images.
-
Using the fluorescent atlas you can already select areas of interest and place lamella site over them.
-
-
-
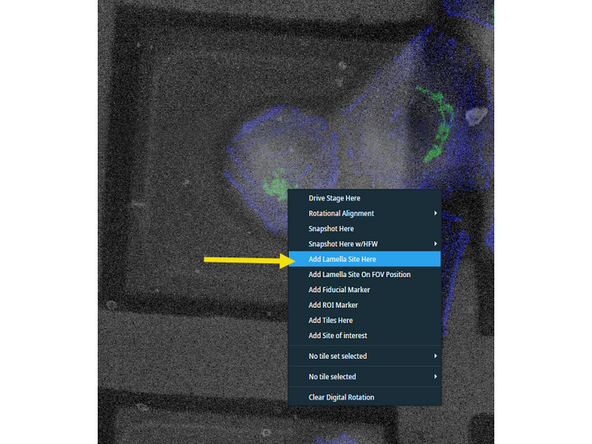
Either based on the fluorescent atlas image (previous step) or based on SEM atlas, select cells for milling.
-
Right-click on the cell -> Add lamella site here
-
You may be able to fit 15-20 lamellae in one session.
-
-
-
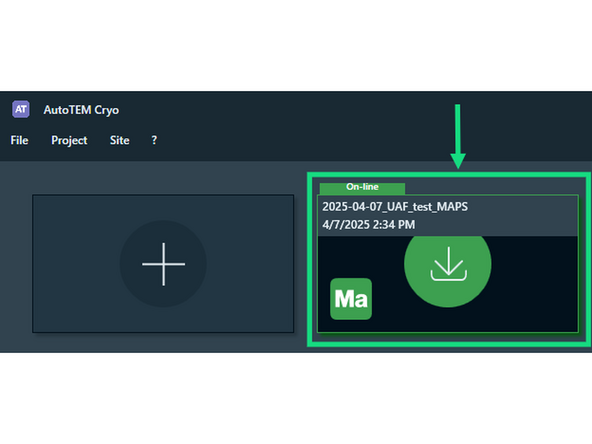
Select live Maps project and import lamella sites.
-
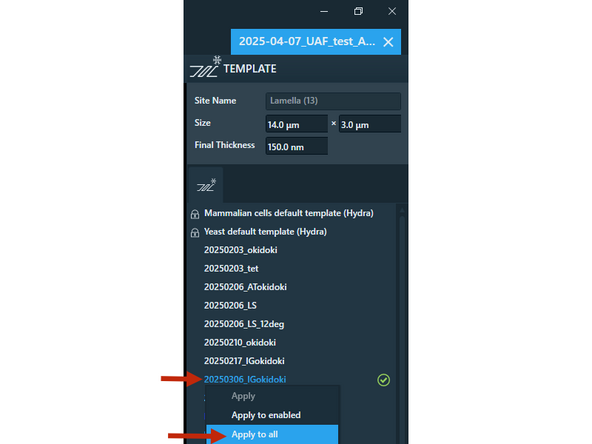
Apply your preferred template for the selected lamella sites and start lamella preparation.
-
It is recommended to switch on milling of artificial features, that will not only enchance lamella targeting, but can serve as CLEM fiducial in the following step.
-
Start lamella site preparation. (see basic workflow here)
-
Revisit lamella sites in Maps software and take high magnification snapshot with all fiducials in the field of view.
-
-
-
Open iFLM software.
-
Switch microscope to LM mode.
-
Make sure to switch to LM mode ONLY, when the stage is in mapping position (sample is perpendicular to SEM).
-
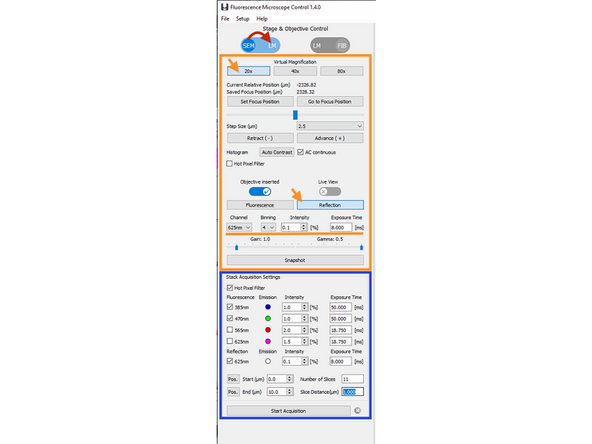
Bring sample in focus (ca. 2500um) while using reflection mode, 20x magnification (bin 4x), 625nm wavelength, 0.1% LED power and 8 ms exposure time.
-
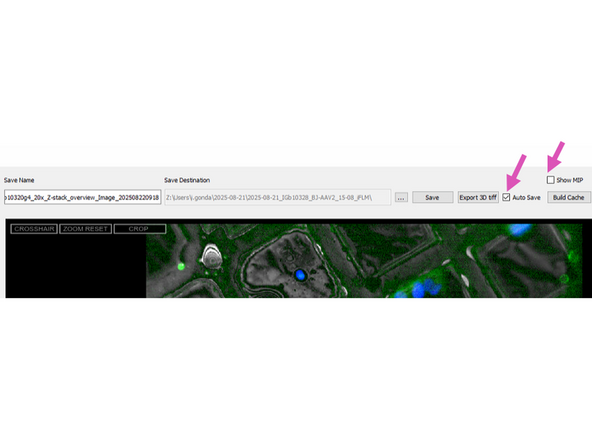
Set focus distance and link Z-height to Y axis. Setup destination path for your Z-stacks and switch on auto-saving. If you need MIP or TIFF images as well, you will need to save them after each acquisition.
-
Navigate to first lamella site, setup Z-stack imaging parameters and acquire Z-stack. Repeat this step for each lamella site.
-
For a 20x, 10um Z-stack with GFP-labeled sample, these parameters work well. Fluorescence: 470nm, 1% LED power, 50ms exposure || Reflection: 625nm, 0.1% LED power, 8ms exposure || Start: 0um, End: 10um, Step: 0.5um
-
Make sure the previously milled artifical fiducials appear in focus somewhere in your Z-stack. This will be crucial for the next correlation steps.
-
-
-
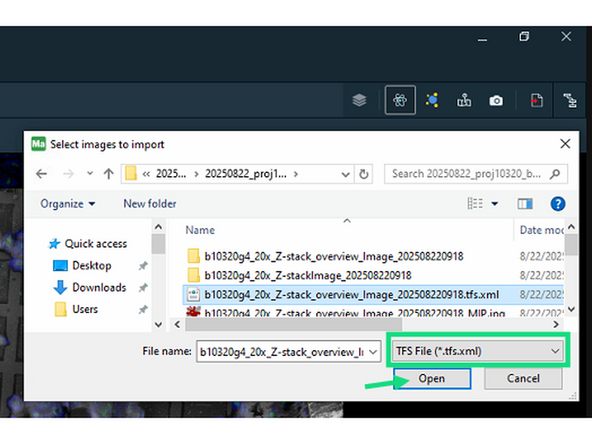
Import the previous acquired iFLM Z-stacks from your project folder, by clicking on the import button and selecting the the .tfs files.
-
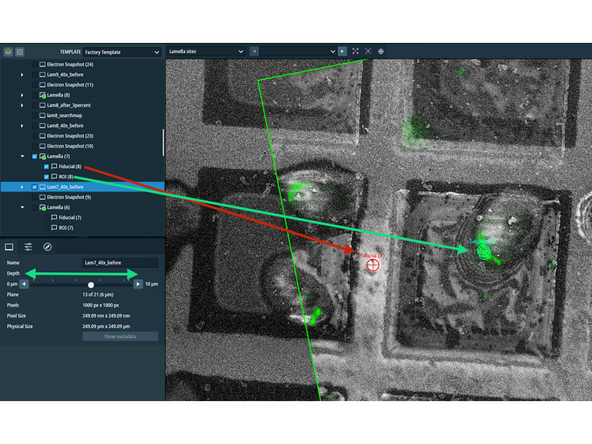
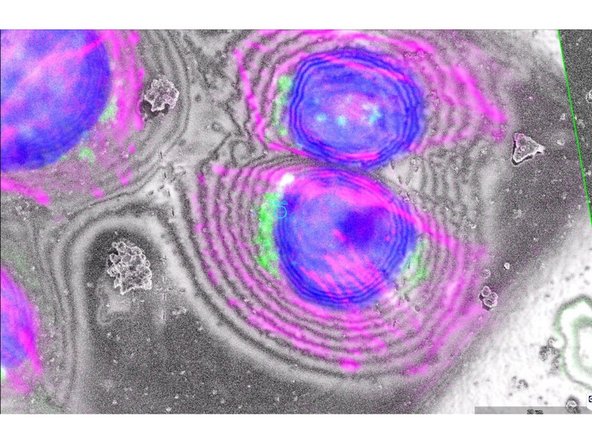
Right click on the Z-stack and select fine alignment. Change Z-slice to set artificial or natural fiducials in focus and use them to correlate to SEM atlas.
-
-
-
Select your Z-stack and switch to the Z-slice where your artificial or natural fiducial is in focus.
-
Right-click on fiducial -> Select as fiducial -> Select corresponding lamella site from the drop down list.
-
Select your Z-stack and switch to the Z-slice where your region of interest is in focus.
-
Right-click on ROI -> Select as ROI -> Select corresponding lamella site from the drop down list.
-
In AutoTEM Cryo the correlation between fiducial and ROI will be calculated from X,Y coordinates in SEM atlas and the Z-coordinate based on the plane number in the Z-stack.
-
-
-
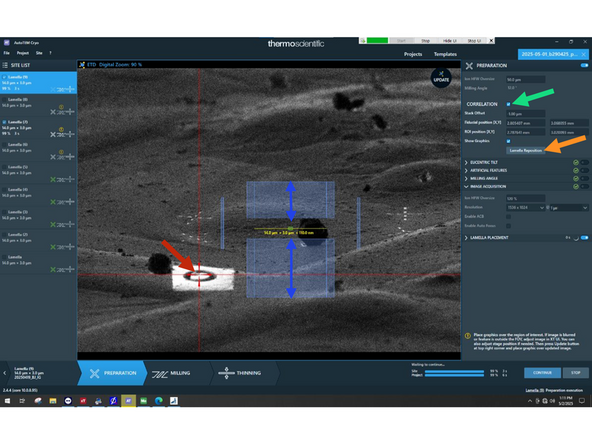
Enable correlation in Preparation step.
-
Place red cross-hair over you r selected fiducial. The calculated position of ROI will be marked by a green rectangle.
-
Select Correct lamella position
-
Adjust rough milling pattern height.
-
-
-
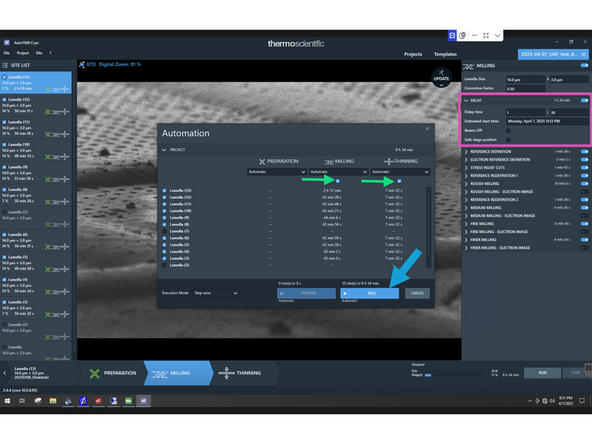
Continue lamella milling with milling and polishing steps.
-
If needed, set delay time on the first lamella on top of the list.
-
Safe stage position and Beams off options cause an error, make sure to disable them if you use delay.
-