Introduction
This guide will walk you through the startup process of the confocal Nikon Ti2 microscope, located at the Balgrist Campus, Room Microscopy 3 W.112.
If you are not familiar with the location at Balgrist Campus, read How to get to the ZMB at Balgrist Campus.
And find a detailed information about this system in here.
-
-
Start the computer
-
Start the A1r+ controller
-
Start the microscope controller
-
The system requires time to initialize all lasers.
-
Laser lines load sequentially from shorter to longer wavelengths (left to right). Blinking lasers indicate they are still booting. To image with a specific laser, wait until its corresponding laser line stops blinking and is fully operational.
-
While lasers are booting, you can continue with the rest of the startup procedure.
-
-
-
Pres Ctrl + Alt + Del and log in with your CORE credentials
-
-
-
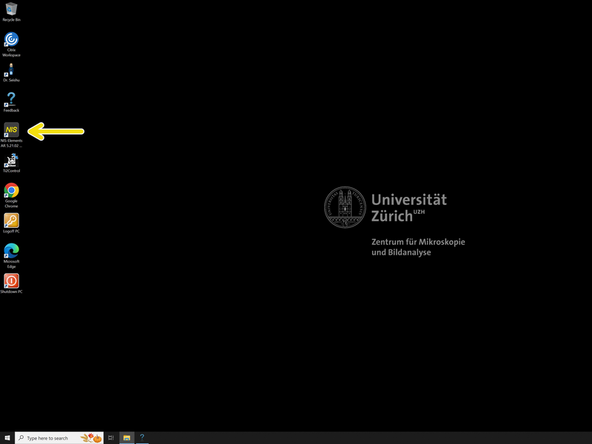
Star the NIS-Elements SW
-
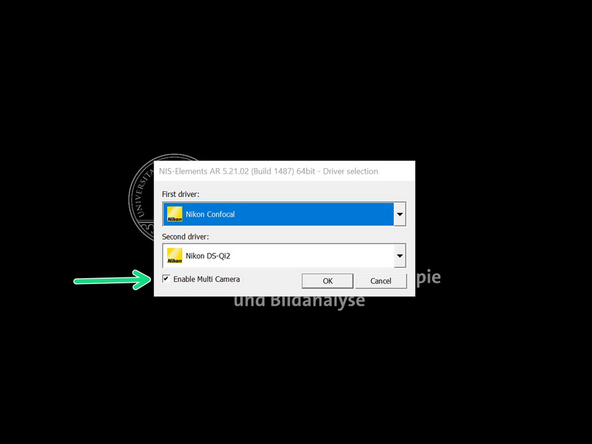
Enable Multi Camera
-
In the first driver select Nikon Confocal
-
In the second drive select Nikon DS-Qi2
-
It is recommended also to use camera for initial and faster navigation in Widefield mode in the sample.
-
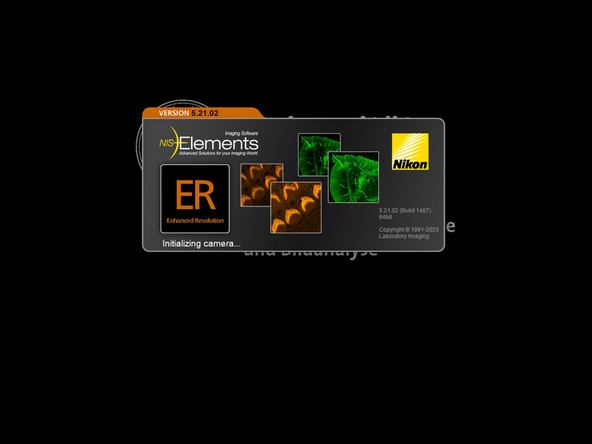
SW will start to initialize
-
-
-
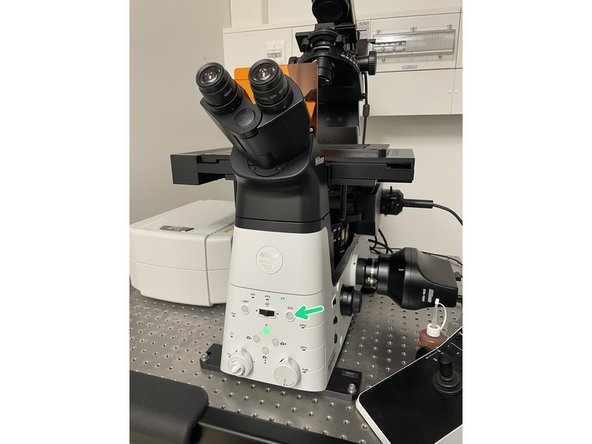
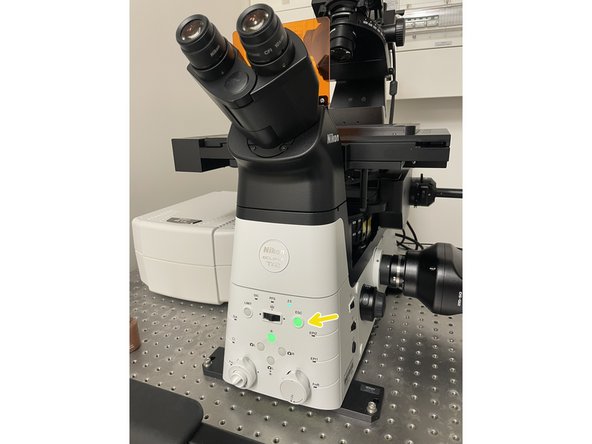
Press the escape button
-
With this you will lower the objective to the lowest position.
-
The escape button will appear green. Now press and hold for 1-2 sec until it appear grey again.
-
With this step you will reset the last remembered position of the objective. In this way, you will ensure that when mount sample you won't crash the objective with your sample.
-
-
-
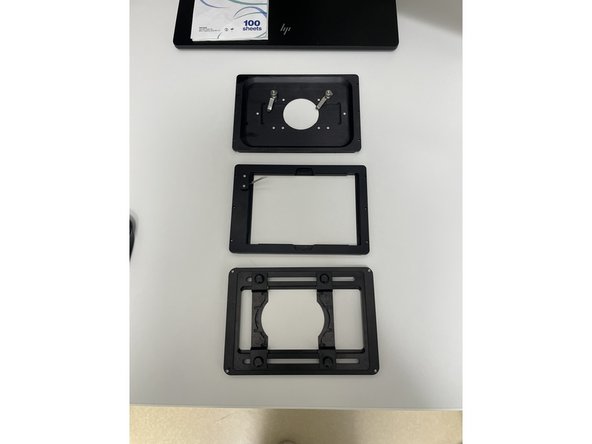
Choose a frame that will fits with your sample holder and mount it on the stage
-
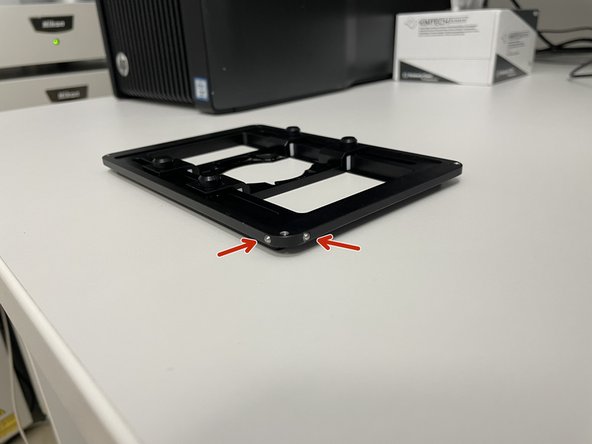
In the universal frame there are two guide pins in one corner, that has to fit first into the top left corner of the stage.
-
-
-
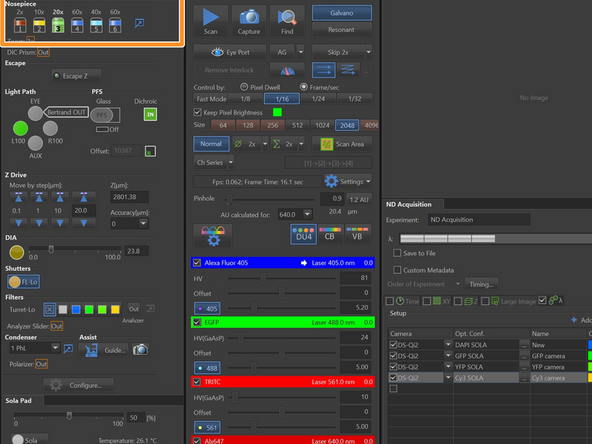
Choose the objective in Ti2 pad
-
If you are using immersion objective, now is the time to add the immersion.
-
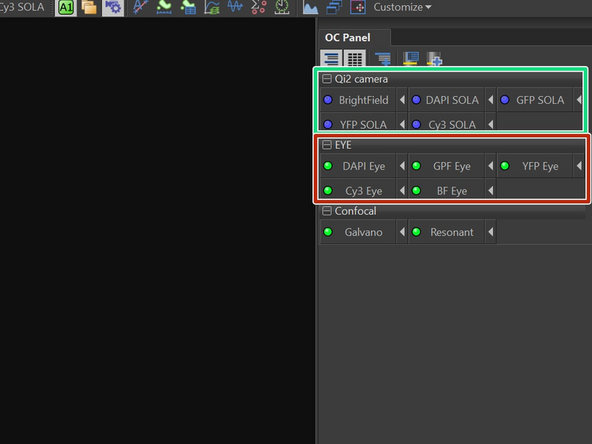
Choose the optical configuration in the OC Panel.
-
To initially focus on the sample it is recommended to use a WF configuration. You can choose from the OCs to:
-
EYE: focus on the sample in the eyepieces
-
Qi2 camera: focus with the camera in the SW
-
-
-
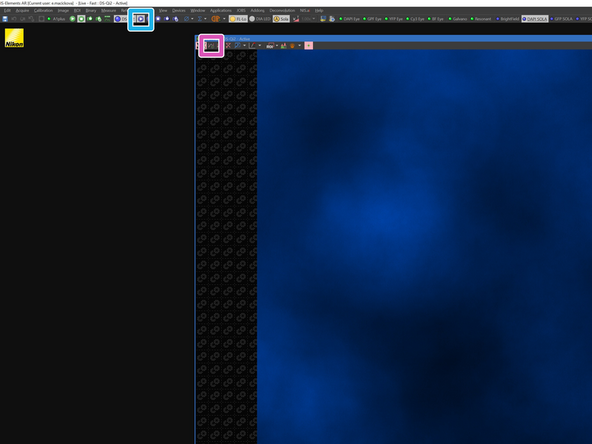
If you focus using camera:
-
Click on the DS-Qi2 Play button. (purple button).
-
Press the Autoscale button (Histogram with Play icon.) This will ensure that the Histogram will be scaled and you won't miss the sample even with a weak signal.
-
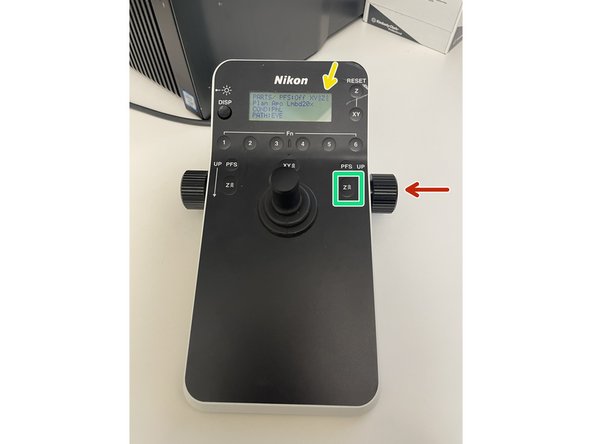
Go up with the objective rotating the knob towards yourself.
-
The number of arrows indicates you the speed of movement. (3 arrows = fastest)
-
You can change the speed with this button
-
Start with 3 or 2 arrows and go up carefully, until you will hear gentle beeping with which microscope indicates you are near to the focal plane. Then change the speed to 1 arrow and find your focus.
-


