
-
-
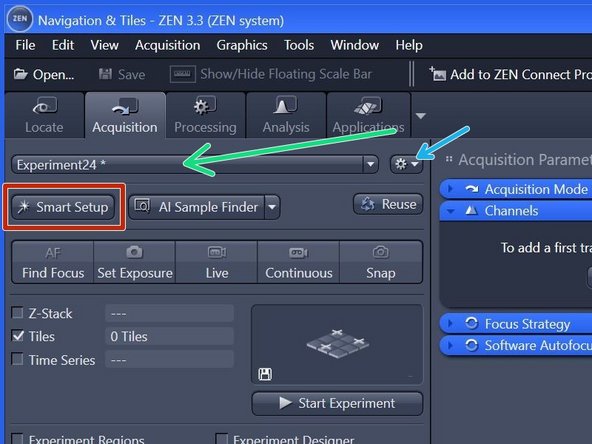
Start Zen software via desktop shortcut
-
Change to "Acquisition" tab
-
-
-
Since the microscope has a new light source, the previous settings in the dropdown menu are no longer functional. Please follow the steps below. New pre-defined settings will be provided soon. If you encounter any issues, contact the staff listed in the feedback form.
-
Click "Smart Setup" to open the "Smart Setup" wizard.
-
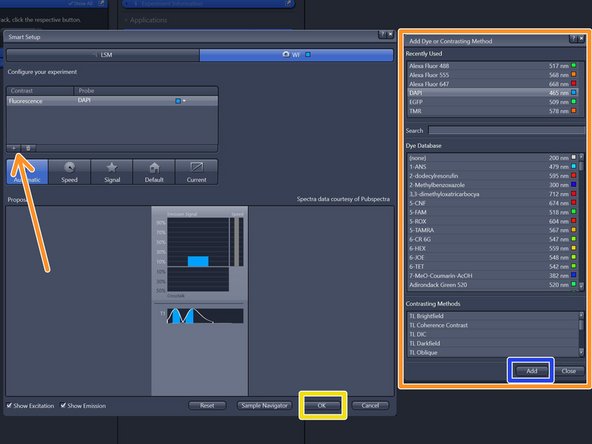
Click "+" to add dyes/channels to your experiment.
-
Choose your appropriate dye for the overview and click "Add". One can also choose more than a single dye.
-
Click "OK".
-
The software automatically sets all the needed tracks and corresponding wavelength settings.
-
You can save the new generated settings.
-
-
-
Load slide on stage (coverslip faces down towards objective).
-
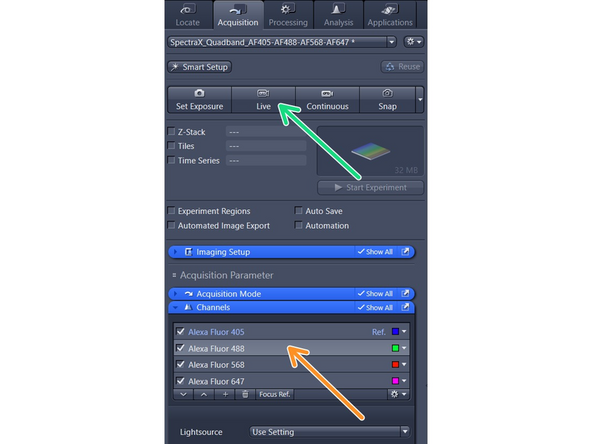
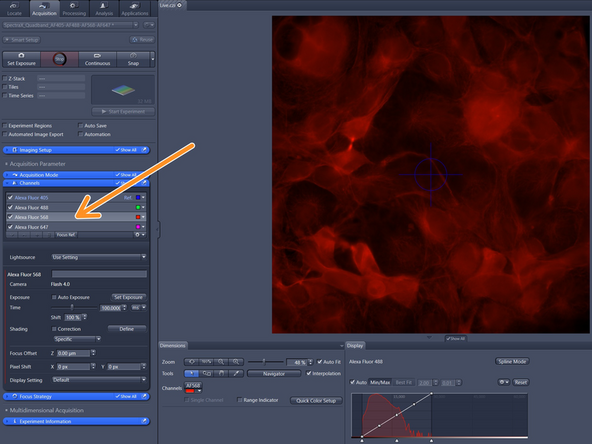
Double click the channel you want to use for finding the focus (e.g. Alexa Fluor 488).
-
Click the "Live" button to start acquisition (you should see light coming out of the objective).
-
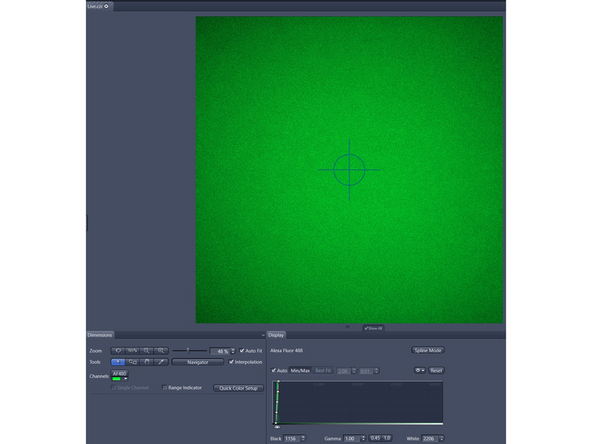
The image typically stays dark because the Display Adjustments are not set correctly. Ensure you have ticked the "Auto" box above the histogram
-
You should see now at least some background noise in the image window.
-
-
-
Use the focus wheel on the touch panel to bring your cells in focus
-
While the "Live Acquisition" is running you can double click on other channels to check signals
-
-
-
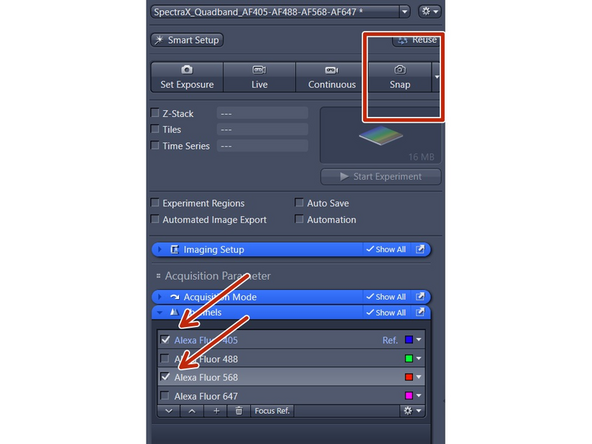
Only channels with ticked boxes will be recorded. Click on "Snap" to take image.
-
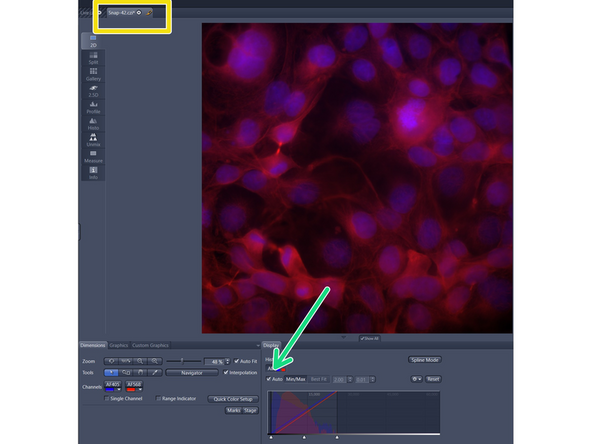
New images will show up as tabs above the current image. Recordings can be saved by right click on the tab and selecting "Save as CZI file"
-
You may need to adapt display adjustments or click the Auto button
-
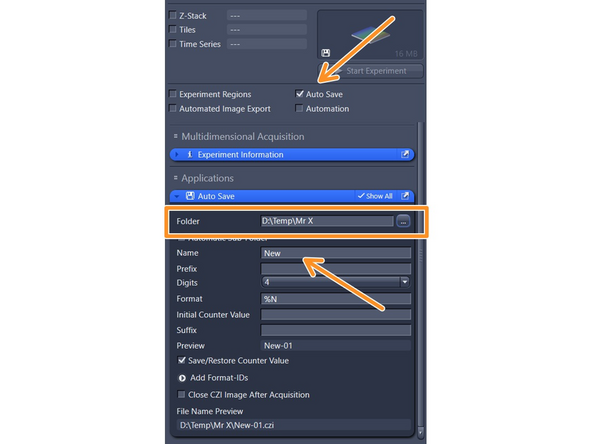
Manual saving can be very tedious. Tick the Auto Save box to save images automatically in a defined location.
-
Single images can be directly saved on the file server in your data folder
-
More complex experiments like tile images, time lapse acquisitions or automated recordings should be saved locally in D:\Data\Temp\"your name". Do not forget to transfer them to the file server after the acquisition is finished. Files in the local temp folder will be automatically deleted after 1 week.
-
-
-
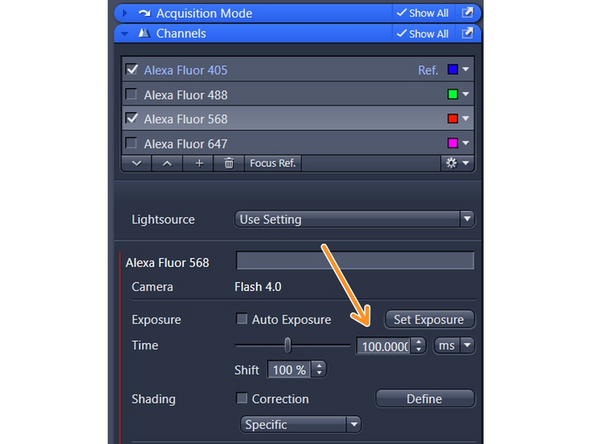
The default 100 ms exposure time typically works quite well for the 63x oil objective.
-
When switching to a lower magnification objective it is likely that one needs to change the exposure time settings.
-
The microscope is equipped with a 16 bit camera which enables a huge dynamic range. It is not advisable to increase the exposure time to fill the complete histogram.
-
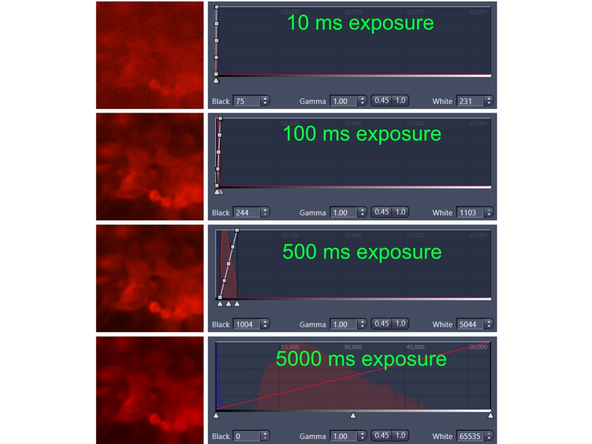
Examples taken with the 20x objective
-
10ms exposure generates a very noisy image
-
100 ms exposure still contains some noise
-
500 ms looks fine
-
5000 ms does not improve the image quality even though the signal appears to fill the complete dynamic range. This setting is just very impractical to work with because the recording becomes very slow and you may experience bleaching
-
-
-
The high resolution camera in combination with the 16 bit recording results in a large default image size of ~8 MB per channel.
-
You have two options to reduce the image file size
-
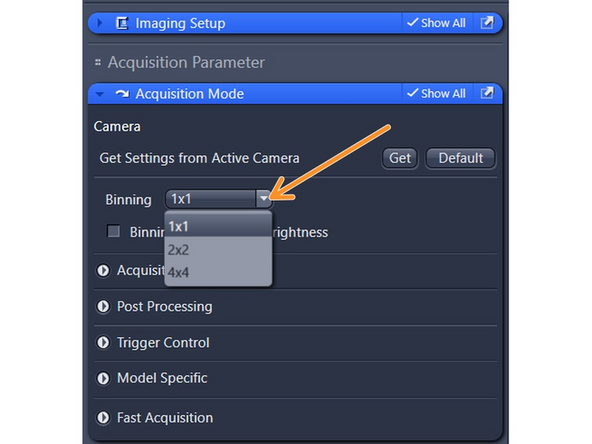
Option 1: Change the Binning settings under "Acquisition Mode".
-
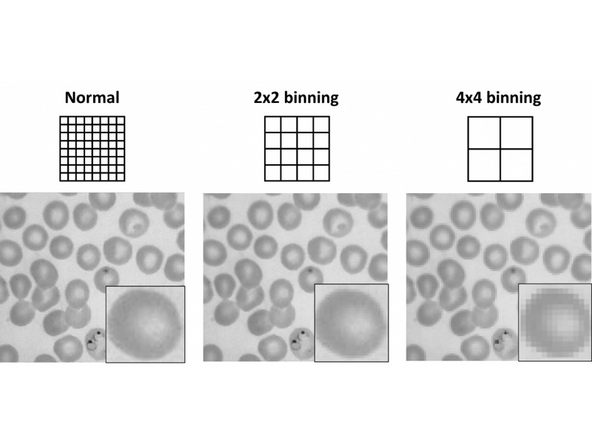
Changing to 2x2 or 4x4 binning will increase pixel size and reduces the resolution within your image. If this will be applicable depends on your experimental question.
-
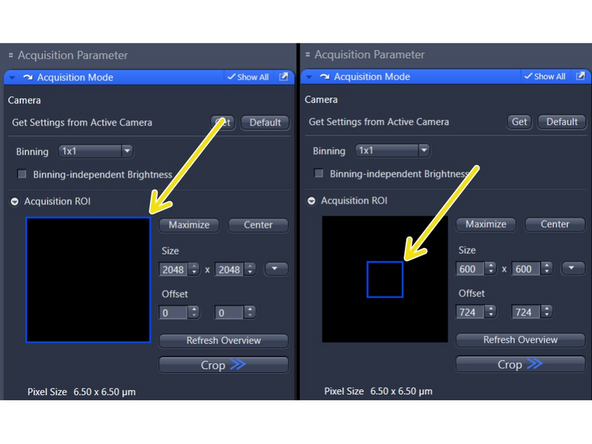
Option 2: Crop the camera field to record a smaller region of interest (ROI). The pixel size won't be affected. This is very useful if you are anyway interested in single cells but won't help for recording tile images.
-


Cancel: I did not complete this guide.
One other person completed this guide.