Introduction
Overview of the direct alignments to be done before starting data acquisition at the transmission electron microscope Titan Krios G3i.
Please find more detailed information about the system here.
-
-
Before data acquisition perform energy filter tuning and acquire a gain reference. Do the same always after microscope and Camera cryocycle (i.e. on Monday Morning) and after a Camera Power Off/Power On cycle.
-
Navigate to a void position like a broken grid square, or remove the grid if no voids are available on the grid.
-
Prepare the gain references (instructions here).
-
Tune the energy filter (instructions here).
-
-
-
The Titan Krios G3i is super stable, only minor alignments are needed before starting data acquisition.
-
Do all the alignments with the objective aperture out, and insert it only before starting data acquisition (step 6).
-
Move the stage to a thin area of carbon.
-
Adjust eucentric height using the EPU autofunction, if you wish, with the "Hole/Eucentric Height" Presets.
-
-
-
Make sure you are on carbon, checking the stage location with a Hole/Eucentric Height preview. If you are not, move the stage by right click on a carbon location in the preview image, and selecting "move here".
-
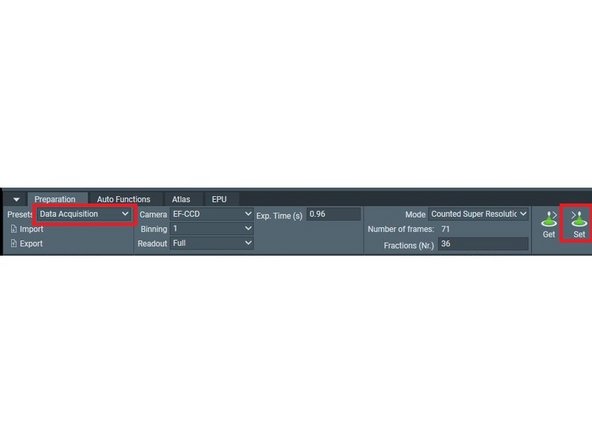
Set the data Acquisition Presents to the microscope.
-
Bring the Sample to focus condition. Adjust with the focus knob using Thon rings: select into Digital Micrograph: "Process -> Live FFT" and adjust until you don't see any Thon Rings.
-
-
-
Once in focus, proceed with the Direct Alignments.
-
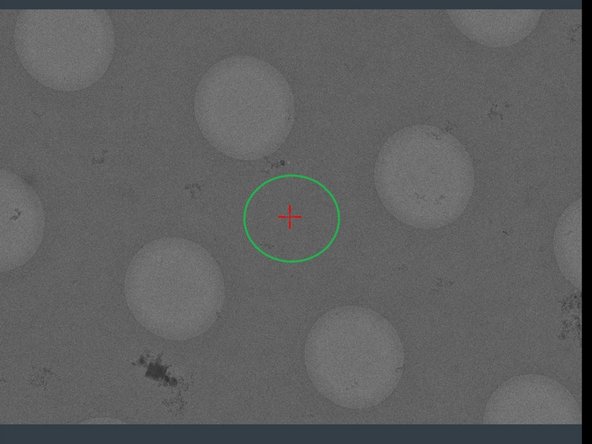
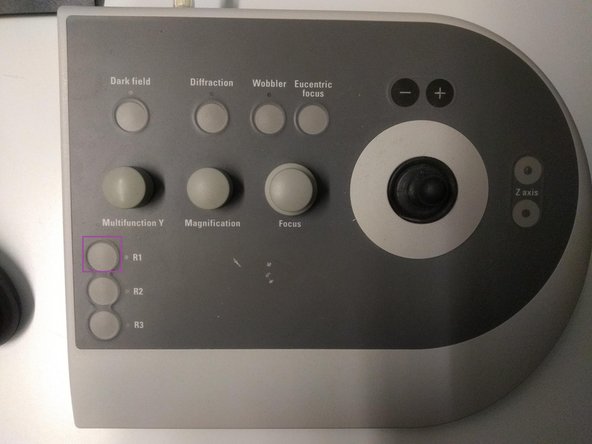
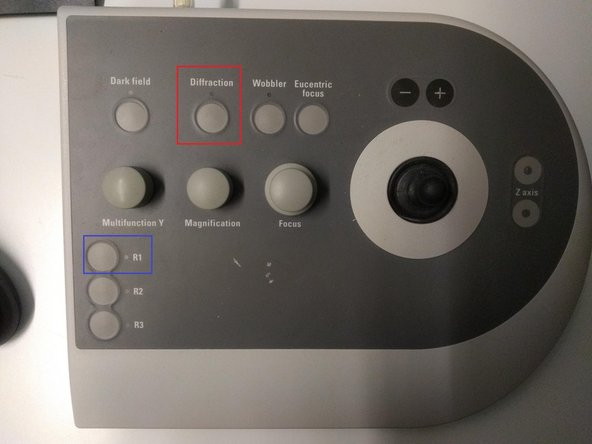
The direct alignements are done on the fluoscreen, insert the screen by pressing R1, on the right microscope control panel.
-
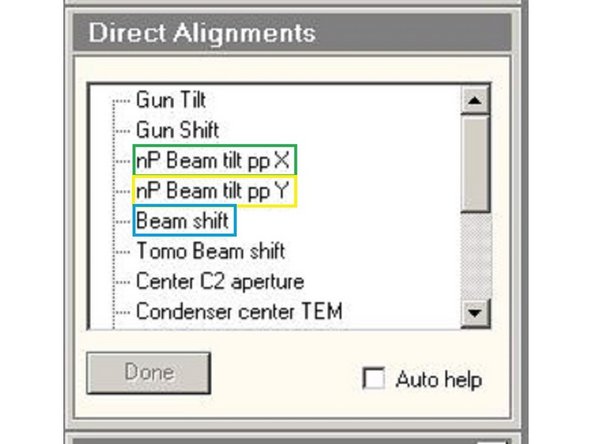
Activate the pivot point X. Use the Multifunction X to you minimize the beam movement.
-
Activate the pivot point Y. Use the Multifunction X to you minimize the beam movement.
-
Center the beam with the beam shift. Use both Multifunction X and Y to center the beam to the K3 position (indicated on the fluoscreen with the green circle)
-
-
-
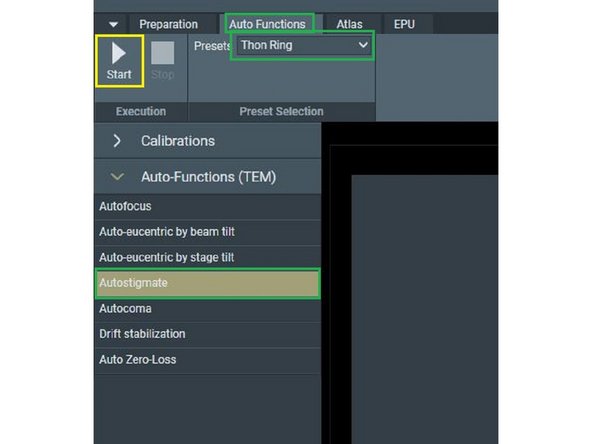
You can correct for the astigmatism and comma free alignments with the EPU Autofuction.
-
In the AutoFunction tab of EPU, select "Thon Ring" as presets, for the Autostigmate function.
-
Start the calibration.
-
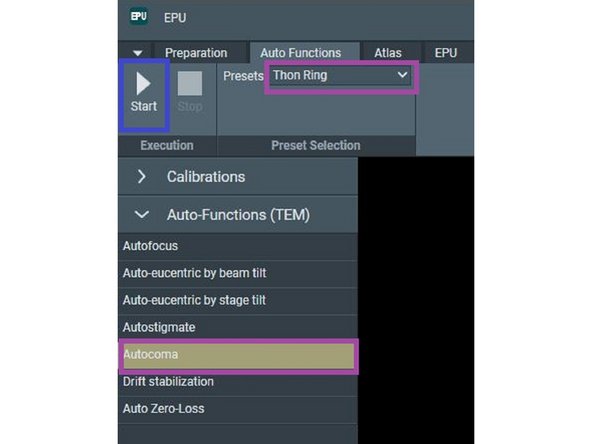
For the Autocoma, in the same tab select the Autocoma function, and keep the "Thon Ring" presets.
-
Start the calibration.
-
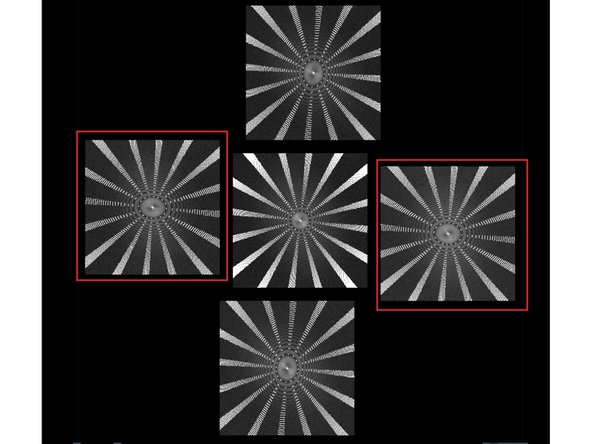
The coma free alignment is successful when the defocus of both positive and negative beam tilt on the same axis stay the same. The example shows the 2 images from the positive and negative beam tilt along the x axis, presenting the same defocus.
-
-
-
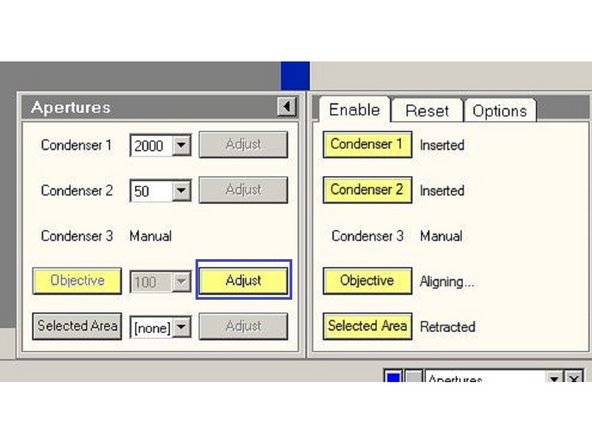
Insert the objective aperture using the Microscope User Interface (TUI). Click the arrow to display if the objective aperture is inserted. Insert it by clicking on "Objective" button.
-
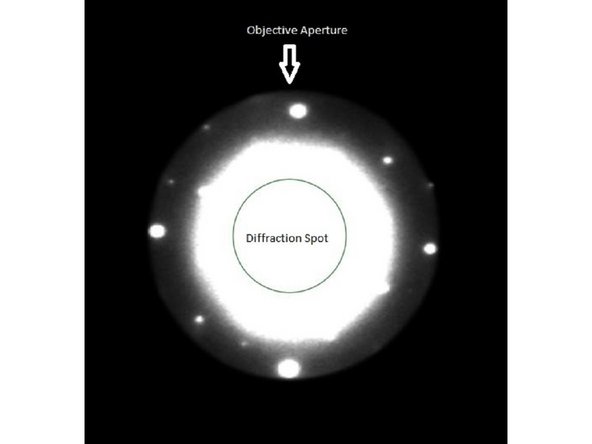
Switch on the diffraction mode on the right microscope control panel.
-
Insert the Fluoscreen (R1).
-
To observe the objective aperture, click on the image and change the intensity of the live view on the fluoscreen with wheel of the mouse.
-
-
-
The objective aperture needs to be centered to the diffraction spot.
-
Select "Adjust" on the aperture tab, and center the aperture using the Multifunction X and Multifunction Y wheels.
-
-
-
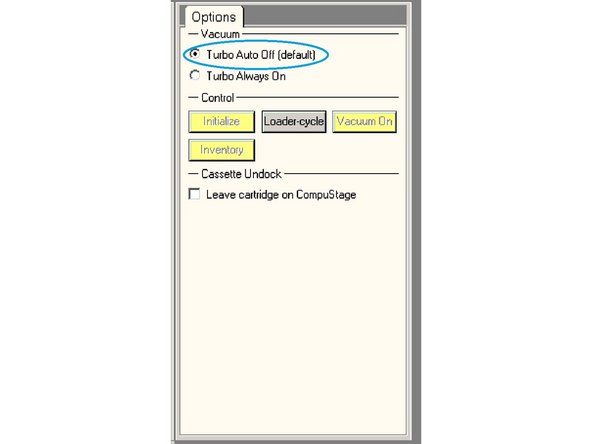
Make sure that the Turbo pump is set Turbo to Auto Off (otherwise the vibration would affect your data).
-