-
-
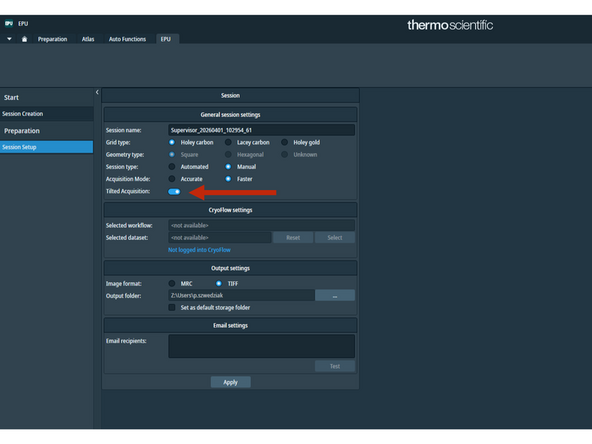
After screening your grids start an EPU session.
-
Make sure to tick option 'Tilted Acquisition'.
-
-
-
Similarly to a regular EPU session - select the grid squares on which you would like to collect your data.
-
-
-
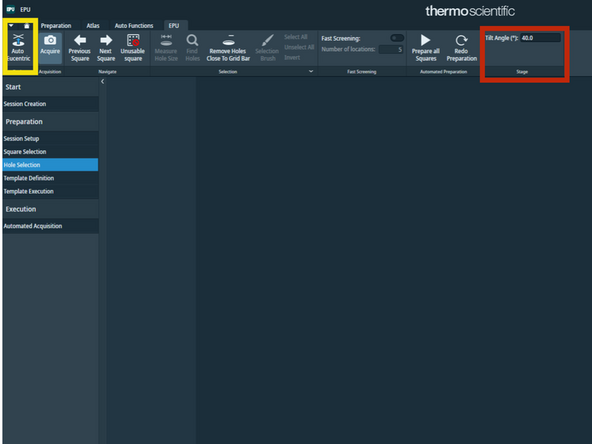
Specify the stage tilt angle, typically 30 or 40 deg.
-
Click 'Auto Eucentric'.
-
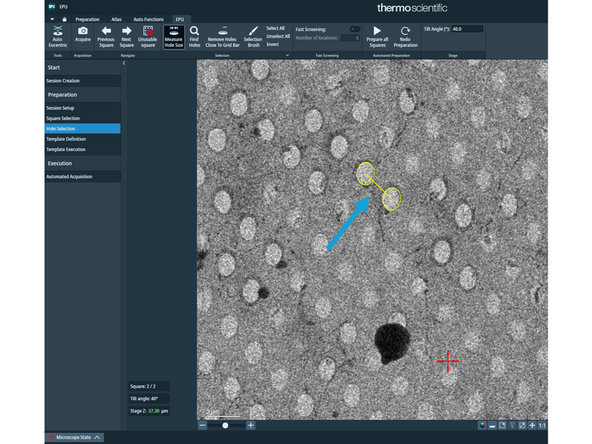
Measure hole size - please note that due to the stage tilt the hole appear oval rather than circular. The two yellow patterns adopt the oval shape accordingly.
-
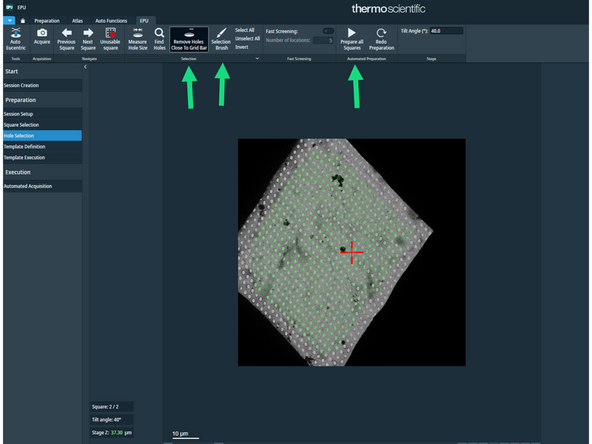
Press 'Remove Holes Close to Grid Bar', prepare all squares and clean them with the ice filter and/or selection brush.
-
-
-
Import your data collection template.
-
Rearrange the green data acquisition areas to ensure data collection over the ice rather than carbon.
-
Click 'Show/Hide Tilt Axis'. Tilt axis will be displayed as blue line. On the Glacios G2 it will be ~vertical (please see the corresponding screenshot), on the Krios G3i it will be ~horizontal.
-
Position 'Autofocus Area' on the tilt axis.
-
-
-
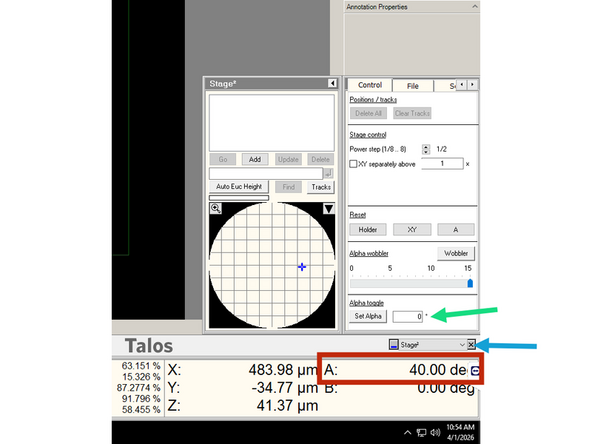
In the microscope user interface (left screen, bottom-right corner) the alpha tilt (A) will show the current stage tilt (30 or 40 deg, depending on your settings).
-
Open the 'Stage' control panel by clicking the menu in the bottom-right corner.
-
Enter value '0' next to 'Set Alpha'.
-
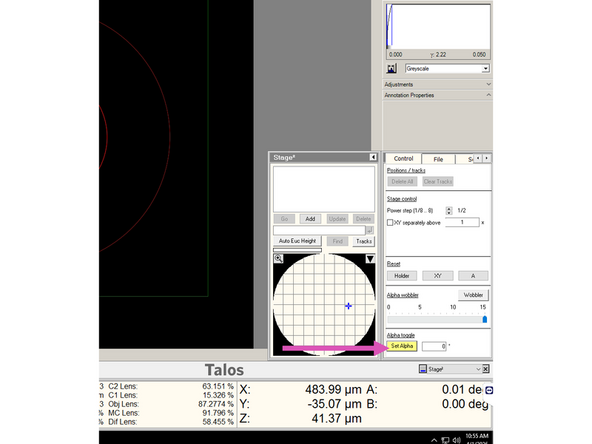
Click 'Set Alpha' - the button will become yellow and the alpha tilt (A) will change to '0'.
-
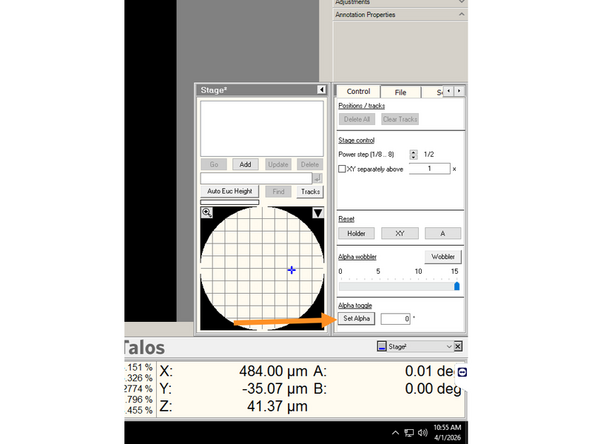
Unclick the 'Set Alpha' button. It should turn gray again, meaning the option is deactivated.
-
Proceed to direct alignments, as usual.
-
Once the EPU run has started the stage will be automatically tilted to the preset angle.
-