-
-
After loading a new cassette with your grids perform autoloader inventory.
-
-
-
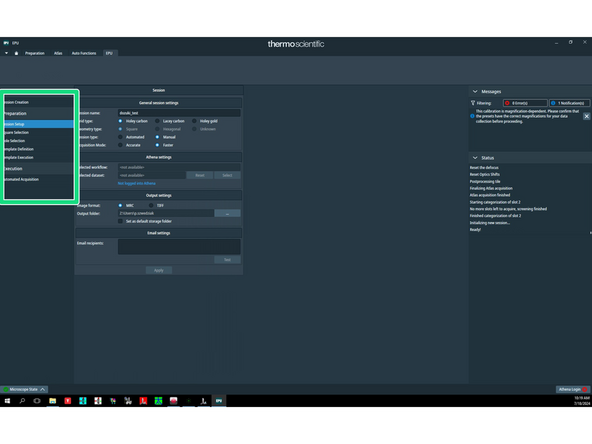
Launch EPU
-
Load your settings by clicking 'Import' and selecting appropriate file.
-
-
-
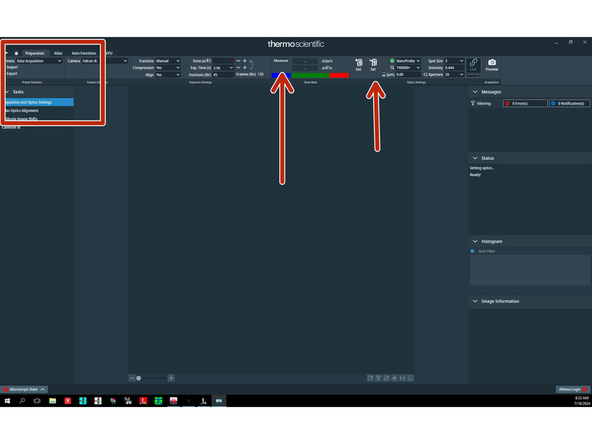
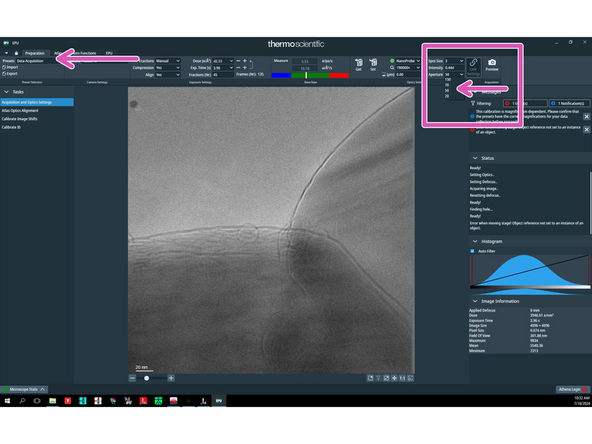
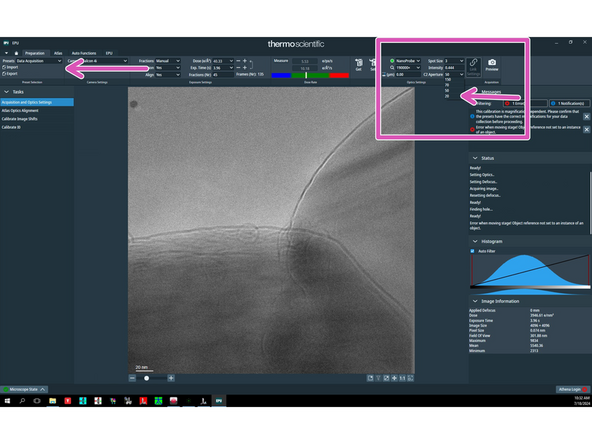
Load Data Acquisition presets by clicking 'Set'. Make sure that the beam covers the detector. Then click 'Measure'.
-
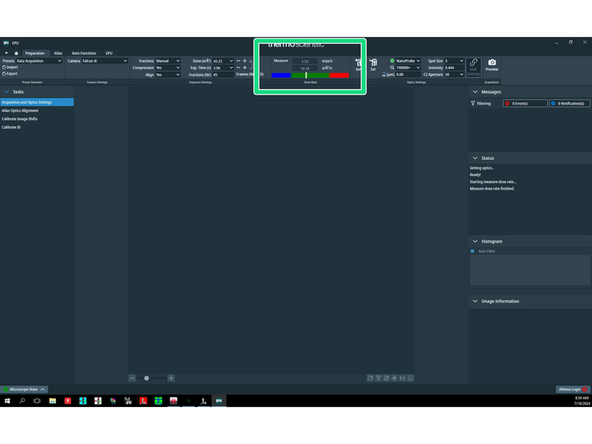
After a moment, the current electron dose in e/pix/s will show up. Make sure you stay in the green range. The optimal dose is between 5 and 10 e/pix/s
-
-
-
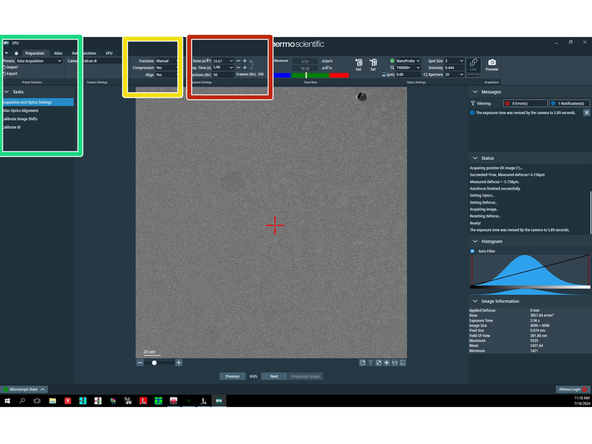
Go to 'Data acquisition' preset.
-
in the 'Fractions' menu choose 'Manual'; and set both 'Compression' and 'Align' to 'Yes'.
-
Specify the total dose to ~60 e/A2. Make sure that the 'Frames number' is divisible by 'Fractions number' and there is not less than 1 e/A2/fraction. You might need to play a bit with exposure time in order to find the best combination.
-
-
-
Load your first grid on stage using the microscope user interface (Autoloader tab). Identify an easily recognisable feature that is visible at every magnification you will use during your EPU session (e.g. piece of ice).
-
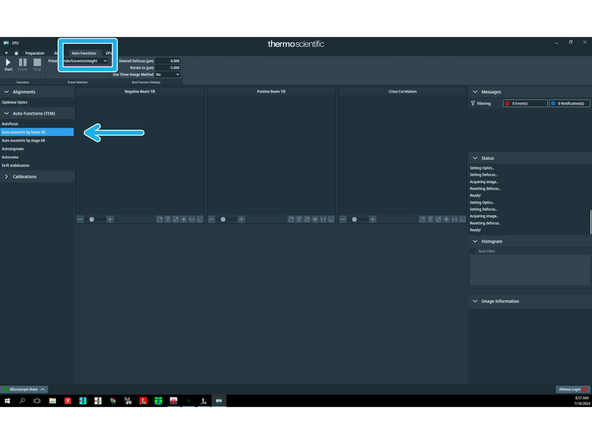
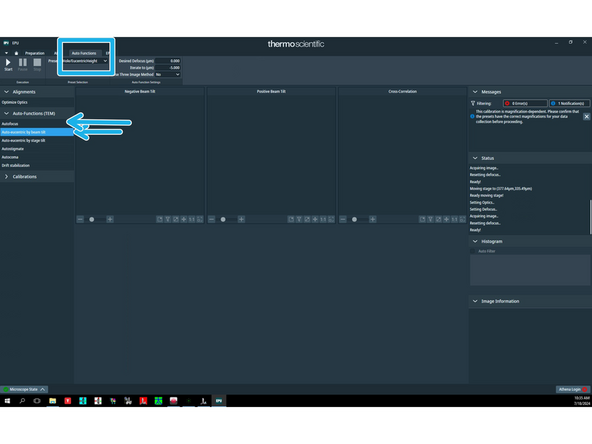
Go to 'Auto functions' tab and perform the eucentric height routine. It is essential to be at eucentric height for image shifts calibrations.
-
Make sure that the feature you intend to use for the calibrations is visible using the 'Data acquisition' preset.
-
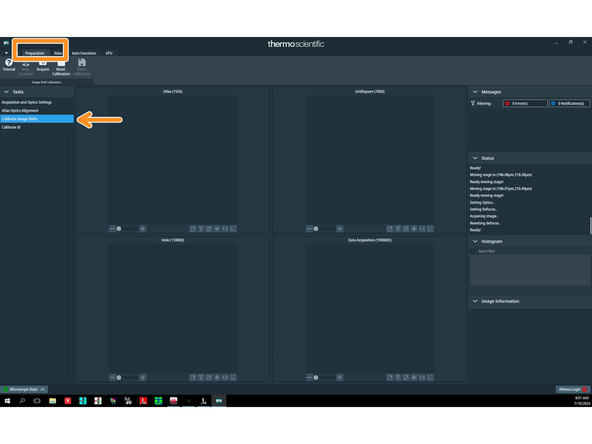
In the 'Preparation' tab go to 'Calibrate image shifts'.
-
-
-
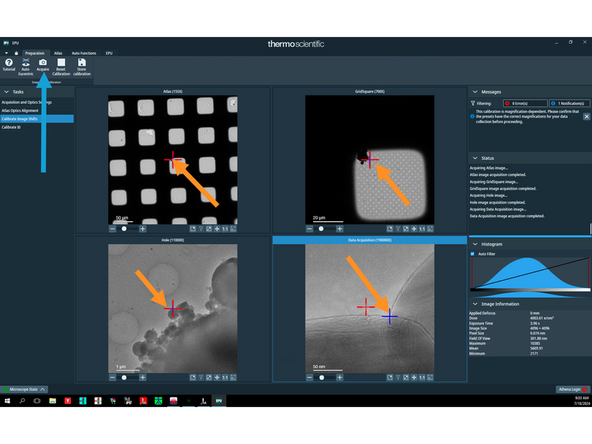
After pressing 'Acquire' EPU will automatically acquire four images using Atlas, Grid square, Hole/Eucentric height and Data acquisition presets.
-
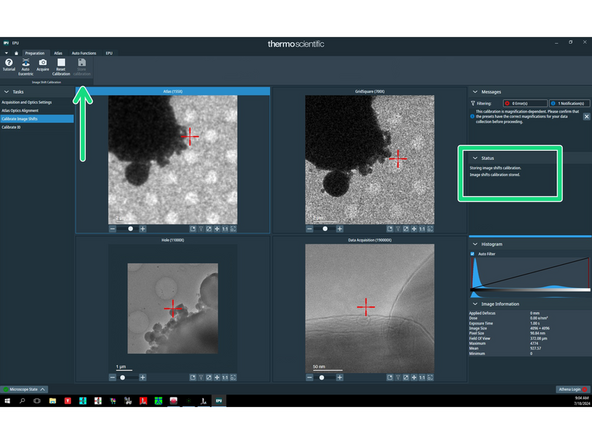
Identify the same feature in every image and double click on it. Please note that Hole/Eucentric height and Data acquisition images are 180 deg rotated with respect to Atlas and Grid square images.
-
Finally, press 'Store calibration'.
-
-
-
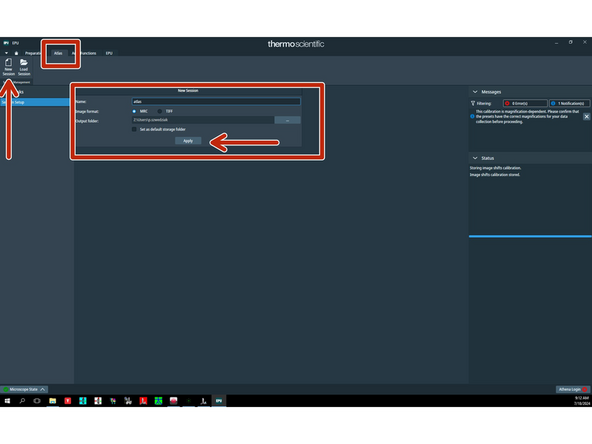
In 'Atlas' tab click 'Session setup' and 'New session', specify appropriate path and name of the storage folder and click 'Apply'.
-
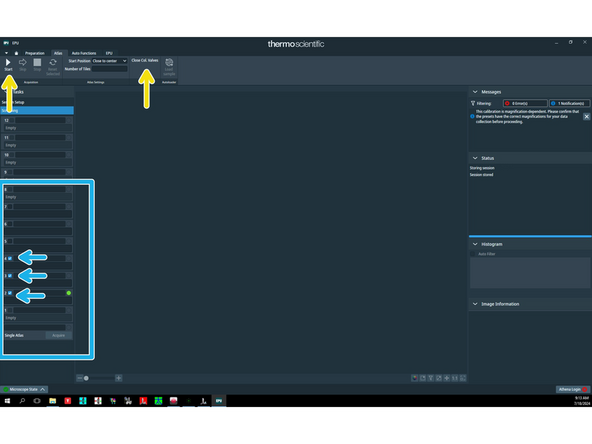
In 'Screening' tick boxes next to the symbols of grids that you want to acquire atlases of.
-
Once you are ready click 'Close col. valves' on the EPU interface (this will automatically close column valves after the atlas acquisition has completed) and click 'Start'.
-
-
-
Once you have reviewed the atlases and screened your grids in more detail and selected the best grid, you are ready to setup an EPU session.
-
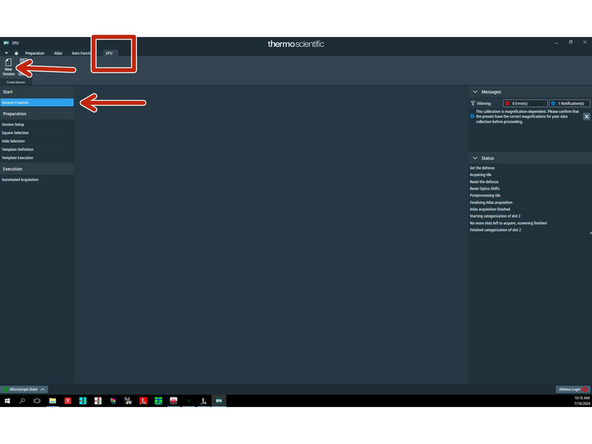
In 'EPU' tab click 'Session creation' and 'New session'.
-
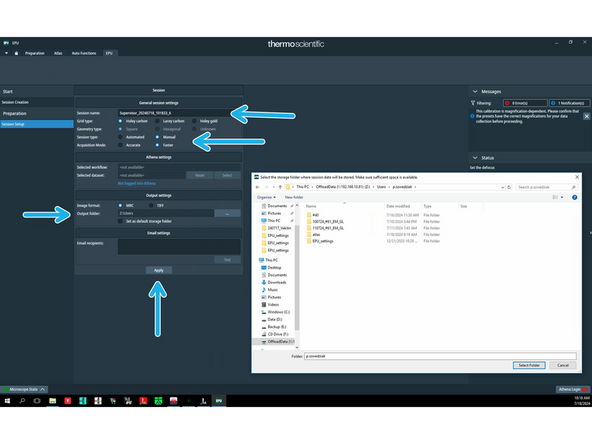
Specify session's name and appropriate output storage folder. Select 'Grid type' - 'Holey carbon'; 'Session type' - 'Manual'; 'Acquisition mode' - 'Faster'. Click 'Apply'.
-
This will open 'Preparation' steps on the left hand side that will intuitively guide you through the process.
-
-
-
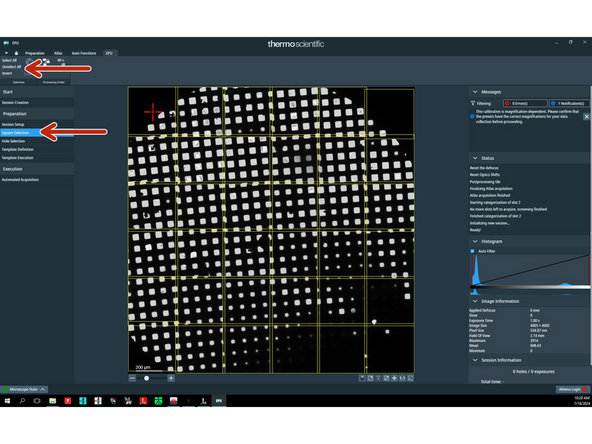
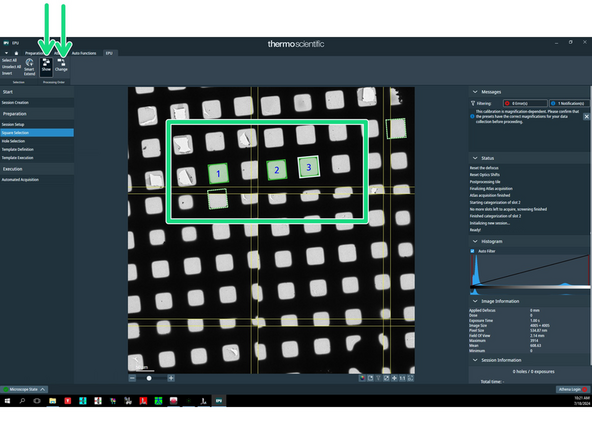
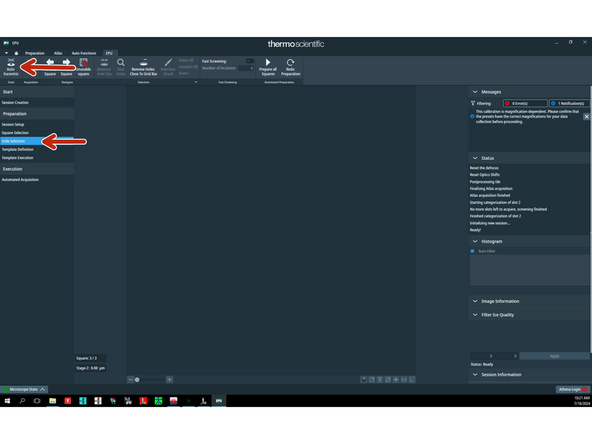
In 'Square selection' click 'Unselect all'.
-
In order to add a square right click on it and choose 'Select'. You can see the order of squares by clicking 'Show' and you can change this order by clicking 'Change' and then clicking on respective grid squares.
-
If you use Presets for Mesh200 go to 'Preparation' tab and in 'Data acquisition' preset change C2 to 50 um. If you use Presets for Mesh300 you can leave the C2 aperture of 20 um.
-
-
-
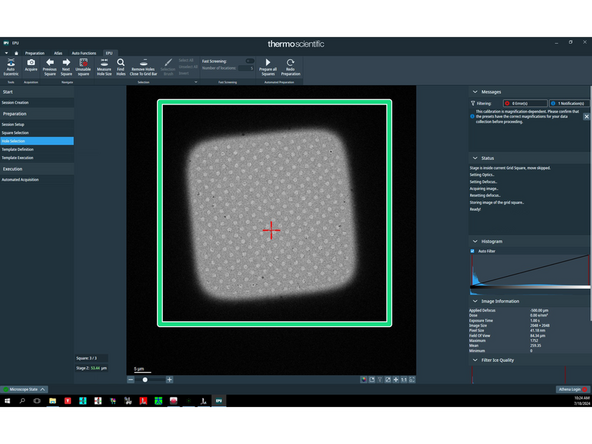
Go to 'Hole selection' and press 'Auto eucentric'.
-
The auto eucentric routine will run in the background and ultimately a grid square image will appear.
-
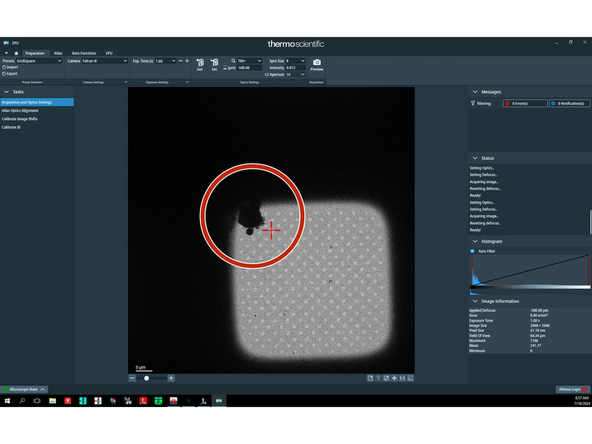
Click on 'Measure hole size'. Two yellow circles will appear. Adjust their size so that it matches the grid hole size and place the two yellow circles over neighboring holes. Click 'Find holes'.
-
-
-
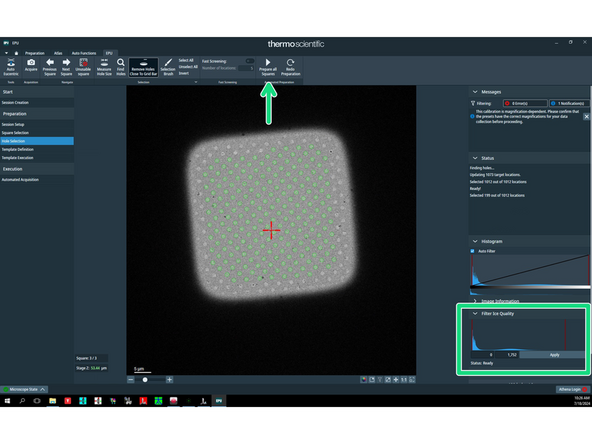
Click on 'Remove holes close to grid bar' to automatically unselect holes over grid bars and their proximity.
-
Play with the ice filter settings to select holes with optimal ice thickness. Once you are happy click on 'Prepare all squares'. Wait until all the grid squares have been processed.
-
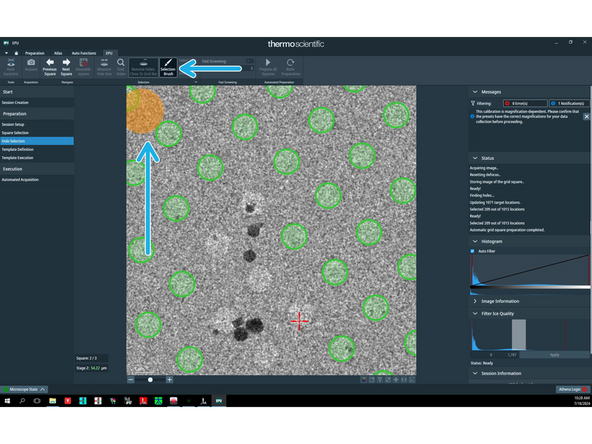
Click on 'Selection brush' and manually go through all your grid squares and unselect holes with obvious problems (ice, cracks etc.).
-
-
-
Go to 'Preparation' tab and in 'Data acquisition' preset change C2 back to 20 um in case you used C2 50 um in the previous step.
-
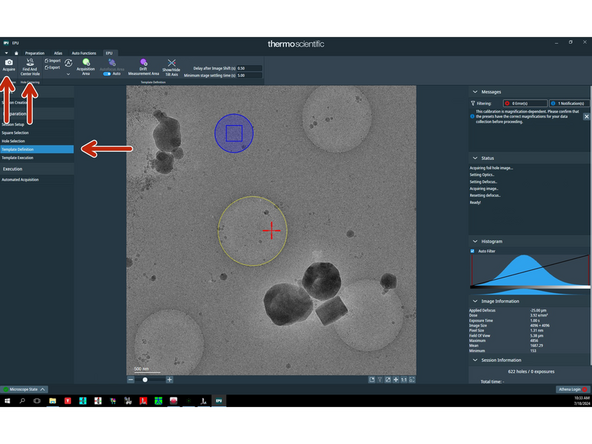
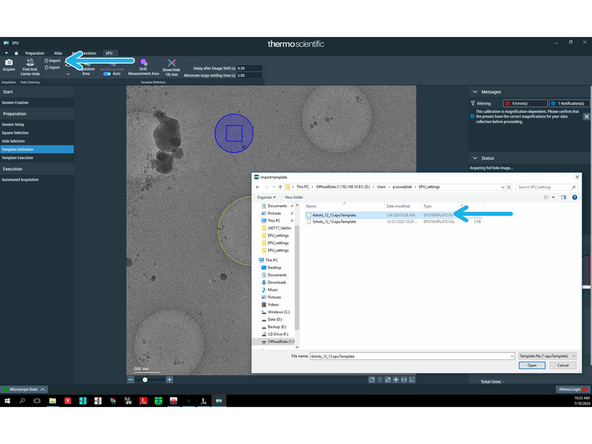
Go to 'Template definition' and click 'Acquire' and then 'Find and center hole'.
-
Click on 'Import' and select your template of choice. Make sure to place the autofocus area on the carbon between the holes. Autofocus recurrence should be set to 'After centering'. Don't forget to specify the defocus list values that will be used for data collection (will show up after clicking on the green circle).
-
-
-
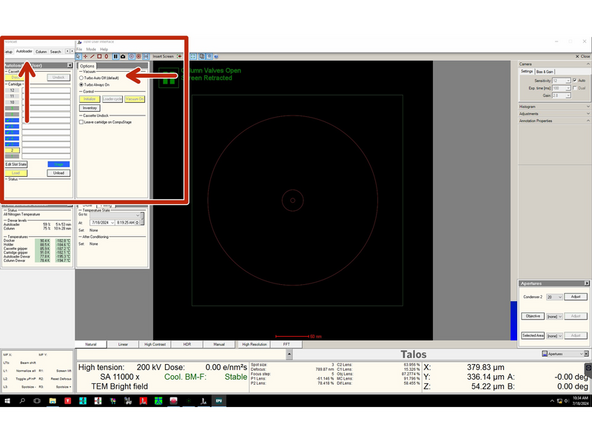
Switch off turbo pump in the 'Autoloader' tab.
-
Navigate to an area that will not be used for data collection. Make sure that you are over the carbon film and not over the hole. Go to 'Auto functions' tab and run 'Auto eucentric' and 'Autofocus' routines.
-
It is of crucial importance to be at eucentric height and in focus before proceeding with direct alignments. The next step will help you to make sure this is the case.
-
-
-
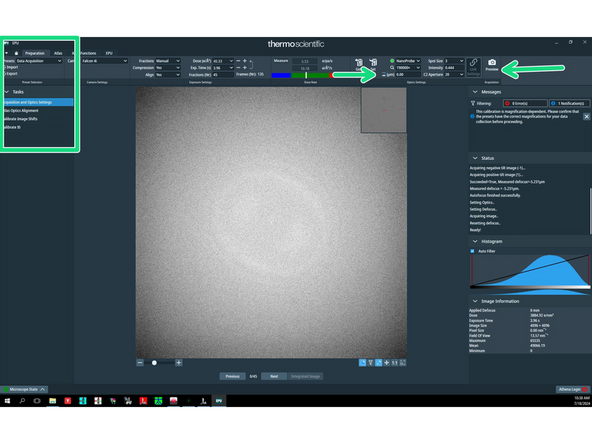
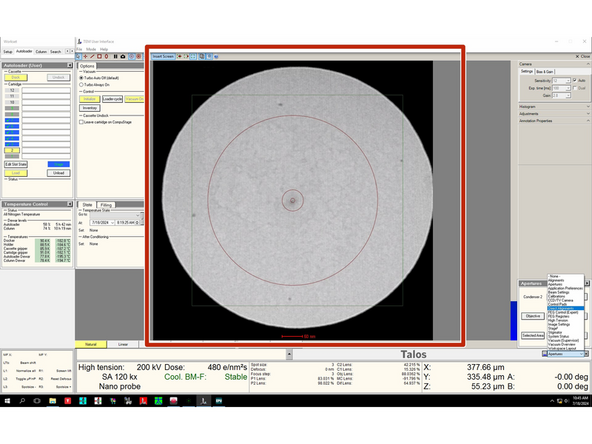
Go to 'Data acquisition' preset, specify defocus value '0' and press 'Preview'.
-
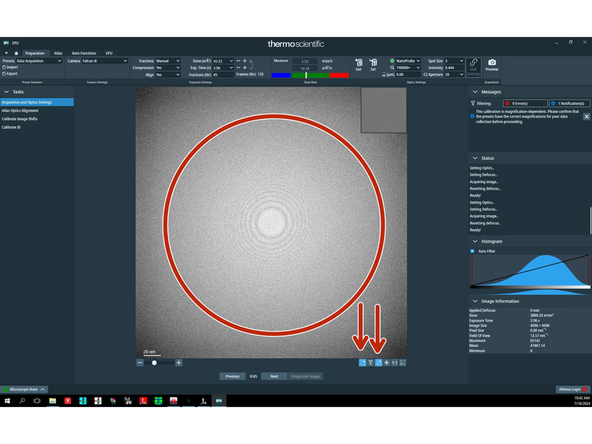
After clicking two buttons in the bottom part of the image you will see its FFT. The goal is to have as few Thon rings visible as possible, ideally none. For example, this image is heavily underfocused with many Thon rings.
-
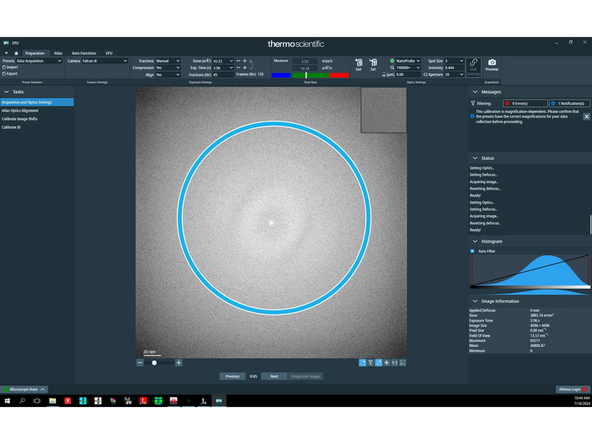
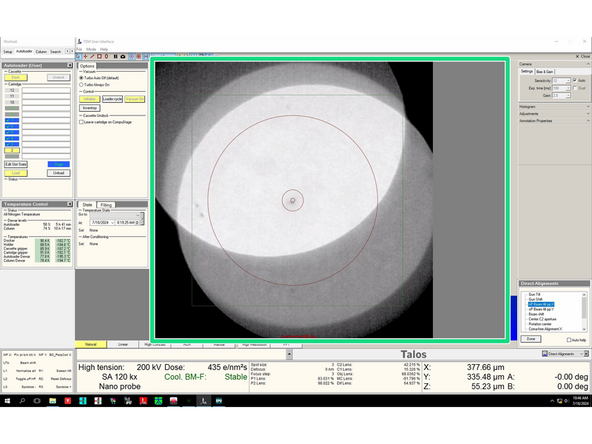
This image, in contrast, is in focus. In order to achieve this, you might need to change defocus by turning the 'Focus' knob on the handpanel and clicking 'Acquire' in order to compare the FFT with the previous one.
-
-
-
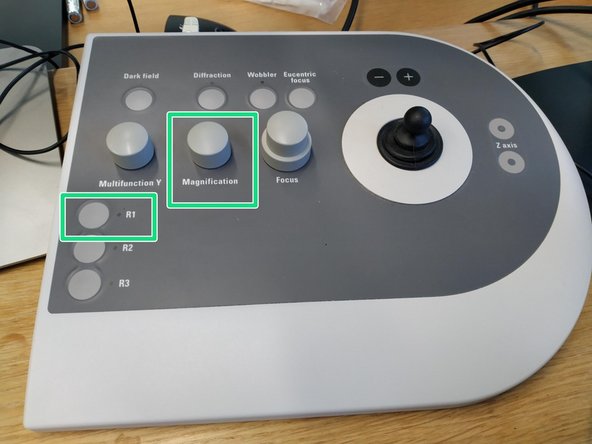
Drop the FluCam screen by pressing 'R1' button on the handpanel and change the magnification to 120k by turning the 'Magnification' knob anticlockwise.
-
You should be able to see the whole beam on the FluCam.
-
-
-
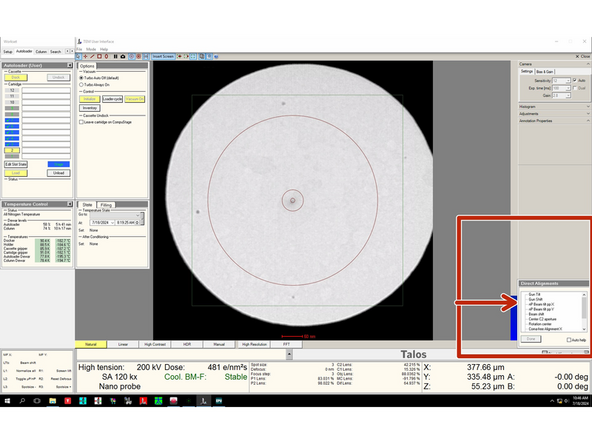
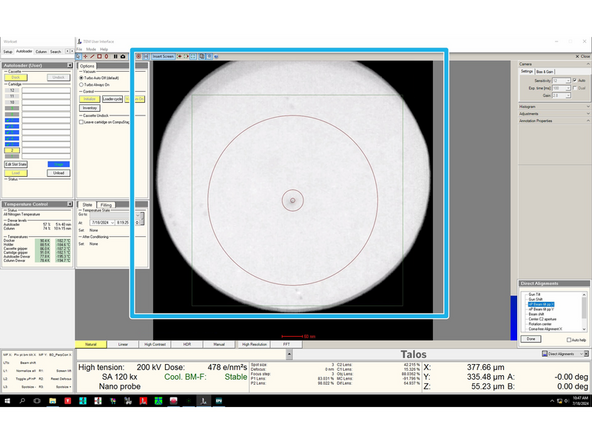
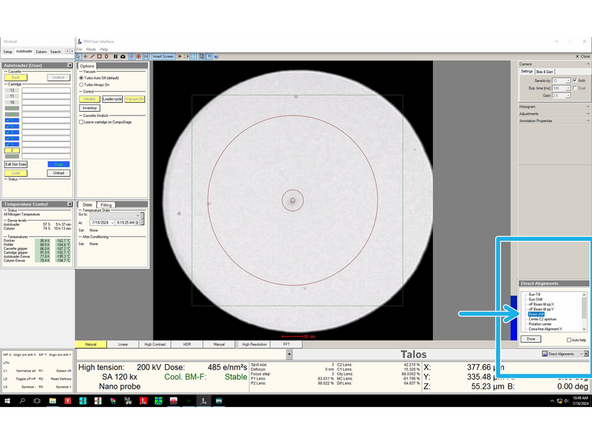
Go to 'Direct alignments' menu (bottom right) and select 'nP Beam tilt ppX'.
-
The beam will start oscillating. If the pivot points are off you will see two circular beams with little or no overlap (see the image). By turning the 'Multifunction X' knob minimize the movement until you see a single beam.
-
Once you see a single beam (see image) click on 'Done'. Repeat for 'nP Beam tilt ppY' by clicking on it, adjusting with 'Multifunction X' and clicking on 'Done' again.
-
-
-
Center the beam around the camera (green square on the FluCam) by clicking on 'Beam shift' and adjusting the beam position with both 'Multifunction X' and 'Multifunction Y' knobs on handpanels.
-
-
-
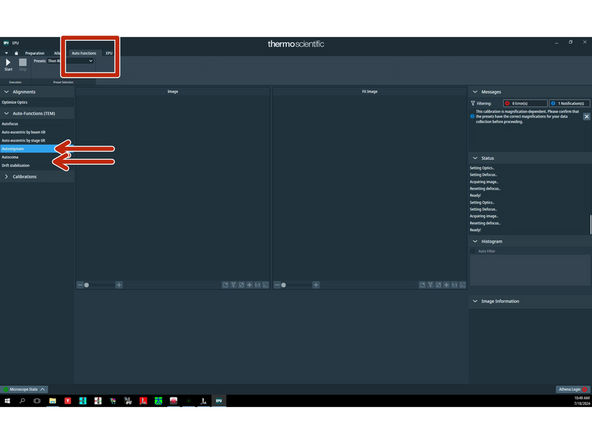
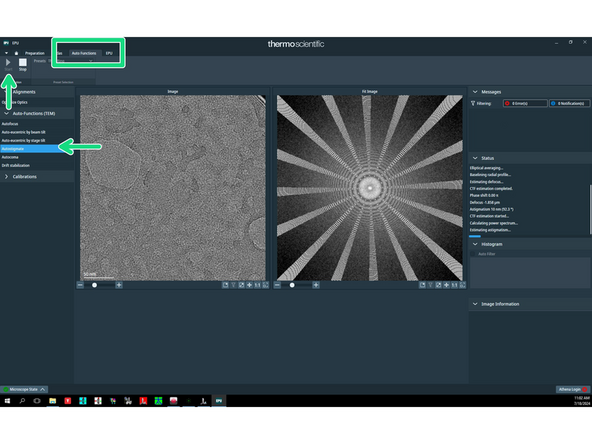
Go to 'Auto functions' tab and run first 'Autostigmate' routine and then 'Autocoma' routine.
-
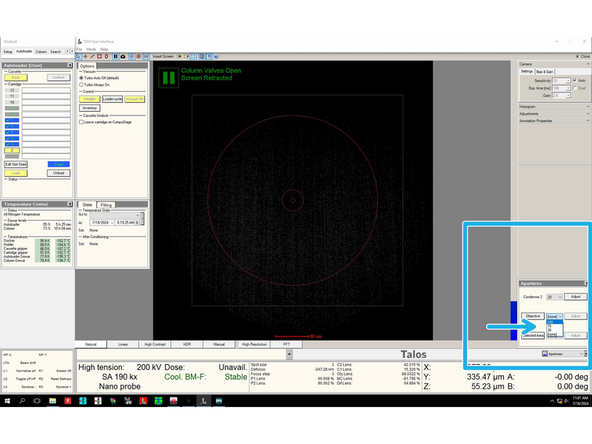
In 'Aperture' menu select '100' from the drop down menu next to 'Objective'.
-
Run the 'Autostigmate' routine in the 'Auto functions' tab again.
-
-
-
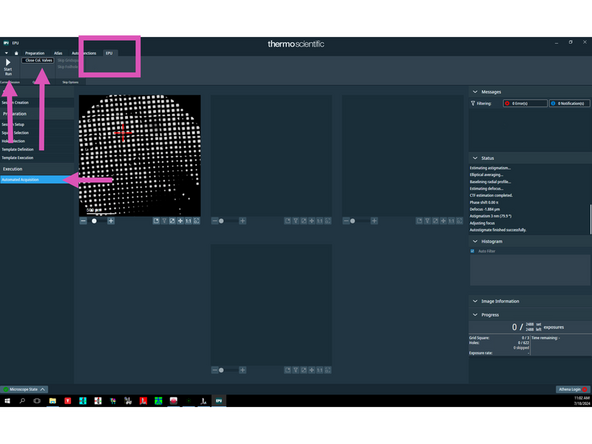
Go to 'EPU' tab and 'Automated acquistion', click 'Close col. valves' on the EPU interface and 'Start run'.
-