
Introduction
How to start up and image using the TEM - Tecnai Spirit located at the Center for Microscopy and Image Analysis (ZMB), Irchel Campus, room Y42-H-95, UZH, Zurich, Switzerland.
Our Tecnai Spirit TEM is an easy to use 120 kV transmission electron microscope (TEM) designed to provide high-contrast, high-resolution imaging and analysis in life science applications.
-
-
Apertures
-
Goniometer (Stage)
-
Liquid nitrogen tank
-
Control software interface
-
Phosphor screen
-
Control panels
-
EDX-detector
-
-
-
Fill the liquid nitrogen dewar flask from the tank in front of the facility.
-
Wear the supplied safety gloves and glasses, when you work with liquid nitrogen.
-
-
-
Wear safety glasses.
-
Check the nitrogen level during your session. One filling lasts for up to two hours.
-
-
-
Turn on screens if not already on.
-
The control computer of the Spirit is never logged of.
-
In case you need to log in: User: Supervisor / PW: supervisor
-
Please, never log off Spirit computer.
-
-
-
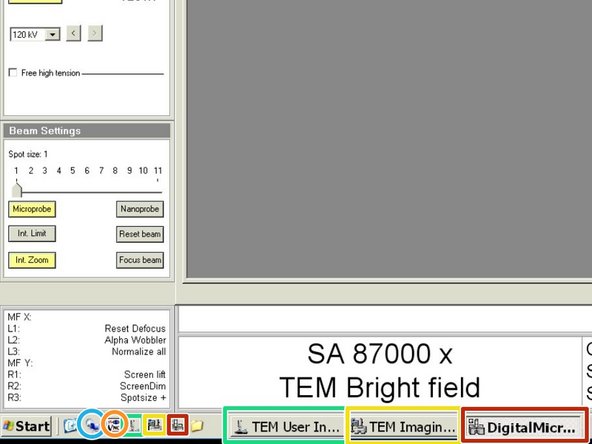
Make sure the following softwares are running:
-
TEM User Interface
-
TEM Imaging and Analysis
-
Gatan Digital Micrograph
-
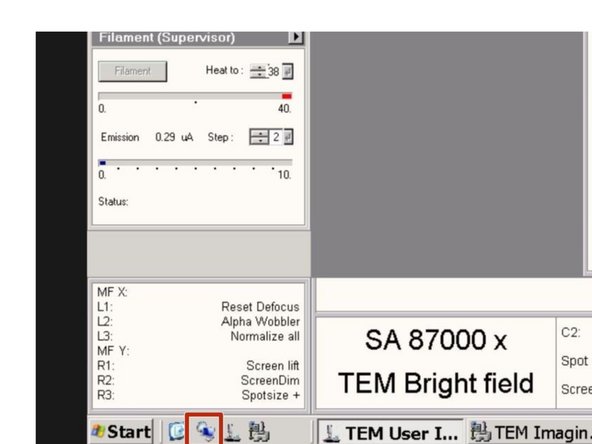
Remote desktop connections can be set up with these icons:
-
Support PC
-
EDX PC
-
-
-
Click on the link to open a remote desktop connection to the support PC
-
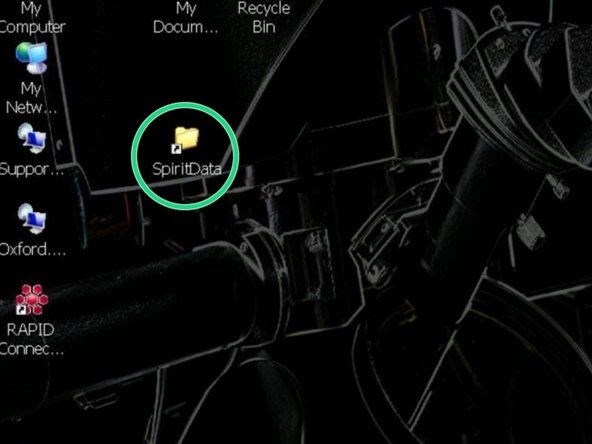
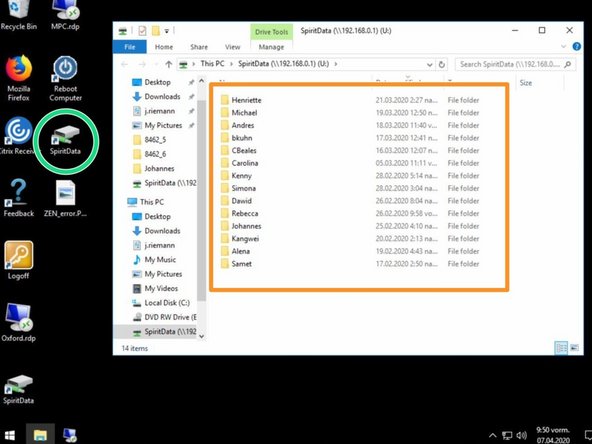
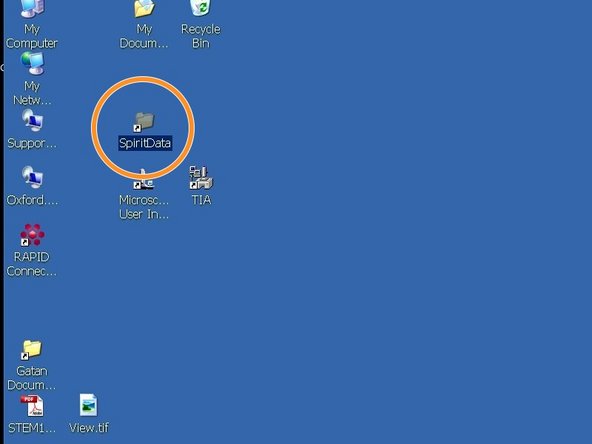
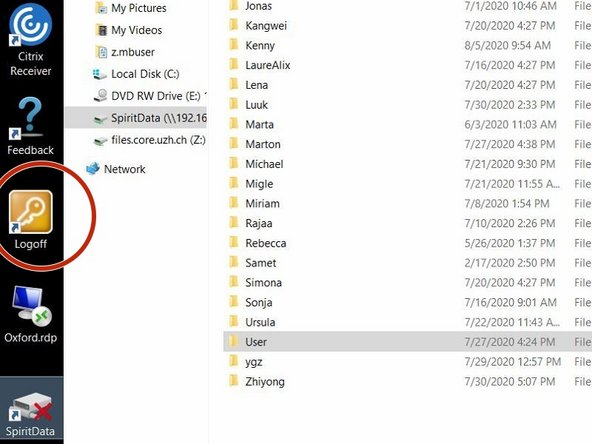
For security reasons, the FEI Tecnai Spirit is not directly connected to the network, therefore you need to first save your images to the "SpiritData" folder. This drive is shared with the Support PC and you must transfer your images to your data drive on "Z" at the end of your session.
-
Open the "SpiritData" folder in your account. And in a second window open your ZMB folder: Z:Data/Your Folder
-
In the "SpiritData" drive create a folder with your name. This is the location where you have to save your data.
-
-
-
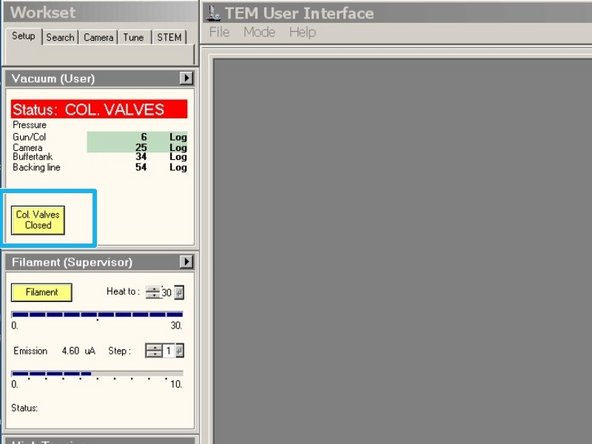
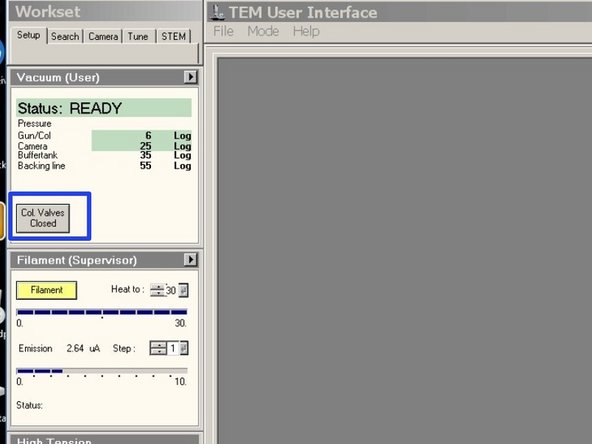
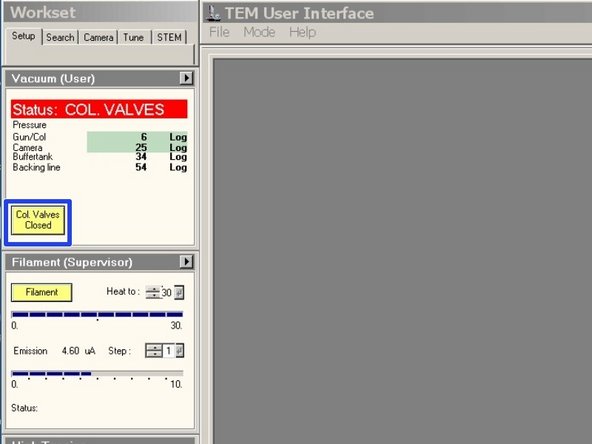
Check if the vacuum is highlighted in green.
-
"Gun/Col" should be around Log 6
-
"Camera" should be around Log 26
-
Turn on "High Tension". (Yellow = On)
-
Turn on "Filament" (Yellow = On)
-
-
-
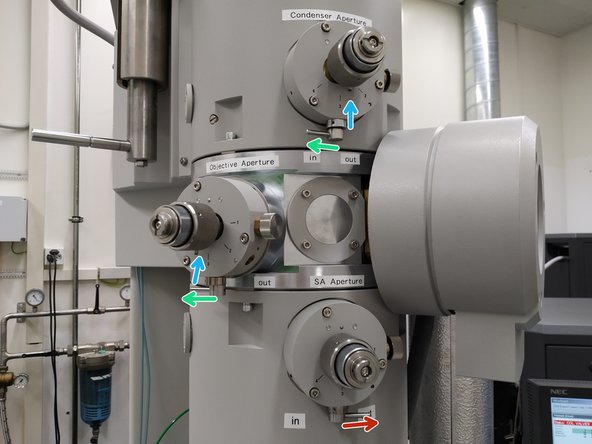
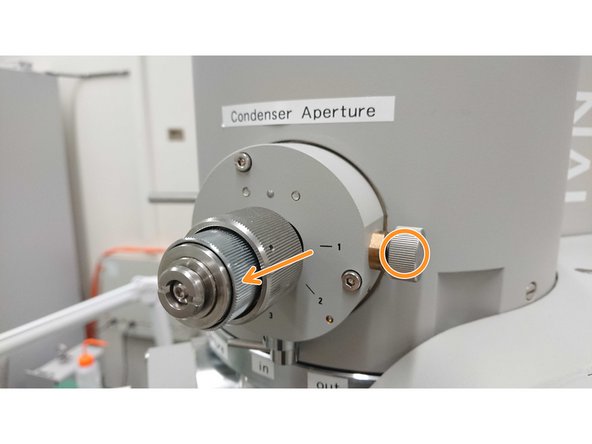
The condensor aperture needs to be inserted.
-
The objective aperture needs to be inserted .
-
The SA aperture needs to be retracted for TEM bright field imaging.
-
The condensor and the objective aperture are both in position three for regular imaging .
-
The position is indicated by a small pin.
-
-
-
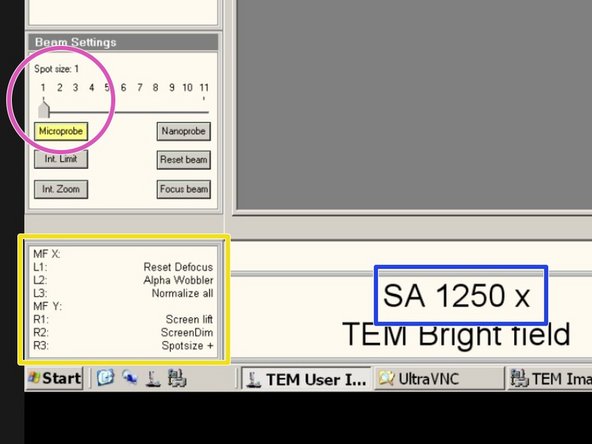
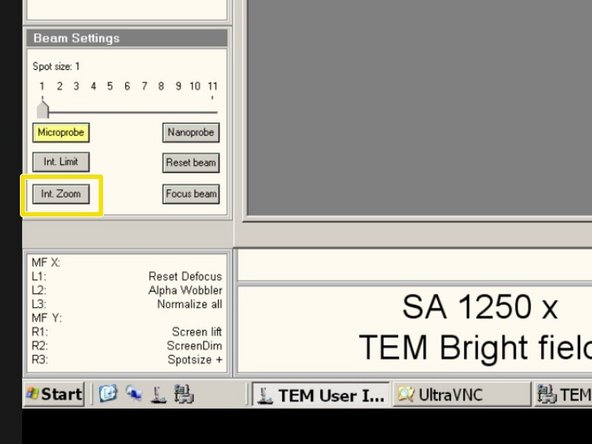
Set the microscope to Spot size 1 and to "Microprobe"
-
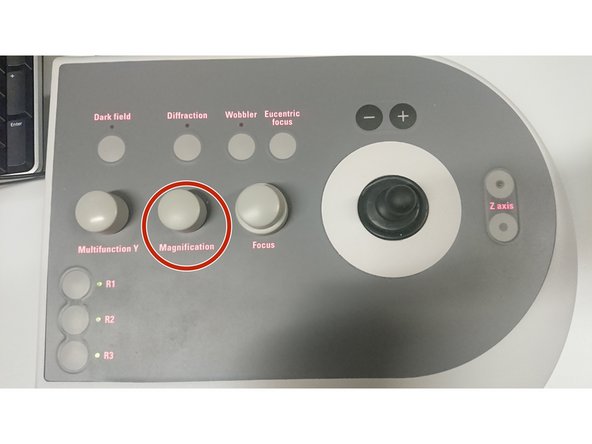
This list shows the functions of the keys on the control panels.
-
Magnification.
-
Adjust the maginification to "2550x" for the alignment.
-
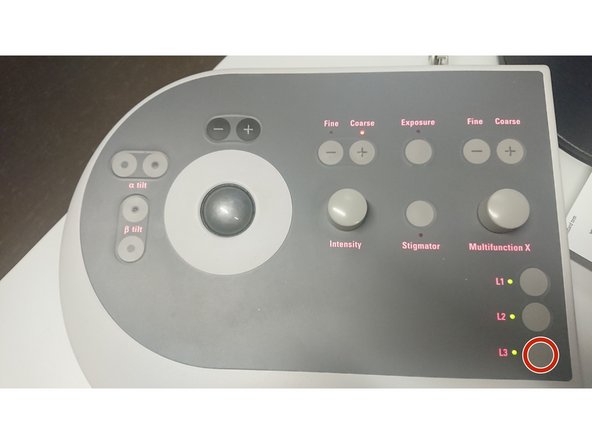
Right control panel.
-
Press the button L3 to normalize all lenses.
-
Left control panel.
-
-
-
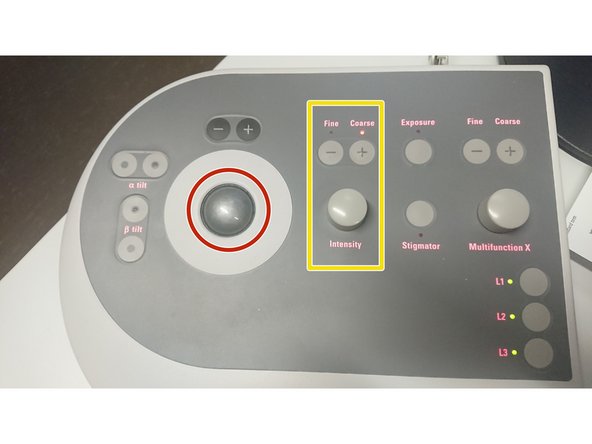
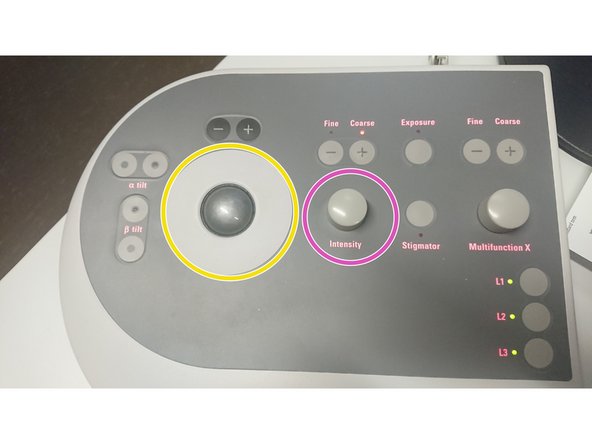
Use the trackball for quick beam shift adjustment.
-
Intensity controller.
-
"Fine" and "Course" change the sensitivity of the knob
-
Click on "Col. Valves Closed" to open the column valves.
-
-
-
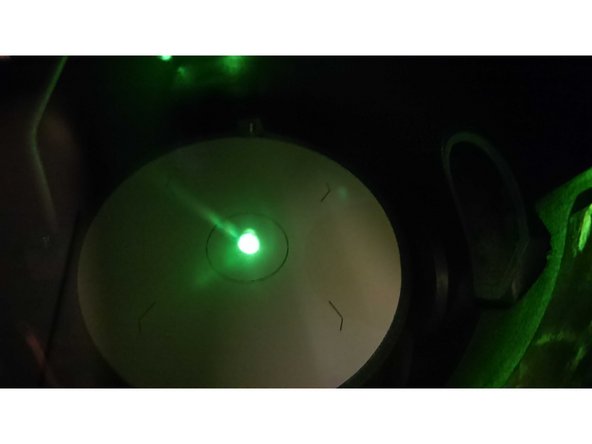
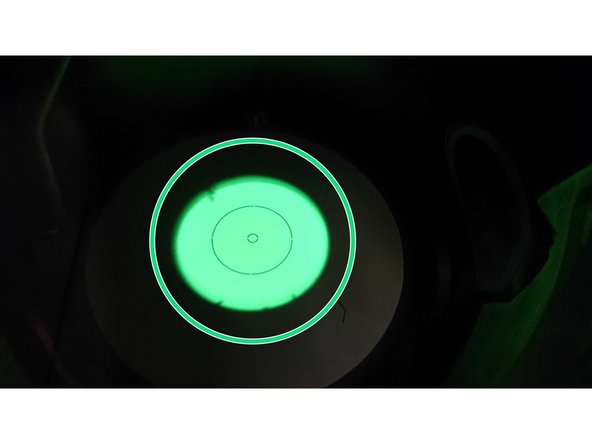
Turn the intensity controller either left, or right until you see the electron beam on the phosphor screen.
-
Use the intensity controller to change the diameter of the beam. Make it as small as possible.
-
Use the trackball to center the focussed beam in the middle of the screen.
-
-
-
Increase the magnification and check if the beam is still centered. If not center it with the trackball
-
Magnification.
-
Check the centering of the beam up to 16500x
-
Trackball. (left control panel)
-
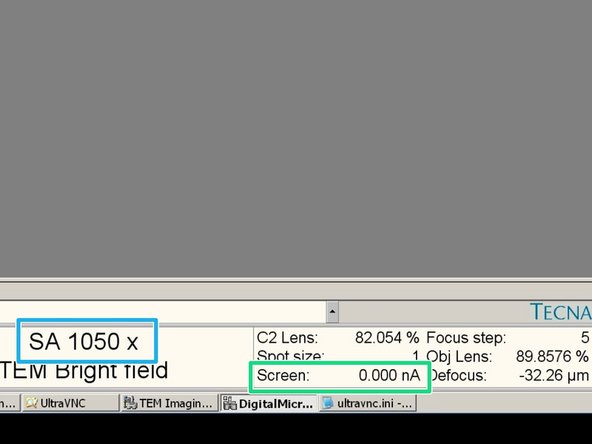
Go back to 2550x magnification.
-
Turn the intensity button (left control panel) clockwise until the the screen current in the software is 2.3 nA or lower.
-
Screen current.
-
-
-
The beam needs to stay centered, if you defocus it by turning the intensity knob clock wise.
-
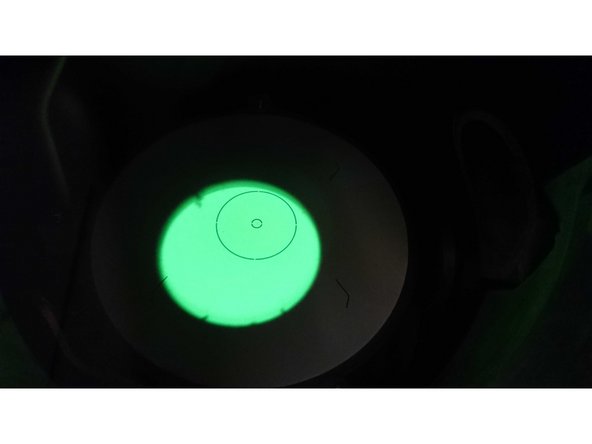
If the beam does not stay centered, you have to align the condenser aperture.
-
-
-
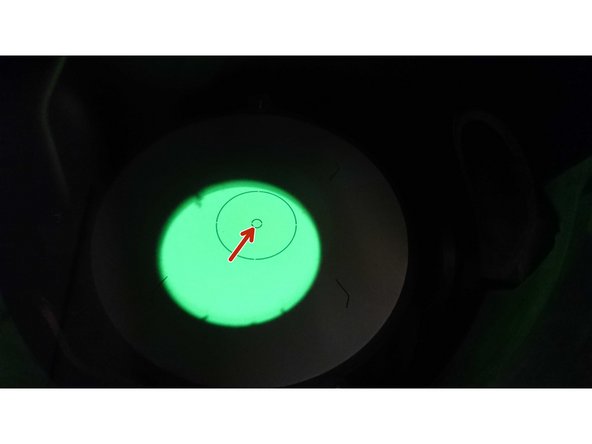
Center the condensor aperture by turning its X and Y axis adjustment.
-
Center the beam.
-
Centered condenser aperture.
-
-
-
Activate "Int. Zoom", if it is not activated.
-
Close the column valves.
-
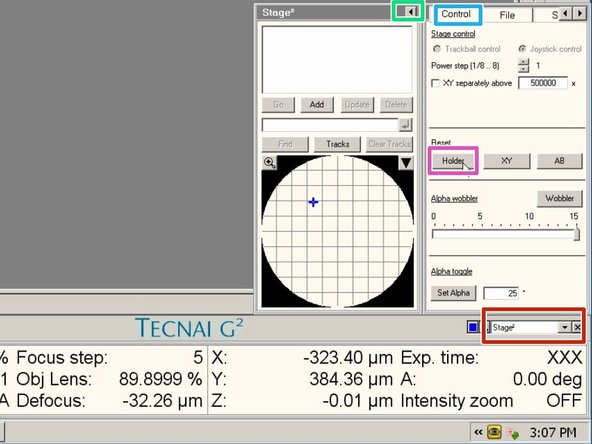
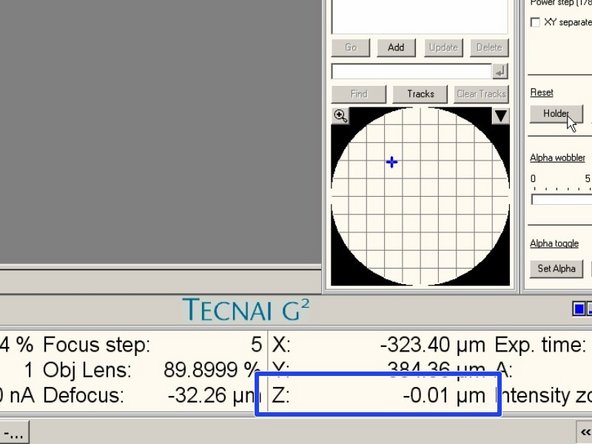
Go to the menu "Stage²".
-
Expand the window.
-
Go to the tab "Control".
-
Click reset the "Holder"
-
-
-
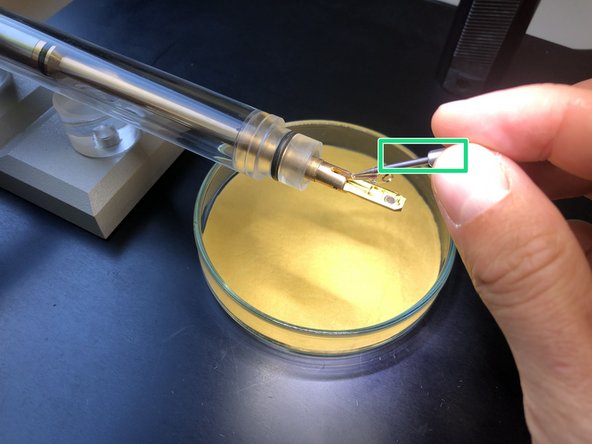
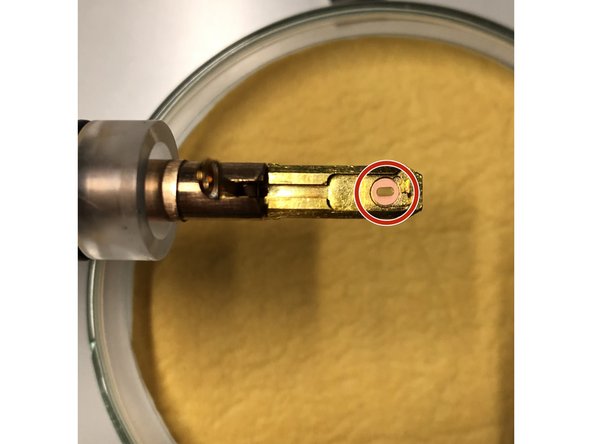
Use non magnetic forceps. Use a magnification glass for better visibility if needed.
-
Do not touch the front part of the holder with bare hands.
-
Everything in front of the sealing O-ring goes into the vacuum.
-
Open the holder clamp with the supplied needle.
-
Place the grid into the groove with the forceps.
-
You can position the grid by gentle tapping the finger against the transparent tube of the TEM holder.
-
Close holder clamp with the needle!
-
-
-
Align the small pin to the arrow on the stage.
-
Insert the holder as straight as possible, until you feel a resistance.
-
-
-
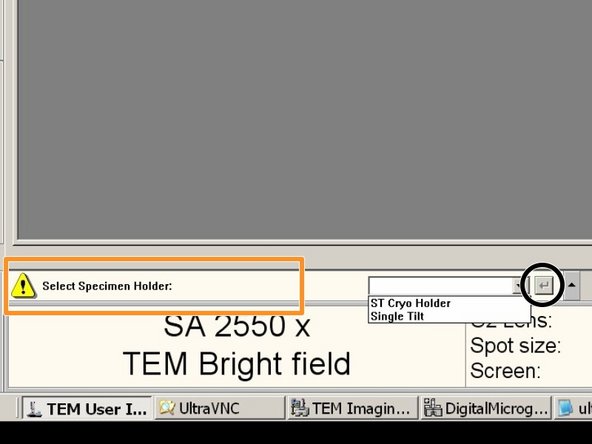
If this message appears: Select the Single Tilt Holder
-
And confirm.
-
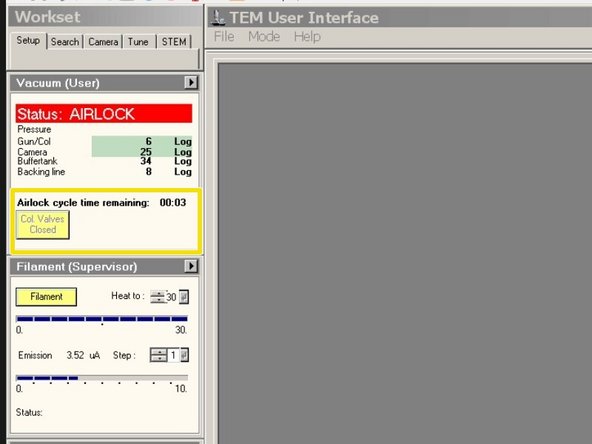
Wait for the countdown to finish.
-
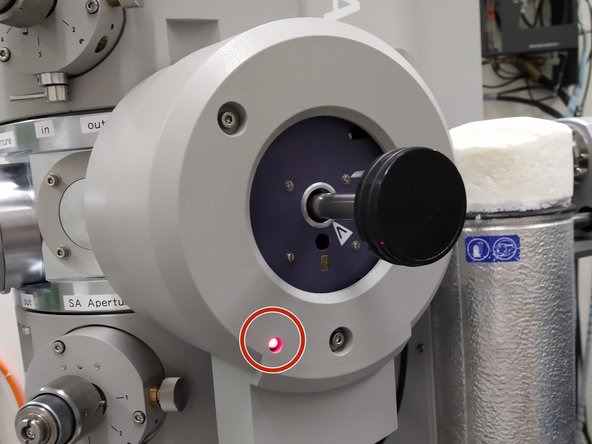
Wait until the red light turns off.
-
-
-
Turn the holder counter clockwise, until it is dragged in to the machine.
-
Make sure the holder is completely inserted.
-
Guide the holder with your hand during insertion.
-
-
-
Open the column valves.
-
Go to 2550x magnification.
-
Check if the screen current is still at 2.3 nA or lower.
-
Do not insert the camera if the screen current is higher than 2.3 nA, as this can damage the camera chip.
-
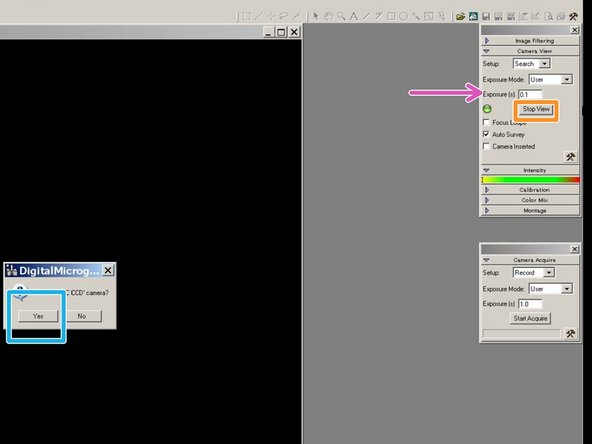
Go to "Digital Micrograph" on the right screen.
-
Set the exposure time for the live view to 0.1 seconds.
-
Click on Start view.
-
Click on "Yes" to insert the camera.
-
-
-
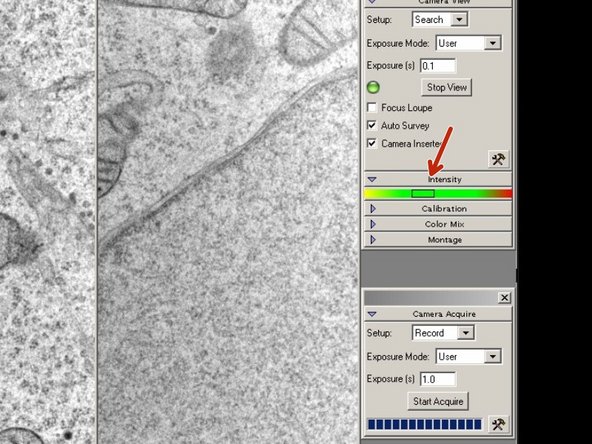
Always check, that the intensity is in the green or yellow range.
-
To much intensity can damage the camera chip!
-
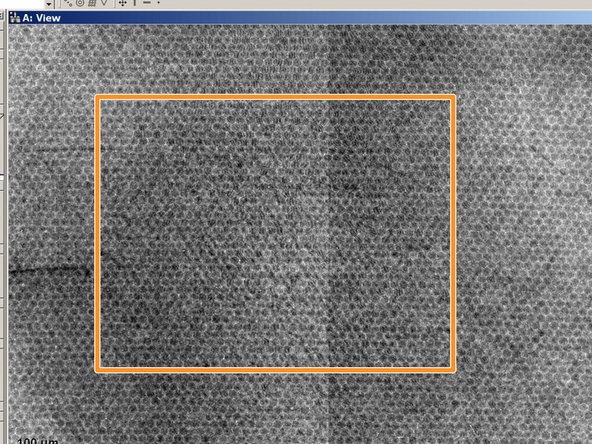
If you see this "honeycomb" like structure, the intensity is by far to high and you need immediately to dim the electron beam, or retract the camera out of the beam.
-
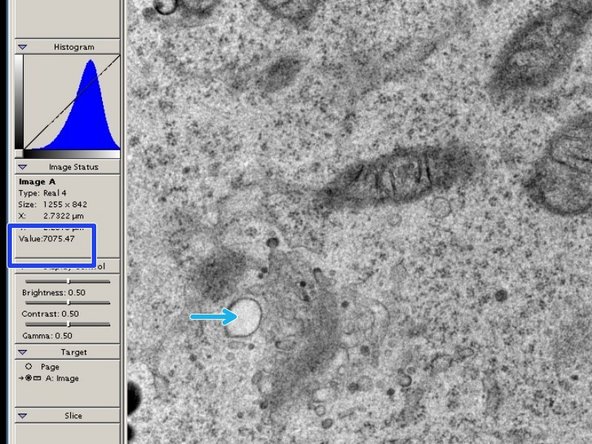
Digital Micrograph can show you an intensity value for each point in an image.
-
Move the mouse to a white area in your live view.
-
The value for a white area should be around 7000 or lower. Adjust the intensity if that is not the case.
-
-
-
The microscope performs best, if the sample is set close to eucentric height.
-
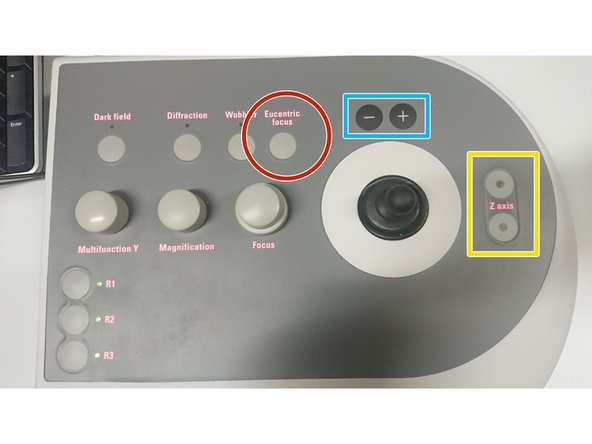
Press Eucentric focus on the right panel to reset the focus of the lenses.
-
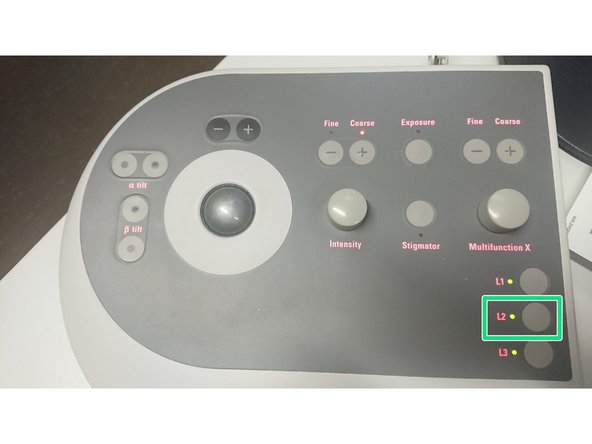
Press L2 (Alpha Wobbler) on the left control panel. The stage begins to tilt between +/-15°
-
Reduce the movement of the image in the live view of Digital Micrograph.
-
by changing the Z height with the Z axis button on the control panel
-
sensitivity can be adjusted by + and - buttons above the joystick
-
The Z-height is shown in the User Interface on the left screen. Use it as an orientation. (Z-values are usually between -20 um and +20 um)
-
-
-
Reduce the movement of the image in the live view of Digital Micrograph.
-
-
-
Push the "Wobbler" button on the right control panel.
-
Turn on the "Focus" knob, until you do not see a double image anymore.
-
-
-
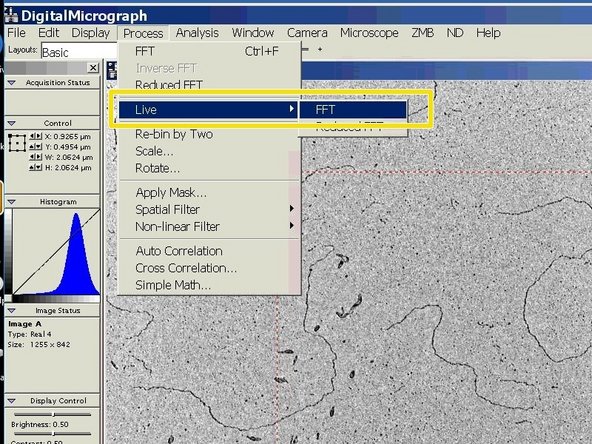
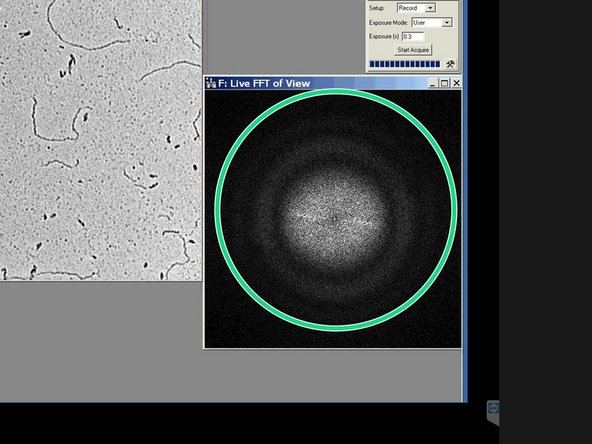
The Live FFT can be used to judge the focus and astigmatism of an image.
-
Choose the "rectangular ROI" tool.
-
Draw a square shaped region of interest with the mouse. You need to press the alt key, while drawing the region.
-
Go to "Process", choose "Live" and click on "FFT".
-
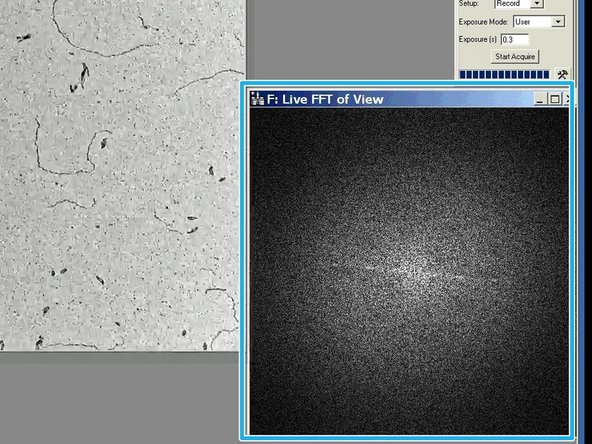
The live Fourier Transformation will appear in a separate window.
-
The image is in optimal focus, when the white disk is as wide as possible and no additional rings are visible.
-
-
-
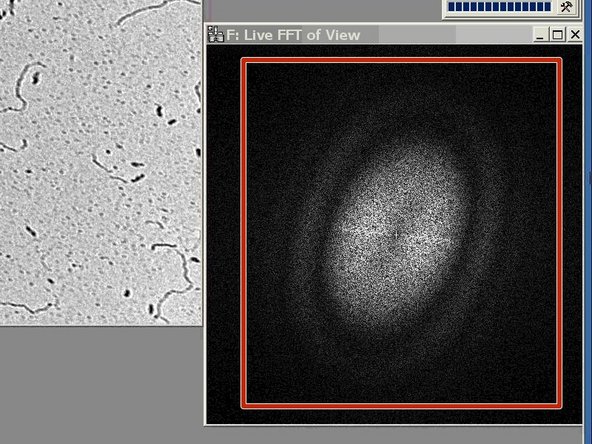
To check for astigmatism go out of focus (overfocus), until you see rings in the FFT.
-
If the rings are oval and not round, you need to correct for astigmatism.
-
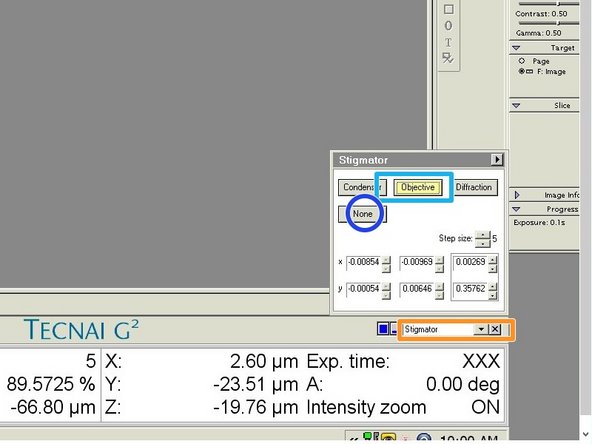
Choose "Stigmator" in the menu in TUI.
-
Click on "Objective".
-
Use the multifunction knobs on the left and right control boards to adjust the astigmatism. Check in the Live-FFT, if the rings get circular.
-
Click on "None", when you are finished with the adjustment.
-
It is possible to choose between three different presets. You can also duplicate presets by a right mouse click to have a setting as a backup. You can then get back to the original astigmatism settings, if your corrections made it worse.
-
-
-
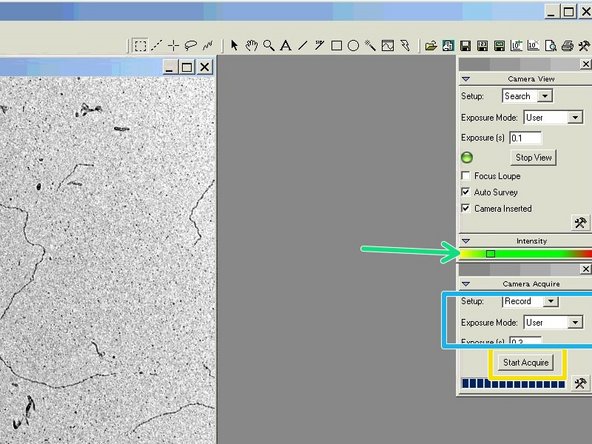
The intensity value should be in the lower green range.
-
The setup should be set to "Record". Choose the "Exposure Mode" "User" and an exposure time of 0.5 sec.
-
Click on "Start Acquire" to take the image.
-
-
-
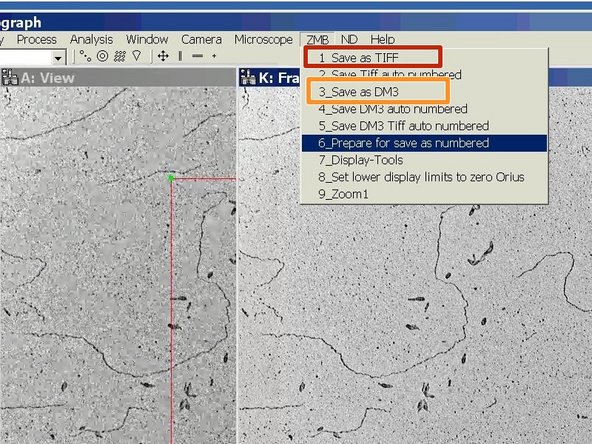
Save your image as TIFF.
-
Or save your image as DM3.
-
DM3 allows for more adjustment in the post processing, but you will need the Gatan software to open it.
-
-
-
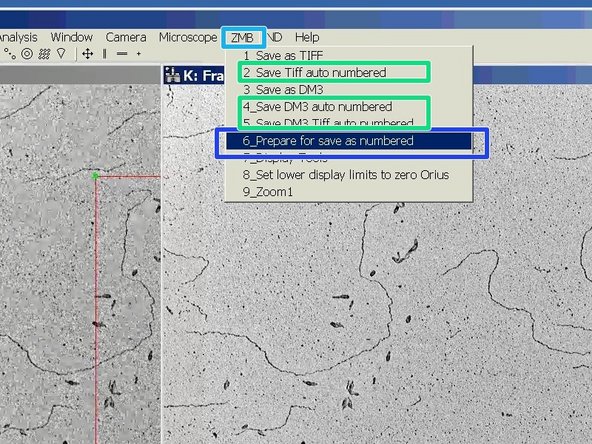
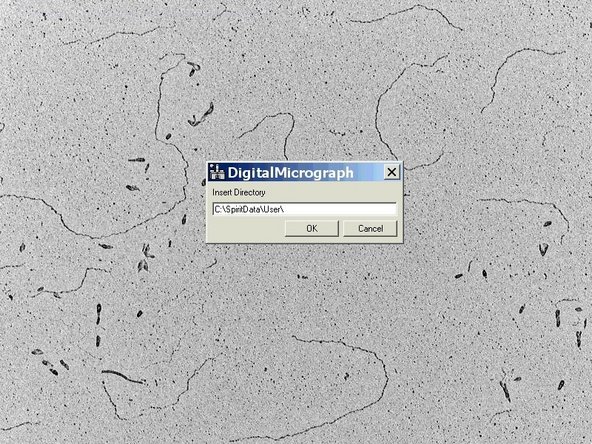
There is a way to automatize the naming and saving of acquired images.
-
Go to the "ZMB" tab.
-
Choose "Prepare for save as numbered".
-
Follow the setup by typing in the storage location, name and starting number.
-
After you prepared the saving path and name you can choose one of the auto numbered options (option 2, 3 or 5) to save new images.
-
-
-
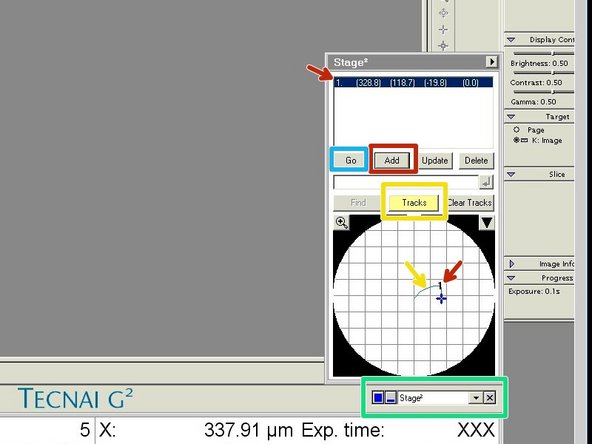
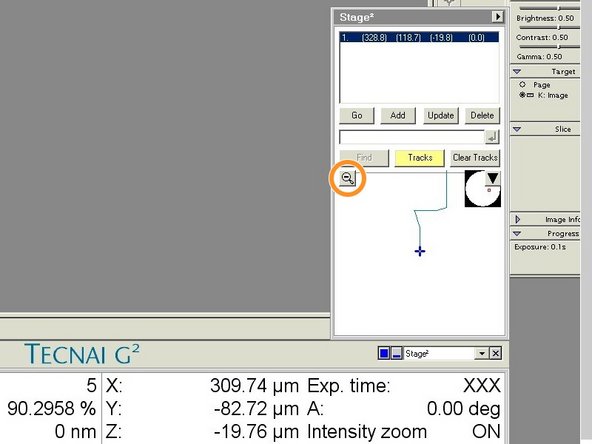
Open the "Stage" tab.
-
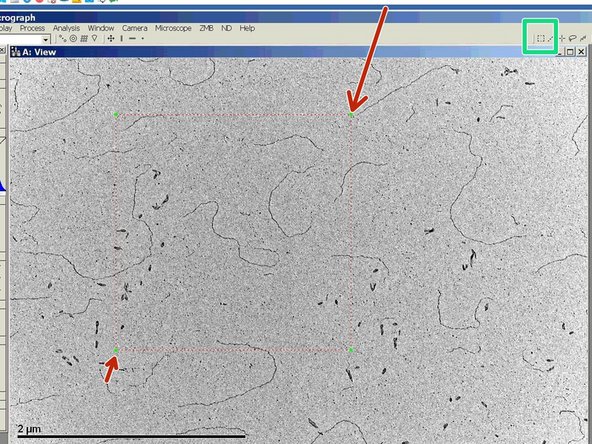
Activate "Tracks" to visualize where on your sample you already have been.
-
Click on "Add" to save points of interest.
-
If you click on "Go" you can move the stage back to the saved coordinates.
-
With a click on the magnifying glass you can see the tracking in more detail.
-
-
-
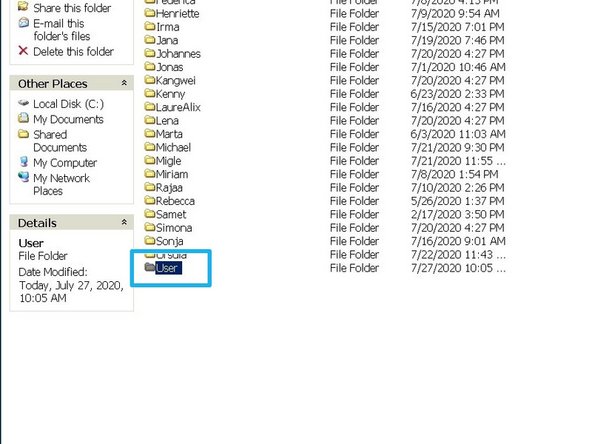
Go to the "SpiritData" folder on the microscope control computer.
-
Create a new folder with your name.
-
Save all your images in this folder.
-
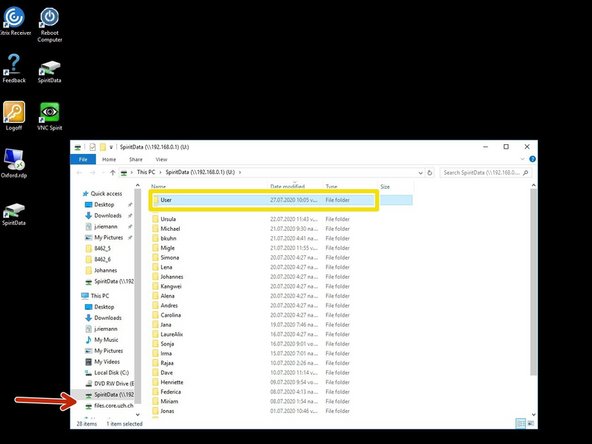
Open the remote desktop connection to the support PC.
-
Copy your files from the "SpiritData"
-
to your data drive in Z.
-
-
-
Log off from the Support PC, when you are finished with your data transfer
-
-
-
Reset the stage.
-
Close the column valves!
-
In this position the holder can stay, if you need to reposition your hands.
-
Pull the holder out completely.
-
Do not tilt the holder during removal or insertion. An angle can lead to a vacuum failure of the system.
-


The Tecnai™ Spirit TEM is an easy to use 20 kV to 120 kV transmission electron
microscope (TEM) designed to provide high-contrast, high-resolution imaging and
analysis in life science applications.
The Tecnai™ Spirit TEM is an easy to use 20 kV to 120 kV transmission electron
microscope (TEM) designed to provide high-contrast, high-resolution imaging and
analysis in life science applications.