-
-
Open the file drive in the windows explorer.
-
Create a folder with your ZMB username, e.g. j.doe
-
Save all data in this folder.
-
-
-
Acquire image by scanning a frame with desired options and freeze.
-
Open menu.
-
Select "Save Image"
-
Select location, type in name and save your file.
-
-
-
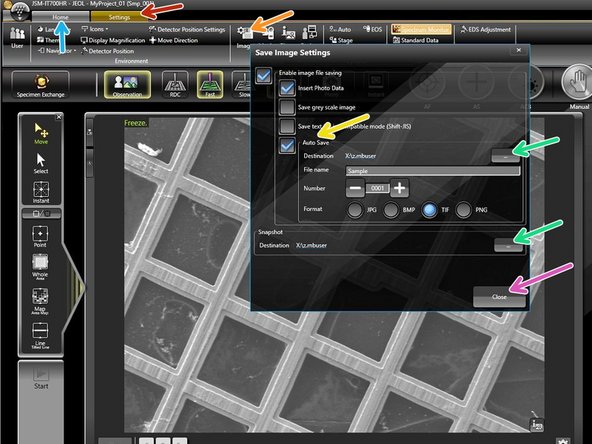
When using the autosave function, images will always be stored in the internal Jeol database. Smileview is required to access images (see next steps) .
-
Select "Settings" tab
-
Select "Image"
-
Activate "Auto Save" function.
-
Select your created directory to store images and snapshots.
-
Close window.
-
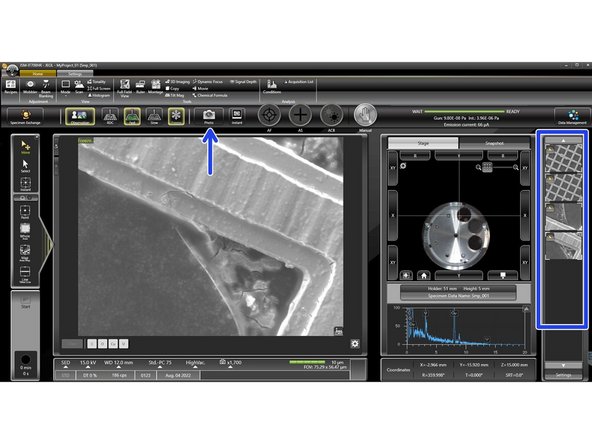
Select "Home" tab and continue imaging.
-
Press "Photo" to capture image and autosave (arrow). All images are kept in the image gallery (square) and saved to an internal Jeol database
-
-
-
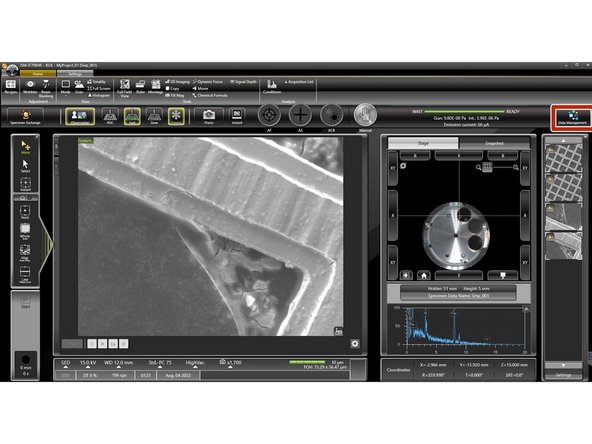
When using the autosave function and acquiring EDX spectra, all data will be stored in the internal Jeol database. Smileview is required to access images and spectra later.
-
Open Smile View software by clicking "Data Management".
-
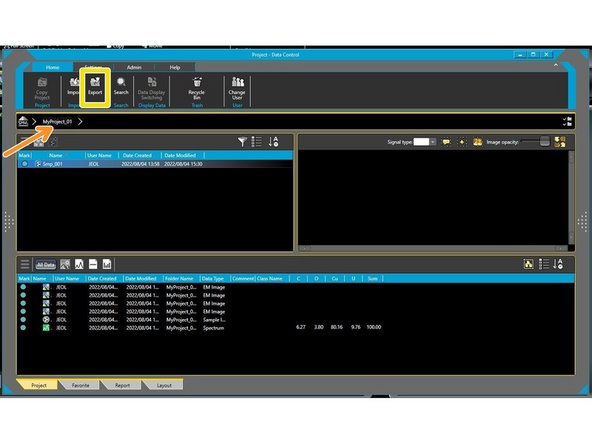
Click on your project e.g. MyProject_01
-
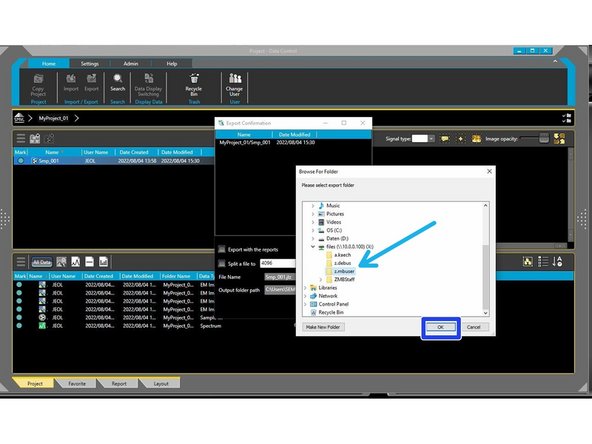
Export data.
-
Select your folder.
-
Confirm and export
-
-
-
Login at support computer.
-
Start Citrix client.
-
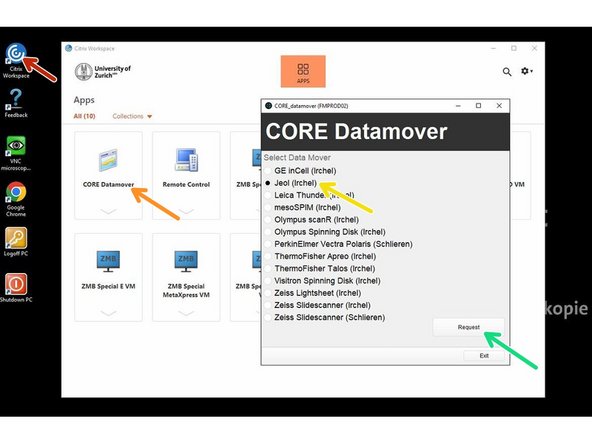
Start data mover
-
Select "Jeol (Irchel)"
-
Press "Request"
-
You get a confirmation, that your request is created. You will be notified by email, as soon as your data are moved to the server in your directory, e.g. j.doe.
-
-
-
Book the "ZMB Special E VM" and login.
-
Only ZMB Special E VM contains the Smile view lab data control software of Jeol.
-
Open the "SMILE VIEW Lab Data..." software.
-
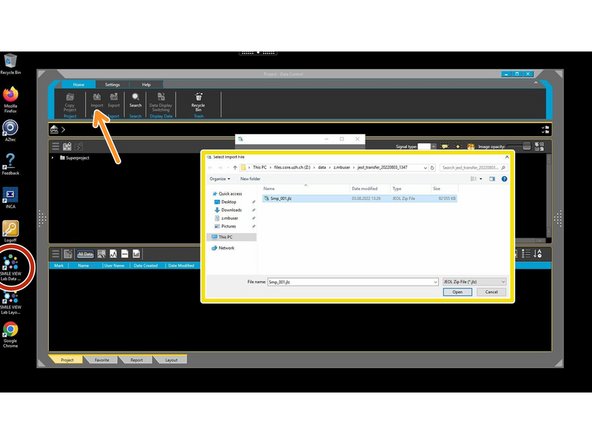
Click on "Import"
-
Select your data.
-
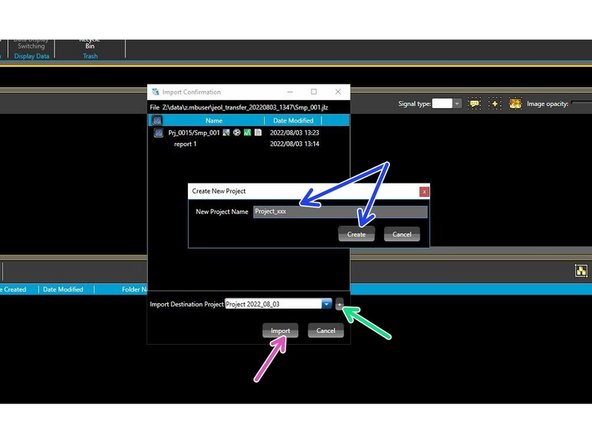
Create a project where the data should be imported to.
-
Insert name and create.
-
Import.
-