-
-
Generally the system is always on, as this prevents condensation in the image formation path
-
Wait at least 30 sec. before you restart the Operetta CLS after a shutdown
-
Switch on the Operetta CLS (green button on the side)
-
The instrument is initialized (status light blinking green). As soon as the status light stops blinking (constantly green), the Operetta CLS is ready and can be used
-
Switch on the Harmony PC and log into Windows®
-
Notice It is recommended to let the instrument warm up for 1 hour before starting measurements. Otherwise drift as well as condensation artifacts can occur
-
-
-
Double-click the Harmony icon on the desktop
-
Log into Harmony. You will be given a user account after training
-
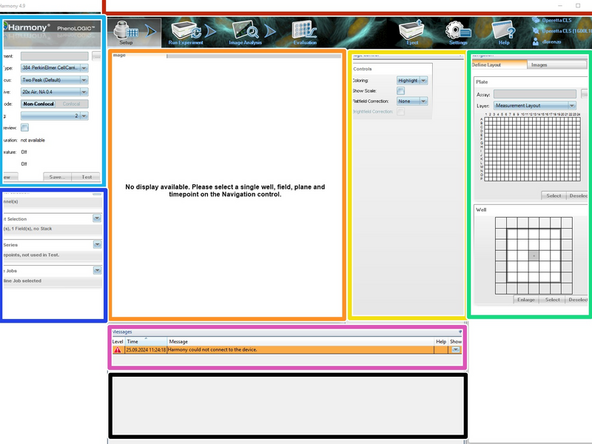
The Harmony Software has a bug where it indicates that it “isn’t connected to the device”
-
Override this connectivity error by pressing the “NEW” button under the C02
-
Afterwards you should see in the top-right corner that the software is connected when the plug symbol comes together
-
-
-
Main menu bar
-
Content area
-
Image control
-
Navigation
-
Global control
-
Settings
-
Messages
-
Results
-
-
-
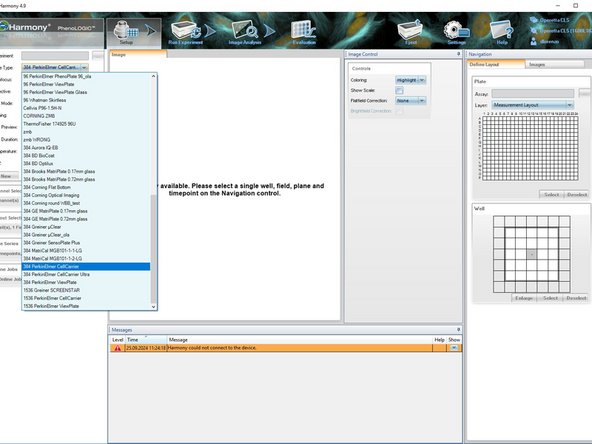
The most important information is the plate type. Before loading a plate you have to select from the drop down menu the plate. If you plate is not on the list, you can add it with the instructions in the next step
-
For slides clean them and place them in the allocated holder, coverslip down
-
Clean the bottom of the plate with 100% EthOH and KimTech wipes
-
You might asked to adjust the objective collar after chooseing a plate, for this go to this guide
-
Press eject and the sample holder arm will come out
-
Put the plate in the holder
-
Press load and the plate will be taken inside the system. Make sure that there are no labels, sealing plastics around the plate and such
-
-
-
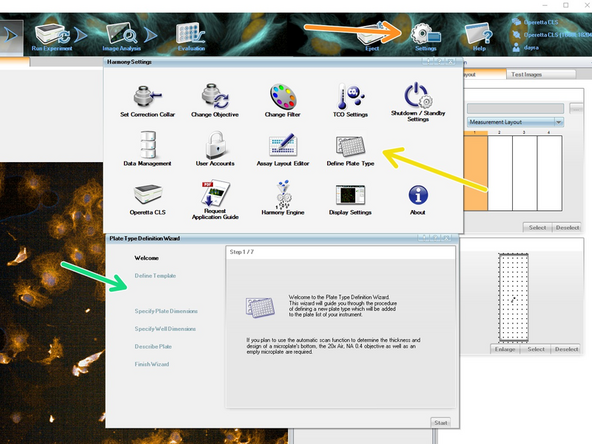
Go to "Settings"
-
"Define Plate Type"
-
Follow the wizard instructions
-
You can find the specifics of the plate with the manufacturer
-
-
-
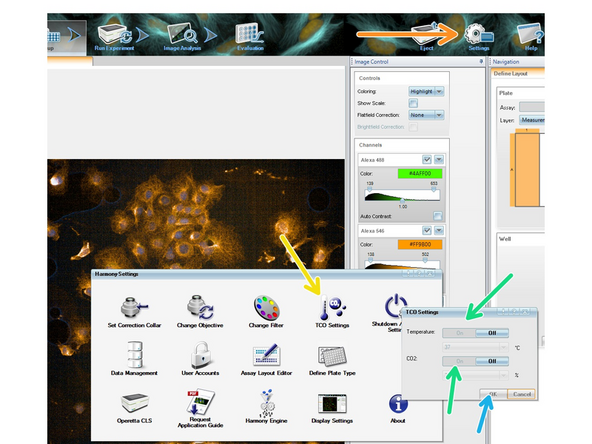
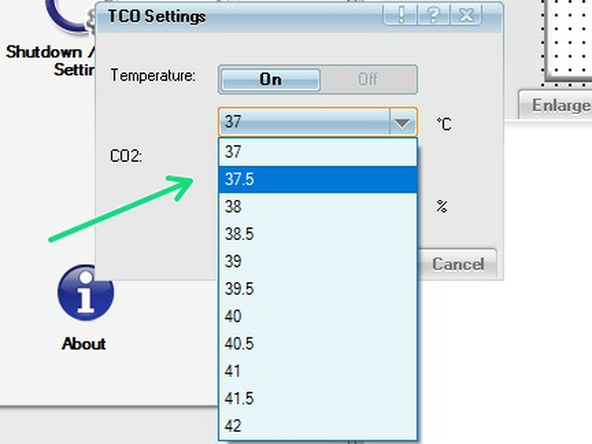
The temperature needs to be adjusted at least 2hrs before the experiment. Otherwise z-drift could be experienced
-
Go to "Settings"
-
Then "TCO Settings"
-
Turn on the temperature and CO2 levels and adjust them as needed
-
Press OK
-
The gas connection is always on at 3 bar.
-
-
-
Now that you have completed the starting steps, go to this guide to create an image in x-y and z
-