-
-
Go to Setup
-
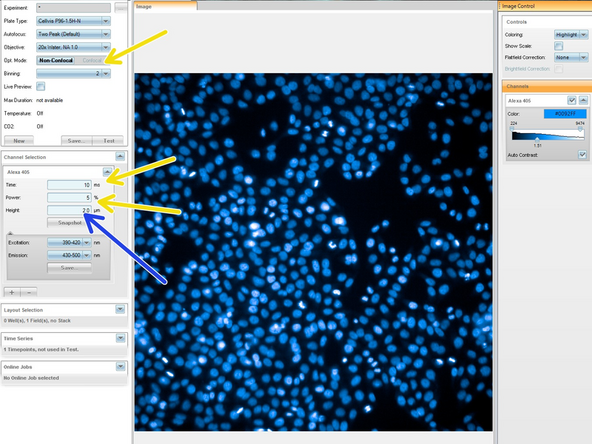
Select the 5x objective and Non-confocal optical mode to find focus easily as well as your sample. Later you will select your objective of choice
-
Choose binning
-
Activate Live Preview
-
Symbols for Temperature and CO2:
-
Start-up: the stated value has not yet reached the target value
-
Regulating: the target value is almost reached, but it is not yet stable (< 4 ° C below the target value). Check the messages panel for specifics
-
Ready: the target values have been reached (+/- 1°C around target temperature, and +/- 0.5 % around CO2 concetration)
-
-
-
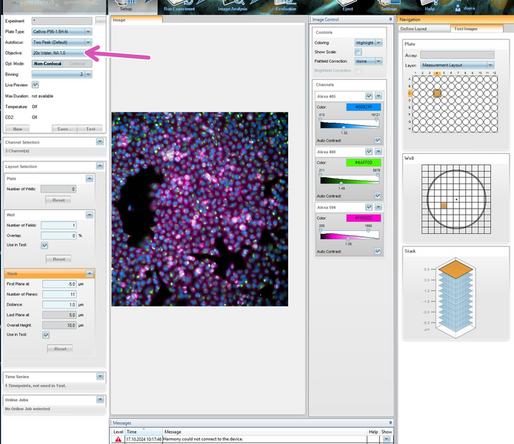
In the Global Control, choose the objective that gives you the needed magnification for your experiement
-
Note that the collar of the 20x objective sometimes needs to be adjusted to match the refractive index of the bottom of the plate
-
When the message "The correction collar needs to be adjusted..." appears, click "Yes". The selected objective is then moved into service position and the lid unlocks
-
The lid will open automatically and you can remove the objective from its position (12 o’clock position in the objective turret) by just lifting it up
-
If necessary, adjust the correction collar by gently turning the collar to the value [mm] given on the previous dialog
-
Only touch the objective as shown in the picture, do not touch the lens. Make sure not to screw the objective out of its mount when adjusting the correction collar. The objective must remain screwed in firmly
-
Ensure that the red dot on the objective holder is placed correctly on top of an identical dot inside the microscope, and that the ball bearing fits inside the small round groove of the holder of the objective
-
-
-
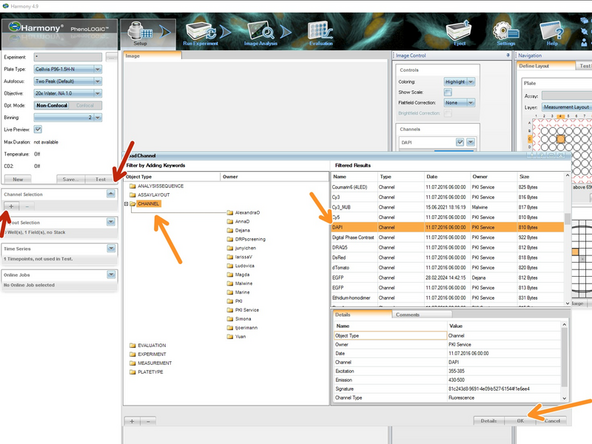
Add the fluorescent channels you are aiming to image in the "Channel Selection" panel and click "+"
-
For transmision light, use the "Brightfield" channel
-
First choose your nuclear staining to test your imaging settings, or whichever staining is the most ubiquitous in your sample. DAPI for example
-
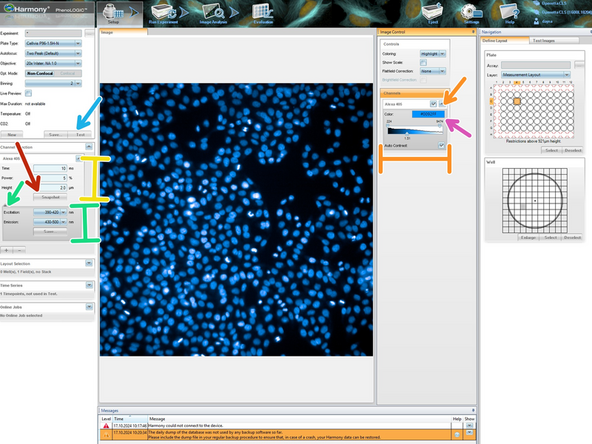
Adjust the exposure "Time"
-
Not that for confocal mode, you can only enter exposure times which are a multiple of 20 ms (e.g. 20, 40, 60 ms)
-
"Power" of the light source
-
and "Height" of focusing in case that you would like the focus to be slightly above or below to where the autofocus has been found
-
Note that for confocal imaging mode your will need significantly less power and exposure time. Ensure to adjust those accordingly before testing and possibly bleaching the well
-
-
-
Click on "Snapshot" for checking just one channel's settings
-
Check the channel's histogram to avoid saturation. If the image is satisfactory, add more channels
-
if needed adjust the height of focus, exposure and power pf the illumination to improve image quality
-
You can also modify the excitation wavelength and detection windows, when you need to customize the channel independently
-
Once you check each channel independently, you can check the full image with clicking "Test"
-
Change the look-up-table by double clicking the color bar
-
-
-
When choosing one of the two water immersion objectives, you must first flush the objective
-
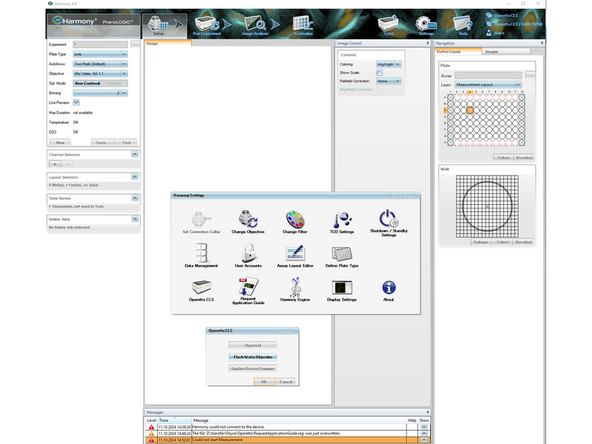
Go to "Settings"
-
Then "Operetta CLS"
-
Then "Flush Water Objective" twice consecutively
-
Open the front lid and watch that water falls inside the left bottle. This means that the flushing is working
-
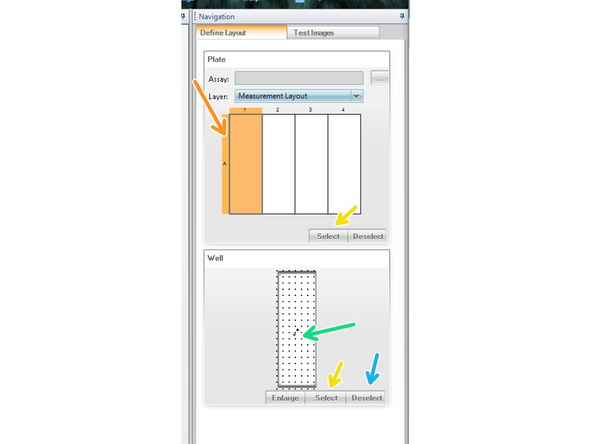
In the "Define Layout" menu, choose a well and
-
as position inside the well for testing
-
-
-
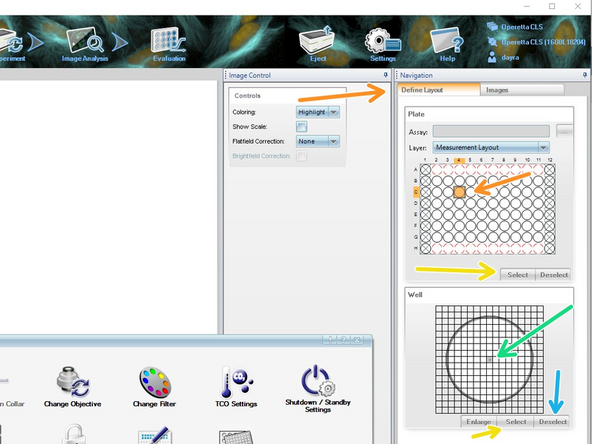
In the Navigation Panel on the right side of the screen, select a well or a slide with a left click. The selection will become orange
-
If you clikc "Select", the well will become gray
-
By default the center of the well/slide is selected
-
To change the test position inside the well/slide, left click on the position of interest, then "Select", and "Deselect" the previous position, as only one position is needed for testing
-
-
-
When the autofocusing of the system is not working, you will receive a notification of this at the "Messages" panel
-
If your plate is just out of the fridge, condensation could be formed on it that impedes proper focusing
-
Increase the time exposure gradually up to 300 ms for widefield mode, and more conservative values for confocal mode. Do not go beyond 300 ms, increase the laser power slowly instead
-
Make sure that the collar of the 20x air objective is set up to the proper height, as well as placed properly inside the microscope
-
When using the water objectives, flush the objective once more at Settings>Operetta CLS>Flush Water Objective
-
Change the height values so see if that helps
-
Go to the lowest magnification objective for troubleshooting, If you were using a water immersion objective, make sure to first clean the plate or slide before changing
-
-
-
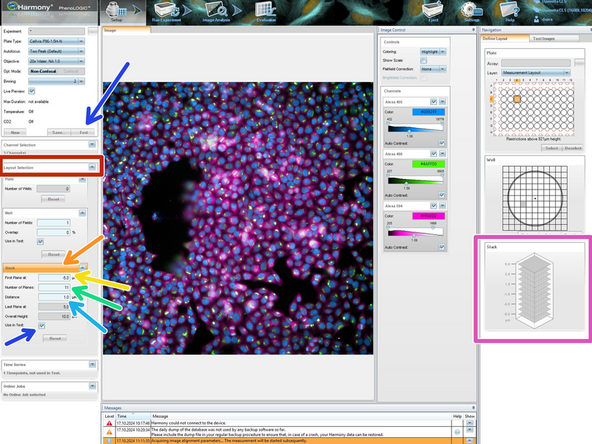
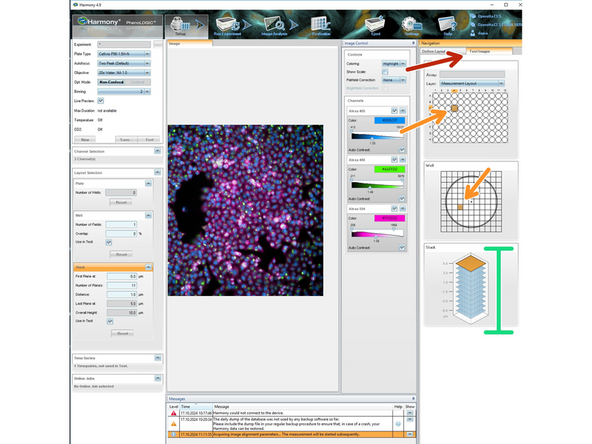
Set up Z-stack settings in the "Layout Selection" panel
-
Go to "Stack" to define which planes of the well are measured (Z-stack). It is defined (and measured) 'bottom-up'
-
The "First Plane" defines the bottom of the stack
-
Give the "Number of Planes"
-
And the "Distance" between planes
-
Ensure that "Use in test" is checked to see it online when testing
-
If you define a stack, the height defined in each individual channel will be ignored
-
The "Stack" panel on the right will display the Z-stack you define
-
-
-
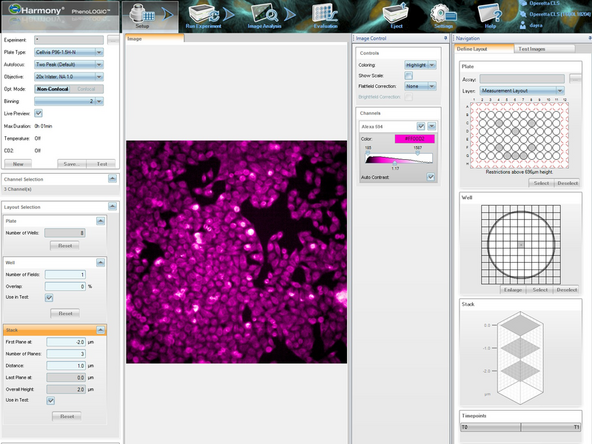
On the right "Navigation" panel, go to "Test Images"
-
You can click on the well and the areas where you have made a test stack
-
Click on the stack and navigate it with the arrow keys, or clicking on each plane with the mouse and the images will show on the Image panel
-
If you would like to update the start and end of the stack you can go to the previous step and adjust accordingly
-
-
-
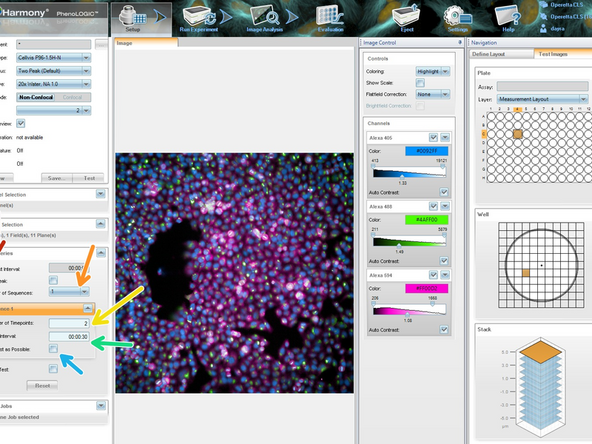
Go to the "Time Series" panel
-
Select the number of sequences (different sequences for different time points)
-
Provide the amount of "Timepoints" where the imaging should be done
-
Give the interval between time points on "Fixed Interval"
-
Uncheck "As Fast as Possible"
-
-
-
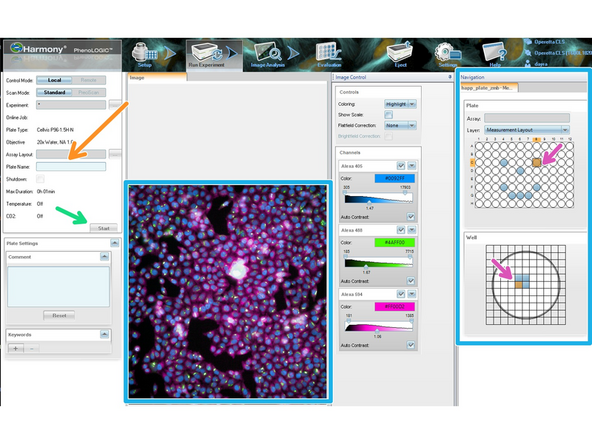
In the Navigation panel go to Define Layout
-
Select the wells you want to image by clicking on each well (they become orange), and then click on select (they become gray)
-
On the Well window also select the areas you would like to image
-
-
-
Go to Run Experiment
-
Give a name to the plate
-
Click start
-
After the imaging is done, you can check the images in the Navigation panel
-
Click each well and location
-
-
-
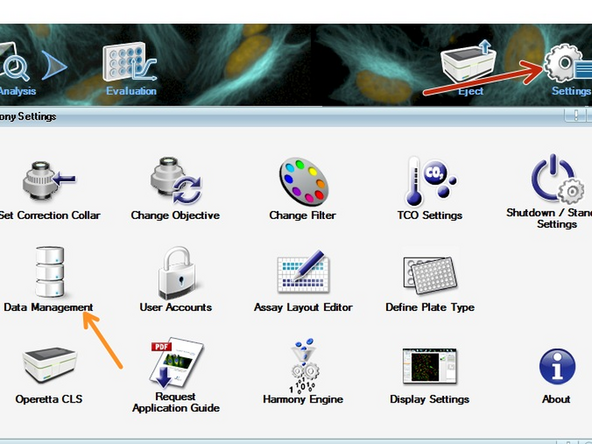
After you acquire your images you can manage your data in the Settings menu
-
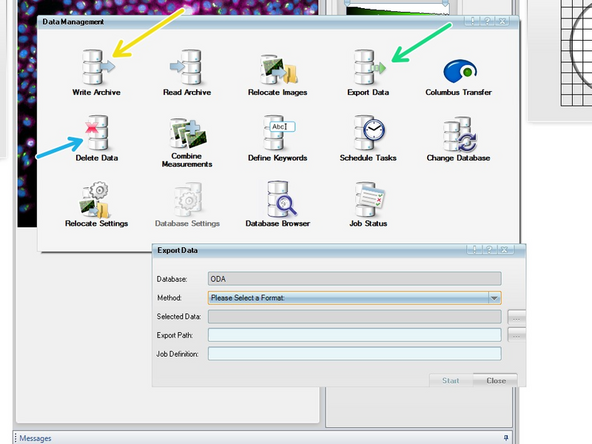
You access the Data Management
-
Here you can back up your data to the database
-
Export the data to a different format, such as TIFF
-
And delete your data once you do not need it any more
-
Note that we have a data retention policy of 90 days. All data that exceeds this period will be deleted and cannot be backed recovered
-