Introduction
For acquisition of large data sets (e.g. multipositions, timelapses or large volumes) it is recommended that you use the available X: (cache) drive. By doing so acquisition and saving is not limited by the network speed. Transfer of the files can be initiated through our Data Mover solution.
-
-
Open the "Experiment Manager" tab on the bottom right.
-
Define where your data will be saved by clicking on the "Acquisition Settings" icon .
-
-
-
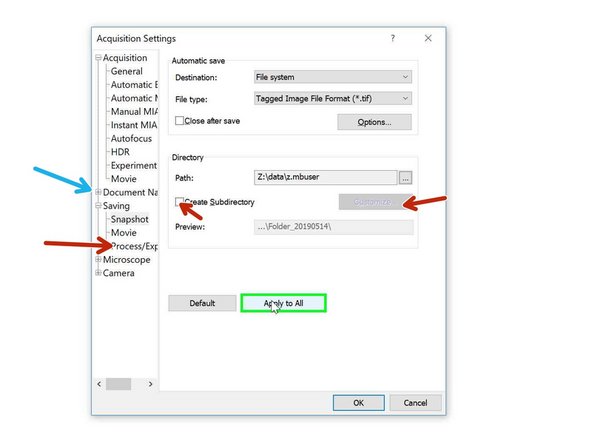
Go to "Saving"<"Process Experiment".
-
Choose file system as "Destination".
-
Olympus Spinning disk: choose OSPIStorage (X:) and enter your personal data folder.
-
Olympus ScanR: Choose automatic_transfer (X:)
-
Select "Close after save".
-
Finally press "Apply to All".
-
-
-
When acquiring multipositions you can custom define the naming of your files/ experiments.
-
You can change file naming here.
-
Or create subfolders containing each well ID e.g.
-
To set up an experiment go to Olympus Spinning Disk - 2: Multichannel + Z-stack acquisition
-
-
-
You can now set up your experiment and acquire your data.
-
Once you are done, please remove your sample and clean the microscope appropriately.
-
Close the cellSens software.
-
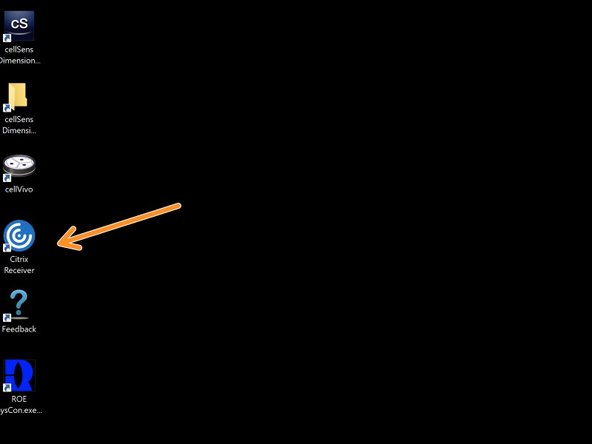
Open Citrix workspace directly on the computer.
-
Optional - You can also access Citrix from your own computer provided you have installed the Citrix client). Check out How to section for more info.
-
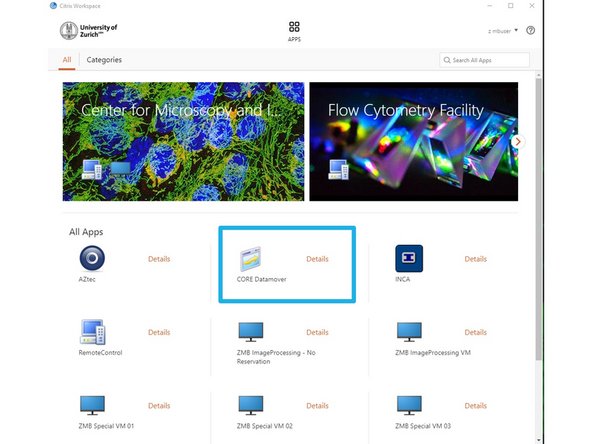
Select the "CORE Datamover" icon.
-
-
-
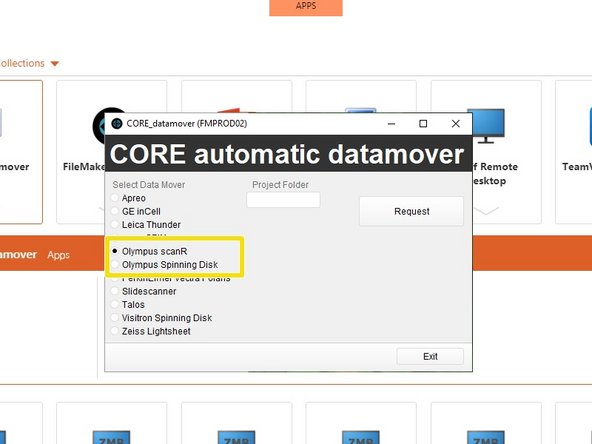
Select the option "Olympus Spinning" disk or "Olympus ScanR" accordingly.
-
You will receive a confirmation email within 15 min.
-
Additionally you will receive an email once the transfer has started and another once it ends.
-
Finally your data will be available on you Core date folder.
-


