Introduction
This guide will show you how to use the XYZ navigation tool for more automatized acquisition.
In particular, how to create quick overview of your specimen with low mag objective and focus map of your sample, which can be later used for tilt compensation in tile scan or multipositon measurement also in combination with Z-stack.
You may find it useful for followings task:
- Scanning tissues with curvature in the Z-plane
- Targeting cells with unique phenotype (or transfected cells), which requires overview of large area and Z-stack across multiple positions
-
-
Check that 'ZMB_Navigator' layout is selected in the bottom left corner.
-
Locate XYZ Overview window
-
-
-
Use 4x magnification objective, choose Optical configucation and focus on your sample.
-
Adjust the intensity of the Epi-lamp and save to OC, if adjustment is needed.
-
-
-
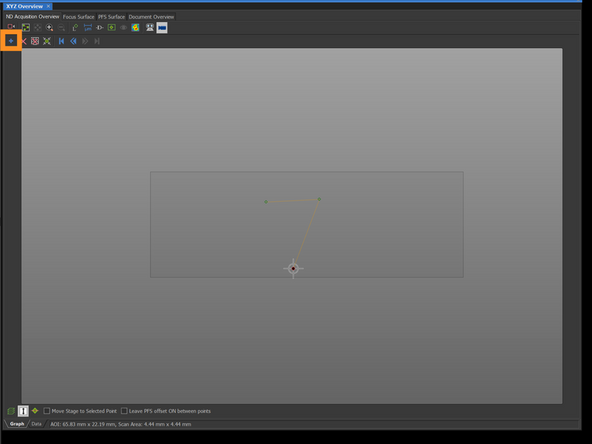
Add to the XYZ overview a points with a +. This will be used to define the boundaries of the overview.
-
A 2-3 point should be enough to define the area of a coverslip.
-
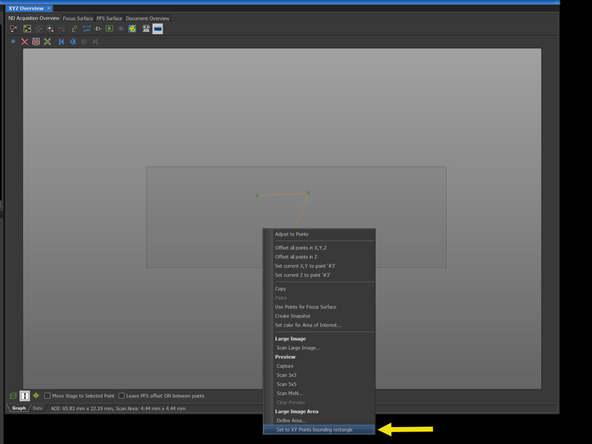
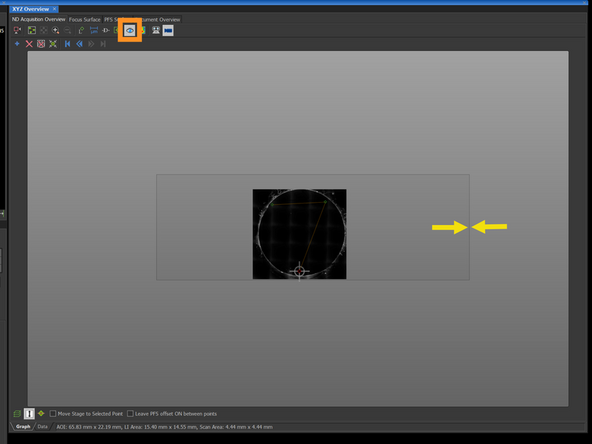
Rightclick on the XYZ overview area and select 'Set to XY Point bounding rectangle'
-
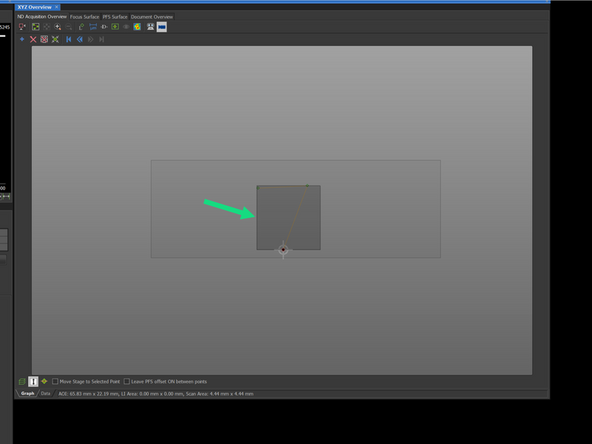
The overview area will appear in the dark grey rectangle. Now you can also modify the size or place of the area.
-
In this case we are capturing the overview of the whole coverslip. However, you can also create the boundary just around your tissue/object.
-
-
-
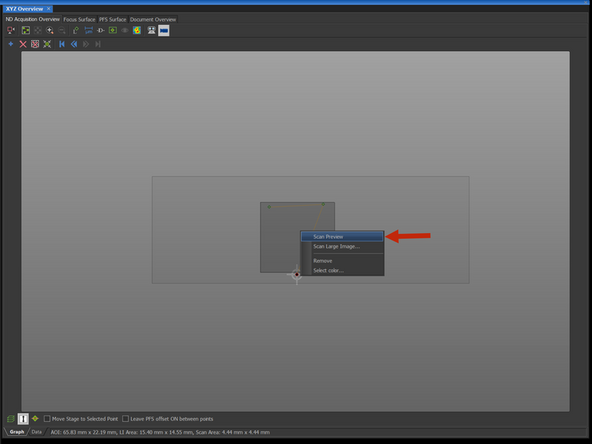
Right-click on the defined area and click on Scan Preview
-
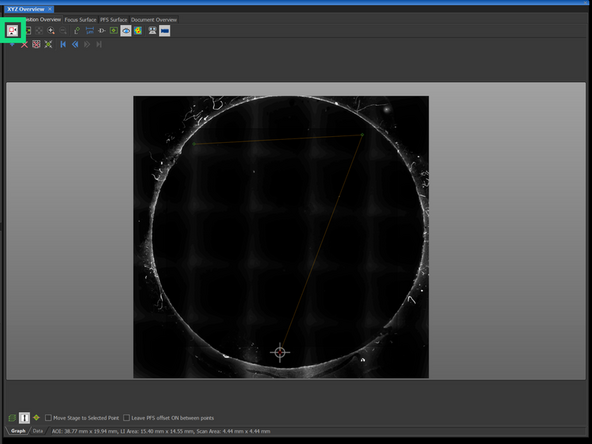
After scan is finished, make sure you have click on the Show Image Preview
-
Now you can also modify boundary of your area of interest.
-
And zoom in the area of interest
-
-
-
Change for a higher magnification objective to better estimate the focus in Z
-
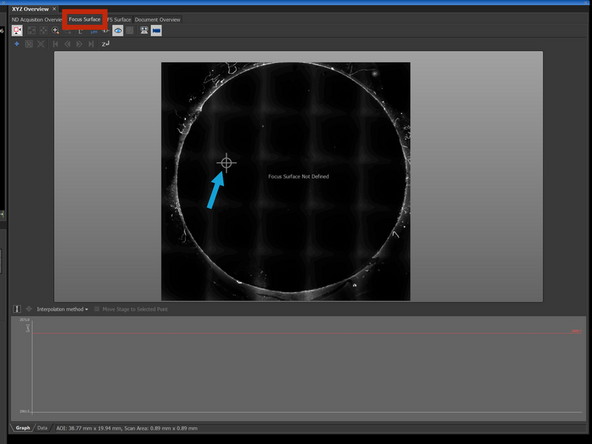
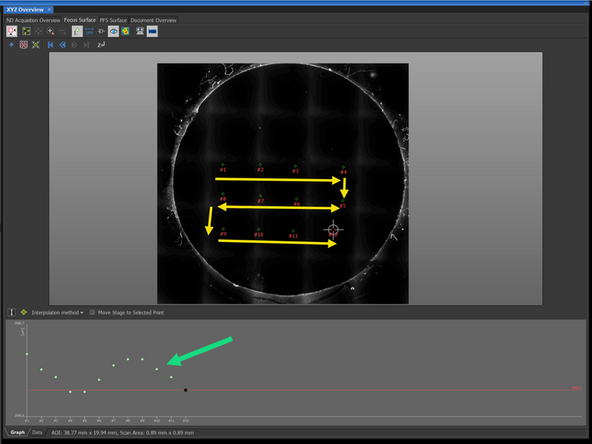
Change to Focus Surface tab in XYZ Overview
-
The cross indicates your position in the sample
-
Go live and adjust the focus in Z.
-
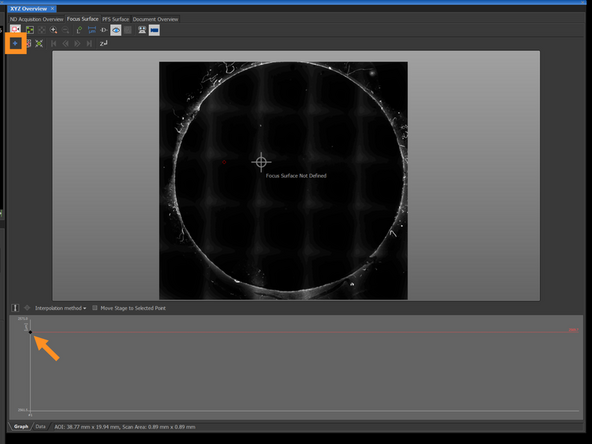
When sample is in focus, add a new focus point.
-
You can continue adding more focus point, until you cover the area, where you want to image.
-
In the diagram, you can see the positions of the points in Z
-
How many focus points? With monolayer of cells, you can estimate the tilt of the coverslip with few focus points, positioned at the edges of your area of interest. With tissue, you may need to add more focus points, as the tissue can be curved and may not follow the same plane as the coverslip.
-
-
-
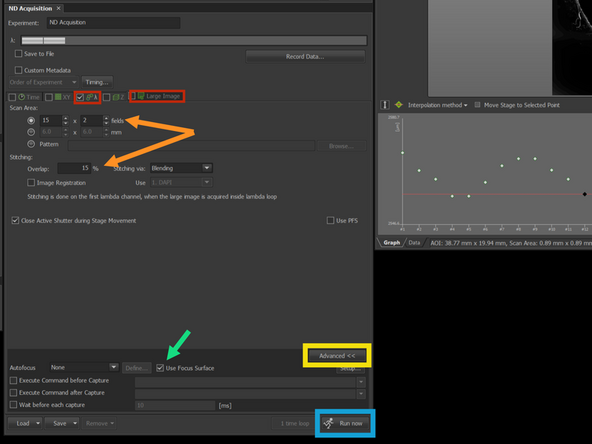
Define number of channels (λ) and scan area in the ND acquisition tab
-
Define X*Y and % of overlap used for stitching
-
Open Advanced
-
Tick the Use focus surface
-
Press Run Now
-
-
-
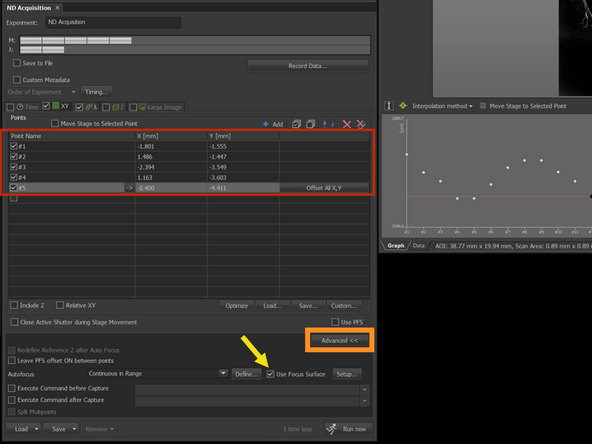
In XY tab define a list of positions, you would like to acquire.
-
Select Advanced
-
Tick the Use focus surface
-
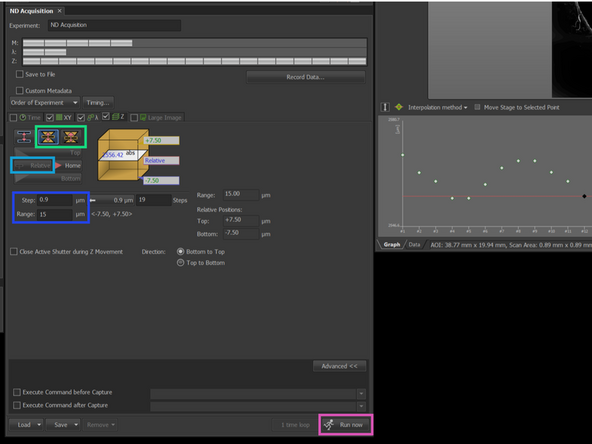
In Zstack tab choose Symmetric or Asymmetric Z stack.
-
If not selected, select Relative
-
You can change the range Step size and Range of Z-stack around the relative position.
-
Make sure that λ tab, XY tab and Z stack tab are ticked and press Run now
-
The microscope will change the Z of relative position according to the Focus map. Make sure that you selected enough range in Z to cover the whole volume.
-