Difficulty
Moderate
Steps
15
Time Required
00:15:00 - 00:30:00
- Nikon SD 6: Multiwell plate imaging 15 steps

In Progress
This guide is currently being written. Reload periodically to see the latest changes.
Introduction
This guide will provide information about how to acquire data in high-throughput manner in the multi-well plate sample holder.
-
-
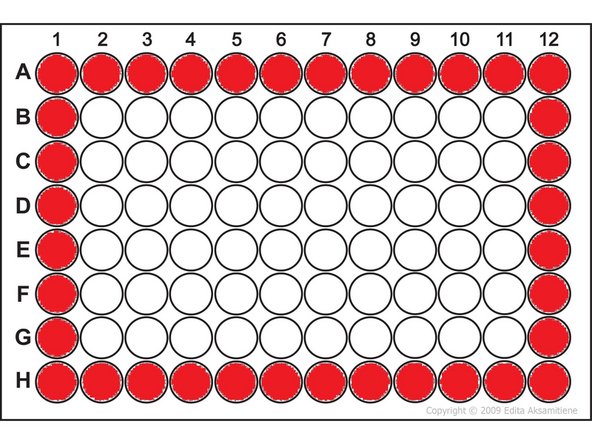
96 well plate (also 384 well plate): If you want to use objectives 20x, 40x, 60x , the imaging in the outer wells in red is prohibited due to the objective and stage limitation. If you will try to image in the outer wells, you risk the hardware damage!
-
When you need to change objective, always go in the loading position of the stage and then change the objective. Otherwise, you risk the hardware damage!
-
-
-
Important, when you are setting up well-plate imaging for the first time. We recommend that some zmb staff will assist you.
-
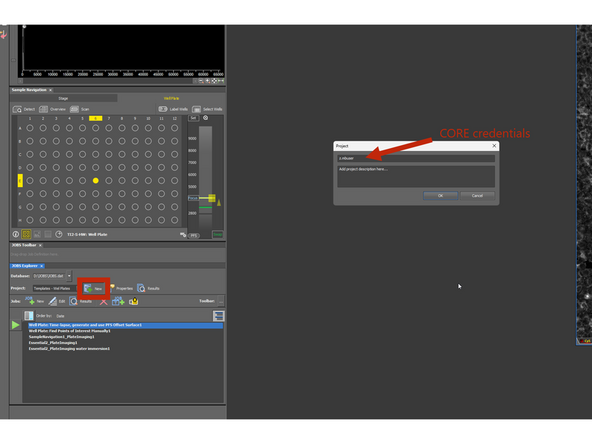
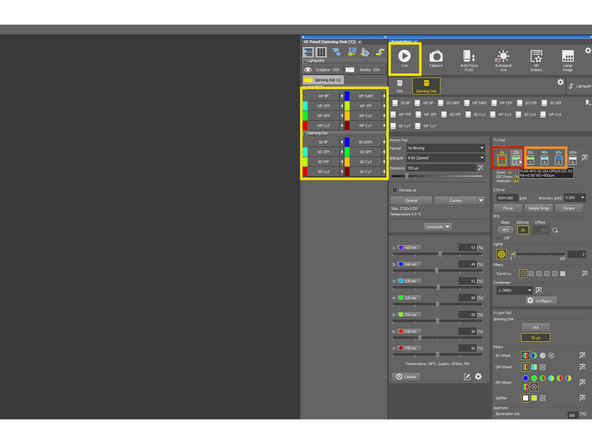
Open JOB Layout - top left corner.
-
In JOB Explorer, create a project with your CORE credentials - e.g. z.mbuser
-
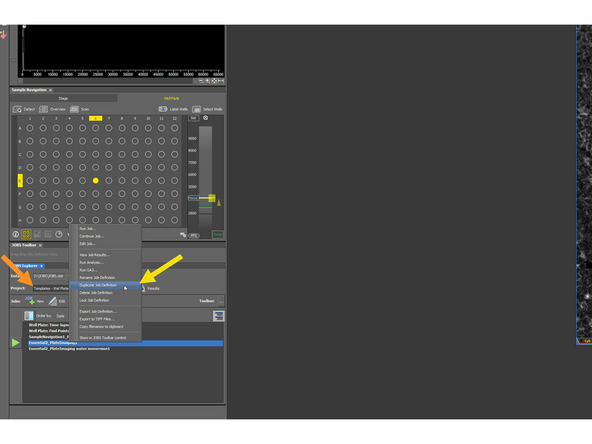
Go to the Templates - Well Plates
-
Right-click on the JOB and choose "Duplicate JOB definition"
-
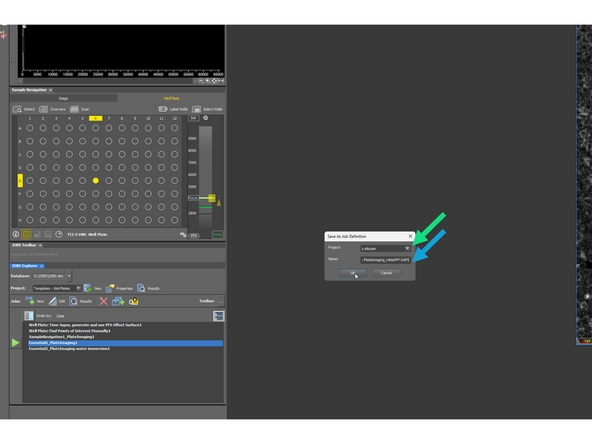
In the new window choose as a directory the project with your name (CORE credentials)
-
Change the name for something meaningful and confirm OK
-
-
-
Important, when you are setting up well-plate imaging for the first time (If you change your experiment/dyes/concentration, you need to repeat this step)
-
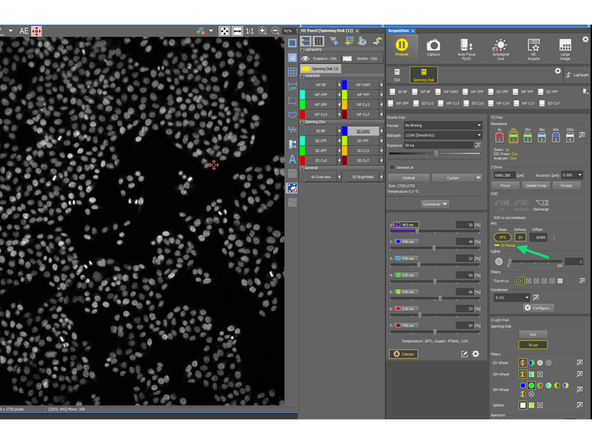
Select the objective you want to image with.
-
If WATER IMM objectives: you need to initialize the water dispenser.
-
Focus on the sample and select the OC you want to use for acquisition.
-
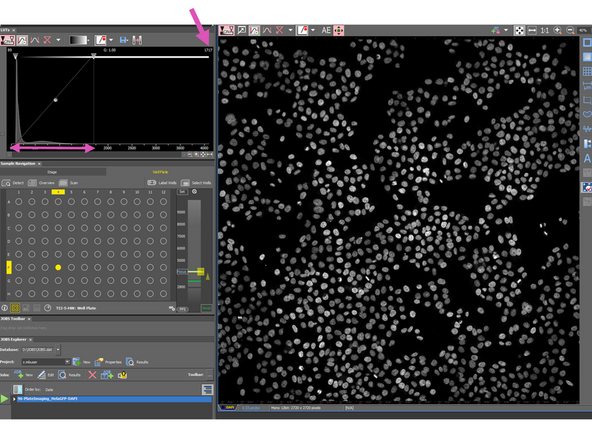
Press Autoscale
-
Optimize: Laser intensity, Exposure
-
Check for the Saturation (in more details in the next step)
-
Repeat for all channels you want to use for acquisition.
-
-
-
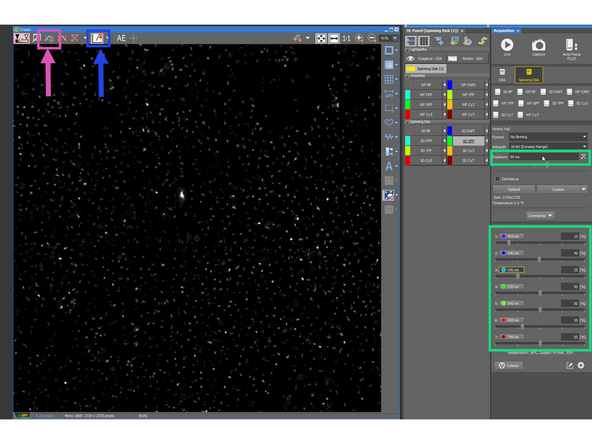
Avoid saturation under every circumstances
-
You can click on the Saturation control - all pixels saturated will be displayed in red color.
-
Press auto scale - if the max intensity value is 4,096 (for 12-bit), the image is saturated. This will help you to discover saturation, if your eye will overlook few red pixels
-
If your image is saturated:
-
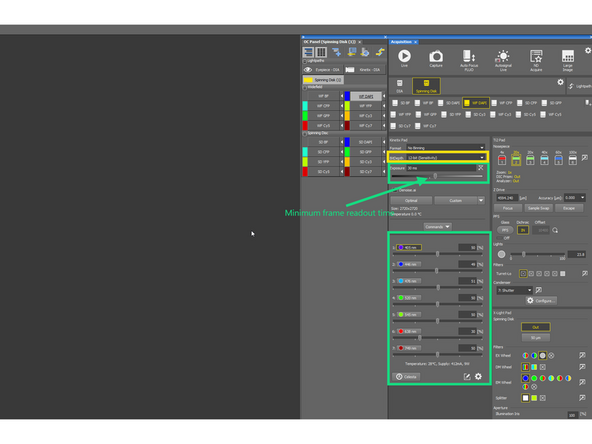
Decease the Laser power and/or Exposure time (not less then min read out time of 1 frame)
-
Or increase the bit-depth of the image to 16-bit format (e.g. when you can't tune the intensity with laser power and exposure time - usually can happen with extremely bright fluorophores).
-
Optimized image - no saturation, max. intensity 1710, good S/N ratio, no bleaching
-
Keep the same bit-depth format for all channels - needs to be adjusted per OC
-
-
-
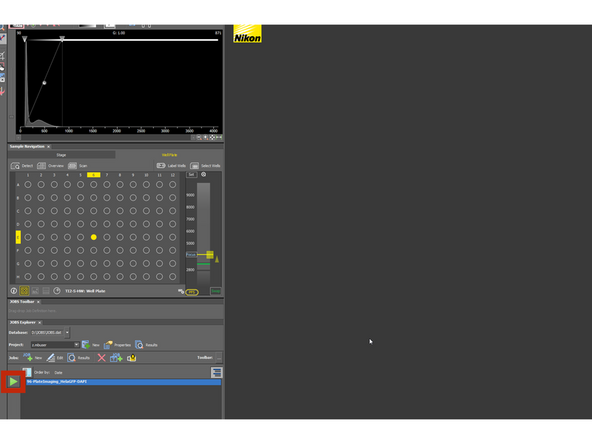
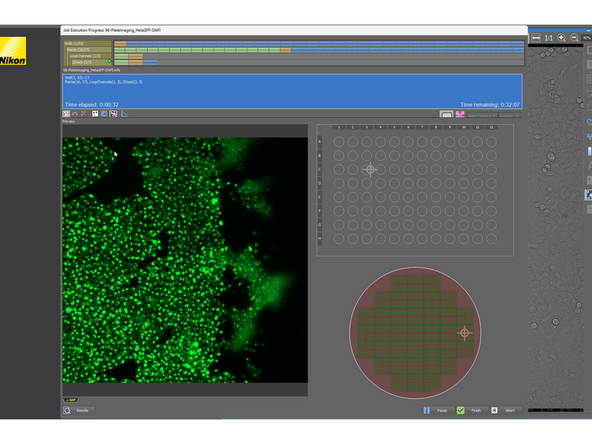
Click on the JOB and press the play button
-
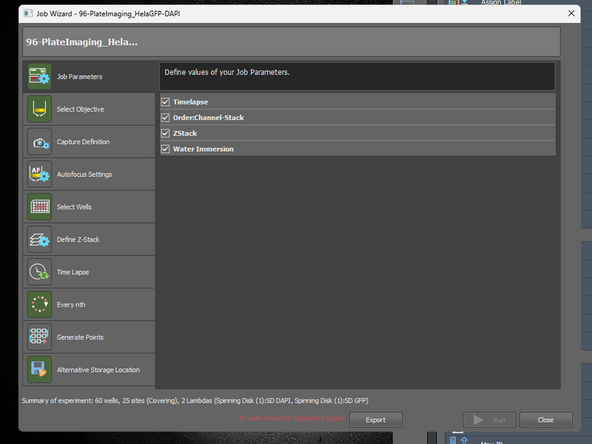
Select, if you want to do:
-
Z-stack (default order: If two or more channels are selected, the system will acquire all channels at one Z-plane before moving up to the next plane.)
-
Order: Channels - Stack: Acquire the full Z-stack in one channel first, and then switch to the next channel. (Faster option, Recommended).
-
Timelapse
-
Water Immersion - Required for WI immersion objectives!
-
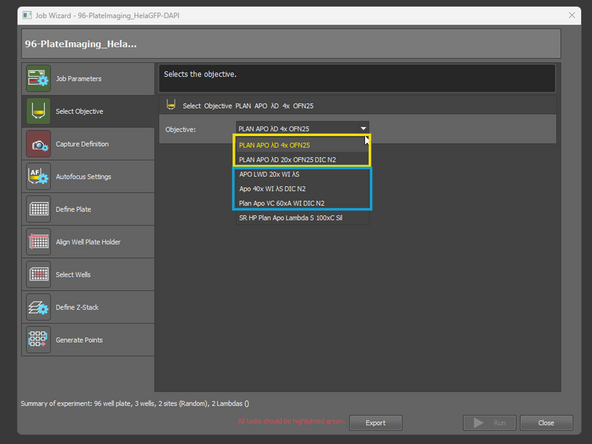
Select from AIR objectives. - 4x or 20x
-
Select from WATER IMM objectives - 20x/40x/60x
-
-
-
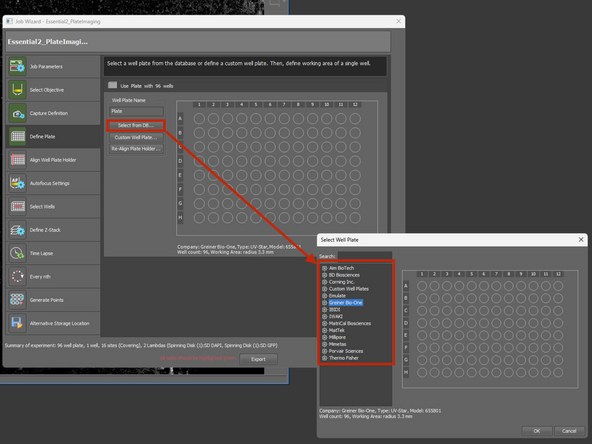
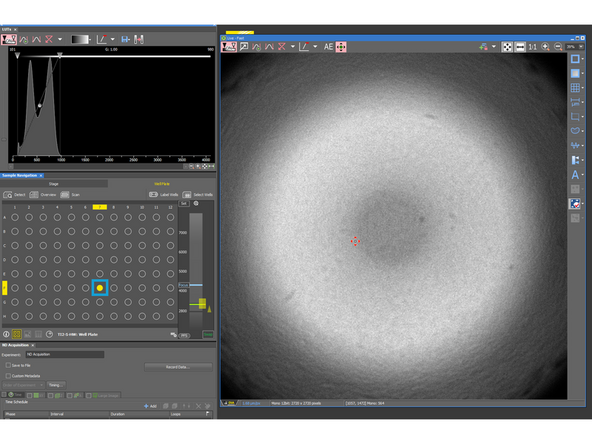
You can choose well plate type, from the database
-
If you don't find your well plate type, you can create your custom well-plate and fill the specifications.
-
-
-
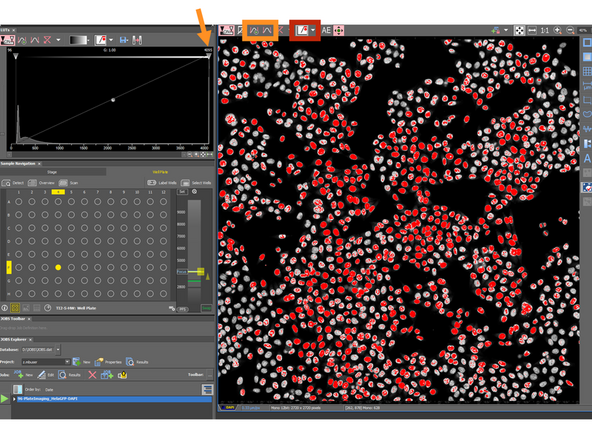
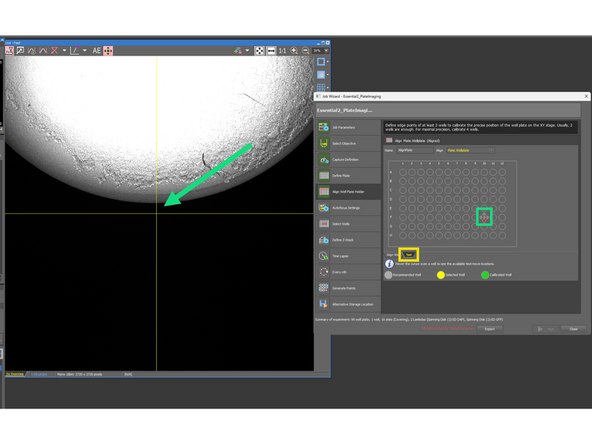
In this step, you need to define the center position of the 4 outer wells A1, A12, H1, H12
-
Use 4x magnification lens and choose 4xOverview - with this you can see nicely the whole well, and there is almost no risk of crashing the objective into the stage. (Reminder:change the objective only when you are positioned in the center of the stage)
-
Click on the well you want to calibrate, e.g. A12, (when is selected it turns yellow). Go live and position the stage (use joystick and focus) so you can determine the center of the well A12.
-
Then click Set. And repeat for the other 3 wells.
-
When all 4 a wells are calibrated, they turn green.
-
To test your alignment, go to the Test tab
-
You can select either the well center or one of the point on the rim of the well, and in the Live mode observe if the alignment went well.
-
Test at least few wells.
-
-
-
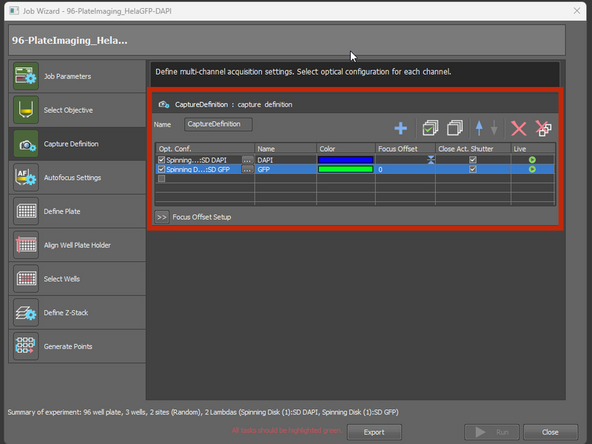
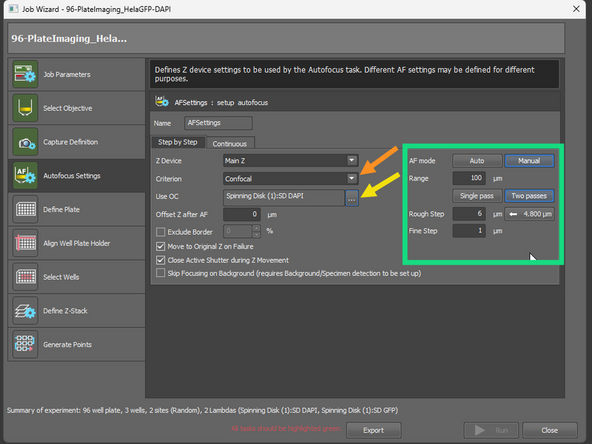
Select channels
-
Select settings for SW Autofocus: by default the microscope use the HW Autofocus (coverslip reflection). SW AF is used, only if the HW AF fails.
-
Choose the algorithm: Confocal, Fluorescence (=Widefield)
-
Choose corresponding OC. For confocal = Spinning Disk OC. For Fluorescence = Widefield OC.
-
Use channel with bright signal - usually nuclear stains
-
Fine tune the range, and step size
-
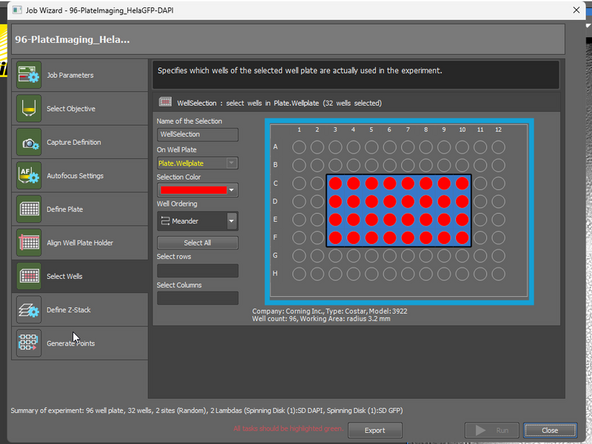
Choose the wells (when holding ctrl, you can choose more groups of wells)
-
-
-
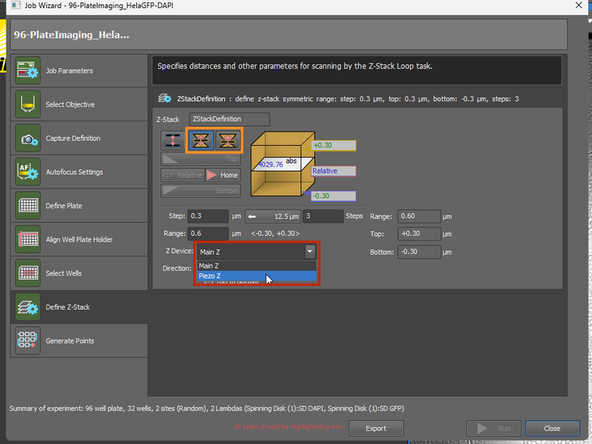
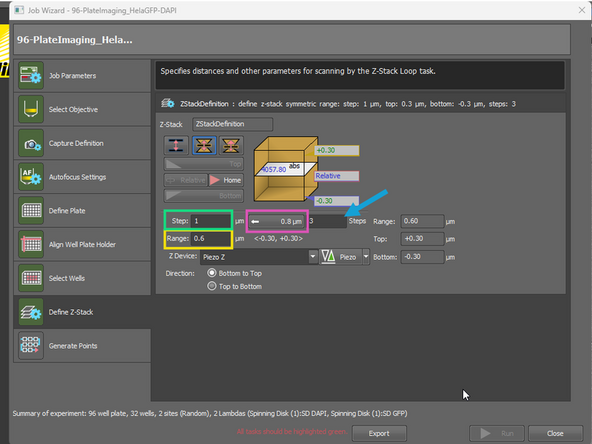
Choose Piezo Z (faster)
-
Choose Symmetric or Asymmetric mode
-
Change the range of Z-stack
-
The Step size (in μm).
-
Recommended step size for current objective. Note, that if you are currently still on 4x lens, the value is not correct and too large for e.g. 20x lens.
-
Based on that, the total number of Steps will be calculated. You can also type number of Step and the Step size will be adjusted.
-
-
-
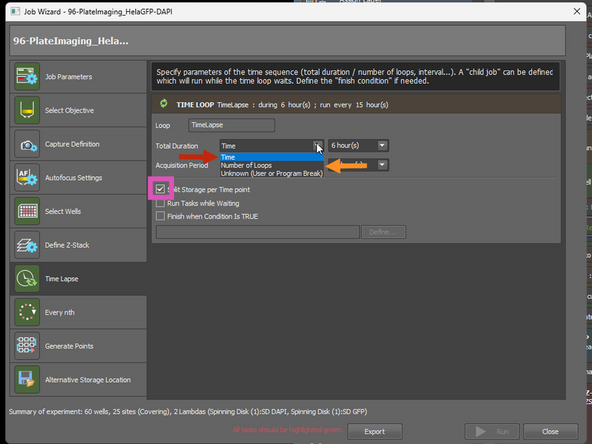
You can define the total duration of experiment:
-
Time: e.g. 6 hours
-
Number of Loops: e.g.: 24 n. of loops, loop every 15 min = 6 hours
-
Split storage per Time-point. This will generate smaller files, and in case of connectivity issues, the data will be written directly to the folder after each Time-Point.
-
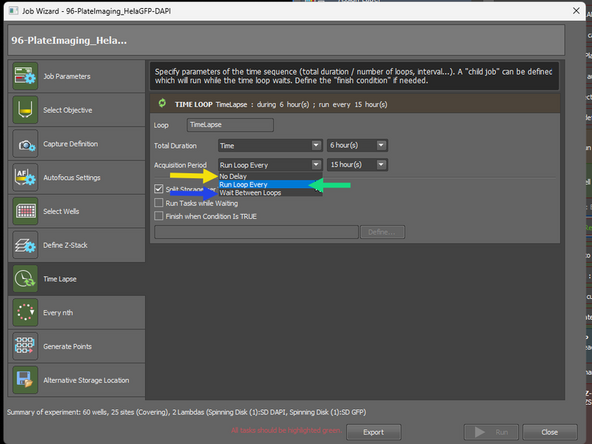
You can choose:
-
No delay
-
Run loop every: the interval countdown starts from the first position of the loop. Example: if the imaging task takes 5 minutes, the countdown still runs from the start, so after the last position only 25 minutes remain before the next loop starts (for a 30-min interval).
-
Wait between loops: the interval countdown starts after the last position of the loop has finished - Example: if the imaging task takes 5 minutes, the system waits the full 30 minutes after the last position before starting the next loop.
-
-
-
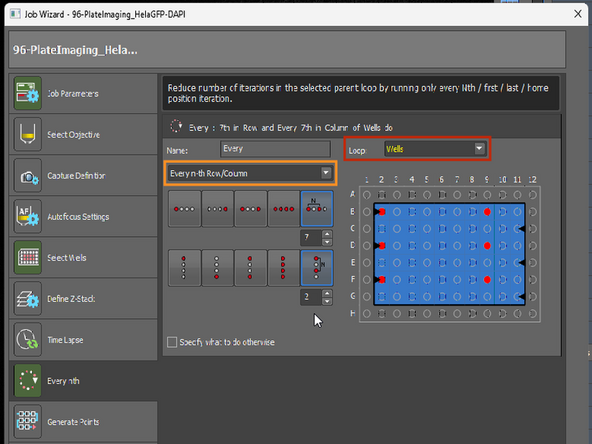
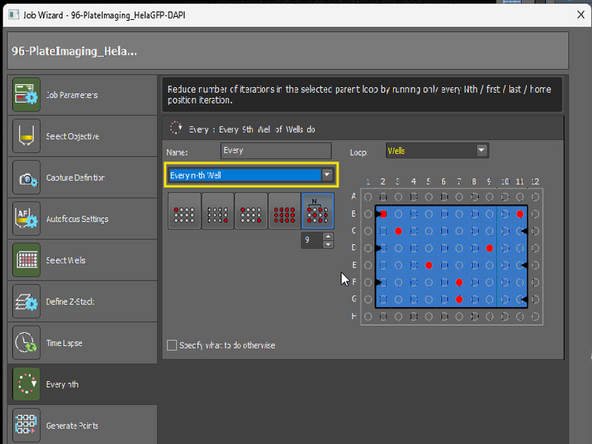
Required if WATER IMM objective is used:
-
In loop has to be Well
-
Define either by Row and Columns: first AND/OR last, EVERY, N-th
-
Or by every N-th Well
-
The number has to be tested by user, however it depends on a few factors:
-
Live-Cell or RT?: At 37°C the water evaporates faster
-
Travel range: Do you image only in the edge positions of the well plate? e.g. A1 and H12 or within a small group of 6 well (A1-3, B1-3)?
-
-
-
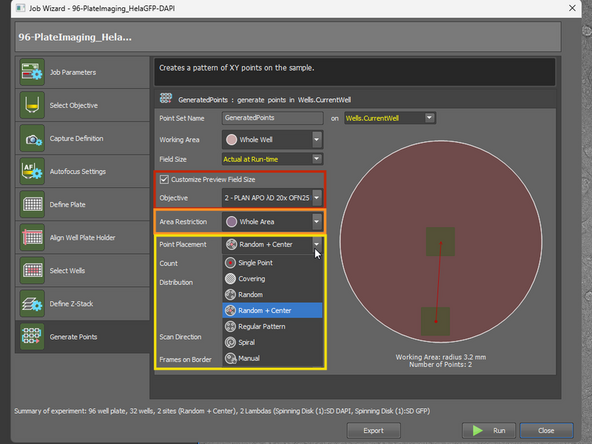
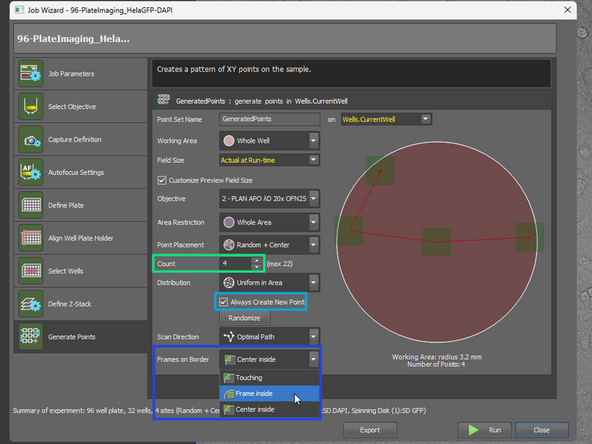
Preview, with selected objective
-
Area restriction: Example: if you want to acquire only in the middle, or only in the outside (e.g. various cell confluence in different parts of the well)
-
Point placement: Single point, Covering, Random, Random + Center, Regular pattern, Spiral, or Manual selection
-
Count: for Random you can select how many positions per well you want to have
-
If ticked, in each well a new set of randomized position will be generated
-
Choose whether you want to includes borders of well or not
-
-
-
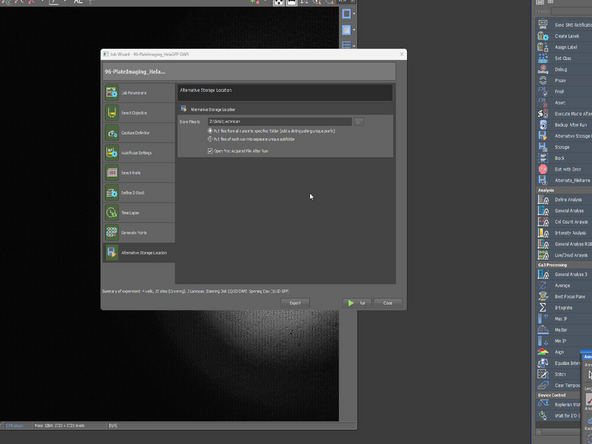
Define the filepath, to your data folder
-
-
-
Select the objective for imaging
-
If WI selected - initialize the WI dispenser
-
Focus on the sample
-
Turn on PFS
-
Finefocus
-
Position has to be in focus.
-
For well-plate imaging HW auto-focus (PFS) is used, which works nicely with well-plates designed for imaging as the microscope scan for reflection from the bottom of the plate. If you are using special plates, or the HW auto-focus simply does not work, consult that with ZMB staff.
-
-
-
If your plate alignment, focus strategy does not work, changes in the JOB are possible. Please consult it with ZMB staff.
-