Difficulty
Moderate
Steps
5
Time Required
00:15:00 - 00:25:00
- Nikon SD 4: Large image λXYZ 5 steps

In Progress
This guide is currently being written. Reload periodically to see the latest changes.
-
-
Optimize the settings of the OC (laser pw., exposure time, bit depth, ... )
-
Select the Large image option in ND acquisition
-
You can specify the dimension of the Tilescan image either in X*Y fields or by physical size (mm)
-
Select Show FOV on the Sample Navigation tab. If you choose the FOV option, it is useful for the estimation how many FOV you need for tilescan.
-
Select how much overlap you want to have.
-
If you see issue in the final stitched image, you may adjust this value and increase %
-
Go to live preview and position the objective approximately in the middle of the Tilescan (yellow cross). There is an example what would you cover with 5*5 FOV
-
You can change the order of the steps.
-
-
-
Go to Advanced options and select one of the strategy, then the Define button became active, so click on it
-
You can select, if to do the auto focus in discrete steps or in continuous mode. We do the example in Steps in Range:
-
Select the step size, and the range in which it should search for the focus. This will depend on the expected curvature or tilt of the tissue. (There is also option to do two passes strategy: 1. Coarse steps and 2. Fine steps)
-
You can preferably select Piezo, to be faster
-
You can either select current OC or you can choose different one.
-
It is important to select the Criterion, whether you use the OC of SD (=confocal) or WF(=Fluorescence) or Brightfield (=BF), so then you use the right algorithm
-
And Test current settings. And if they works for your sample, Save and Close.
-
The auto-focus strategy works well for the 2D images. However if you want to do also Z-stack, we do not recommended this strategy.
-
-
-
Refer to guide n.3, if you need to remind how to setup a Z-stack and let´s focus on explaining the Order of the experiment
-
Tilescan first in CH1 > Tilescan in CH2 > then move in Z
-
CH1 will do Tilescan and Z > CH2 Tilescan and Z
-
Tilescan first, changing channel every tile > then move in Z
-
Z-stack first, changing channel every plane > then move in XY
-
(Full Z-stack in CH1 > Full Z-stack in CH2 > then it moves in XY) The microscope scans the Z-stack first in one channel, then it acquire in the second channel, then moves to the next XY tile.
-
Recommended: Good compromise of precision and speed.
-
-
-
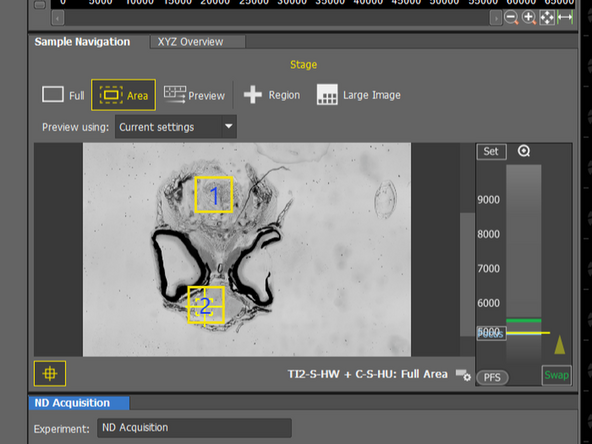
Let's acquire two points, as indicated in the Sample Navigation tab.
-
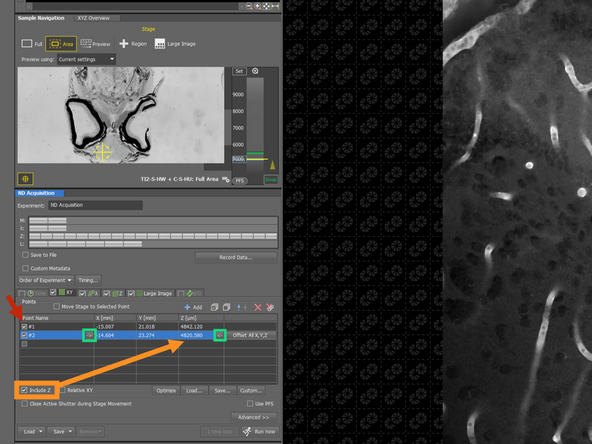
Move with the stage to the area, where you want to acquire image and Add the point there in the ND Acquisition tab
-
You can rename the points (instead of just #1, #2) for better orientation later.
-
If your sample is not flat (e.g., curved tissue or tilted coverslip), you may also want to define the Z-position individually for each point to ensure proper focus.
-
Need to make changes? Click on the arrow next to a point to update its position or Z-focus.
-
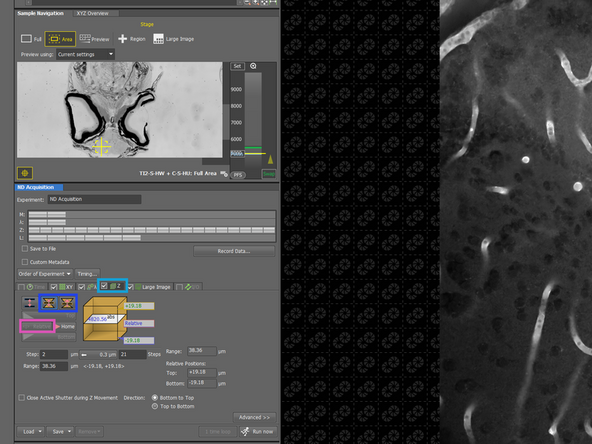
If you need Z-stack:
-
Use either Symmetric or Asymmetric mode depending on how you want the range to be distributed around the focus point.
-
Choose Relative to define the Z-stack relative to the center position you specified in the XY Multipoints tab.
-
-
-
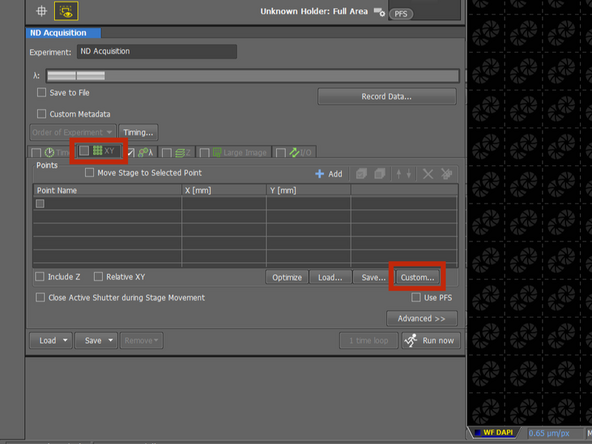
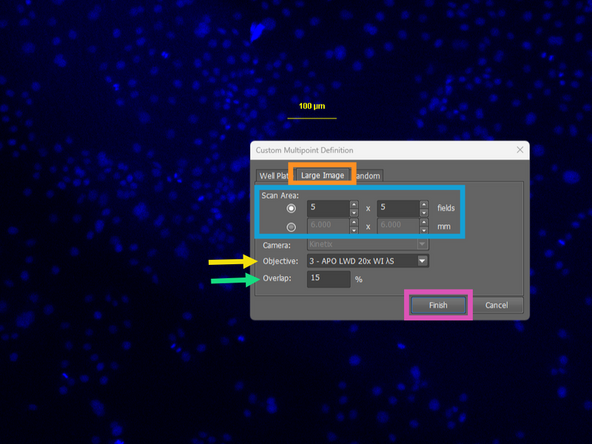
Select XY tab and Custom
-
Select Large Image
-
Choose the Covered area
-
Choose which objective you will use for imaging, so it can calculate the offset of each position
-
Select overlap - minimum is 1%
-
Confirm
-
All the positions are then listed in the XY tab
-