-
-
Lasers and main power supply
-
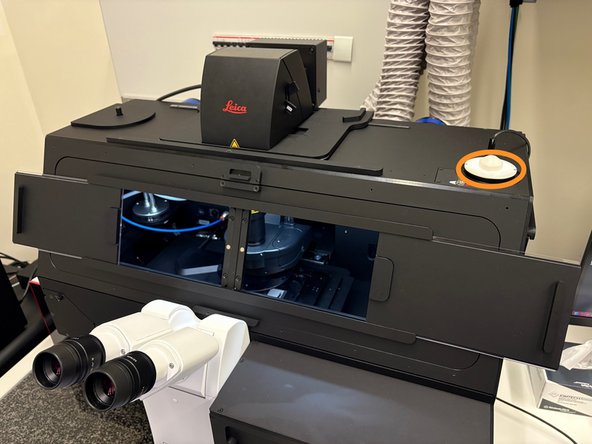
Microscope stand with live cell incubation box
-
Control-PC
-
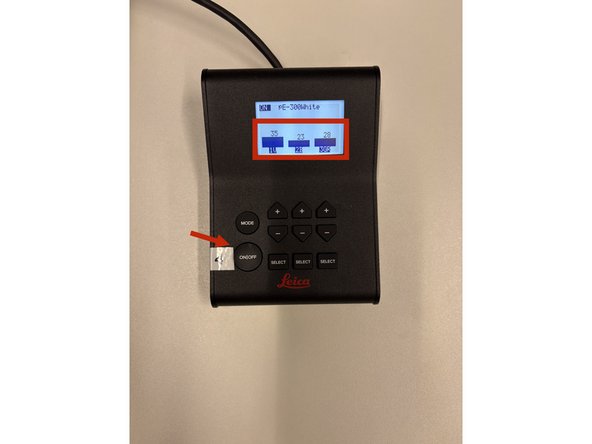
Controller LED for eyepiece
-
-
-
Switch on the following components to use the microscope.
-
1: Control PC
-
2: Microscope power supply
-
3: Laser power supply
-
4: Eyepiece lightsource (optional)
-
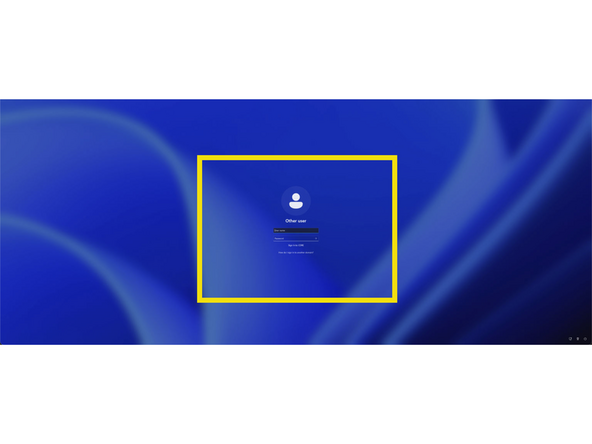
press ctrl+alt+del, to log in, when the computer is booted
-
-
-
log in with your zmb core account
-
start LASX
-
-
-
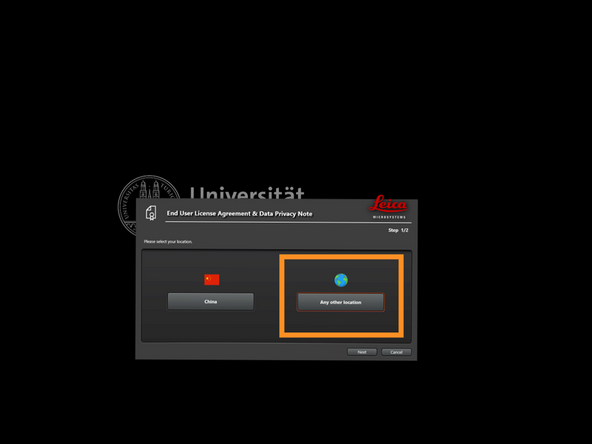
choose any other country to use all software functions
-
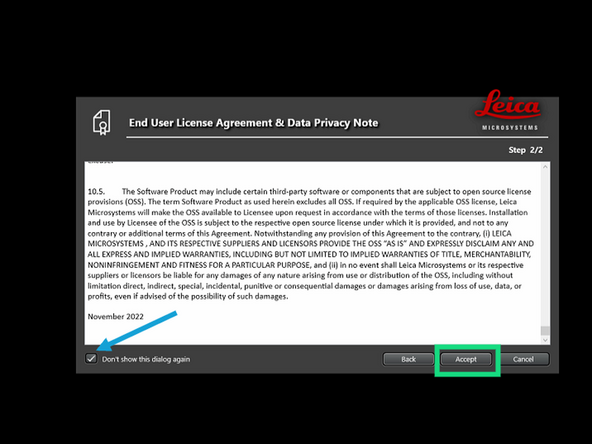
checkmark here to save setting
-
agree to continue
-
-
-
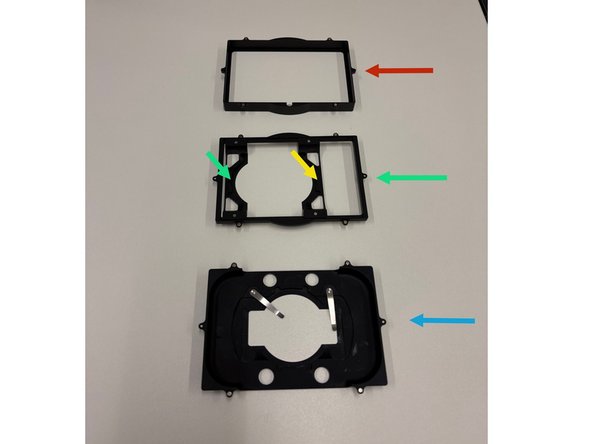
Choose from the available sample holders.
-
Well-plate holder
-
Flexible slide/dish holder
-
Fixed part
-
Fixable slide holder
-
XY stage movement
-
Toggle between coarse movement "XY Fast" and slow movement "XY Precise".
-
When mounting the sample, turn on the light in the environmental box by rotating the knob
-
-
-
Make sure that these blocks are fully colored. If they are striped - press ON/OFF button again
-
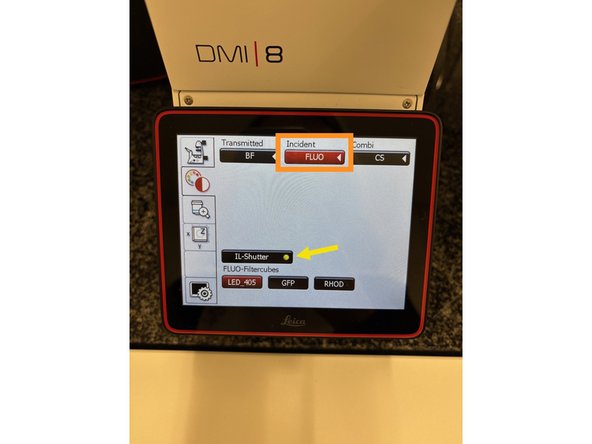
Click "FLUO" and choose an appropriate "FLUO-Filtercube" : e.g. "GFP".
-
Open the "IL -Shutter" (if activated the dot is yellow).
-
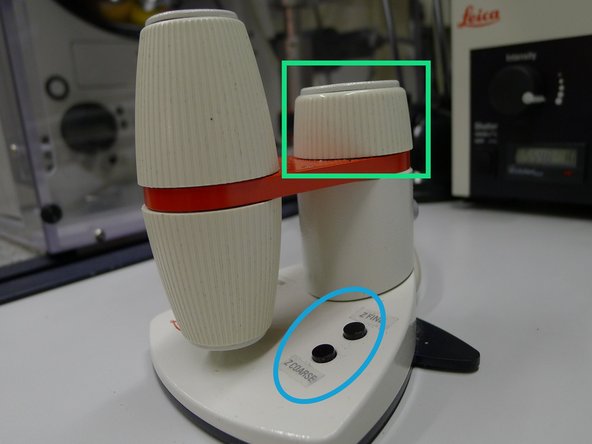
Look through the oculars and focus your sample by using:
-
the z-wheel on the external controller.
-
Moving sample upwards (towards objectives) turn z-wheels clockwise/away from you. Moving sample downwards (away from objectives) turn z-wheels counter-clockwise/towards you.
-
Toggle between "Z FINE" and "Z COARSE"
-
-
-
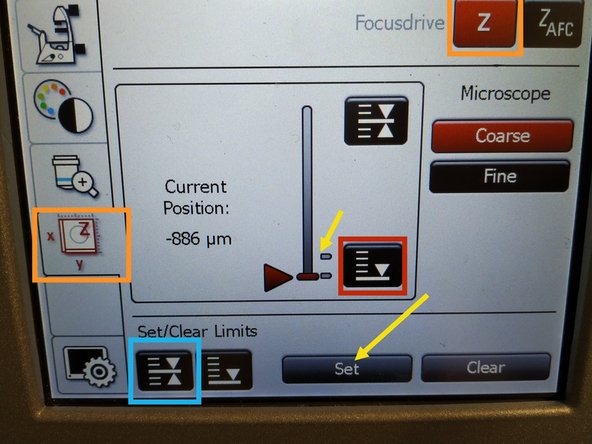
The storage of the focal plane is helpful in order to find the focus back if the sample or objective will be changed.
-
To save your current focus position select the "xyz tab" and the "Focusdrive Z" on the touchscreen of the microscope.
-
Click the "Focus-Position" button.
-
Press "Set" and the line will be updated
-
Press the "Lower Limit" button in order to move down (for safe change of the objective or the sample).
-
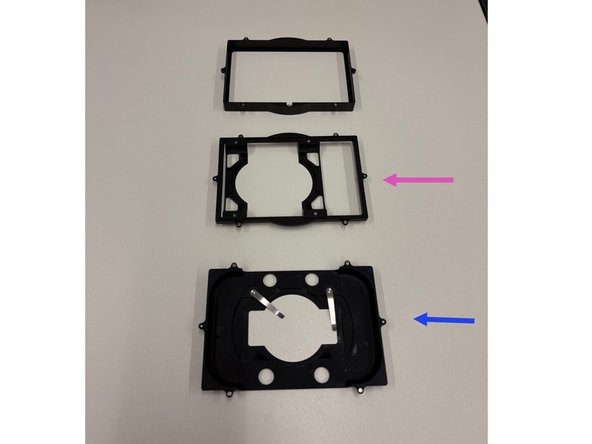
For different sample holder you will have different Focus-Position Level!
-
The Adjustable/Flexible one, has the focus significantly higher then the Fixable one
-
-
-
Lower the stage. Toggle within the software to the objective of choice.
-
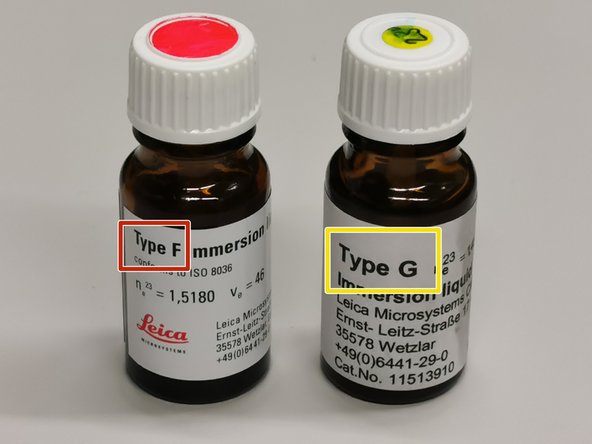
Depending on the objective different immersion media will be used. Apply directly on the sample.
-
Oil objectives: "Type-F" immersion liquid.
-
"Glycerin" objectives: "Type-G" immersion liquid .
-
"Water" objectives: ddH2O (always use fresh).
-
Mount your sample again and press the "Focus-Position" button.
-
-
-
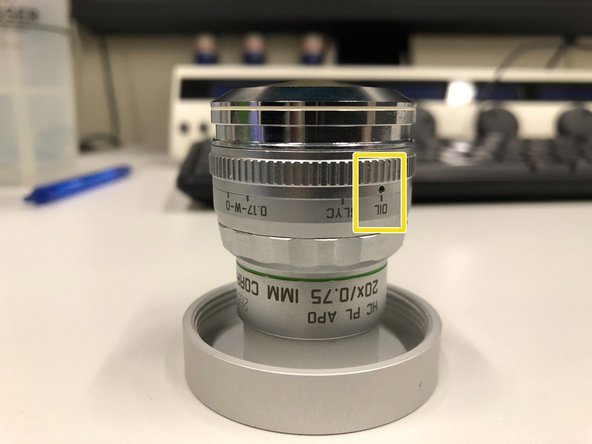
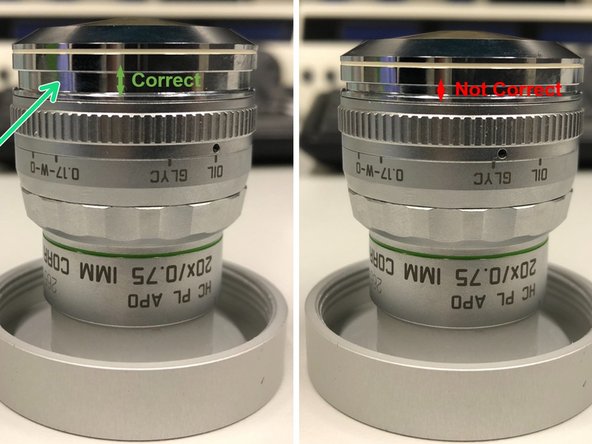
For optimal imaging performance on some objectives the correction collar has to be adjusted.
-
20x IMM (multi-immersion - Oil, Glycerin or Water) needs to be set to the corresponding immersion media ("OIL", "GLYC" or "0.17-W" (with cover glass) or "W-0" (without cover glass)).
-
Make sure that the cap of the spring-loaded front lens is released (working position).
-
DO NOT remove the objectives for adjustment. They can be also accessed on the system.
-