Introduction
In this guide you learn how to start-up, mount a sample, and find the focus using the Leica SP8 upright MP DIVE FALCON microscope in confocal mode.
-
-
Only remove the front part of the box when needed for your experimental setup or when exchanging objectives (explained here).
-
The 25x/1.00 W objective is the default on this instrument. If you want to change it, please change it back at the end of your session.
-
On the front switch you can turn on and off the internal lights and choose the light intensity.
-
When turned on, the light will be automatically engaged when opening the viewing window. Be extra careful with the detectors!
-
Before removing the front part be sure to perform the following steps inside the box:
-
unplug the power connector.
-
carefully detach the magnetic cable holders.
-
do not detach the non magnetic cable holders.
-
-
-
For removing the front part of the box open the 4 holding wheels.
-
Open the side door.
-
Hold the box above the detector as well as on the right corner and horizontally slide it away from the microscope.
-
The interior of this box is quite cramped. Be sure to very carefully place the objectives as well as your equipment.
-
-
-
The default objective on this instrument is the 25x/1.0 W motCORR. However, it is optimized for IR-imaging and has bad performance for 400nm (e.g. DAPI). Therefore, you might consider changing to the objective revolver.
-
To change to the objective revolver, please check out our guide.
-
-
-
The correct turn on sequence is important for correct initialization of the microscope.
-
Before you turn on the system, please make sure that the correct objective is mounted (turret or single MP objective).
-
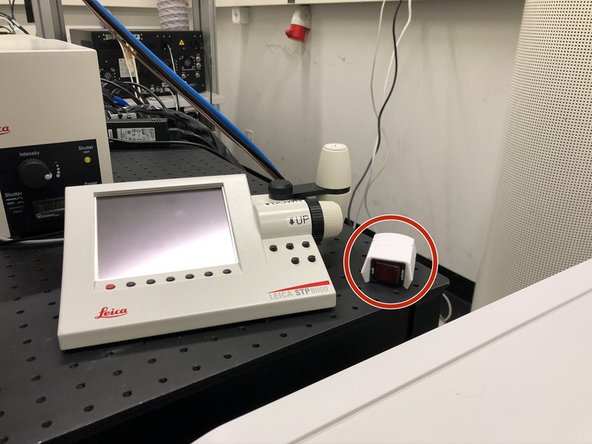
Turn on the remote switch and wait for 10s.
-
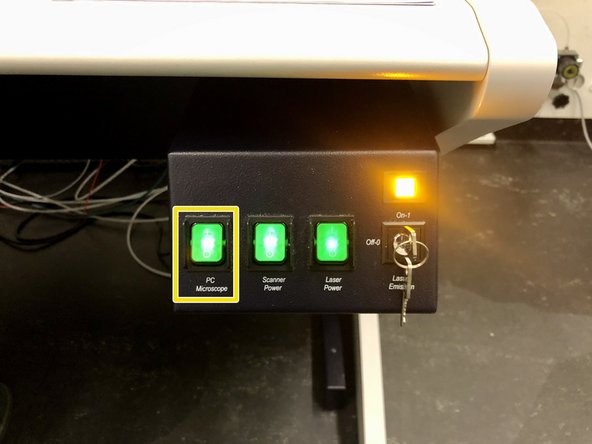
Switch on ONLY the PC button.
-
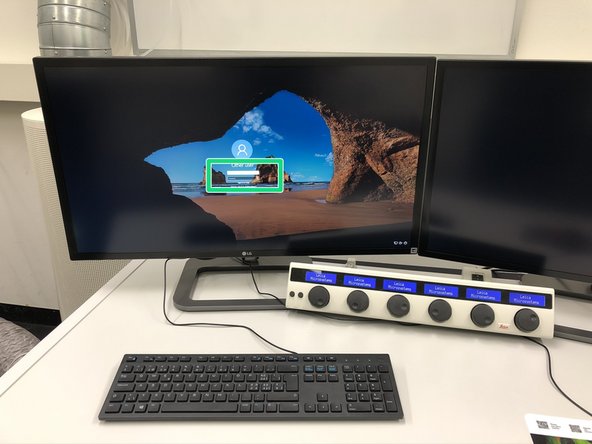
Log in and wait until the feedback form appears.
-
-
-
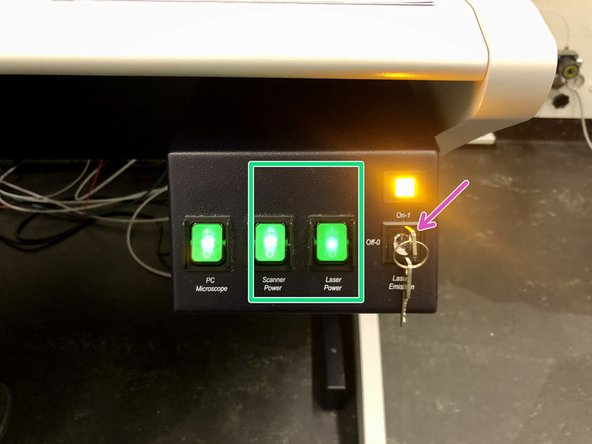
Switch on the “Scanner Power” and “Laser Power” buttons.
-
Switch the laser emission key to “On”
-
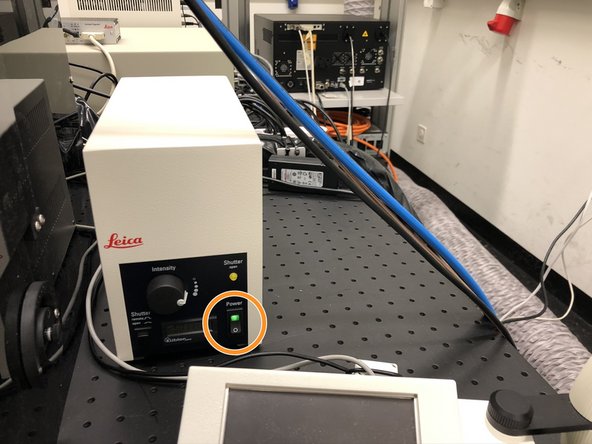
If you need widefield fluorescence (GFP filter only), turn on the fluorescence lamp.
-
-
-
Make sure the WLL is ready (green lights).
-
Go to the back of the room and make sure the scanner is ready (green light).
-
If either WLL or scanner are not ready within ~2min, switch off the laser emission key, "Scanner Power" and "Laser Power" (see previous step). Wait for 10s and switch them on again. If these steps still don't solve the problem, do a full restart.
-
-
-
Before starting the software be sure that the sample stage is safely away from the objective. Otherwise the stage might fatally crash into the objective during stage initialization.
-
To lower the stage open and lower the holding ring.
-
Next open the stage handle and move it away from the objective.
-
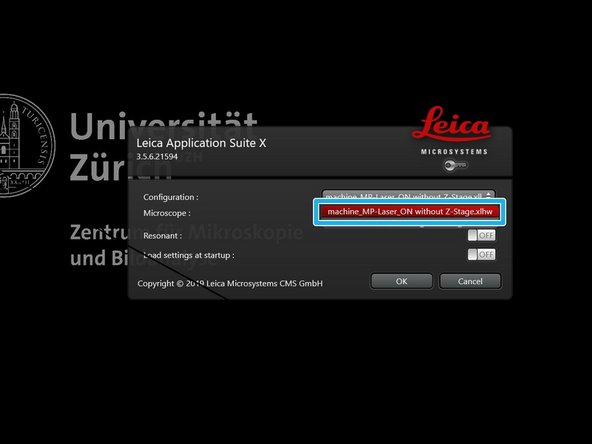
Start the "LAS X" software using the desktop icon.
-
Select the "machine-confocal" hardware profile and press "OK".
-
If you'd like to use the "Navigator" option, do not forget to initialize the stage.
-
-
-
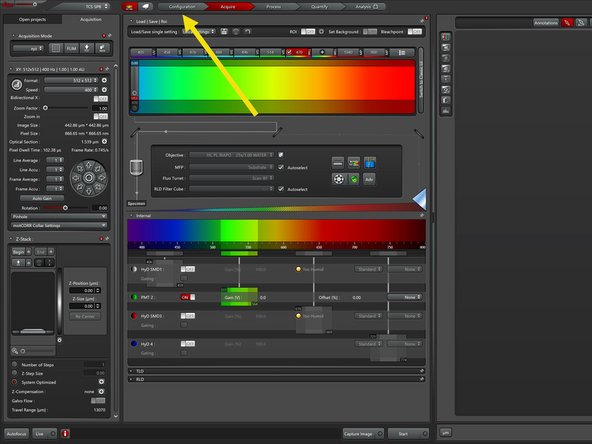
In the main window go to "Configuration".
-
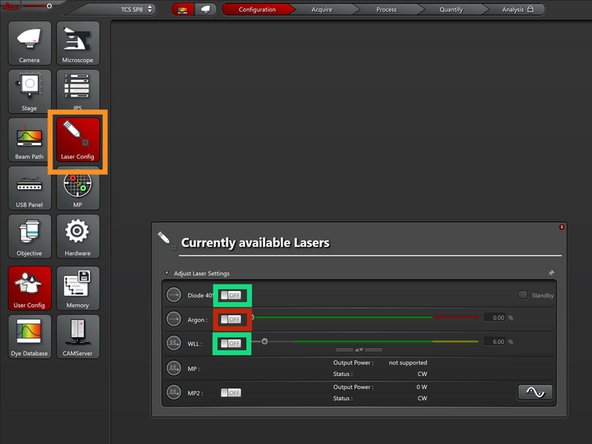
In "Laser Config" turn on the "Diode 405" laser and the "WLL".
-
If you need higher laser powers (e.g. for FRAP), turn on the "Argon" lasers.
-
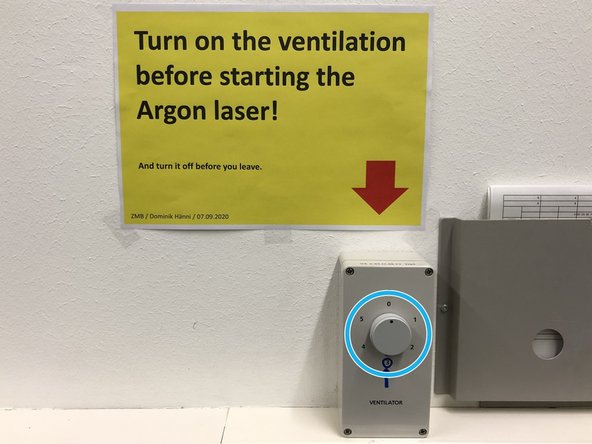
If you use the Argon laser, be sure to turn on the ventilation (wall mounted switch, position 3) before starting the laser!
-
-
-
Mount a sample on the sample stage. Adjust the height of the stage if needed (The sample should be 5-10mm away from the front lens).
-
Use the controller to position your sample in
-
x/y.
-
z coarse.
-
z fine.
-
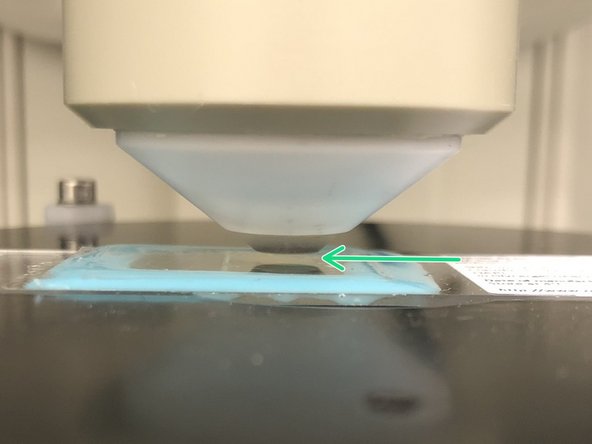
In order not to crash into the specimen when searching the focus, visually approach the sample as close as you can still see an airgap between the lens and the sample.
-
-
-
Add ddH20 for immersion. Long working distance objectives need plenty of immersion water.
-
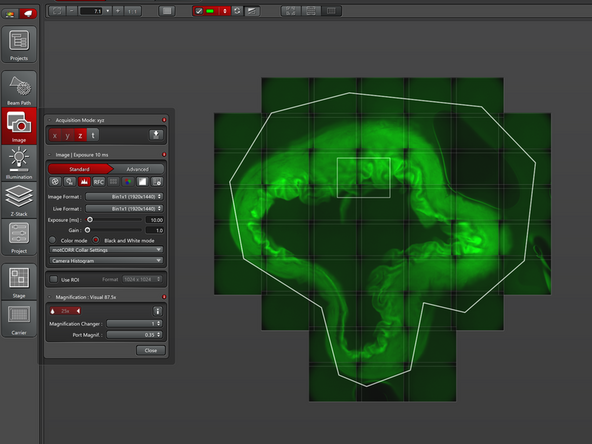
Almost all biological samples show a green auto fluorescence.
-
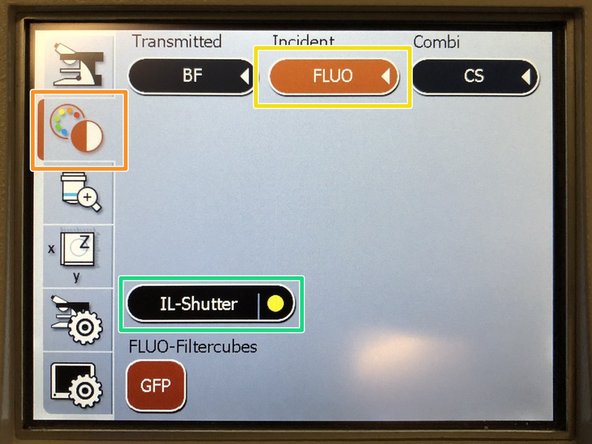
On the external controller press the filter selection.
-
Press "FLUO".
-
Engage the "IL-Shutter".
-
Look trough the ocular and slowly move the objective "Up" until you can see that the green signal increases and you can see some structures.
-
If you do not find the focus, try again by first approaching the sample by looking at the objective and not trough the ocular.
-
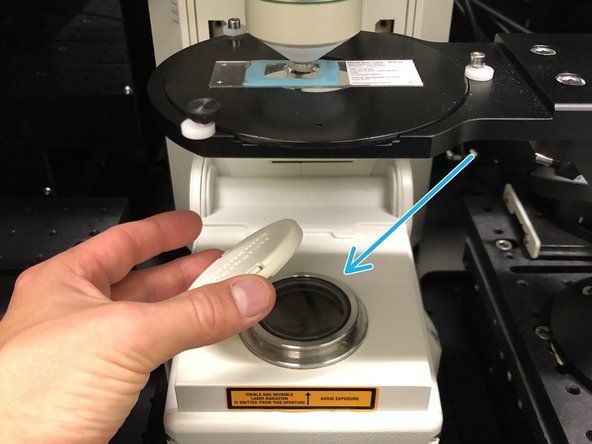
If you want to use transmission illumination for focusing on your sample, remove the protection cap before turning on the transmission light.
-
-
-
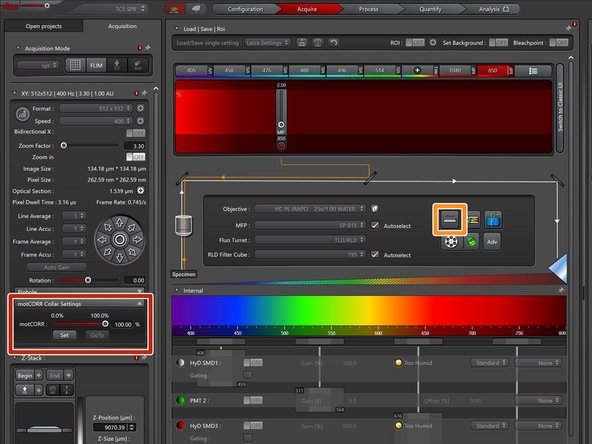
Proper adjustment of the objective correction collar is crucial for getting good imaging performance in multiphoton microscopy. For simple adjustments this microscope is outfitted with motorized collar rings.
-
Open the "motCorr" settings.
-
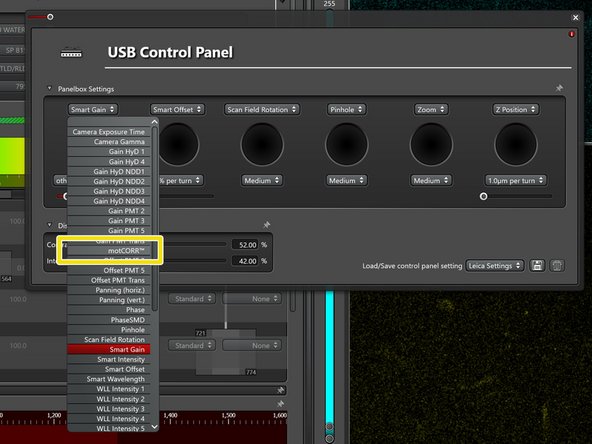
Open the settings for the external microscope controller (on the desk).
-
Add the "motCorr" controls to the external controller for simple adjustments.
-
Turn off auto contrast adjustment to be able to see absolute differences in the image intensity.
-
Go live and adjust the motCorr until the image is optimally bright and sharp.
-
Repeat this step whenever you put a new sample on the microscope.
-
-
-
Please visit our guide on how to use the camera on the SP8 upright here.
-