Introduction
In this guide of the Center for Microscopy and Image Analysis we show how to start up and mount your sample on the Leica SP8 inverse confocal laser scanning microscope located in Schlieren.
Please find detailed information about the system setup here.
-
-
On the right hand side of the table (main switch board):
-
Switch ON the "PC /Microscope", "Scanner Power" and "Laser Power".New line.
-
Turn the "Laser Emission" key to "On-1".
-
Switch ON the fluorescence lamp.
-
You can vary lamp intensity by turning the wheel
-
Ensure "Shutter" button is pressed and "Shutter open" control light is on
-
-
-
Sign-in with your ZMB core credentials.
-
-
-
Start the “LAS X” software using the Desktop link.
-
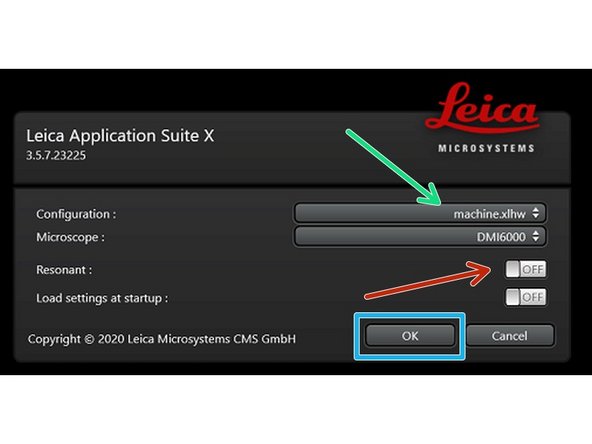
Select "machine.xlhw" as configuration (only necessary when starting software for the first time)
-
Optional: enable the "Resonant Scanner" (this scan mode allows faster imaging but is not well suited for recordings of dim signals).
-
Click "OK"
-
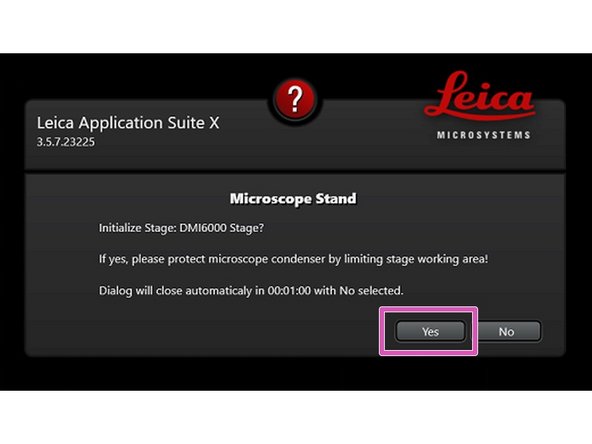
Ensure that no sample is mounted on the stage and click "YES" when prompted to initialize the stage.
-
-
-
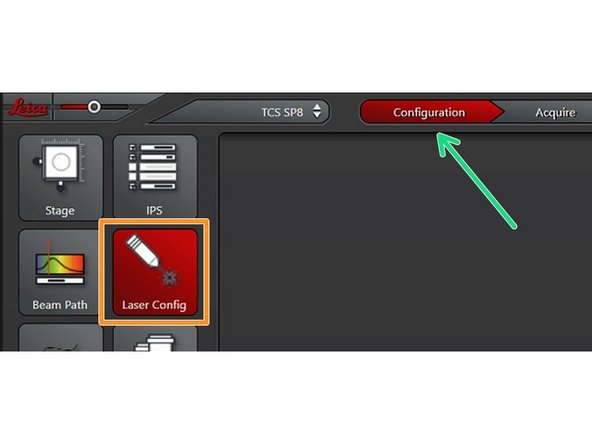
Navigate to the "Configuration" tab
-
Select the "Laser Config"
-
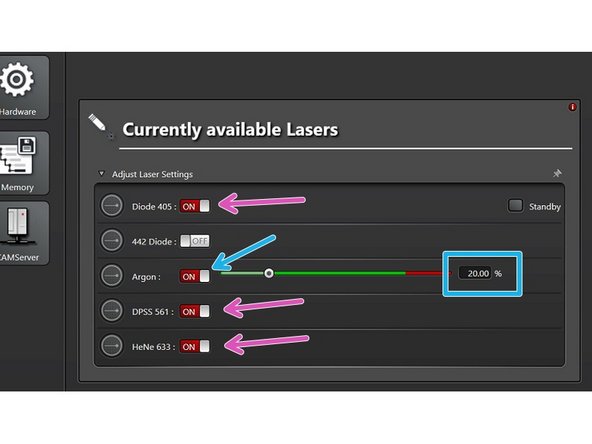
Only switch "ON" the lasers you will need for your experiment!
-
If needed "switch ON" Argon laser and set power to 20%
-
Change back to "Acquire" tab
-
-
-
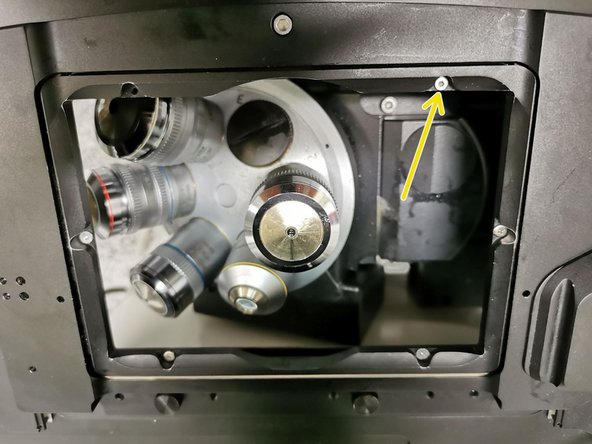
Lower the objective turret by pressing the "Z" downwards button on the right side of the microscope.
-
This step avoids possible collision during placing of inserts and/or samples.
-
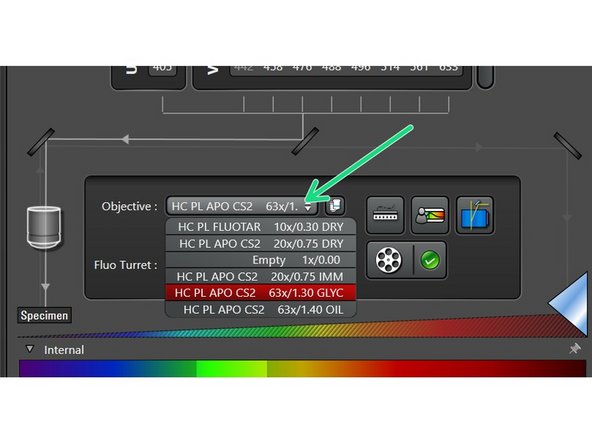
Select your objective of interest from the drop down menu.
-
It is recommended to start with the 10x dry objective for simplified focusing.
-
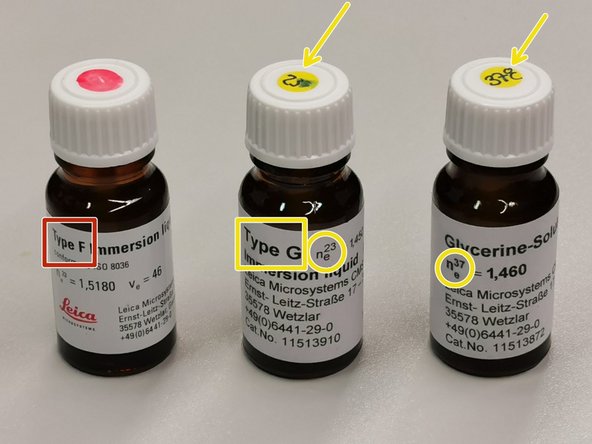
Depending on the objective different immersion media have to be used. Apply directly on the sample not the objective!
-
Oil objectives: "Type-F" immersion liquid.
-
Glycerin objectives: either"Type-G-n23" immersion liquid (for RT measurements) or "Glycerin-n37" immersion liquid (for measurements at 37°C).''
-
-
-
Push back the condenser arm.
-
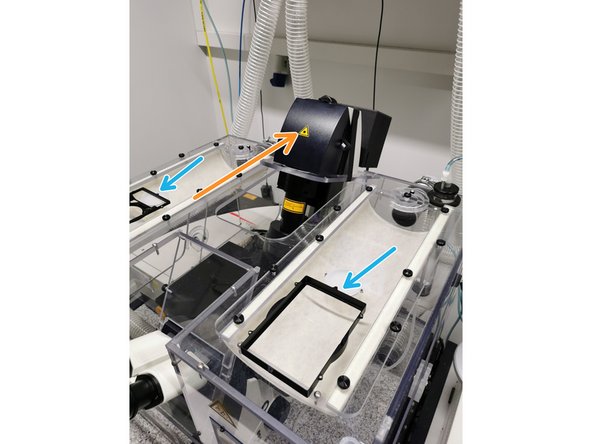
You can find different stage inserts on top of the incubator box.
-
The stage inserts are hold in place by small magnets. You can remove an insert by carefully pulling against the resistance.
-
Empty stage ready to load a new insert (screws visible).
-
Ensure that not the well plate holder is loaded when placing a stage insert.
-
-
-
Add a drop of immersion liquid on the coverslip when using an immersion objective (do not "drown" the complete coverslip!).
-
Place your sample with the coverslip facing down and fix it with the two clamps .
-
For beginners we strongly recommend to fix only one clamp to not break your sample/the objective when missing the focus.
-
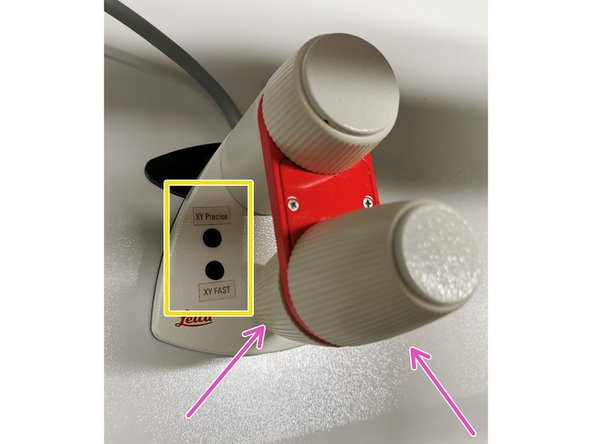
Move your sample over the objective with the help of the external xy controller (two wheels above each other).
-
Toggle between coarse movement "XY Fast" and slow movement "XY Precise".
-
-
-
Select a filter which allows you to bring your sample in focus (preferably a bright signal). You should hear a click when the filter is loaded.
-
Press the "Shutter" button. You should now see some light coming out of the objective (GFP, N2.1 should be clearly visible, DAPI is difficult to see).
-
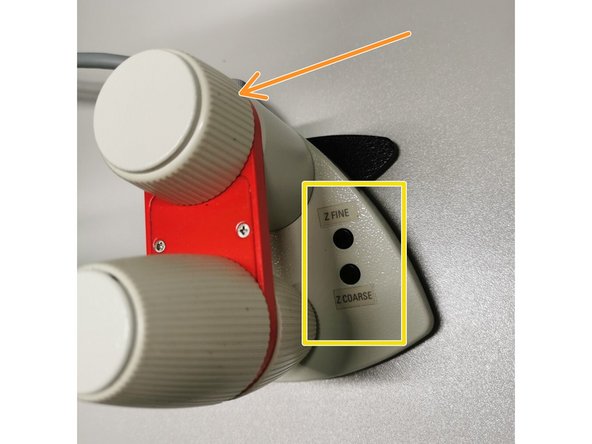
Look into the ocular and move the external focus wheel until your sample gets in focus.
-
Turning the z-wheel clockwise = moving objectives upwards (towards sample).
-
On the controller toggle between "Z FINE" and "Z COARSE" for changing the focusing speed.
-
Z COARSE mode moves very fast and one can easily miss the focus. Double check from time to time whether you already lifting your sample!
-
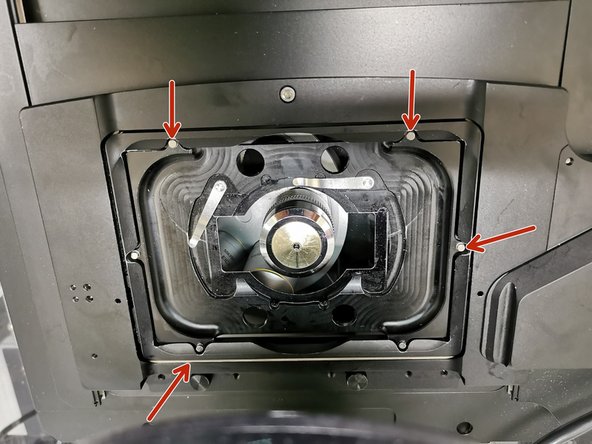
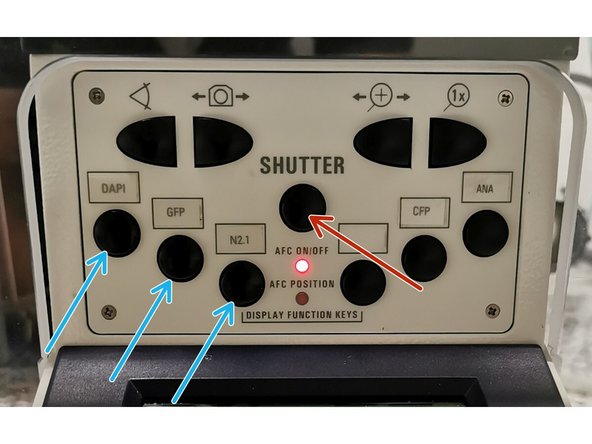
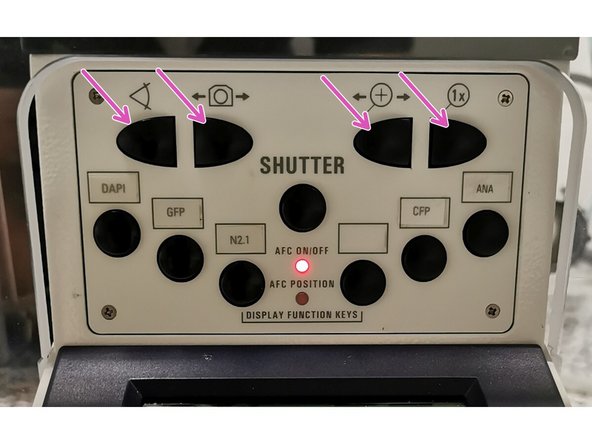
If you cannot see anything at all it may be that a filter got stuck during the microscope startup.
-
Usually, this can be fixed by pressing the upper four buttons one after the other from left to right. Finally, press again the very left upper button and recheck if you can find the focus.
-
-
-
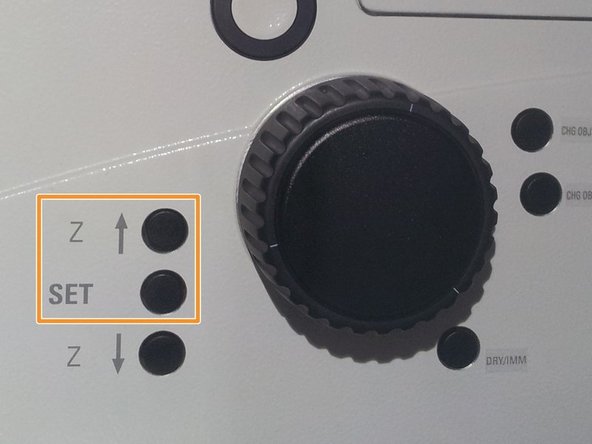
Storing the focus position can be helpful to find back the focus if the sample or objective has to be changed.
-
Jointly press the "SET" and upper " Z" button (right side of the microscope stand) to set the current z-position to zero.
-
''If a focus position was saved by a previous user, you have to repeat that "twice" to delete first the old saved position.
-
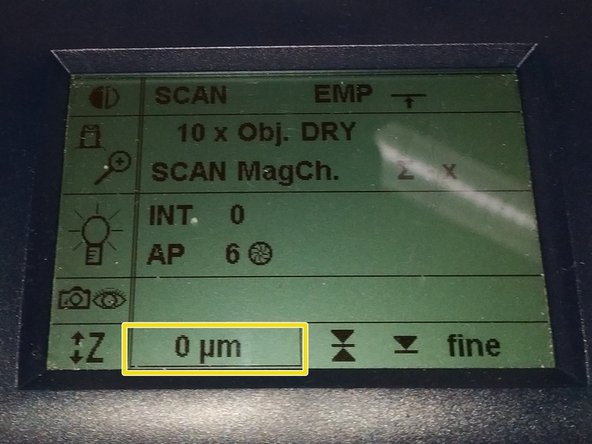
The "Z"-position on the display should now show "0 um".
-
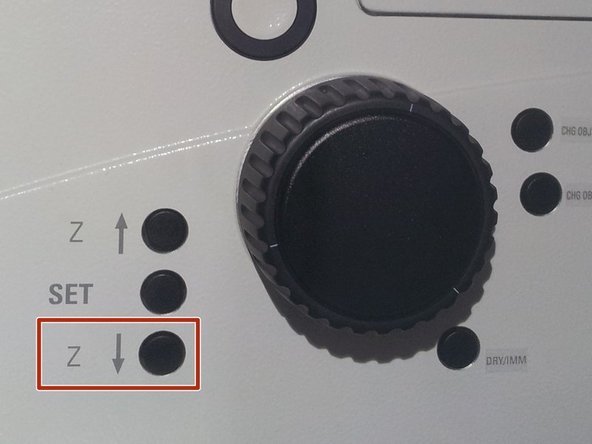
Press the lower "Z" to move down (for safe change of the objective or the sample).
-
-
-
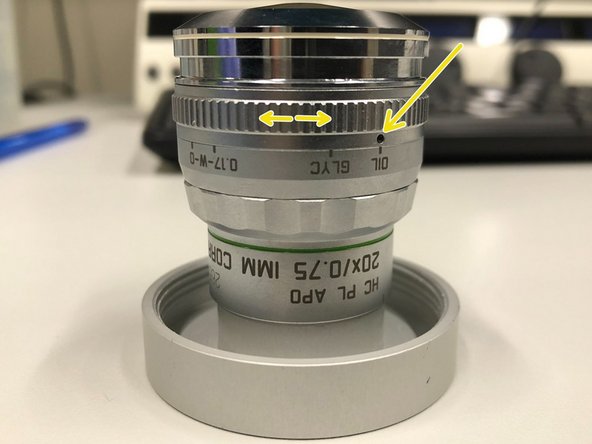
For optimal imaging performance of the 20x objectives the correction collar has to be adjusted.
-
20x IMM (multi-immersion - Oil, Glycerin or Water) needs to be set to the corresponding immersion media ("OIL", "GLYC" or "0.17-W" (with cover glass) or "W-0" (without cover glass)).
-
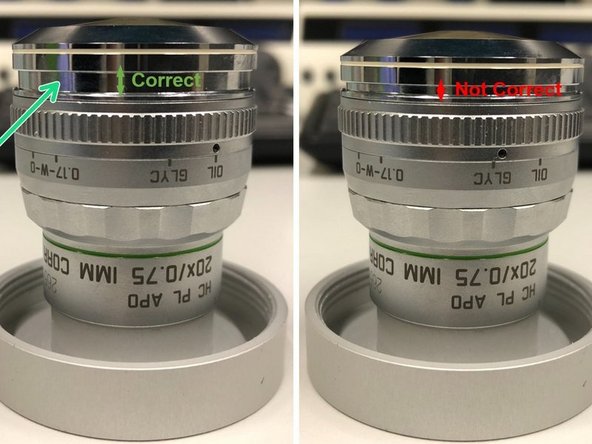
Ensure that the top part of the spring-loaded front lens is released (working position). Mandatory for all immersion objectives (20x IMM, 63x glycerin, 63x oil).
-