Introduction
In mid 2020 Leica upgraded the upright FLIM multiphoton microscope which was previously located in room Y42-H-91.
- This guide will introduce previously trained users to the most important changes and also explains the relevant aspects for operating the upgraded microscope without the need for an additional hands-on training.
- The Leica FLIM implementation is quite a bit different from the previously used Picoquant solution. For users who have been using FLIM on this microscope a quick hands-on explanation by the ZMB might be required.
The most relevant changes are:
- New location (Now in room Y42-H-77).
- New, spectrally flexible detectors for multiphoton imaging (DIVE).
- New Leica FALCON FLIM instead of Picoquant FLIM (The additional Picoquant FLIM control computer is gone).
- New multiphoton laser routing with auto alignment functionality.
- New Vario beam expanders for adjusting the IR beam diameter and divergence for optimal deep tissue imaging performance.
- New Ludin light insulation box.
-
-
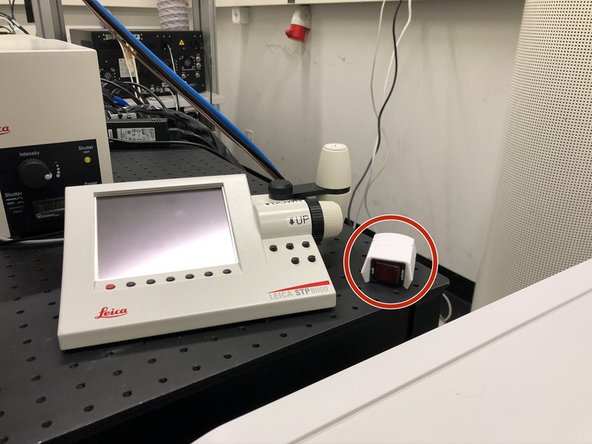
Due to the new detector geometry, the microscope is outfitted with a new light insulation box. Only remove the front part of the box when absolutely needed.
-
On the front switch you can turn on and off the internal lights and choose the light intensity.
-
When turned on, the light will be automatically engaged when opening the viewing window. Be extra careful with the detectors!
-
Before removing the front part be sure to perform the following steps inside the box:
-
unplug the power connector.
-
carefully detach the magnetic cable holders.
-
do not detach the non magnetic cable holders.
-
-
-
For removing the front part of the box open the 4 holding wheels.
-
Open the side door.
-
Hold the box above the detector as well as on the right corner and horizontally slide it away from the microscope.
-
The interior of the new box is much more cramped than the old one. Be sure to very carefully place the objectives as well as your equipment.
-
-
-
Correct turn on sequence is important for correct initialization of the microscope.
-
Turn on the remote switch and wait for 10s.
-
If you need widefield fluorescence (GFP filter only), turn on the fluorescence lamp.
-
Turn on the main switches.
-
Switch the laser emission key to "On".
-
-
-
Engaging the argon laser without turning on the ventilation/cooling will lead to thermal destruction.
-
When using the Argon laser lines for single photon excitation, be sure to turn on the ventilation first.
-
Activate the ventilation by turning the wall mounted controller to position 3.
-
After shutting down the microscope, be sure to also turn of the ventilation again.
-
-
-
The spectral detectors for multiphoton imaging can be found at the same place where the NDD/RLD detectors have been before.
-
Only engage them when using multiphoton excitation and when the sample is in the dark.
-
Always turn them off before manipulating samples or turning on any lights.
-
We recommend to use them in photon counting mode.
-
Adjust the spectral detection windows by the sliders.
-
If you want to know the spectral characteristics of the previously used fixed filters, check out the instrument webpage.
-
-
-
For optimal imaging performance, this system is outfitted with automated excitation beam alignment. Checking the status and performing those alignments is crucial for getting optimal performance.
-
Only run beam alignment when the multiphoton laser lines, shutters and the WLL laser are engaged!
-
Go to "Configuration".
-
Go to "MP" and click the "+" button to start the coarse beam alignment.
-
Go back to the main window and open the "Beam Routing" controls by clicking "Adv". Use the "Beam Catcher" buttons to further align the IR beams:
-
1040nm line.
-
Tunable line.
-
-
-
For increased deep tissue imaging performance in multiphoton imaging, the excitation beam diameter and therefore the NA of the objective can be reduced. This can increase the penetration depth by compromising on the optimal resolution of the objective.
-
Click on "Adv" in the main window to open the "Beam routing" settings.
-
By clicking on the "VBE" buttons you can open the controls for the vario beam expanders.
-
Use the "Live" view together with the sliders to adjust the vario beam expanders and to decide if there is an advantage in your imaging scenario.
-
By a second lens group in the vario beam expanders, its also possible to correct for chromatic shifts between the 1040nm and the tunable IR laser line. Unless you know what you are doing, we do not recommend to play with those settings.
-
Be sure to re-run the beam catcher routine after playing around with the vario beam expander (repeat step 6).
-
-
-
The FLIM functionality can now directly be invoked in the "Acquisition Mode".
-
The FLIM software is automatically started and all FLIM related functions can be accessed on the second screen.
-
The trigger diode for multiphoton FLIM is built into the 1040nm fixed line. Be sure to engage and open the shutters for both lines before performing multiphoton FLIM experiments.
-
If you want to know more about the FLIM functionality and how it can be used in your research, please contact d.haenni@zmb.uzh.ch.
-
-
-
In the old microscope configuration we had a 440/20nm filter for SHG imaging. This means that previously the optimal wavelength for SHG excitation was at 880nm.
-
On the DIVE detector we recommend a detection bandwidth of 20-30nm for efficient SHG signal detection with minimal auto-fluorescence contributions.
-
Due to complex spectral response characteristics of SHG signals we recommend to assess and optimize the SHG excitation wavelength for new samples.
-