
Introduction
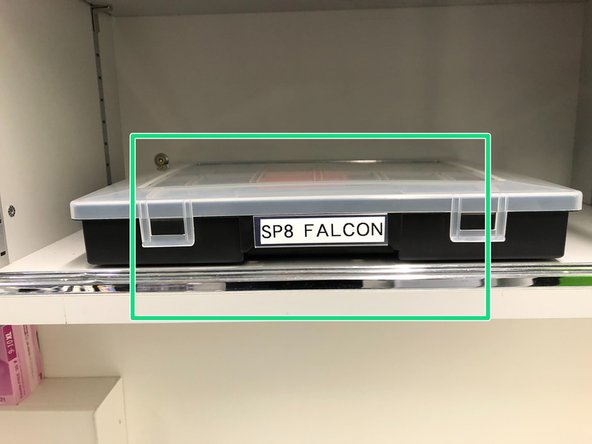
How to start up and mount your first sample on the Leica SP8 Falcon confocal laser scanning microscope located at the Irchel Campus, room Y42-H-81.
Please find detailed information about the system setup here.
-
-
Switch on the red button (underneath the table on the left).
-
Turns on PC, monitors and fluorescence lamp.
-
On the right side of the table:
-
Switch ON the "Microscope", "Scanner Power" and "Laser Power" switches.
-
Turn the "Laser Emission" key to "ON-1".
-
-
-
Sign-in with your ZMB core credentials.
-
-
-
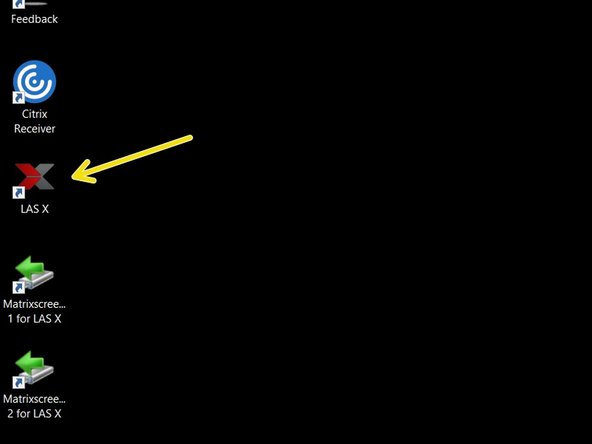
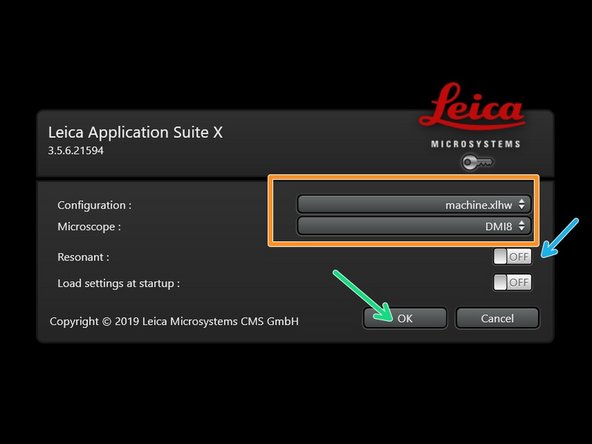
Start the "LAS X" software. Select:
-
"machine.xlhw" for "Configuration",
-
and "DMI8" as "Microscope".
-
Select either "Resonant" (ON) or non-"Resonant" (OFF) scanning mode.
-
Use "Resonant" scanner for fast acquisition and/ or live imaging. However, not advised for FLIM!
-
Click "OK".
-
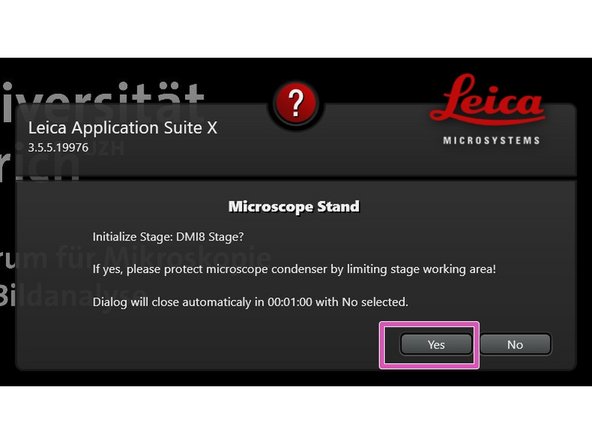
Click "Yes" to initialize the x/y stage. Make sure nothing is placed on the stage.
-
An x/y stage initialization is necessary to use the Navigator function.
-
-
-
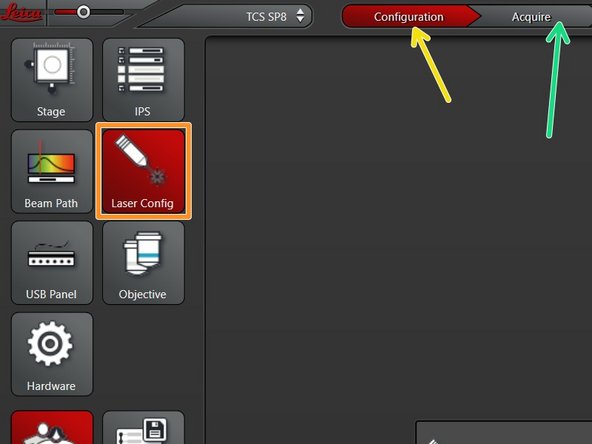
Go to "Configuration".
-
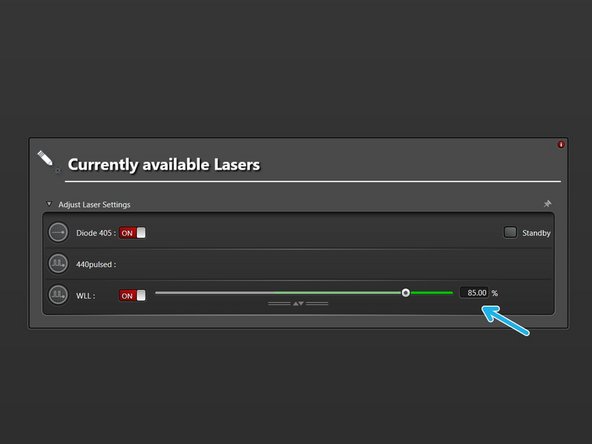
Select "Laser Config".
-
Switch "ON" the lasers you will need.
-
When "ON", the WLL should be at 85% by default.
-
Go back to "Acquire".
-
-
-
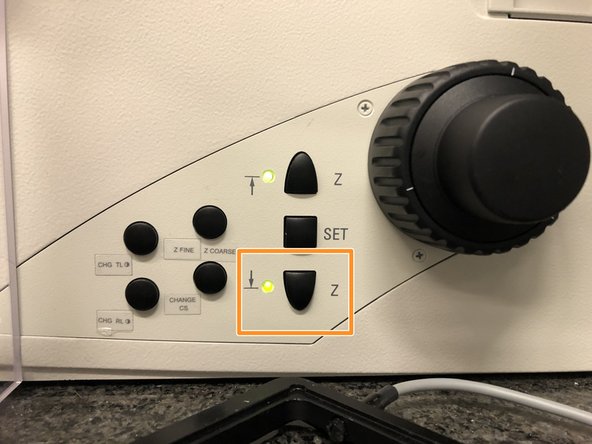
Lower the objective turret by pressing the "Z downwards" button on the right side of the microscope.
-
This step avoids possible collision during placing of inserts and/or samples.
-
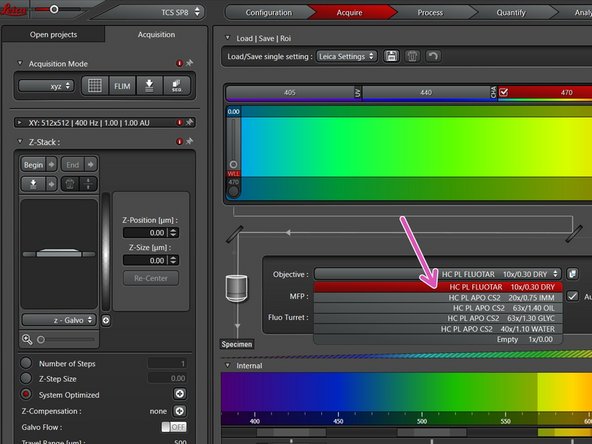
Select the 10x dry objective via the "LAS X" software.
-
In order to facilitate the focusing it is recommended to start with the 10x dry objective.
-
-
-
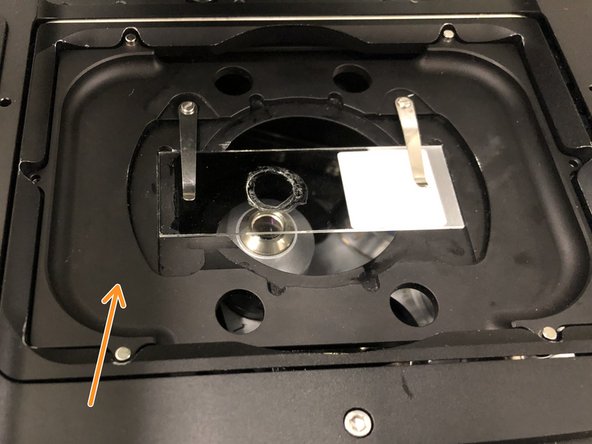
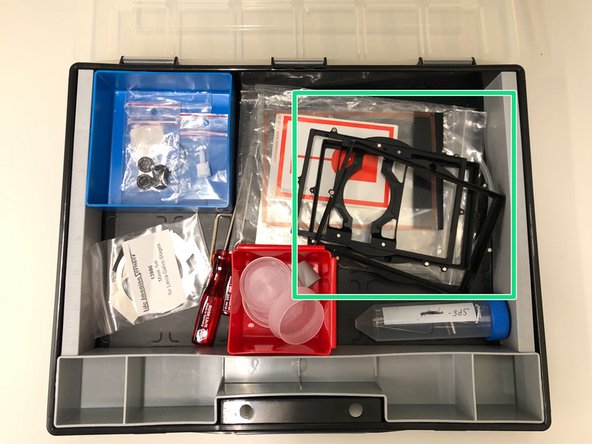
Choose the appropriate sample holder:
-
The depicted stage insert is usually placed at the microscope.
-
Other holders (eg. 96 well plates) are stored in a box on a shelve behind the microscope.
-
If necessary, stage inserts can be easily exchanged as they are held by magnets.
-
-
-
Push the condensor arm of the microscope to the back.
-
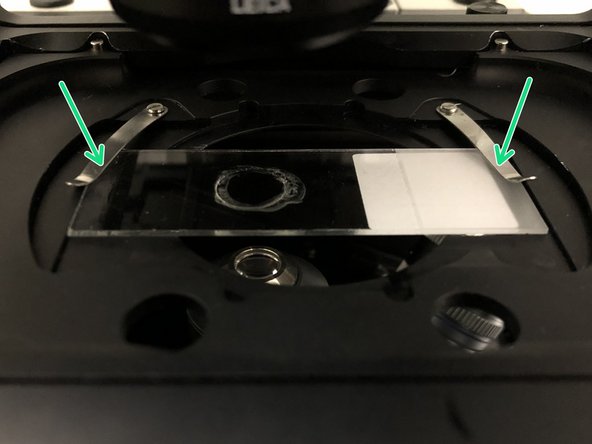
Insert your sample with the coverslip facing down and fix it with the two springs.
-
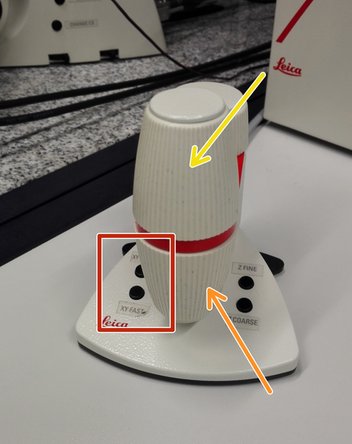
Move your sample above the objective with the help of the external controller "Smart Move".
-
Movement in y-direction.
-
Movement in x-direction.
-
Toggle between coarse movement "XY Fast" and slow movement "XY Precise".
-
Bring back condenser arm to its straight position.
-
-
-
To exchange a stage insert Push the condensor arm of the microscope to the back.
-
Remove the stage insert and place the appropriate one.
-
-
-
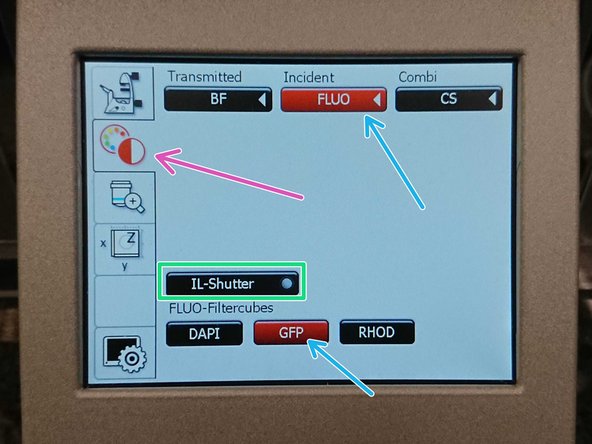
On the touch screen at the microscope stand choose the light path tab.
-
Click "FLUO" and choose an appropriate "FLUO-Filtercube" : e.g. "GFP".
-
Open the "IL -Shutter" (if activated the dot is yellow).
-
Look through the oculars and focus your sample by using:
-
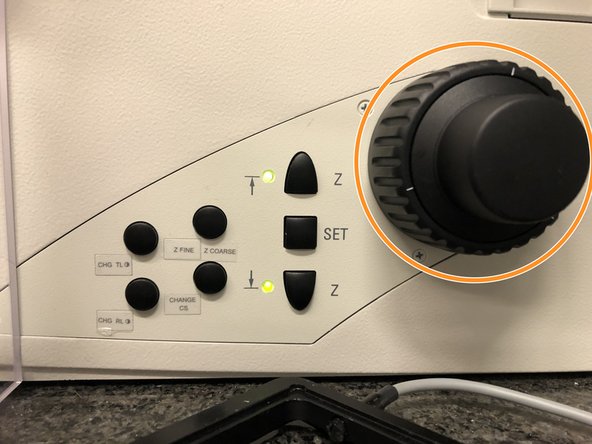
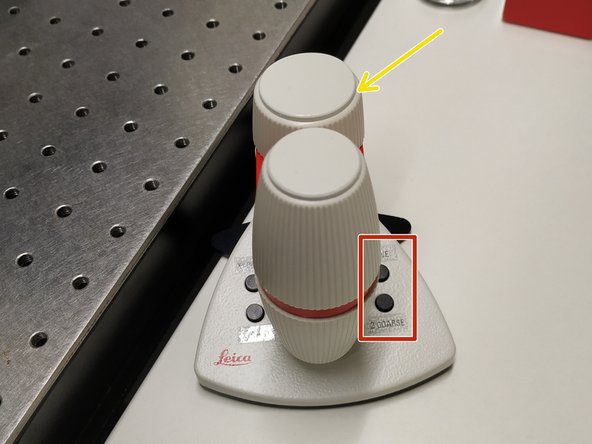
the focus wheel on the microscope stand,
-
or the z-wheel on the external controller ("Smart Move").
-
Turn z-wheels clockwise to move objectives upwards (closer to the sample). Turn z-wheels counter-clockwise to move objectives downwards (away from sample).
-
Toggle between "Z FINE" and "Z COARSE" directly on the Smart Move.
-
-
-
Remove your sample and toggle within the software to the objective of choice.
-
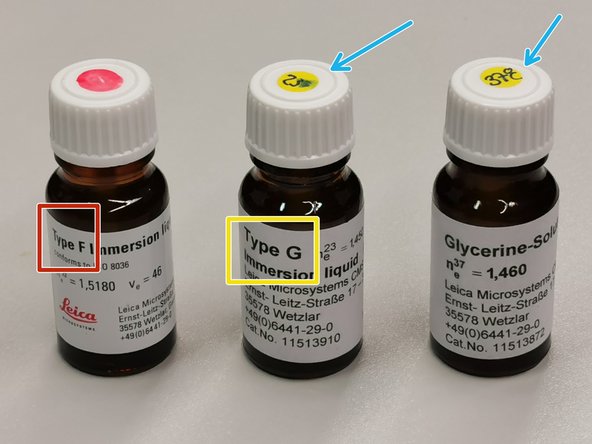
Depending on the objective different immersion media will be used. Apply directly on the sample.
-
Oil objectives: "Type-F" immersion liquid.
-
Glycerin objectives: "Type-G" immersion liquid . For room temperature use the 23°C glycerin media. For live cell imaging the 37°C one.
-
Water objectives : Use fresh double destiled water.
-
You can move (back and forth) the condenser arm for ease of access.
-
Please consider the additional information in the next step to guaranty proper image acquisition.
-
Focus your sample as described previously.
-
-
-
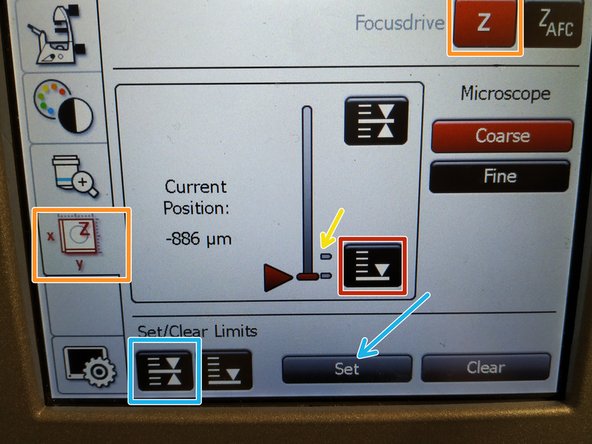
The storage of the focal plane is helpful in order to find the focus back if the sample or objective will be changed.
-
To save your current focus position select the "xyz tab" and the "Focusdrive Z" on the touchscreen of the microscope.
-
Click the "Upper Focus Limit" button.
-
Press "Set".
-
If done successfully you will see an upper marker line appearing.
-
Press the "Lower Limit" button in order to move down (for safe change of the objective or the sample).
-
-
-
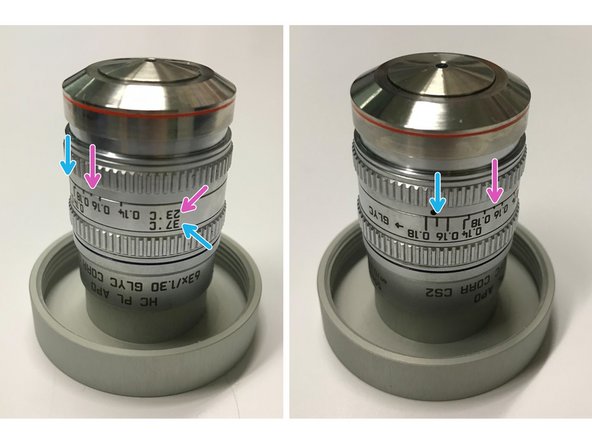
For some objectives the correction collar has to be adjusted.
-
20x IMM (multi-immersion - Oil, Glycerin or Water) needs to be set to the corresponding immersion media ("OIL", "GLYC" or "0.17-W" (with cover glass) or "W-0" (without cover glass)).
-
40x water and 63x glycerol you can correct for the cover glass thickness (0.14-0.18 mm). Standard is usually 0.17 mm.
-
40x water you can adjust for the correct cover glass thickness.
-
63x glycerol you can adjust for the cover glass thickness of the corresponding temperature. Upper row for 23°C with the indicated 0.17mm.
-
Lower row for 37°C and indicated 0.17mm.
-
Make sure that the cap of the spring-loaded front lens is released (working position). Mandatory for all immersion objectives.
-
Please, DO NOT remove the objectives for adjustment. They can be also accessed on the system.
-


Cancel: I did not complete this guide.
One other person completed this guide.
