Introduction
In this guide we describe the usuage of the Leica LASX auto-save functionality. By using auto-save, there is less risk of data loss during an extended image acquisition session and long file saving times after an extended imaging session can be avoided. Since auto-save does not generate standard Leica .lif files, we also show how the resulting files can be handled and visualized.
Here we show the workflow for multichannel, multiposition, 3D time series data.
-
-
In "Open projects" at the bottom of the window you can find the auto-save settings for the next project.
-
Click on the "+" icon in the auto-save settings to open the advanced configuration.
-
Changes in the auto-save settings are only applied when generating a new project. So always make a new project when engaging or changing auto-saving.
-
-
-
We recommend the following settings for autosaving:
-
Data type: TIF
-
Compression: Lossless
-
Shift to 16 bit: Unprocessed
-
Select a "Base data folder" with enough free space. The "Current working folder" can be left blank.
-
The proprietary Leica .lof auto-save file format can be opened in LASX as well as in Imaris. However, the OME Bioformats reader can not read it. Due to this limited compatibility we recommend tif.
-
-
-
Before starting your experiment make a new project with the updated auto-save settings.
-
Perform your experiment. For multiposition experiments we recommend to use the LAS Navigator.
-
Check that the data has been saved to your specified auto-save base data folder.
-
If needed you can now still save your data in the .lif file format. However, this might take long.
-
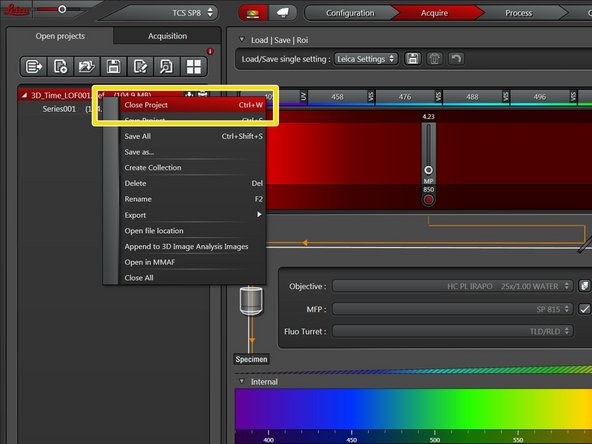
Close your project. Since all data has been saved, that should be very quick.
-
Deleting the project will also delete the auto-saved data.
-
-
-
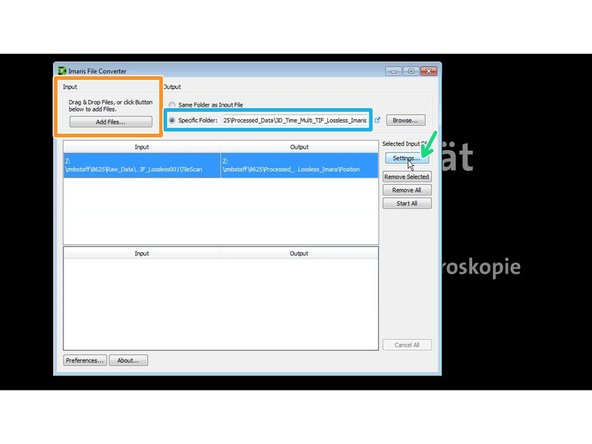
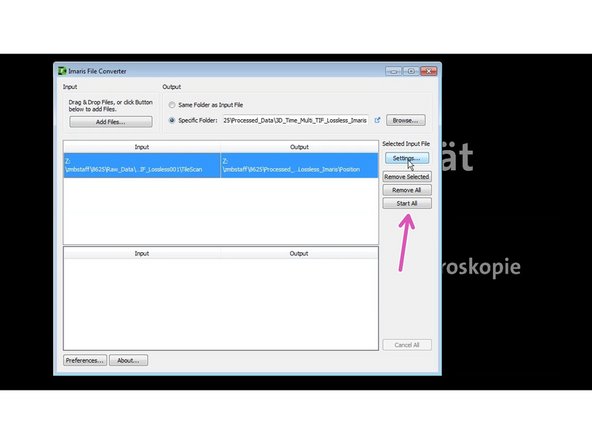
Open Imaris File Converter.
-
Choose an output folder.
-
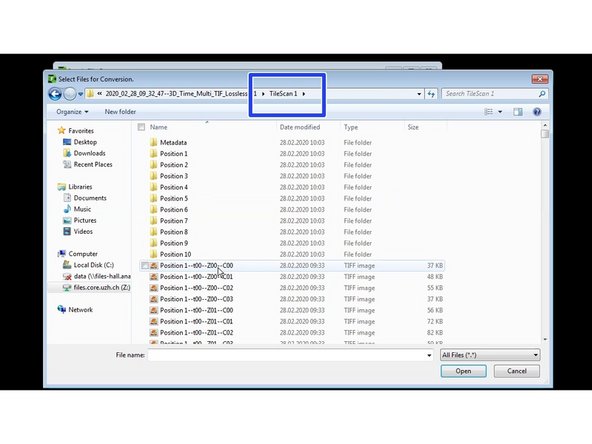
Select the directory where the tif files were saved.
-
When saving multi positions using the Navigator a TileScan folder should include all the tif files that were acquired.
-
Select the first file.
-
-
-
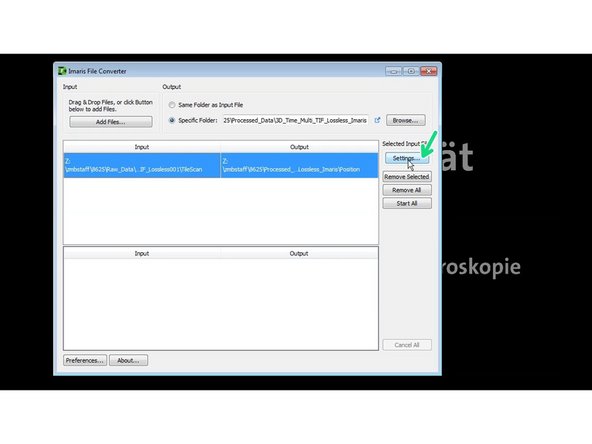
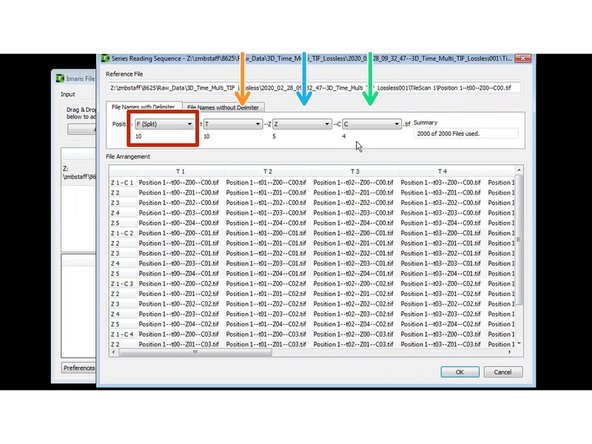
Press settings to check and adjust the correct dimensions.
-
In this case each position will be converted into an independent *.ims file. (F - split)
-
Each file contains a number of different time points (t),
-
a number of Z sections (Z),
-
and a number of channels.
-
Start conversion.
-
If you choose "Same folder as input file" copy the converted Imaris file to a new sub-folder.
-
-
-
Open Imaris
-
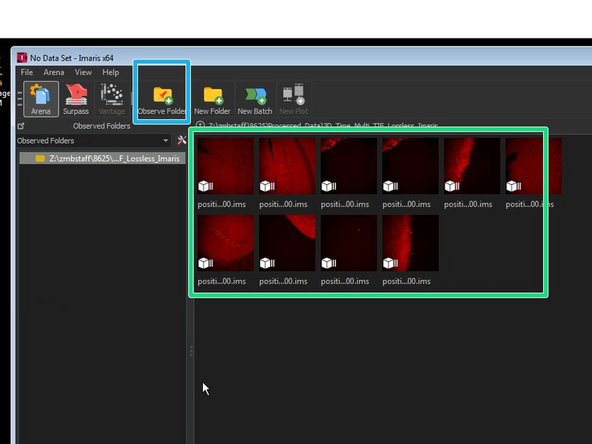
Add the folder containing your converted files in Arena by clicking "Observe Folder".
-
Choose the directory where the converted files were stored.
-
Here you will see a preview of your files for browsing your experiment.
-
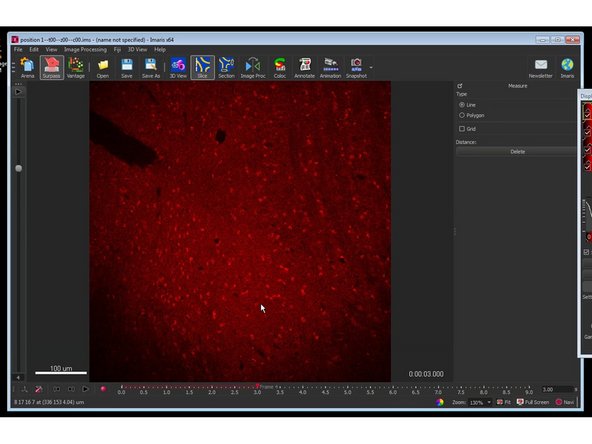
You can now open and explore each file individually.
-
-
-
You can also use FiJi to visualize and process your data.
-
Open FiJi.
-
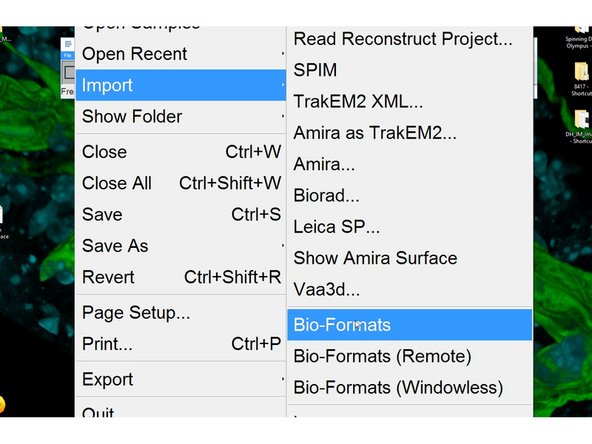
Open files using File<Import<Bio-Formats.
-
Open the folder containing the TileScan and select the first file.
-
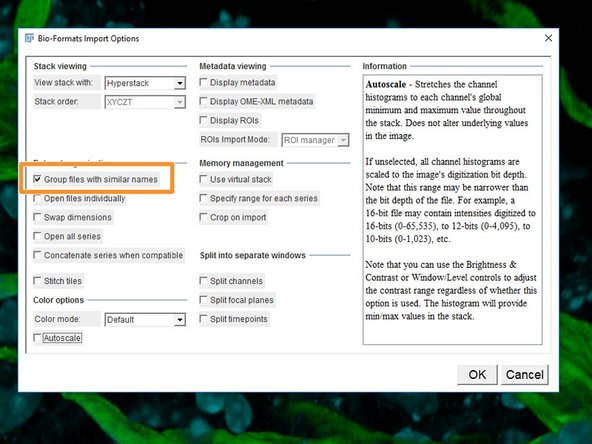
Select the options "Group files with similar names".
-
-
-
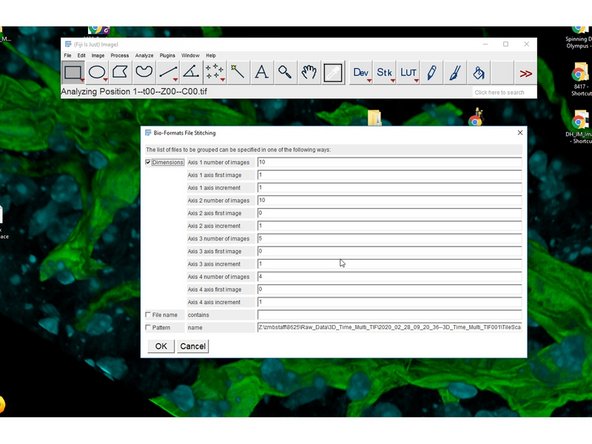
Confirm the dimensionalities. Eg.
-
Position 1--t00--Z00--C00.tif
-
Axis 1 - 10 Positions, Axis 2 - 10 time points, Axis 3 - 5 Z, Axis 4 - 4 channels
-
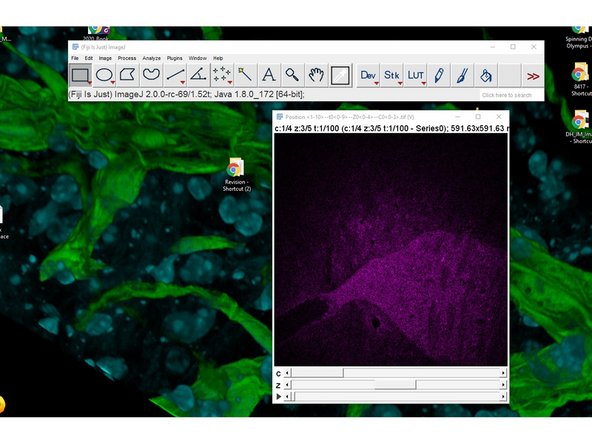
All the files will be loaded into a single hyperstack.
-
The different timepoints will need to be resorted.
-
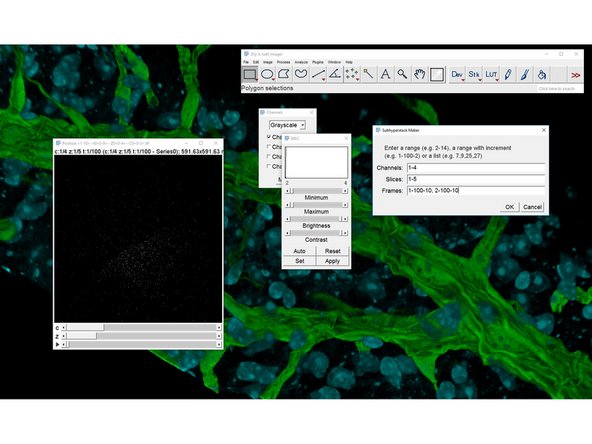
Make a new Substack with an increment to correctly display the time series. Eg. if you have 10 timepoints per position you will need to add an increment of 10.
-
-
-
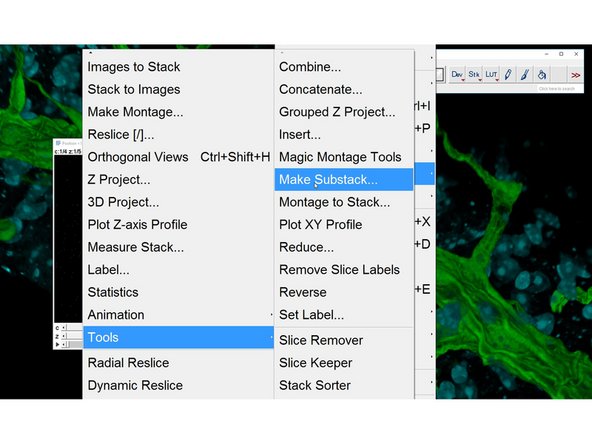
Image<Stacks<Tools<Make Substack
-
Make a new Substack with an increment to correctly display the time series. Eg. if you have 10 timepoints per position you will need to add an increment of 10.
-
Image<Stacks<Tools<Make Substack
-
To display the 2 first positions:
-
1-100-10,2-100-10
-