-
-
Power On switch at the back right of the unit.
-
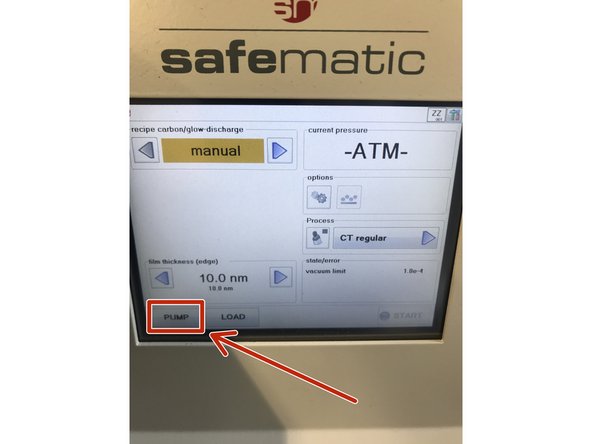
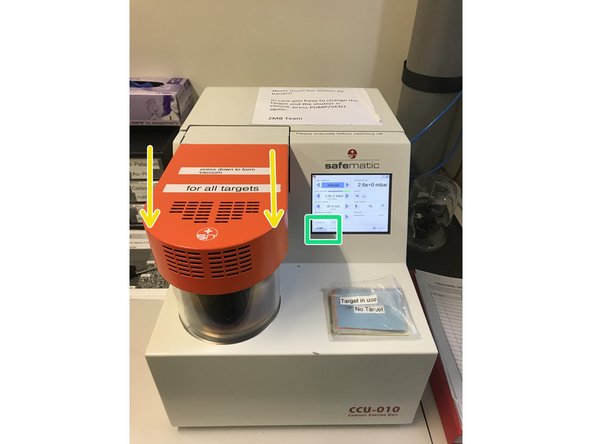
1x Short press Pump on display lower left.
-
Immediately press Vent again (device is ventilated).
-
-
-
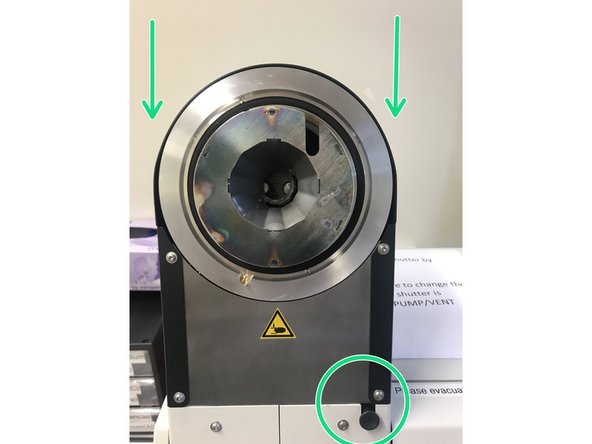
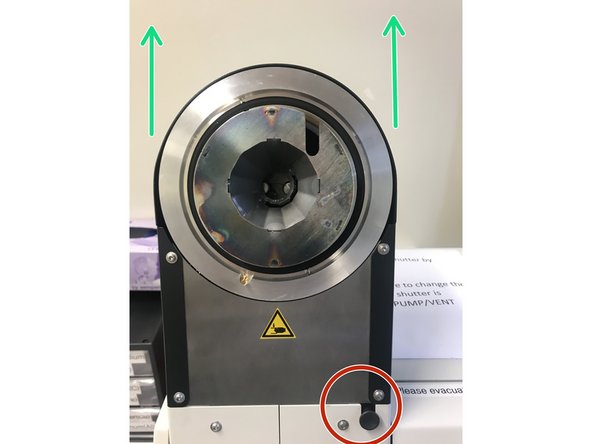
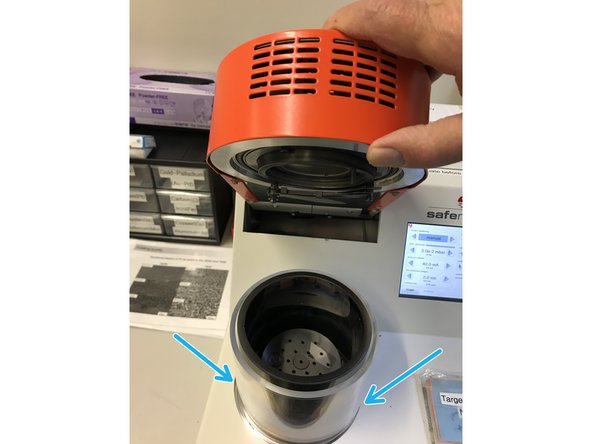
When the chamber is vented, lift the sputter head up.
-
Pull out the knob and make a quarter turn.
-
Pull the sputter head out with both hands put it byside.
-
-
-
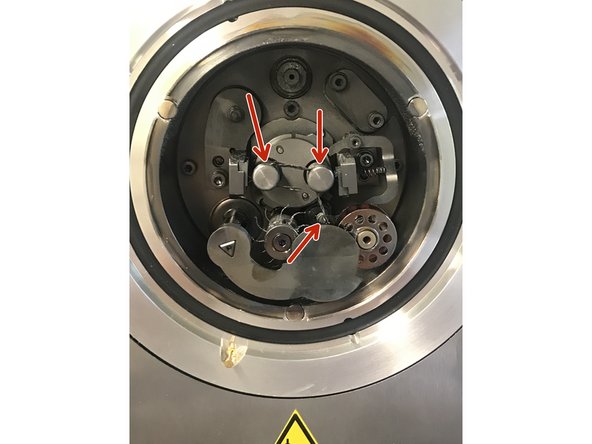
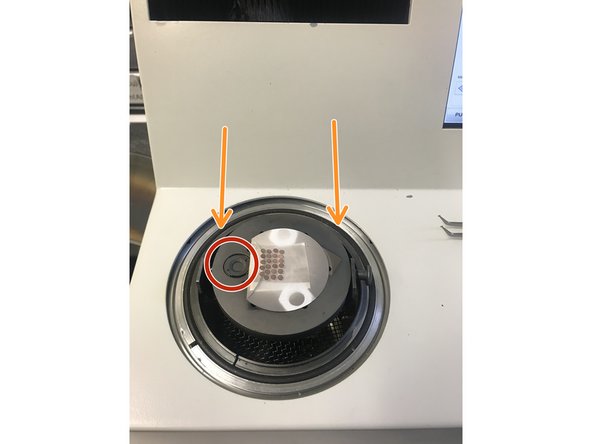
Check the carbon head to make sure everything's right. To do this, remove the metal case and look inside the unit.
-
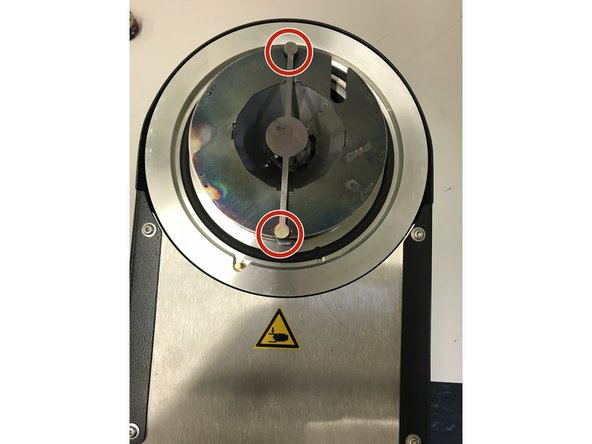
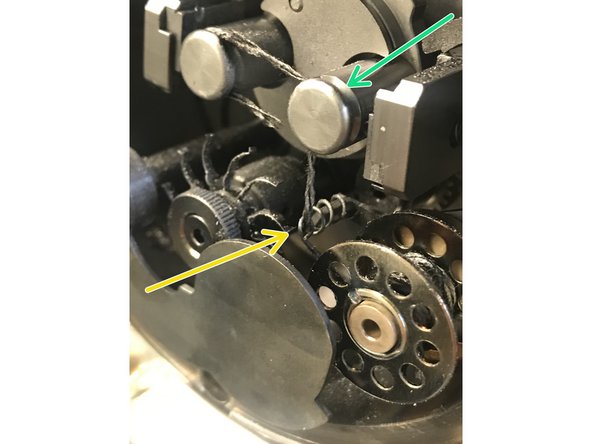
It is important that the carbon filament is inserted through the eyelet and clamped to one or both metal pins.
-
If so, close metal case and mount and fasten the well prepared carbon head with both hands and turn the knob back a quarter turn.
-
If not so: the preparation of the carbon head is explaned in steps 9, 10 and 11.
-
The carbon coating program is automatically shown on the display.
-
-
-
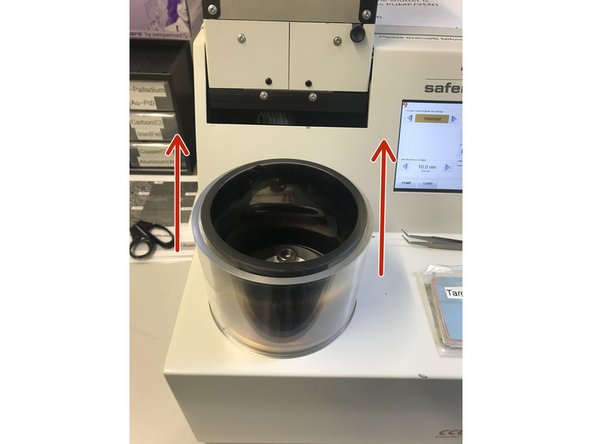
Remove the recipient and place on the side.
-
Press the sample stage all the way down, as far away as possible from the coal head.
-
Place samples on the sample table. Move the recipient back into position.
-
Make sure that the quartz oscillator for the layer thickness measurement is not covered by your samples.
-
Carefully place the carbon head on the recipient.
-
-
-
Press the pump on the display and press the carbon head with the forearm.
-
The vacuum is created.
-
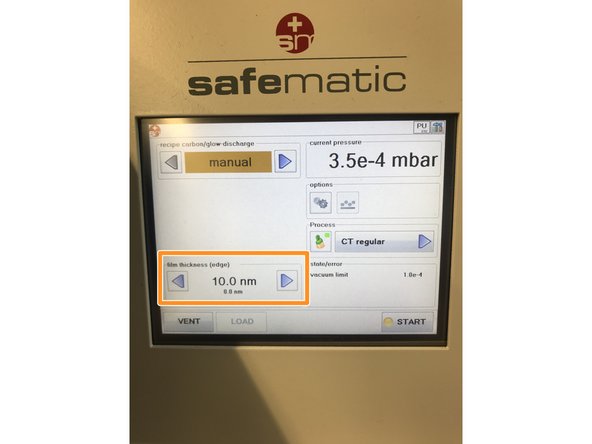
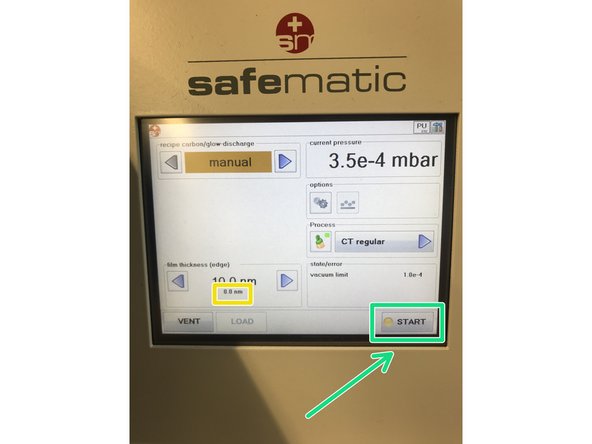
Adjust the layer thickness with arrows left (thinner), right (thicker).
-
When the vacuum has reached approx. 3x10⁻⁴ the "Start" button can be pressed.
-
Carbon coating is running.
-
The current coating density value is the small number below the nominal value.
-
-
-
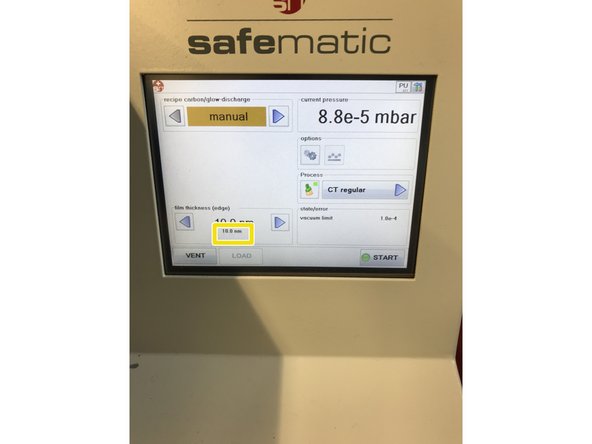
When the coating of the set value is reached, the device stops with the coating.
-
The "Start" button turns green.
-
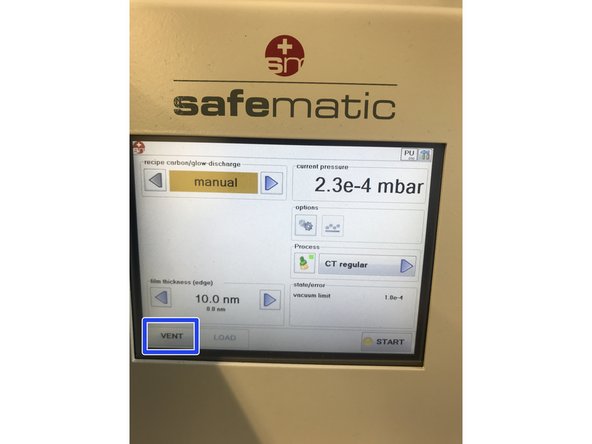
To remove the samples press the "Pump" button.
-
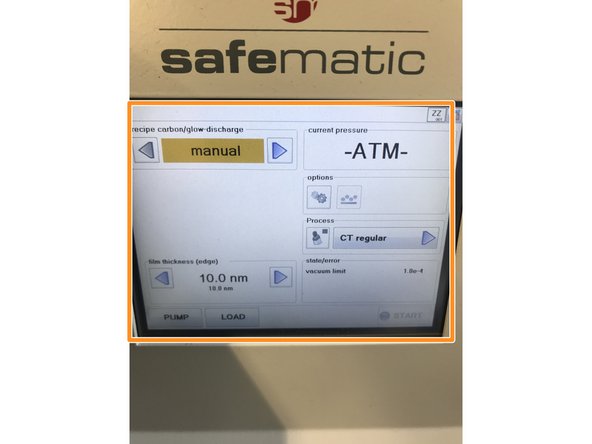
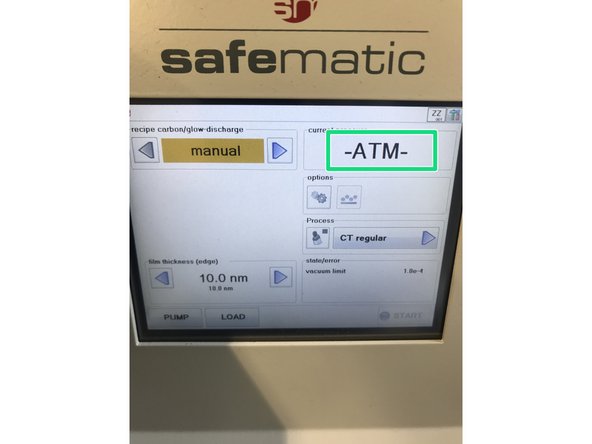
When the chamber is fully ventilated, the display will show -ATM- means Atmosphere.
-
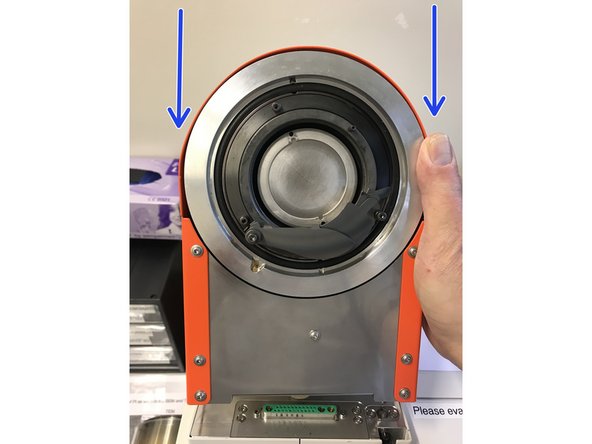
Open the chamber by lifting the carbon head up.
-
-
-
Pull out the knob and make a quarter turn.
-
Pull the carbon head out with both hands put it byside.
-
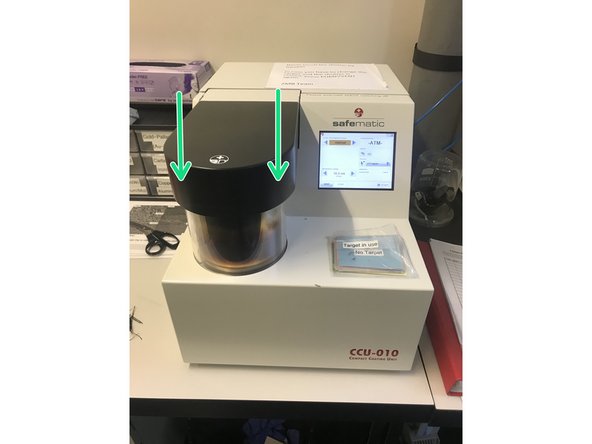
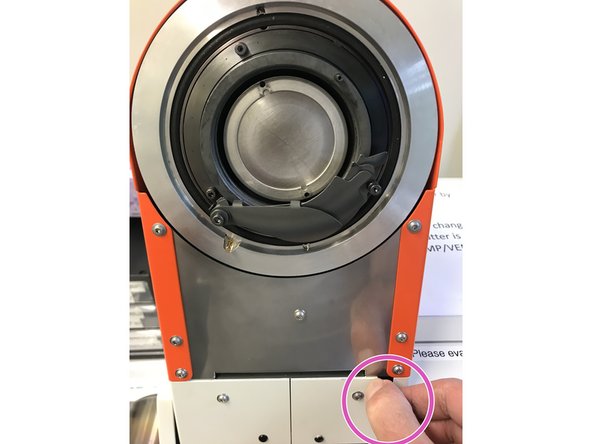
Take the orange sputter head in both hands and mount it on the device.
-
Turn the knob back a quarter turn.
-
The sputter head is fixed.
-
-
-
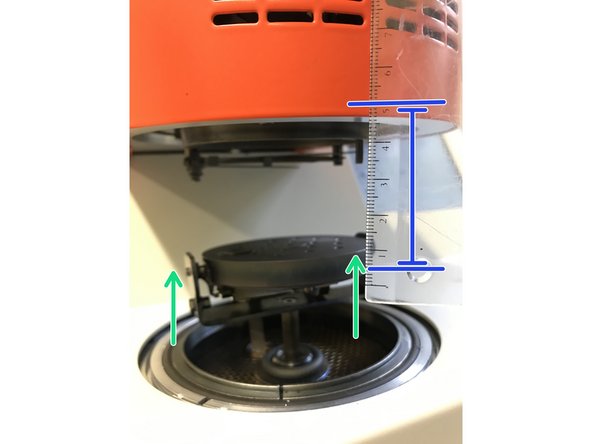
Tilt the sputter head down. Take the scale and lift the sample table upwards until a distance of approx. 5 cm is reached.
-
Lift the sputter head up again and place the recipient centered on the vacuum ring.
-
Carefully place the carbon head on the recipient.
-
Press the pump on the display and press the carbon head with the forearm to achieve the vacuum.
-
The vacuum is created.
-
When the vacuum has reached approx. 1x10⁻¹ switch off the power with the power button on the back of the device.
-
The device always remains in the chamber with vacuum.
-
-
-
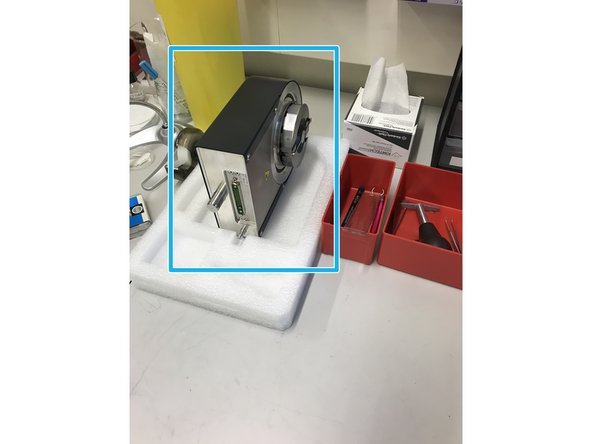
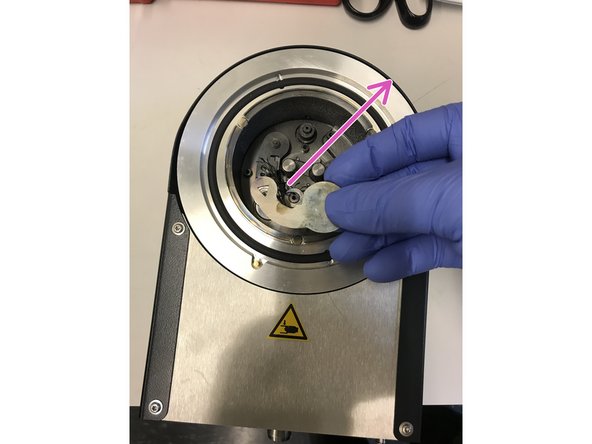
The carbon head lies on the side of the Safematic.
-
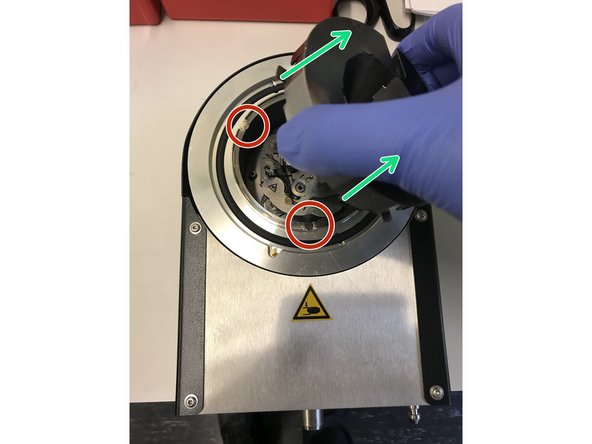
Put the carbon head in front of you and take the metal protection off.
-
Always work with gloves.
-
Observe the magnetic surfaces with which the metal cover is fixed and pull it away, place it on its side.
-
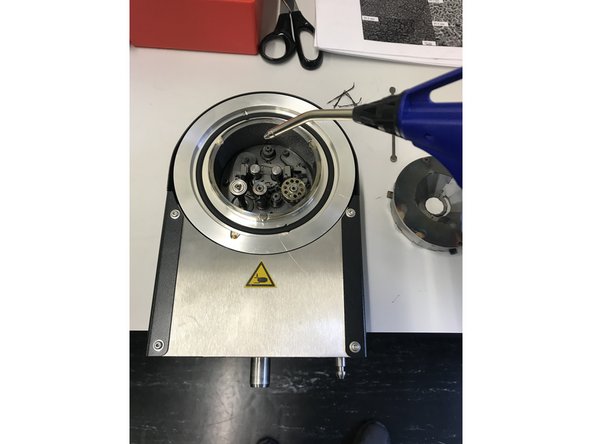
Remove the shutter which is also fixed directly with a magnet.
-
-
-
Take the compressed air tube and blow out the case.
-
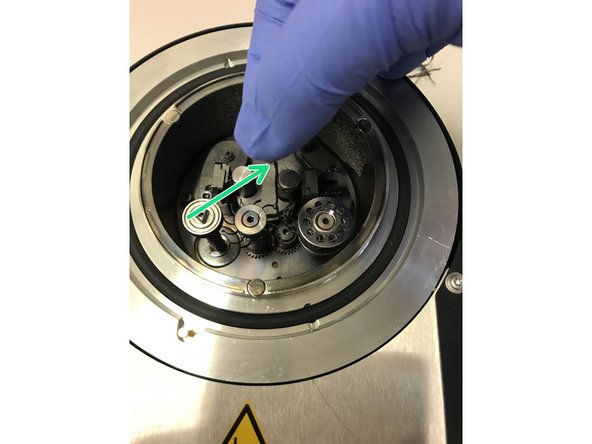
Put the carbon filament in your fingers and mount it through the loop. Precisely explained in step 12.
-
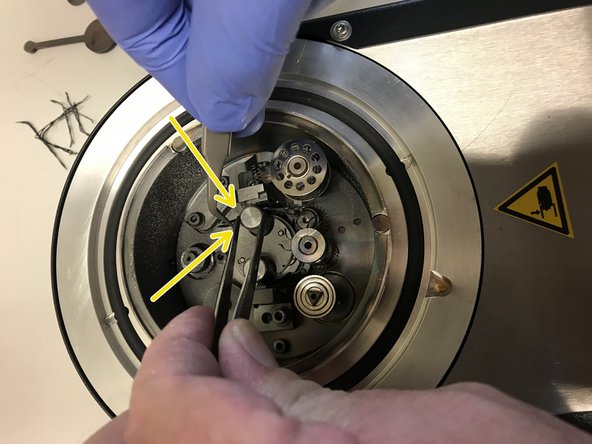
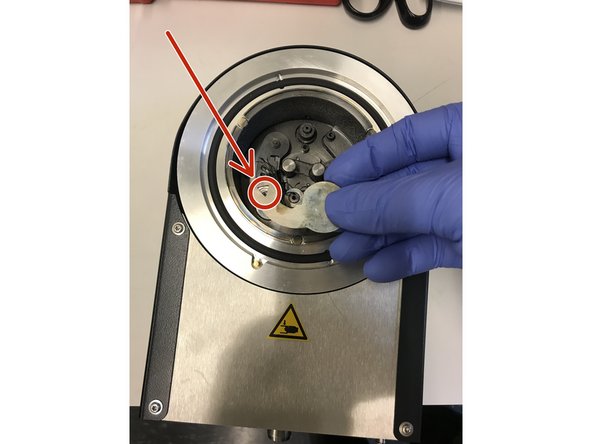
Hold a flat tweezer with one hand and a 2nd finer tweezer with the other. With the flat tweezers you lift the metal pin head and with the other tweezers you guide the carbon wire under the metal pin and clamp the wire by releasing the metal pin head by the flat tweezers.
-
Simply cut the filament with scissors if it extends too far over the attachment.
-
-
-
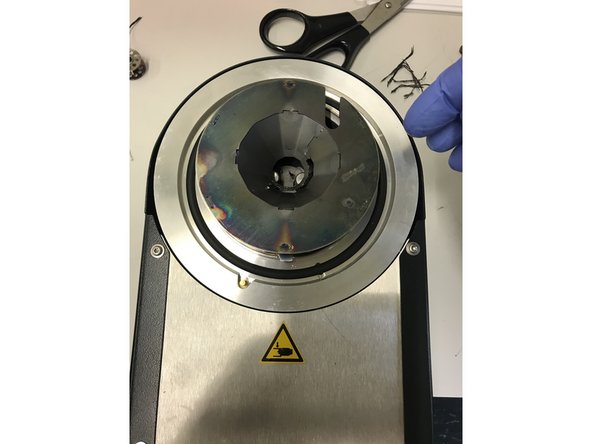
Place the shutter back on the intended triangular metal mold. The shutter holds by magnetism.
-
Place the metal case on the unit. By using the three points magnets the case holds.
-
Carbon head is now ready to use.
-
-
-
Samples that may melt during evaporation can be protected with the Additional Shutter. Simply mount the shutter along the case. Two magnets hold it in position.
-
Simply mount the shutter along the case. Two magnets hold it in position.
-
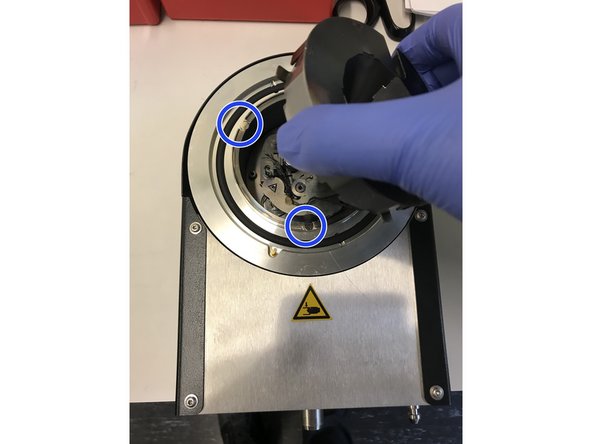
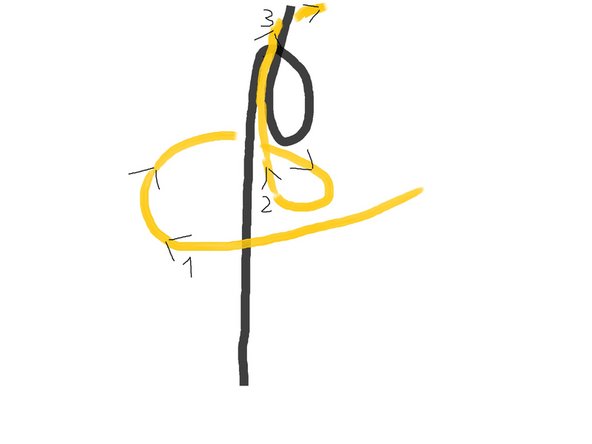
Mounting the carbon filament: it's an eyelet that is open at the top. Guide the thread first around the eyelet (1) and then through the gap (2) and pull (3) it to the first metal pin head.
-
Fix filament at the first metal pin head. Discribet in step 10. At the second the device will fix itself during the run.
-