-
-
Connect the Aria to the Nikon using this guide.
-
Then start the Aria using this guide.
-
-
-
Start the Nikon Spinning Disk using this guide.
-
-
-
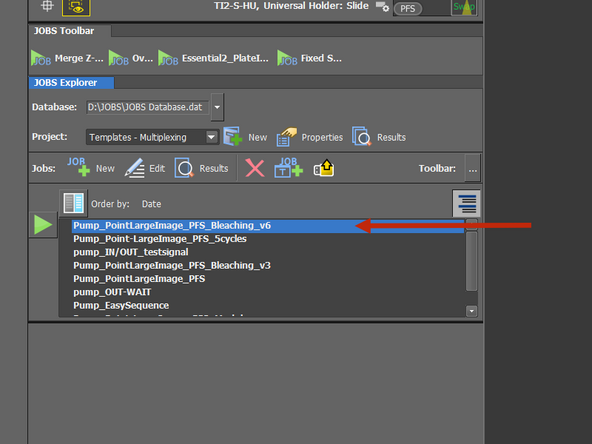
Open the JOBS Explorer.
-
Select your JOB.
-
-
-
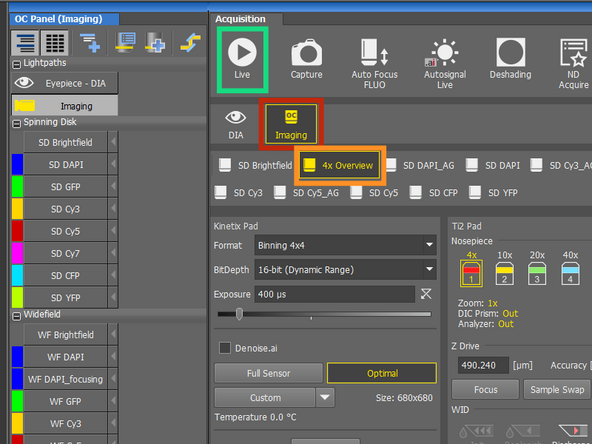
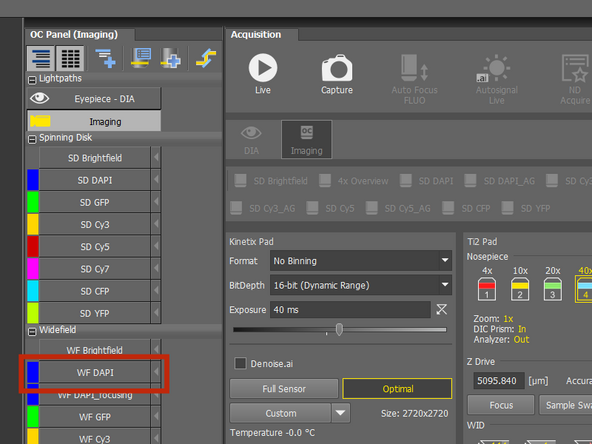
Press "Imaging".
-
Press "4x Overview".
-
Press "Live".
-
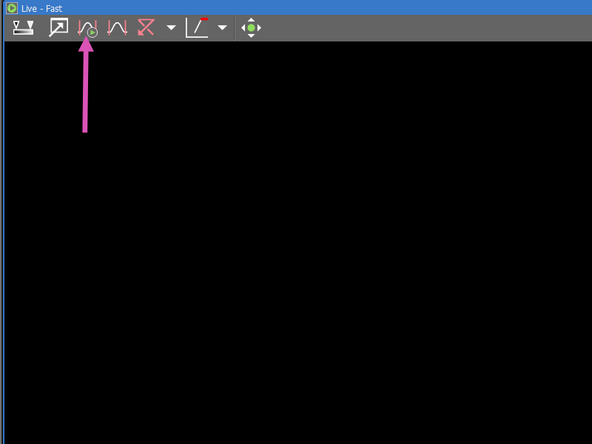
Toggle the Live Auto Histogram and use the manual focus to focus your sample. End the Live mode by pressing "Freeze".
-
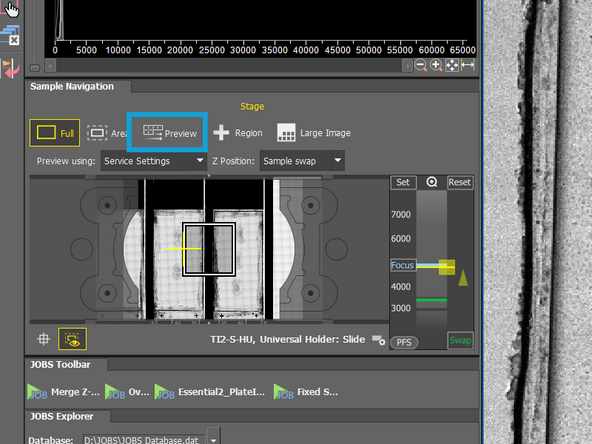
Press "Preview".
-
By double clicking on a position in the Sample Navigation you can quickly navigate to that position.
-
-
-
Douplicate the WF DAPI configuration and drag and drop it down into your personal Optical configurations. Rename it to "Photobleach".
-
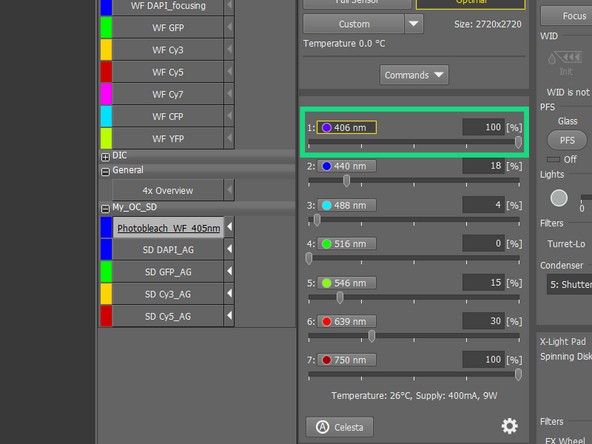
Set the "406 nm" to 100%.
-
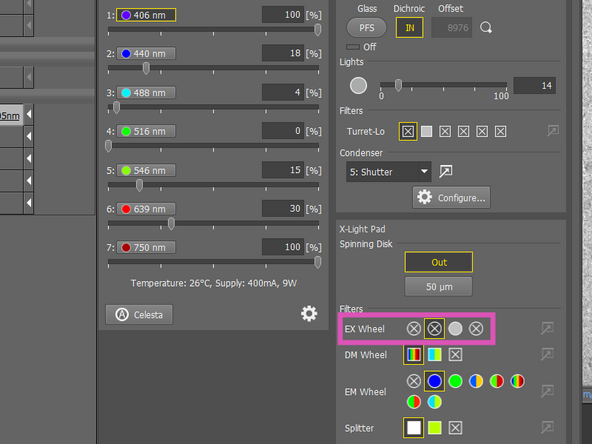
Select an empty Filter.
-
-
-
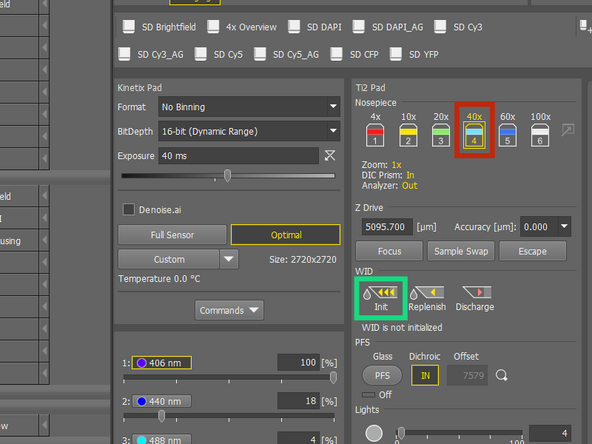
Select the "40x objective".
-
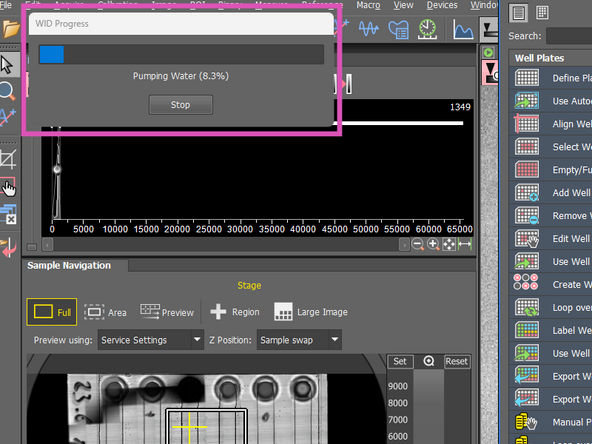
Press "Init" to initialize the water immersion.
-
Wait until the "WID Progress Pumping Water" in the top left corner of the screen has finished.
-
-
-
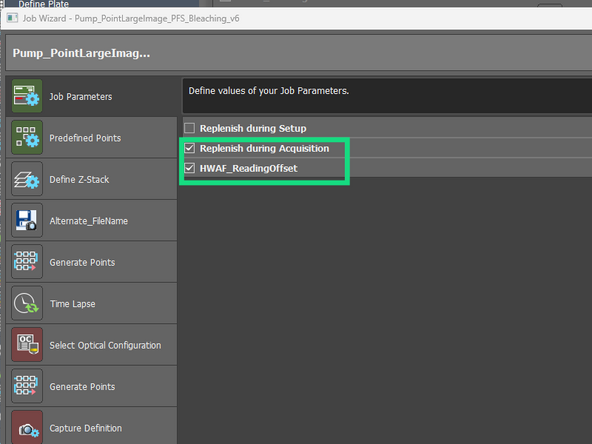
Press "Run" in the JOB Editor to open the JOB Wizard.
-
Select "Replenish during Acquisition" and "HWAF_ReadingOffset"
-
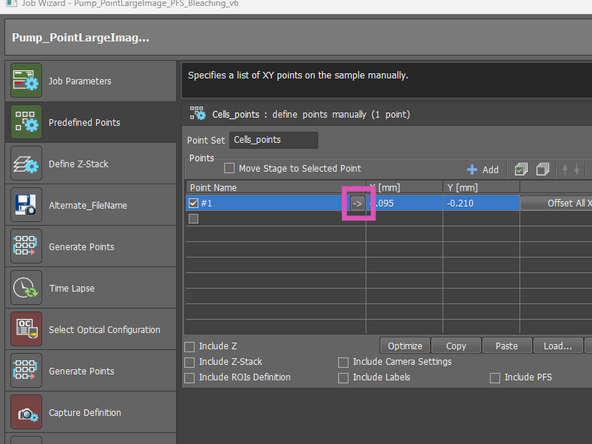
Press "Live" and use the Sample Navigation and/or the manual joystick to find your region of interest.End the Live mode by pressing "Freeze".
-
Press the Arrow to adopt the current X and Y positions into the JOB.
-
-
-
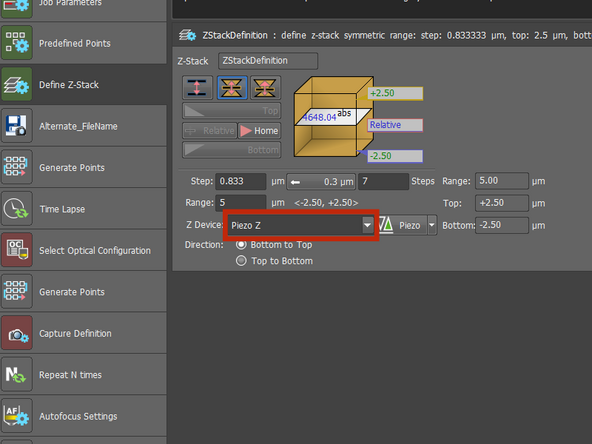
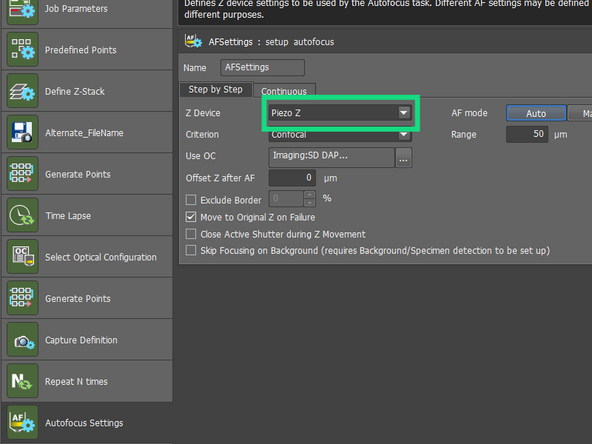
Select the "Piezo Z" from the "Z Device" drop-down menu.
-
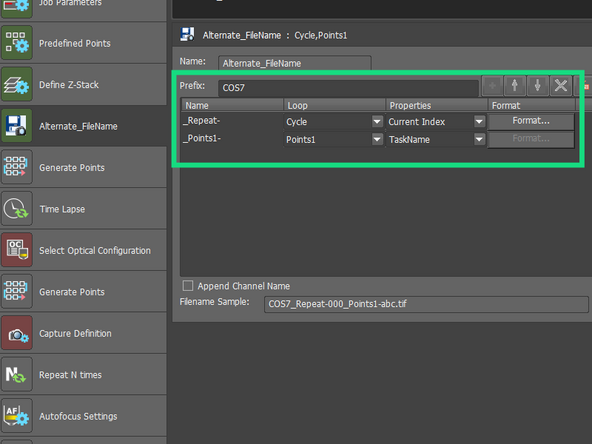
Set up a naming strategy.
-
This is jsut an example of a naming strategy, depending on your experimental setup another strategy might be better.
-
-
-
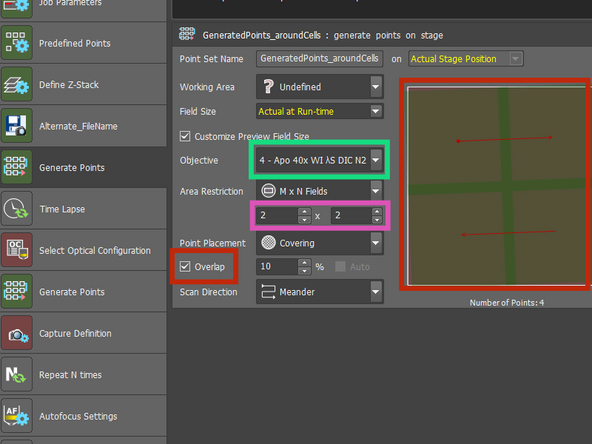
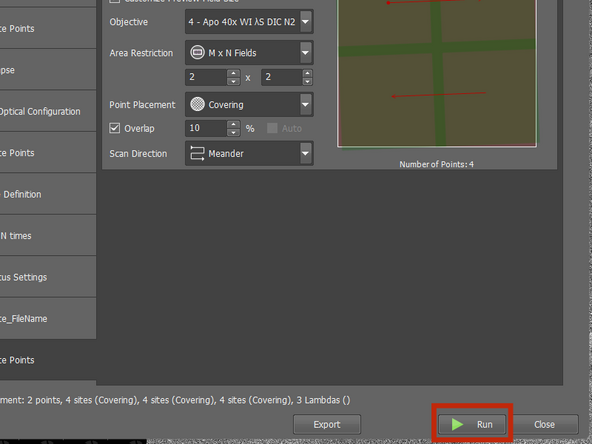
Select the desired objective.
-
Select the desired size of your Region.
-
Depending on your JOB you will have to set up other Points e.g. for the photobleaching. If prompted to do so, set it up the same so you image and bleach the same region of your sample.
-
Check if the overlap of your tiles looks like in the example image. If not uncheck and check the "Overlap" checkbox.
-
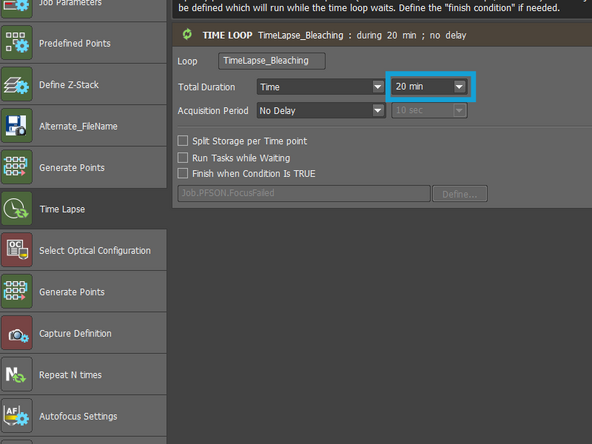
Set up the Time Loop to be shorter than the chemical bleach step in your Aria Sequence e.g. if you chemically bleach for 30 minutes set the time loop to 20 min.
-
-
-
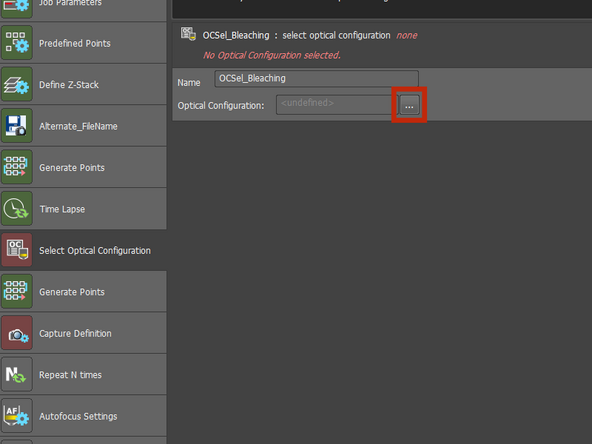
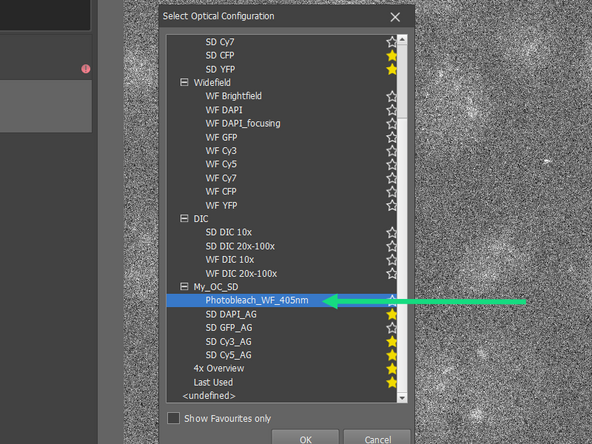
Press "...".
-
Select your previously configured Optical Configuration for the Photobleaching.
-
-
-
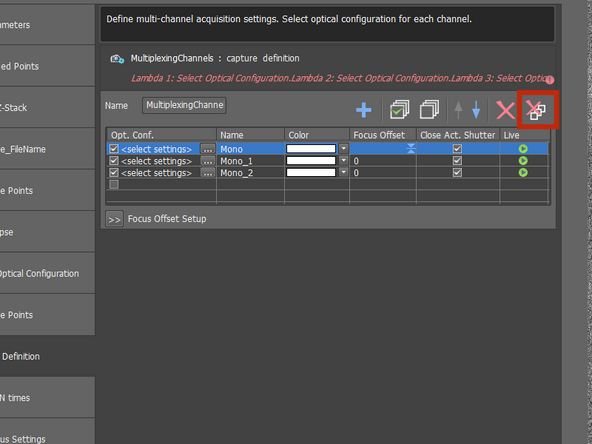
Remove all Optical Configurations.
-
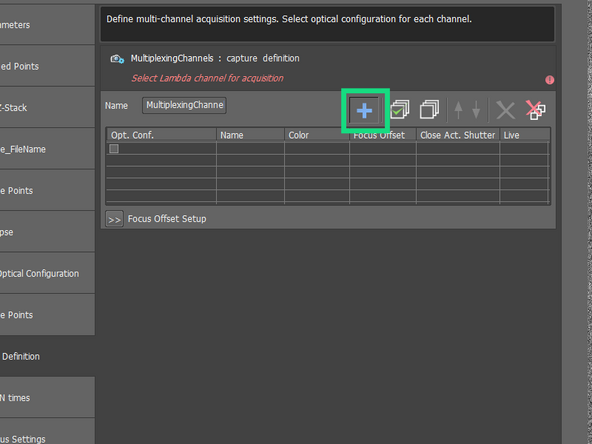
Press "+"
-
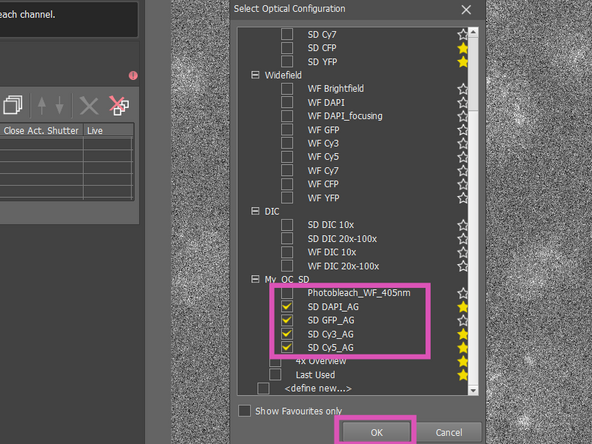
Select all Optical Configurations relevant for your experiment and confirm with "OK".
-
DO NOT SELECT THE PHOTOBLEACH OPTICAL CONFIGURATION
-
-
-
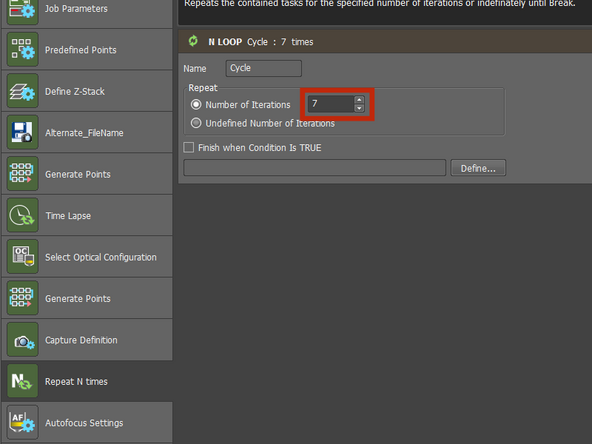
Define the number of rounds (Acquisitions) the Nikon should do. This depends on your experiment.
-
Select "Piezo Z" from the "Z Device" drop-down menu.
-
-
-
Press "Run"
-
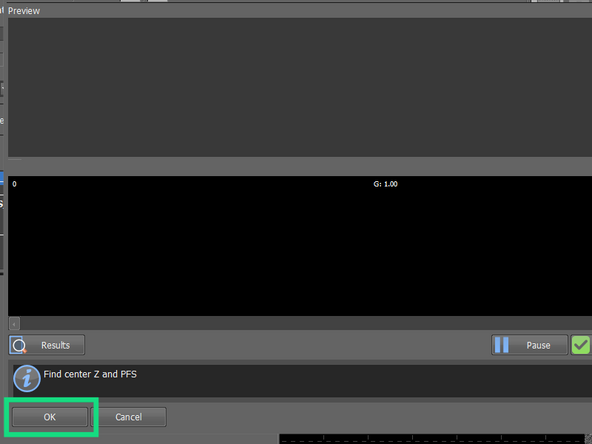
Go into Live Mode and focus your sample. Press "OK".
-
Start the Aria Sequence.
-