Introduction
This tutorial will guide you through the process of cryo-fixation of adherent cells grown on 6 mm sapphire disks at the Center for Microscopy and Image Analysis, UZH, Zurich.
-
-
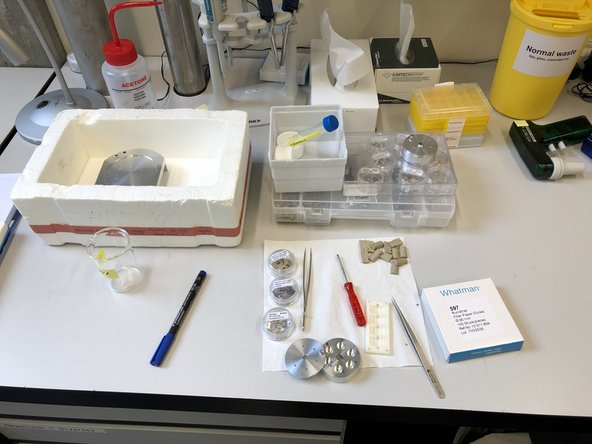
Prepare your tools and parts for high-pressure freezing. In the cupboard above the machine you will find:
-
the three-piece cartridge consiting of an upper cylinder, special middle plate 6 mm and lower cylinder
-
spacer rings 6 mm (200 μm)
-
carriers 0.1/0.2 mm
-
filter paper
-
mini-rack for middle plates
-
metal block
-
petri dishes
-
-
-
In the cupboard on the main floor you will find:
-
2x HPF-tweezers
-
1x orange tweezer
-
LN2 sample storage box
-
box with 1-hexadecene Eppendorf tubes
-
screwdriver for LN2 sample storage box
-
EtOH glas beaker
-
heating plate
-
-
-
Prepare all tools and accesories required for your cryofixation experiment.
-
Check if the 200 µm spacer rings are completely flat otherwise replace them.
-
-
-
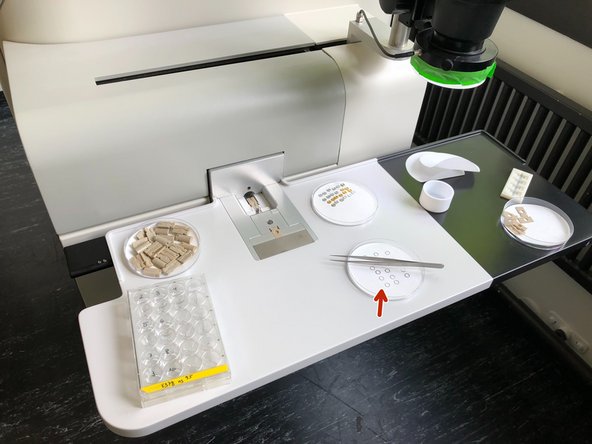
Organize the required 100/200 cavities on a filter paper in a petri dish.
-
For 6 mm sapphire disks the 100 µm cavity must face the cells on the sapphire disk.
-
-
-
Insert the two-piece cartridge consisting of an upper cylinder and lower cylinder in the loading mechanism.
-
-
-
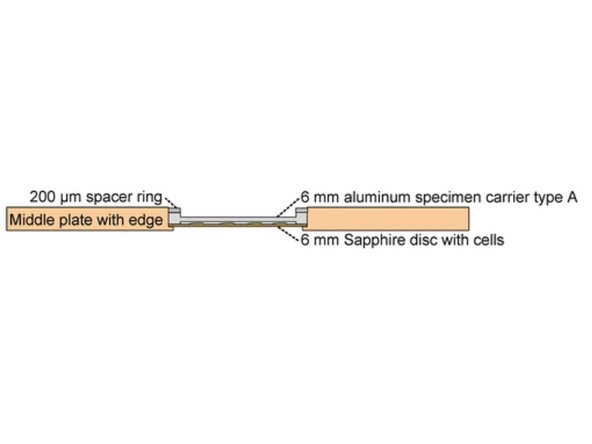
Overview of sandwich configuration
-
-
-
Visualization of sandwich configuration
-
-
-
Hold the sapphire at 45°.
-
Align the edge within the recess of the middle plate.
-
Release it.
-
-
-
Take a aluminium specimen type A (100/200 µm cavity) carrier with 100 µm cavity down and only wet this side with 1-hexadecane.
-
-
-
Add the 200 µm spacer ring on top.
-
Move the middle plate to the loading station.
-
-
-
Blot excess liquid away using filter paper.
-
Important here is that you blot fast and put some pressure to prevent shifting of the 200 µm spacer ring.
-
Flip the loading lever 180° until the process button is in position.
-
Initiate freezing by pressing the button.
-
-
-
After cryofixation, the two-piece cartridge and the specimen carriers are automatically ejected into the specimen dewar and are ready for transfer.
-
Open the sample dewar drawer and transfer the sample dewar to LN2 box.
-
-
-
Always pre-cool the tweezers prior to use.
-
Transfer all components including your sample to the LN2 box.
-
-
-
Always pre-cool the tweezers prior to use.
-
First, transfer the sapphire disk to the LN2 sample storage box.
-
Then transfer the specimen carriers to a beaker filled with 70% EtOH for cleaning.
-
-
-
Place the sample dewar back into the high-pressure freezer drawer.
-
-
-
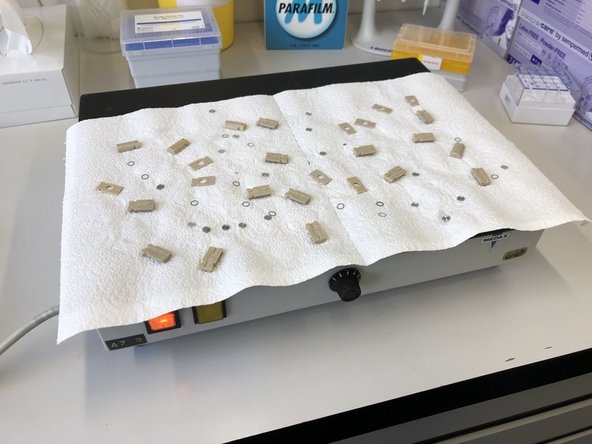
Place specimen carriers to a hot plate for drying.
-
-
-
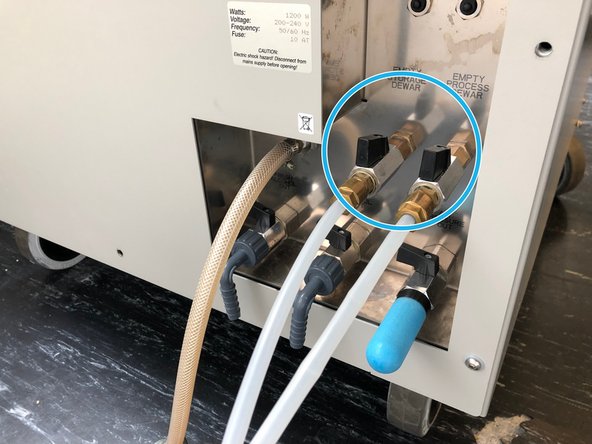
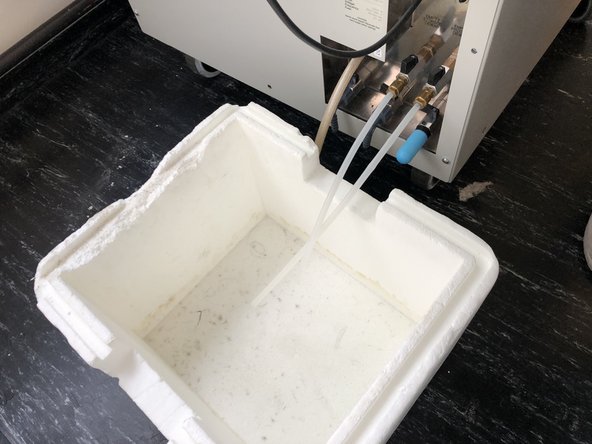
Once all freezing is complete the two valves at the back can be opened. Allow LN2 to drain.
-
-
-
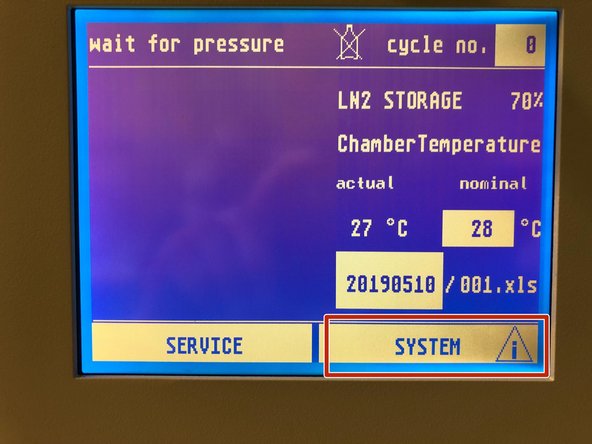
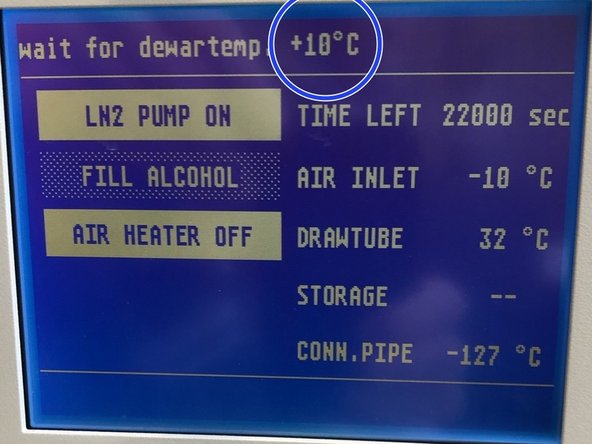
Once the storage dewar has reached a level of below 20% select SYSTEM form the main screen.
-
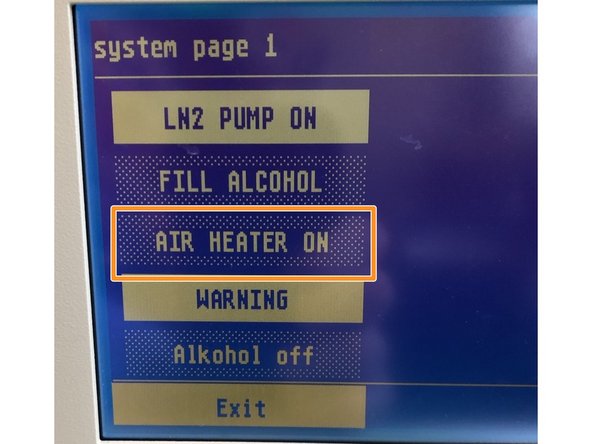
Select AIR HEATER ON.
-
This activates the heating cycle. The 80°C heating cycle will only start once the chamber temperature warms up to 10°C.
-
The bake out will automatically terminate at the end of the cycle leaving the instrument ready for the next user.
-
NOTE: Leave the main power to allow the heating cycle to run.
-
Once the air heating cycle is started, the compressor turns on "air heater working".
-
Once the cycle is complete the machine switches back to the standard screen and you can turn it off using the switch at the front.
-