-
-
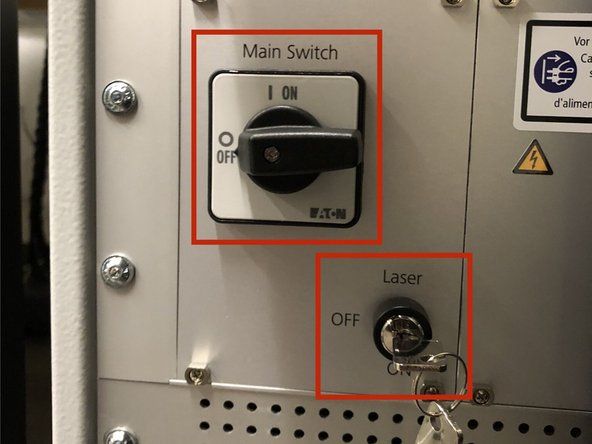
Turn ON the "Main Switch" and also switch the laser key to "ON".
-
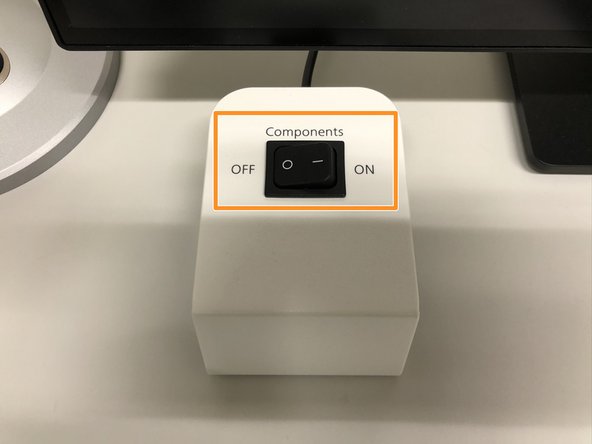
Switch ON the "Components" on the table.
-
-
-
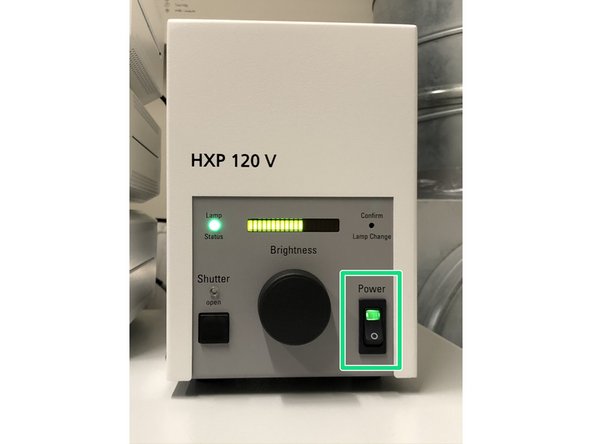
Switch ON the fluorescence lamp.
-
Once turned on, the lamp should remain on for a minimum of 30 min.
-
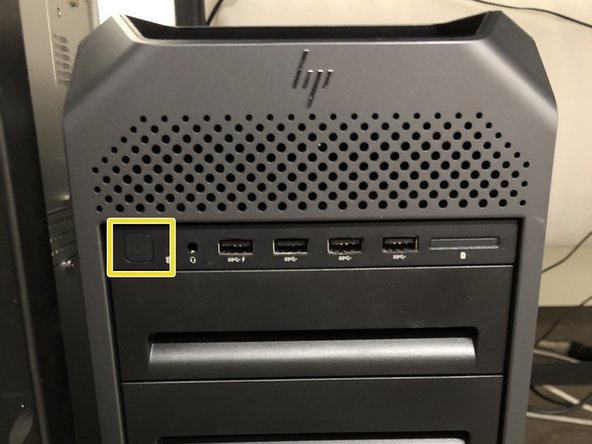
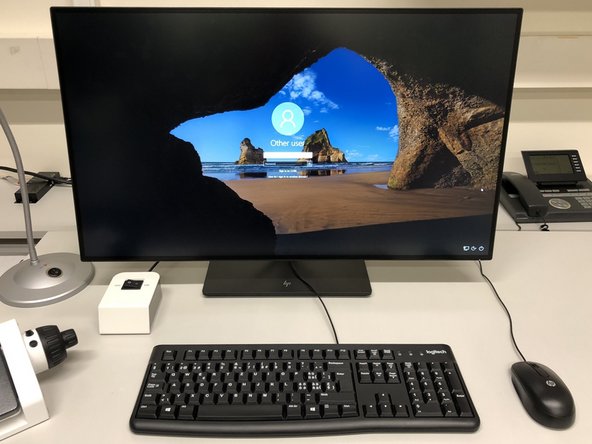
Turn ON the computer.
-
-
-
Sign-in with your ZMB core credentials.
-
-
-
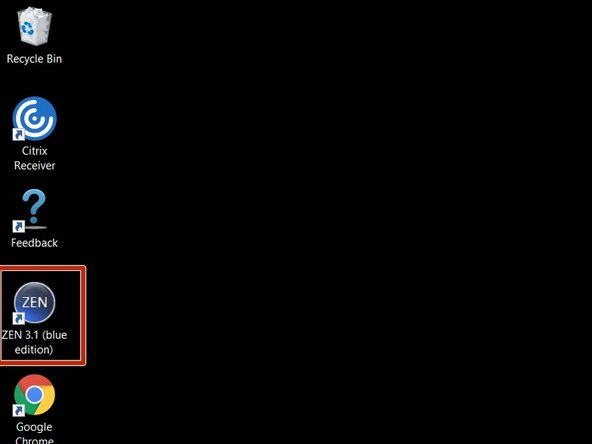
Start the "ZEN 3.x (blue edition)" software.
-
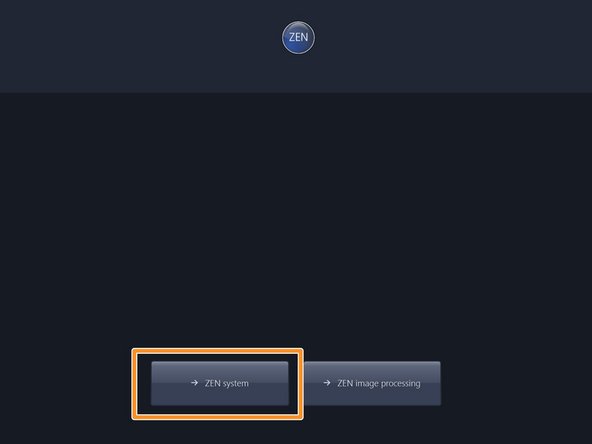
Choose "ZEN system".
-
Make sure there is no sample on the microscope stage and calibrate the stage by clicking "Calibrate Now".
-
-
-
Set up the Aria pump according to this guide.
-
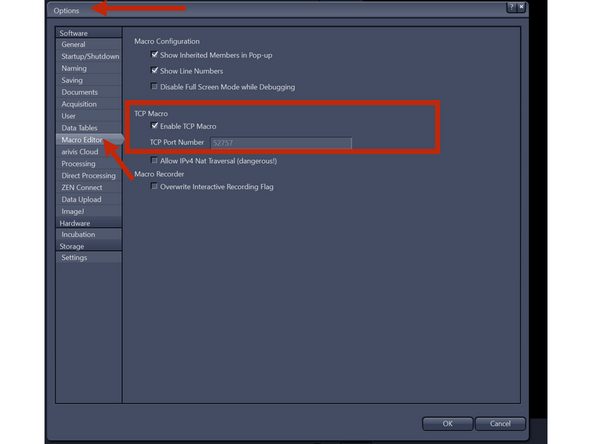
Claim TCP license. In Zen. Tools. Options with wrench symbol. Macro Editor
-
1. connect Aria via USB to microscope PC
-
2. Open Tools -> Module manager -> make sure the Floating licence (FLic Developer Kit) here called Macro Enivrionment is active meaning consumed/checkmarked 2. Open Tools -> Options -> TCP Macro -> enable TCP macro / TCP Port Number 52757 (may vary from system to system)
-
3. Open Aria software -> open parameters (settings) -> make sure TCP port number matches the one in ZEISS ZEN
-
4. In ZEN define your experiment and save as czexp file in Z:\home\n.schilling\Carl Zeiss\ZEN\Documents\Experiment Setups (make sure matching path in Aria)
-
5. create the Aria protocol as shown in example screenshot.
-
-
-
Place the slide in an appropriate sample holder.
-
Place the sample in the sample holder into the microscope.
-
Connect first the waste and then the input tubing to your ibidi slide.
-
-
-
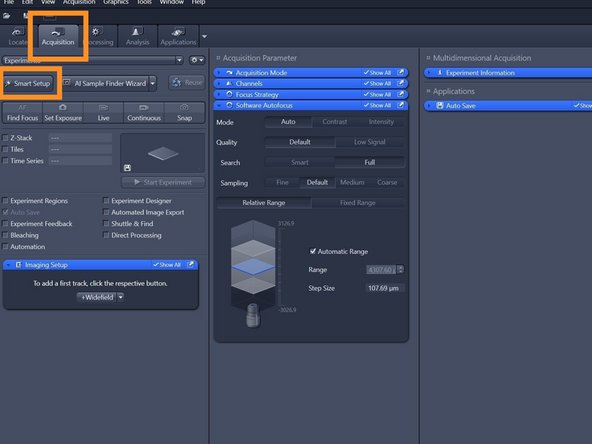
Open the "Aquisition" tab and press "Smart Setup".
-
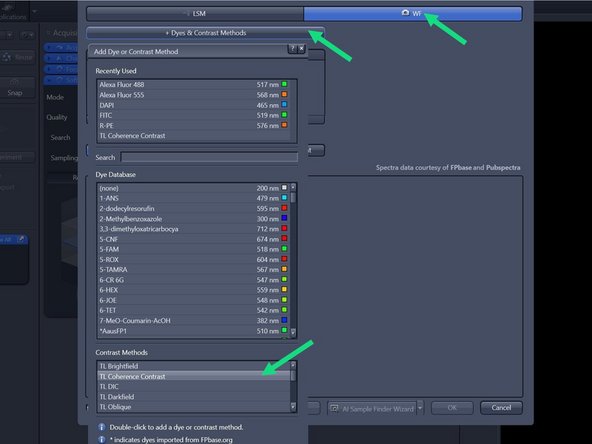
Select "Widefield", press "Dyes and Contrasts" double-click"Coherence Contrast"
-
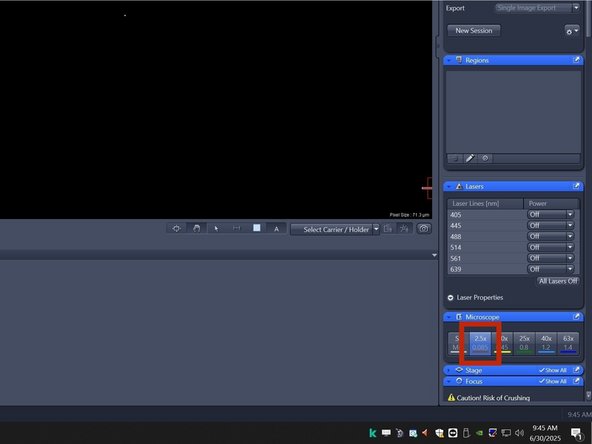
Make sure the 2.5x objective is selected.
-
-
-
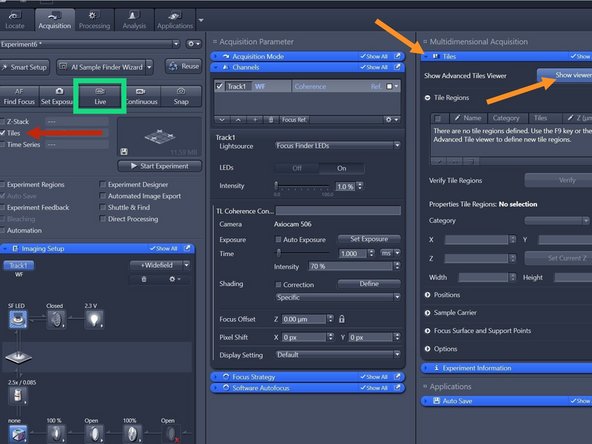
Check "Tiles"
-
Open the "Tiles" tab and click on "Show viewer"
-
Press "Live"
-
Navigate the crosshair to the top left corner of your sample , choose the "Marker-position mode" and press "+"
-
Repeat this step for the lower right corner of your sample
-
-
-
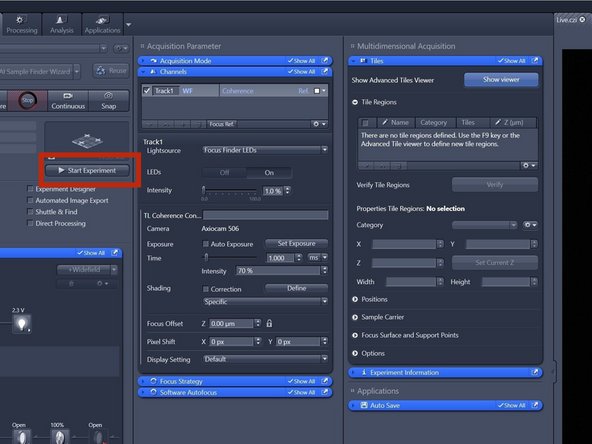
Press "Start Experiment"
-
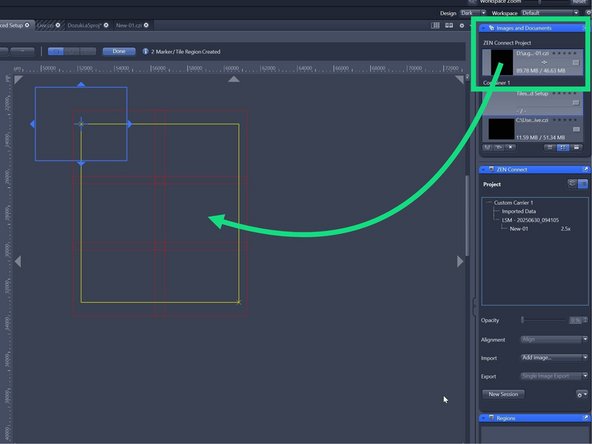
Drag and drop the image from the "Images and Documents" Tab onto the "Tile Viewer"
-
You can now use the Tile Viewer to navigate within your sample
-
-
-
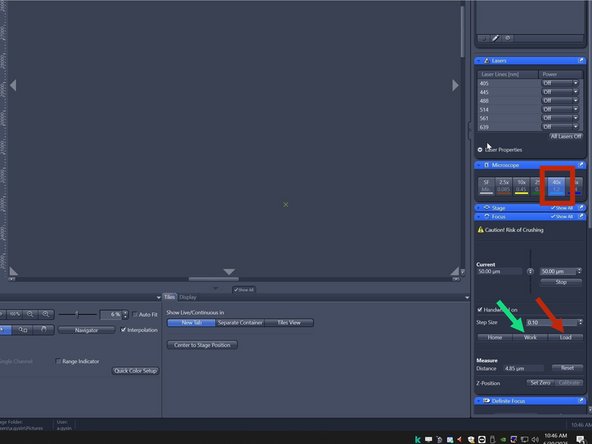
Select the "40x" and press "Load"
-
Remove the entire sample holder and set it down within the microscope without moving the sample in the sample holder or disconecting the tubing
-
Not moving the sample within the sample holder avoids large discrepancies between the 2.5x overview and the later acquired 40x images.
-
Apply a generous amount of oil on the objective
-
Carefully place the sample holder back
-
Press "Work" in the Focus tab
-
-
-
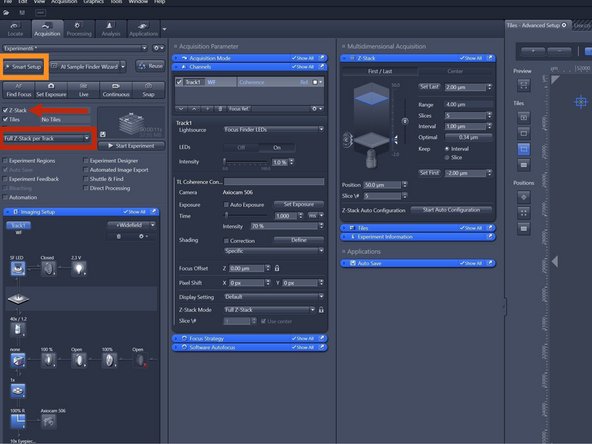
Check "Z-Stack" and choose "Full Z-Stack per Track".
-
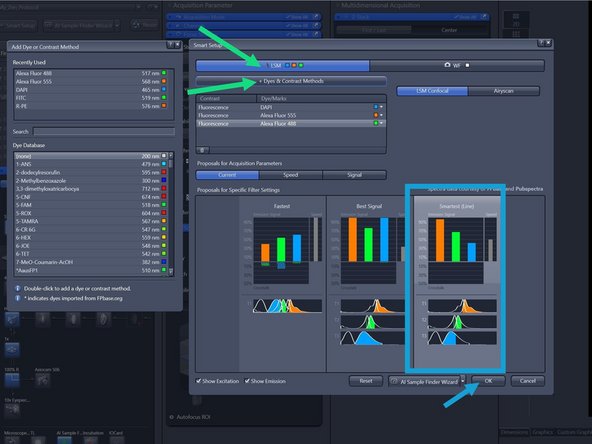
Open "Smart Setup".
-
Press "LSM" , press "Dyes and Contrast" and select your dyes.
-
Select "Smartest (Line)" and press "OK".
-
Alternatively select "Best Signal"
-
-
-
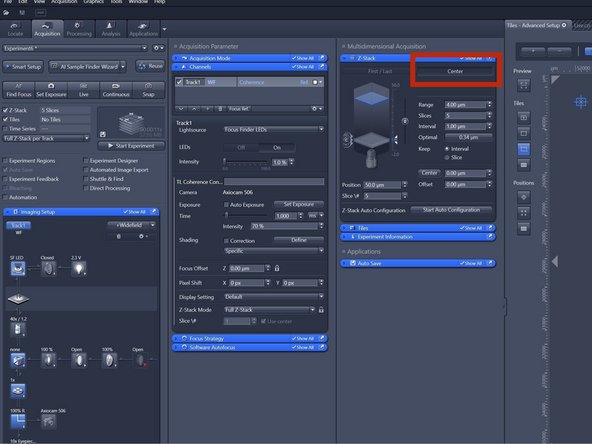
Go to the "Z-Stack" tab and select "Center".
-
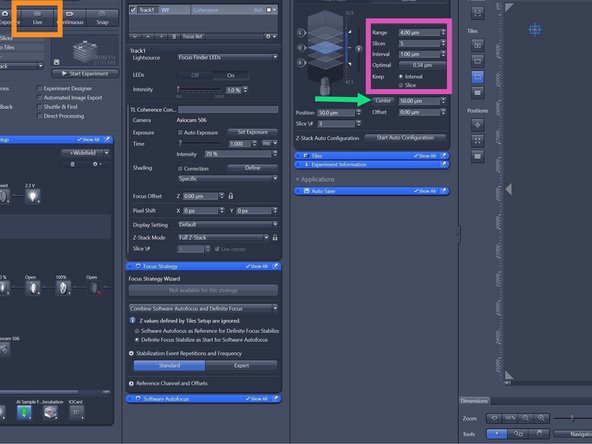
Press "Live" and focus by either using the focus wheel or by pressing Ctrl and using the mouse wheel.
-
Once you have focused, press "Center".
-
Choose the size of your Z-Stack and of the steps.
-
Press "Optimal" for optimal step size
-
-
-
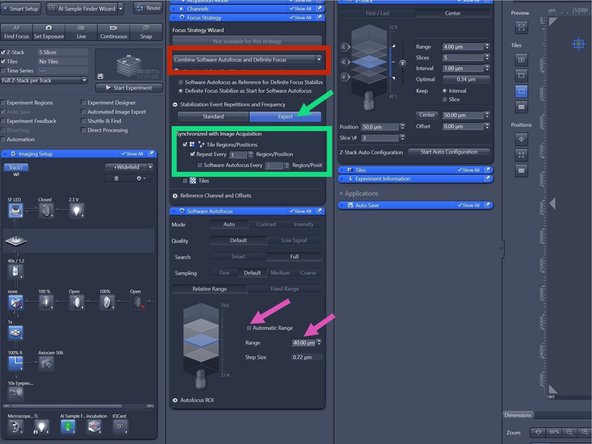
Go to the "Focus Strategy" Tab and select "Combine Software Autofocus and Definite Focus".
-
Press "Expert", check "Tile Regions/Positions" and check "Repeat Every 1 Region/position".
-
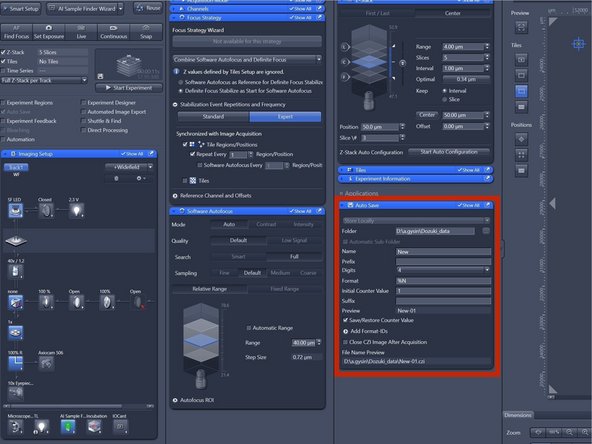
Go to the "Software Autofocus" tab, uncheck "Automatic Range" and set "Range" to 40 micro meters.
-
-
-
Go to the "Auto Save" tab and choose a naming strategy.
-
-
-
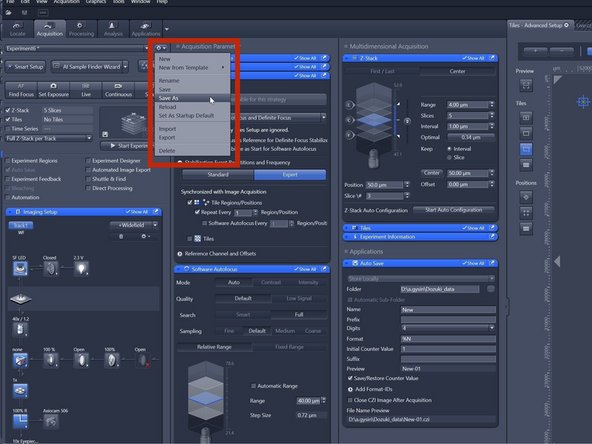
Press the Gear icon, select "Save As".
-
Choose a name for your Zen Protocol and press Enter on the keyboard.
-
-
-
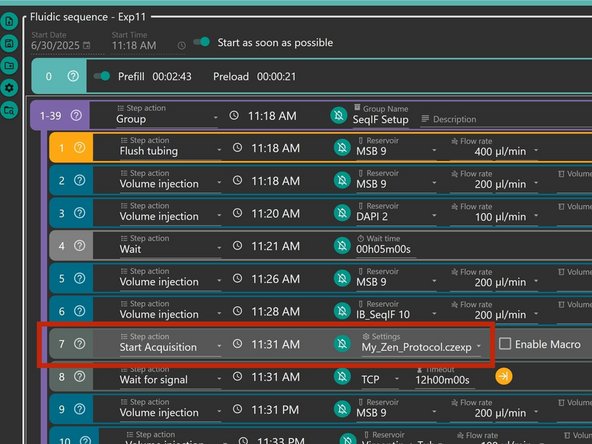
Open the Aria Software and load a sequence using this guide.
-
For ALL "Start Acquisition" steps make sure to select the correct Zen Protocol
-
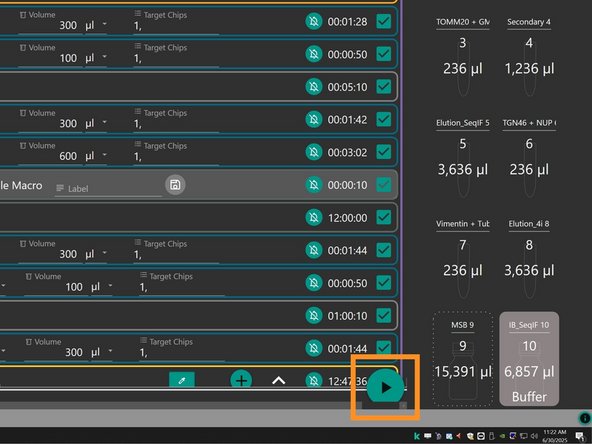
Press the Start Button in the lower right corner.
-
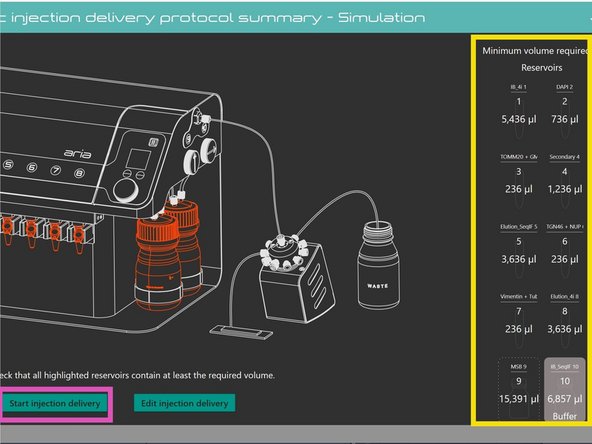
Check if you have enough volume in all reservoirs
-
To start the sequence press "Start injection delivery"
-