Introduction
When performing FLIM or FLIM FRET experiments with a Leica Falcon system, sometimes its needed to extract the pixel by pixel lifetime or FRET data and analyze or visualize it using other software tools. As an example you want to do a pixel by pixel FLIM image fit in the LAS X software but afterwards segment your image (e.g. cells) based on the pixel intensity and extract the corresponding mean lifetimes of your segmented region of interests using FIJI.
Important: This workflow only works using Leica LAS X FLIM/FCS Version 3.5.6 or higher!
-
-
If you do as an example a "FLIM Image Fit" with an intensity threshold, the software will use for all pixels below the threshold the values from here. So if you want them to have a lifetime of zero put in a zero in the respective field here.
-
Do your analysis.
-
-
-
Select the "Free" representation for selecting your fitted variables for export.
-
Select the variables to show and export. Usually its the intensity [Cnts] and something else such as the fitted lifetime [ns].
-
Check and note the min/max values of your selected variables for cross checking the scaling factor after the export.
-
-
-
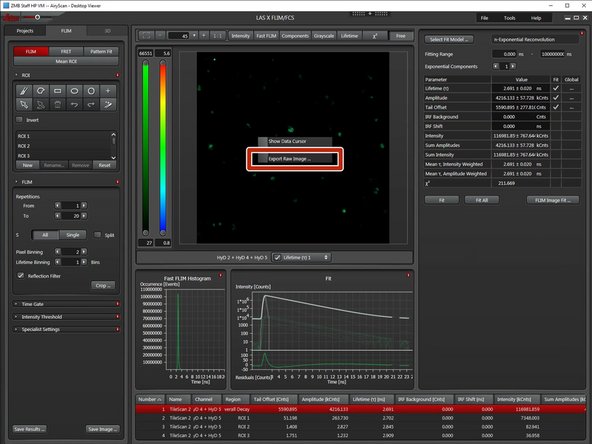
Right click on your image representation and select "Export Raw Image..."
-
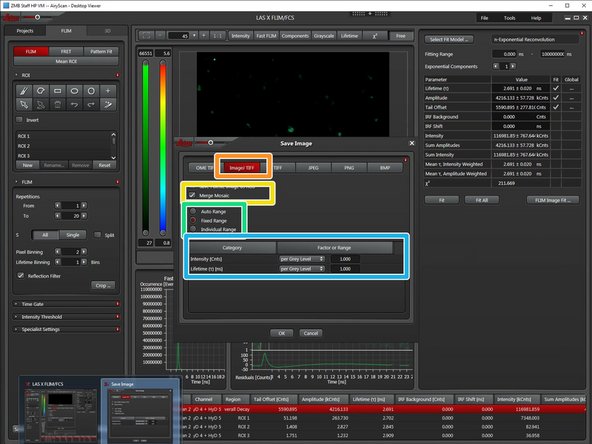
Select an export format. "ImageJ TIFF" might be a good choice for further processing.
-
Select "Merge Mosaic" if you want to export a stitched image of a tile scan.
-
Select "Fixed Range".
-
Select "per Grey Level".
-
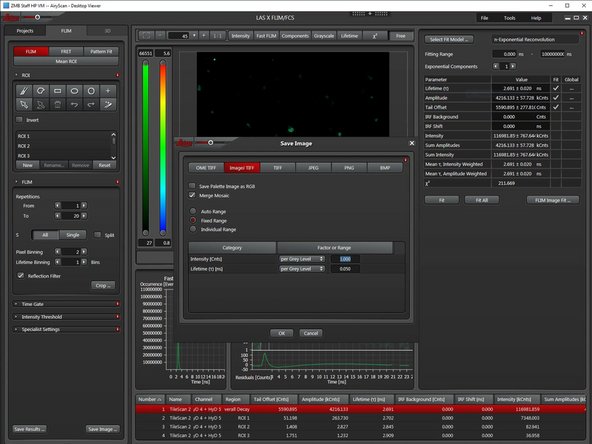
Since LASX is exporting integer .tif files, for certain (non integer) variables such as the lifetime, a scaling factor is needed. This export will round to the next integer value which makes no sense for precise lifetime measurements. So set a scaling factor (e.g. 0.01) and remember it!
-
Press OK to export your raw image.
-
-
-
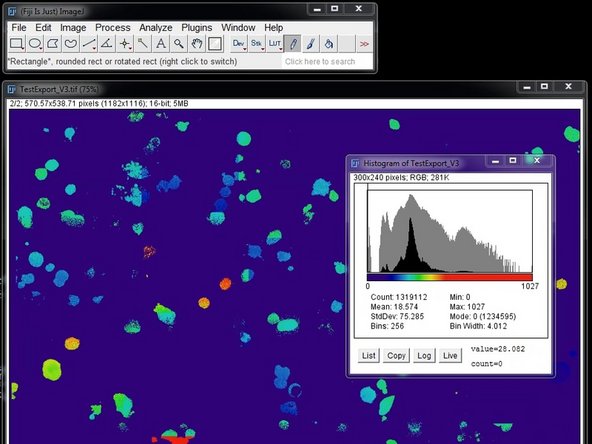
If you open the resulting file in FIJI you should see two channels corresponding to the variables you selected for export (e.g. counts and lifetime).
-
Now you can do a thresholding, segmentation and data extraction on this data by your method of choice.
-
If you want to calculate back the real, fitted values, you have to reapply the choosen scaling factor (multiply).
-
Be careful when segmenting to only include pixels which where within your LASX fitting intensity threshold. Otherwise you include pixels with default/non fitted values and your extracted data might be wrong.
-