Introduction
Why convert to OME formats?
Microscopes produce diverse file formats, complicating interoperability and future-proofing. Converting to an OME (Open Microscopy Environment) format standardizes metadata, ensuring compatibility and facilitating data sharing. We recommend using an OME format especially for publishing data to comply with FAIR principles.
The two OME image formats are OME-TIFF and OME-NGFF/OME-Zarr.
A regular TIFF (Tagged Image File Format) with additional, standardized microscopy metadata.
Pros:
-Wide software support
-Widely used since 2016
Cons:
-Bad performance for large files (larger than ~20GB)
"Next Generation File Format", using the Zarr file format. Also standardizes microscopy metadata.
Pros:
-Great for large files
-Cloud ready
-Large datasets can be processed and visualized efficiently
Cons:
-Still in development
-Not as wide software support as OME-TIFF
How?
Here, we explain how to use the 'NGFF-Converter' tool to convert images to OME-TIFF or OME-Zarr.
-
-
Open the NGFF-Converter.
-
-
-
Drag and drop one or multiple files onto the main window.
-
In the pop-up window, choose the file-format to convert to...
-
...and the export location.
-
Click Apply.
-
The file will be added to the list of jobs.
-
-
-
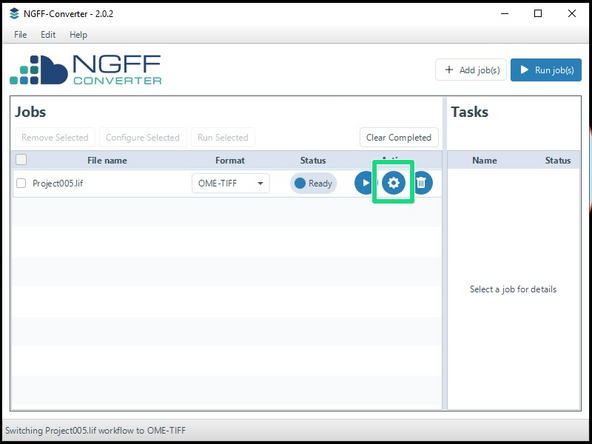
For additional settings, click the 'Settings' button.
-
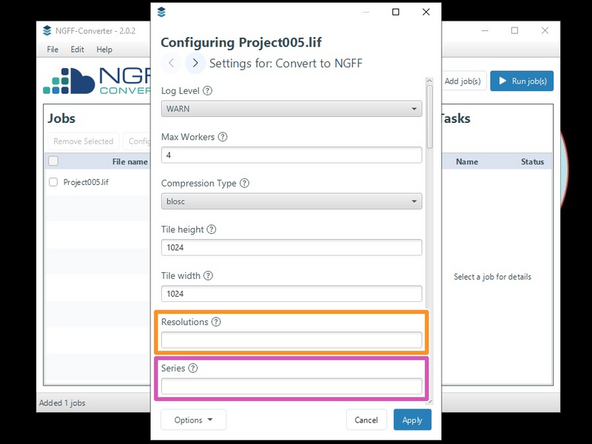
The "Settings for: Convert to NGFF" apply aswell, if you are exporting to OME-TIFF.
-
Interesting settings are:
-
Resolutions: The data will be stored in a pyramidal format. Here, you can specify how many resolutions should be stored.
-
If no sub-resolutions are needed, enter 1.
-
Series: If the file contains multiple images (as e.g. can be the case in a .lif or .czi file), you can choose which images to convert by entering the corresponding number(s) (starting at 0).
-
All selected images will be saved in one file, so if you want one file per image, you need to specify which image should be converted here.
-
-
-
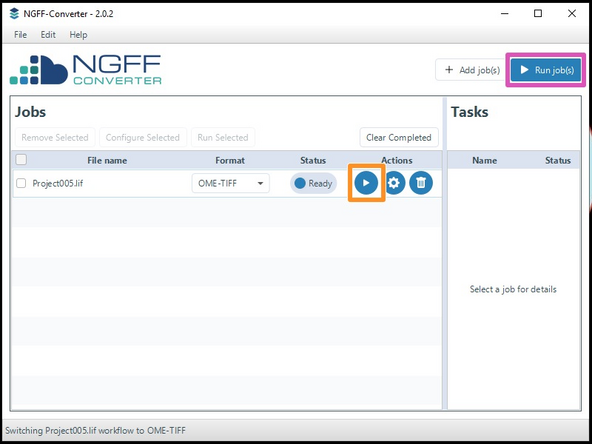
Start either a single job...
-
...or all jobs.
-
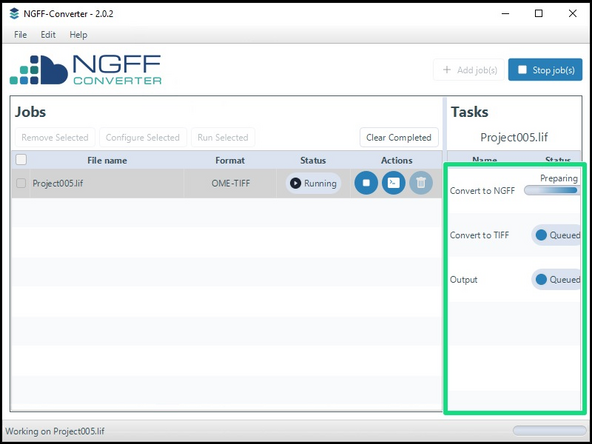
The progress of the conversion is shown in the right tab.
-
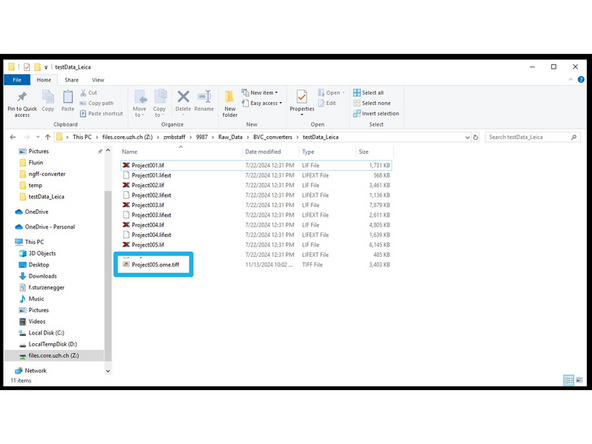
The converted file will be exported to the specified location.
-
-
-
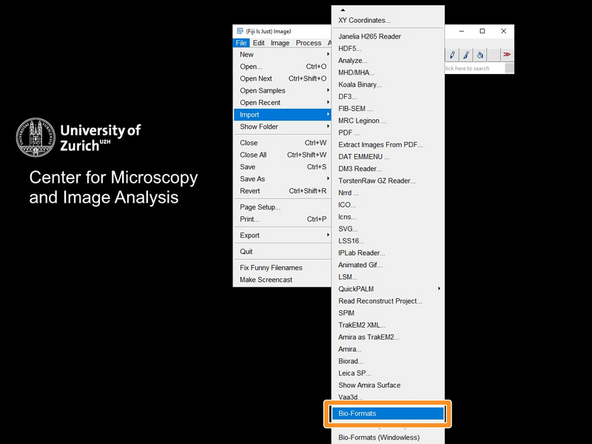
Open Fiji and import the .ome.tif file via the BioFormats importer: File->Import->BioFormats
-
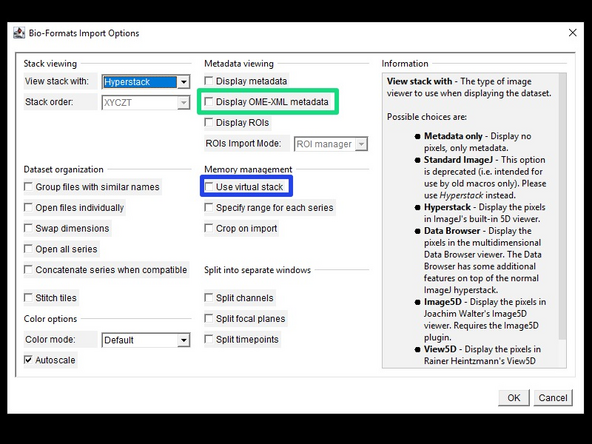
In the Bio-Formats Import Options window, you can adjust different import options (the default is usually fine). Interesting options are:
-
'Display OME-XML metadata' will display the detailed OME metadata of the file.
-
'Use virtual stack' is useful for visualizing very large images and will only load the slices of the image that are currently displayed. This results in much faster initial loading, but slower navigation of the data.
-
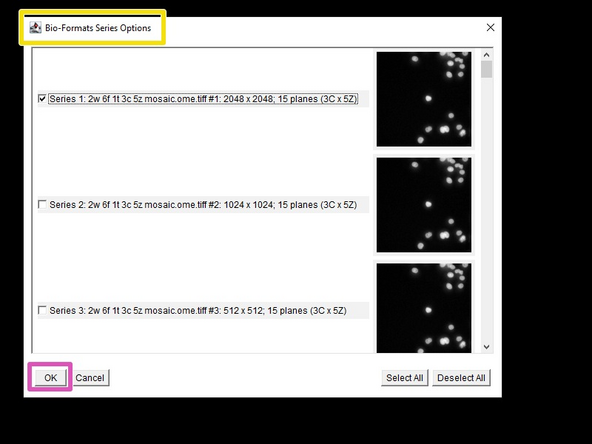
If the file contains either multiple series, or pyramidal data, an additional window will open, letting you decide which to import.
-
The different resolution levels in pyramidal data can be identified via the image-shape. E.g. 2048x2048, 1024x1024 and 512x512 are here the different resolution levels of the same image.
-
Press OK to import your selected image(s).
-
-
-
OME-Zarr files are saved in a folder-structure where the top-folder has either the .ome.zarr or the .zarr ending. Altering the contents of the folder can break the entire imge!
-
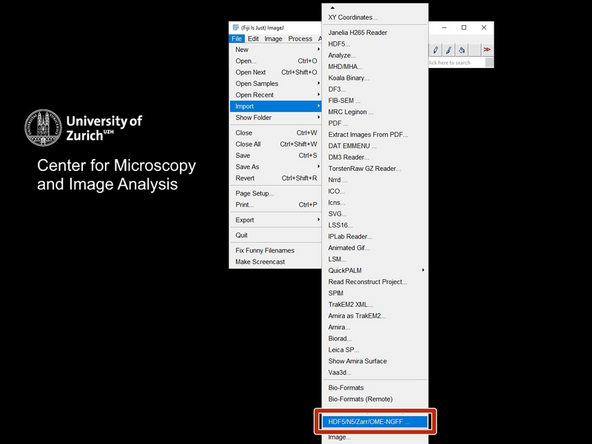
Open Fiji and open the ome-zarr importer: File->Import->HDF5/N5/Zarr/OME_NGFF.
-
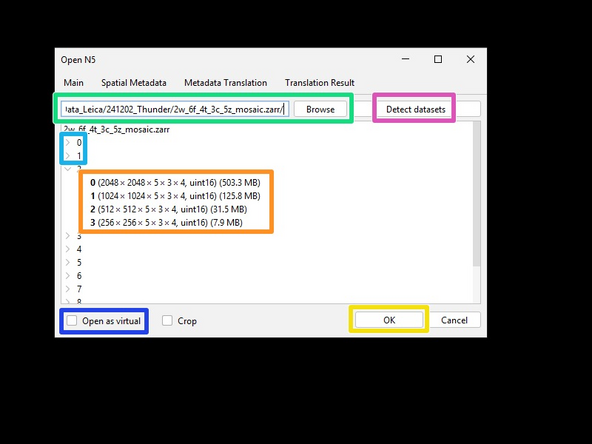
Enter the path to the .zarr file.
-
Press 'Detect datasets' to list all the available images in the file.
-
Browse and select the available series...
-
...and resolution levels to import.
-
The option 'Open as virtual' is useful for visualizing very large images and will only load the slices of the image that are currently displayed. This results in much faster initial loading, but slower navigation of the data.
-
Press OK to import the selected Image(s).
-


