
Introduction
In this guide for the ZMB Benchtop MesoSPIM lightsheet microscope you learn how to locate and focus a sample as well as setting up and acquiring a z-stack.
For a full documentation about the microscope please, visit the project webpage: http://MesoSPIM.org
-
-
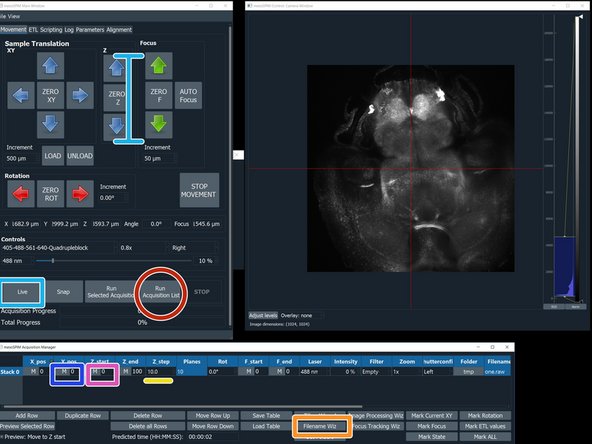
Press "live" to get the first image and stop.
-
Default settings: Right laser illumination; Zoom: 1; 488 nm; Filter 405-488-561-640-quadrupleblock filter. Change this in the corresponding boxes if you need other settings.
-
Click "Adjust Levels" for adjusting the histogram.
-
Use the Y arrows to move the sample up or down (Y).
-
Use the X arrows to move the sample left or right (X).
-
Use the Z arrows to bring the sample into the plane of the lightsheet.
-
It is recommended, after some movements, to stop the scan and check the position of the cuvettes to avoid collisions between the inner and outer cuvettes.
-
-
-
Manual Focus: use the Focus arrows to focus the lightsheet. Start with a course focus step of 500 um, change the "Increment" to 100 um and for a final fine focus, change the focus "Increment" to 20 um.
-
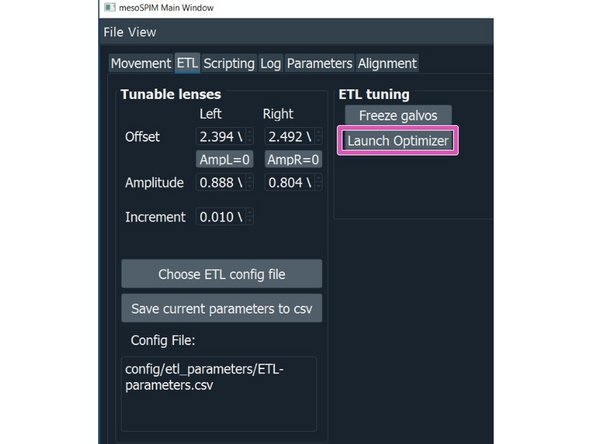
AUTO Focus: click on the "AUTO Focus" to launch an optimizer that lets you automatically search for the best focus within a given range from the current position.
-
Click on "RUN"
-
Once the autofocus has run a new window will appear showing the optimization results. If you are satisfied with the new focus click "Accept".
-
-
-
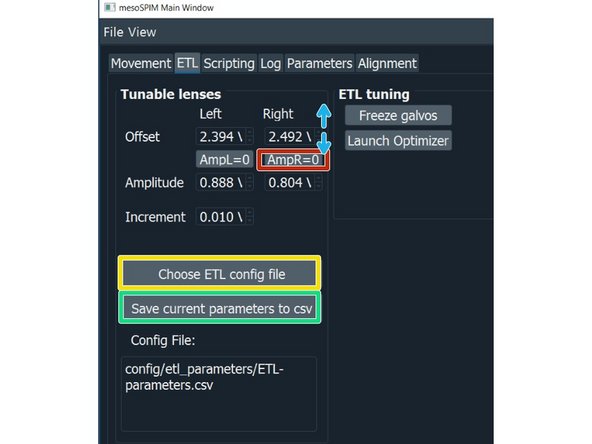
Click "Choose ETL config file", select your ETL parameters file. The file is also specific for the clearing method you are using.
-
Manual ETL adjustment with sample: For the ETL optimization press on "AmpL = 0" to set the ETL amplitude to 0.
-
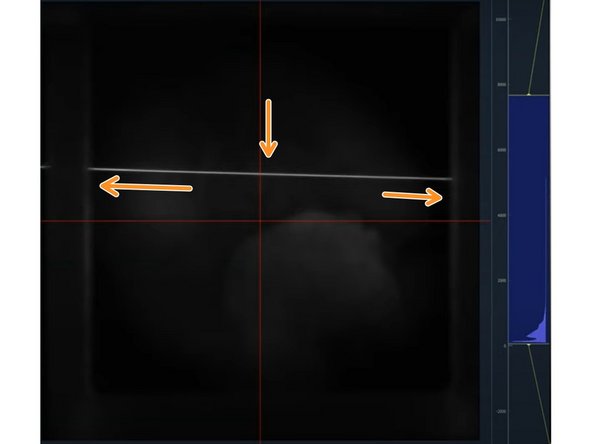
Hover with the mouse arrow over the corresponding offset value and use the mouse wheel to adjust it. Find the waist in the camera image and bring it to the center.
-
Press again on "AmpL = 0" to set the value back to the stored value.
-
Press "save current parameters to csv".
-
ETL parameter optimization: It best performs using a highly transparent sample with sparse but evenly distributed labeling, such as vasculature.
-
Manual method without sample using a parked galvo and scattered laser beam: "https://www.youtube.com/watch?v=dcJ9a7VA...
-
-
-
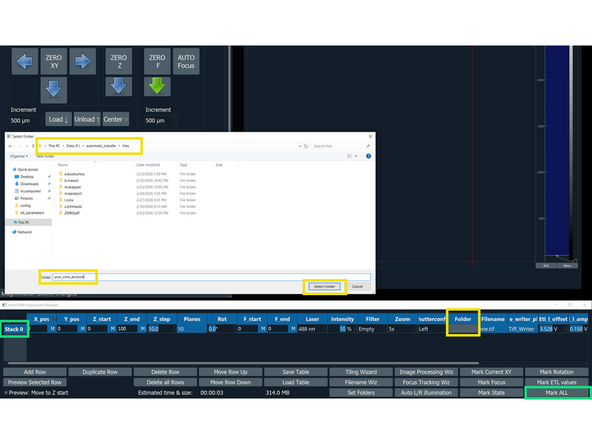
In the "mesoSPIM Acquisition Manager", click on "Stack 0", followed by "Mark ALL"
-
Saving data: Click on "This PC" and select the drive F:\ (Data), select the folder automatic_transfer, then files and create a folder with your core username. The path should look as follows: Data(F:)/automatic_transfer/files/coreusername
-
Press live and use the Z arrows to select the beginning of the stack.
-
Click on the "M" button to the left of the "Z_start" to record this position.
-
Use the Z arrows to localize the end of your stack. Then press the "M" button to the left of "Z_end".
-
Insert the step size in micrometers. The number of planes will be automatically calculated.
-
Click "Filename Wizard". In the appearing menu select "save as" BigDataViewerfile: h5; give a name to the file and press "finish".
-
Click "Run Acquisition List"
-
-
-
The 5x objective should be "per default" mounted at the Benchtop.
-
If you want to use other objectives, there are more stored on the wall close to the microscope.
-
Make sure to open the objective container before unscrewing the objective from the benchtop mesoSPIM.
-
-
-
Carefully unscrew the objective and place it in the objective box (Watch video)
-
-
-
Similar to taking the objective out now, screw the new objective in (watch video).
-
In the MesoSPIM software select the objective you have exchanged.
-


Cancel: I did not complete this guide.
One other person completed this guide.
