Introduction
This guide details how to use the "MASTER - 6 Ab/Mix" template protocol on the Andrew+ robot for automated immunolabeling of adherent cells in a 96-well plate.
It is a flexible template designed for staining with up to 6 different primary and secondary antibodies or antibody mixes. This template can be easily customized in the OneLab software to fit your specific experiment, whether you need to use fewer antibodies or stain specific wells, columns, or the entire 96-well plate.
The core protocol automates all washing, blocking, and incubation steps, ensuring gentle cell handling and highly reproducible, walk-away results.
Reagents:
- Multistaining Buffer (MSB) - For blocking and antibody dilution.
- PHEM Buffer - For washing steps.
- Your specific primary and secondary antibody solutions.
-
-
Your first step is to create a personal, editable copy of the master protocol without altering the original template.
-
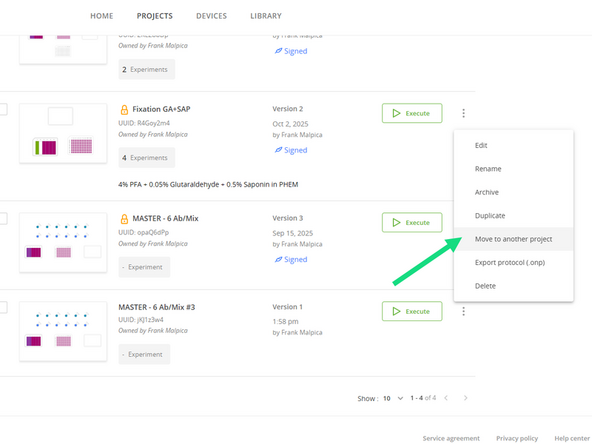
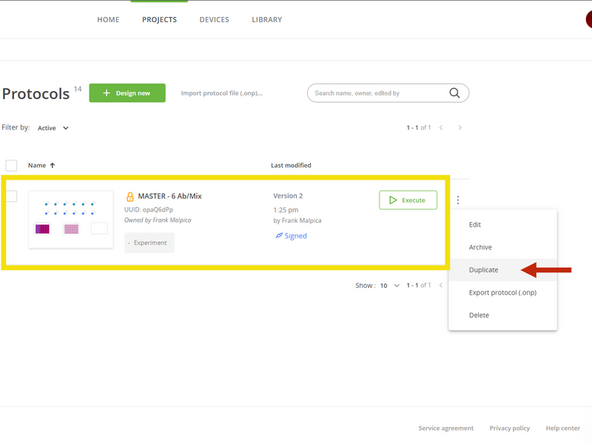
In the OneLab software, find the "MASTER - 6 Ab/Mix" protocol.
-
Click on the three dots and select Duplicate.
-
Give your new protocol a descriptive name that reflects your experiment (e.g., "Immunolabeling Tubulin & TOMM20 - 15-09-2025").
-
For organization, transfer the duplicated file to your own project folder by clicking on the three dots and selecting Move to Another Project
-
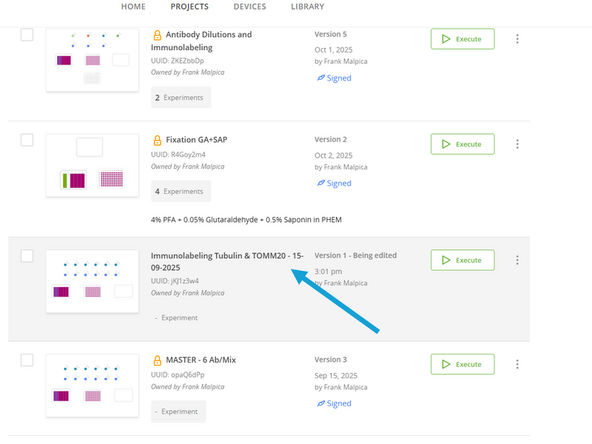
Now open your protocol by clicking on it.
-
-
-
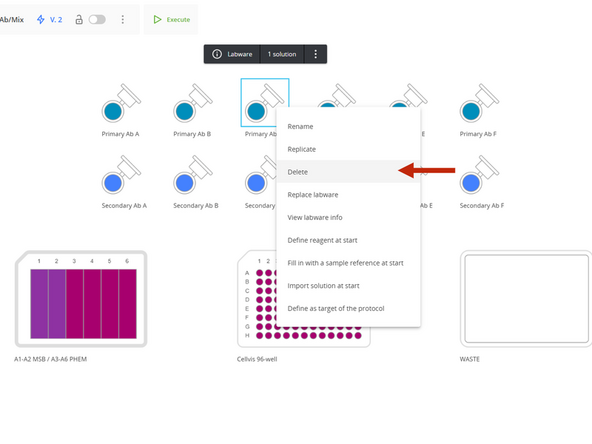
The master protocol is built for 6 different primary and secondary antibodies / antibody mixes (A-F). If you are using fewer, you must delete the unused antibody addition steps.
-
Any changes you make to the protocol are saved automatically.
-
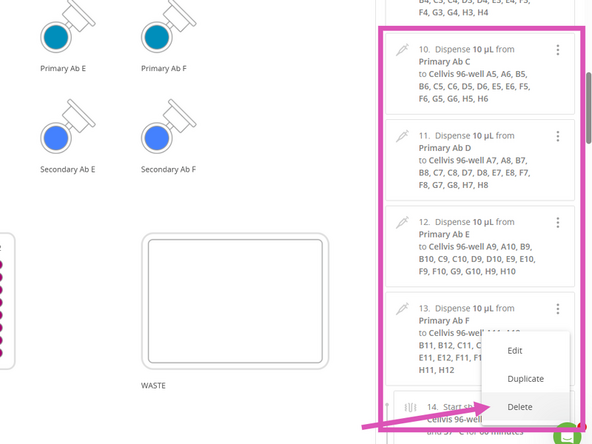
Example: If you are only using two antibody sets (A and B), you must delete the pipetting steps associated with antibodies C, D, E, and F.
-
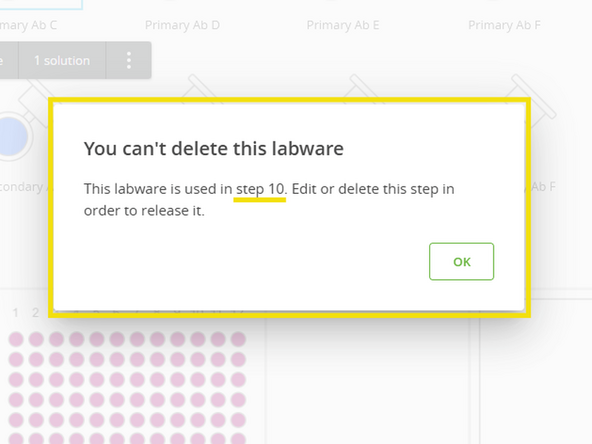
To identify which steps use a specific antibody, attempt to delete its labware from the setup list.
-
A message will appear identifying the protocol step where that antibody is used.
-
Delete Primary Antibody addition steps. To avoid renumbering the remaining steps, delete them in reverse order, starting with step 13, 12, 11, and 10.
-
Delete Secondary Antibody addition steps. To avoid renumbering the remaining steps, delete them in reverse order, starting with step 29, 28, 27, and 26.
-
-
-
To avoid confusion during setup, rename the generic antibody and reagent labels to match your actual experiment.
-
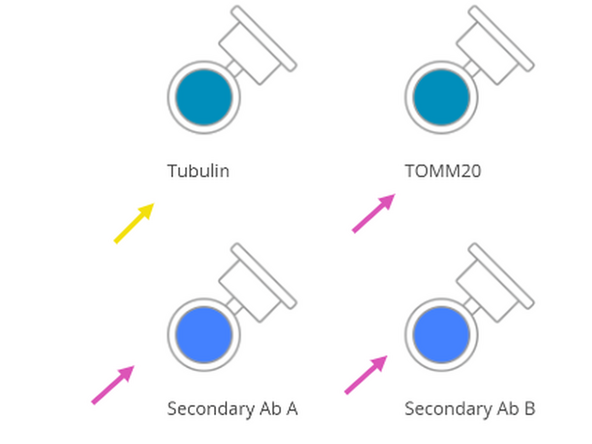
Click on "Primary Ab A" and rename it to your specific antibody (e.g., "Tubulin").
-
Repeat this process for all primary and secondary antibodies you are using.
-
Properly renaming the antibodies is key for correct labware placement, and it enables OneLab to display the required volume for each.
-
-
-
The protocol defaults to staining all 96 wells. If you are only using a portion of the plate, you must adjust this for every step to save reagents and time.
-
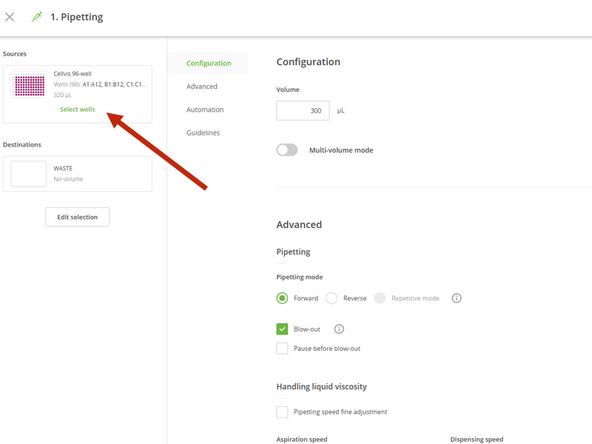
Click on the first pipetting step in the protocol sequence.
-
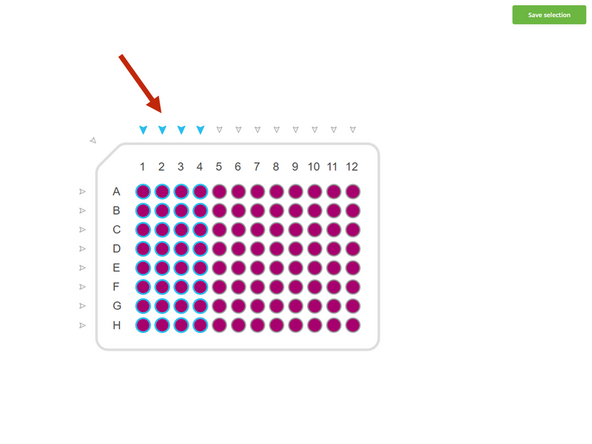
Click on edit and select the destination wells you wish to use (e.g., columns 1, 2, 3, and 4).
-
Crucially, you must apply this same well selection to all subsequent wash, blocking, and antibody addition steps to ensure the entire process is performed only on your chosen wells.
-
-
-
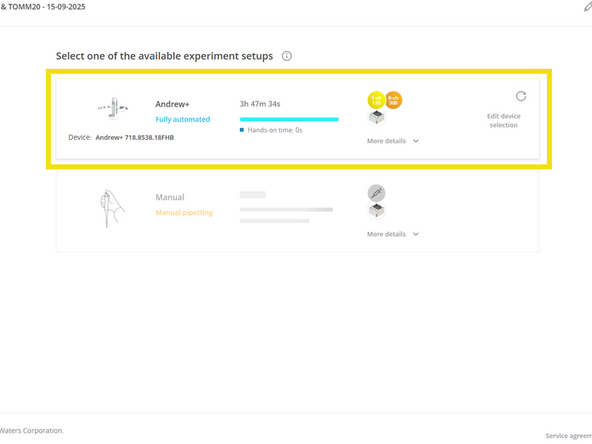
Press Execute to proceed
-
Select the Andrew+ after estimated duration time is displayed
-
A material list will be displayed
-
-
-
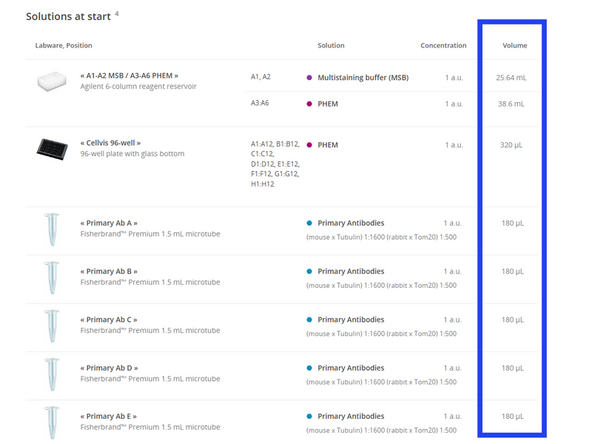
Prepare Reagents and Labware. Before placing anything on the robot, prepare all your solutions and labware.
-
Calculate Volumes: OneLab will automatically calculate the required volume for each reagent based on your customizations in the previous steps. It is highly recommended to prepare 15-20% extra of each solution to account for dead volume and ensure a successful run.
-
Fill Labware:
-
Cell Plate: Ensure your cells are ready for staining in the 96-well plate. The starting volume in each well should be 320 µL or less.
-
Wash Buffer Reservoir: Following the on-screen guide, fill MSB into columns A1-A2 and PHEM into columns A3-A6 of the 6-column reservoir.
-
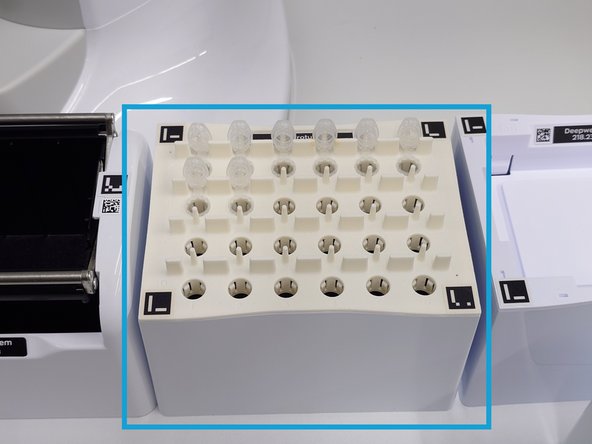
Antibody Tubes: Aliquot each primary and secondary antibody solution into a separate, clearly labeled 1.5 mL microtube and place them with lids open in their respective Domino positions.
-
Waste Reservoir: Ensure the 300 mL waste reservoir is empty.
-
Load the required pipette tips onto the deck as specified in the material list. The software will verify the tip count during the pre-run check and will alert you if an insufficient number is detected before the run begins.
-
-
-
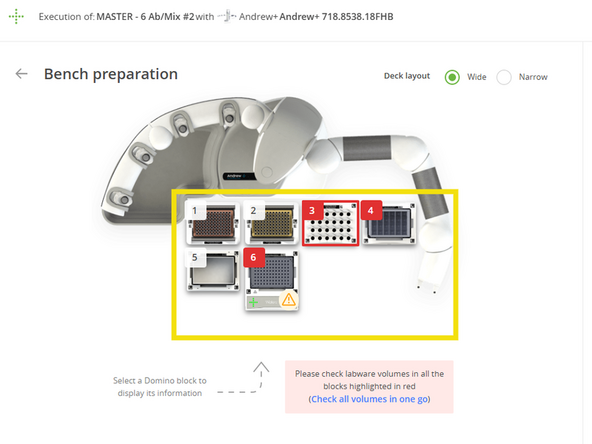
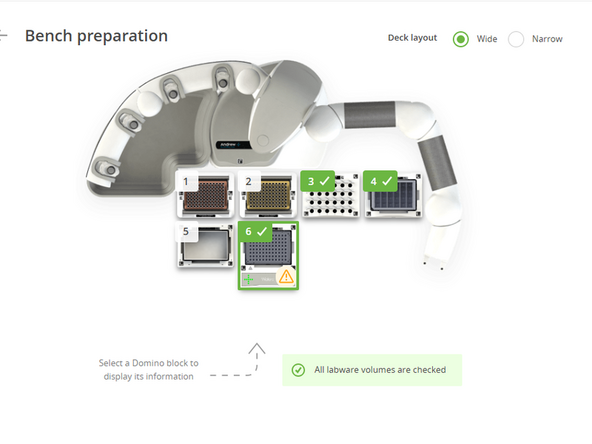
Deck Setup and Final Volume Check This is the final checkpoint before starting the automated run.
-
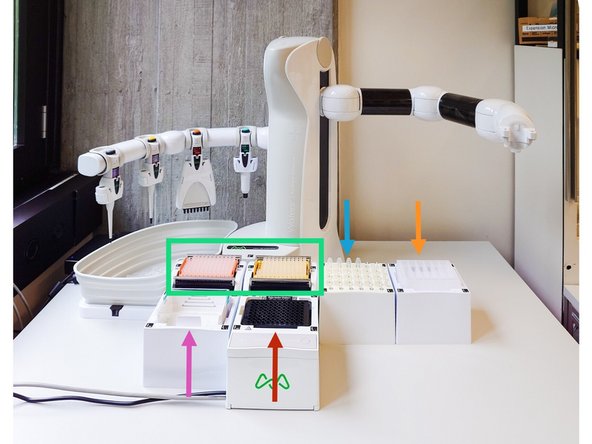
Arrange the Deck: Following the visual layout in your OneLab protocol, place all prepared labware onto the Andrew+ deck. Each item is held by a magnetic Domino that locks into a specific position. Ensure every plate, reservoir, and tube is securely seated before proceeding.
-
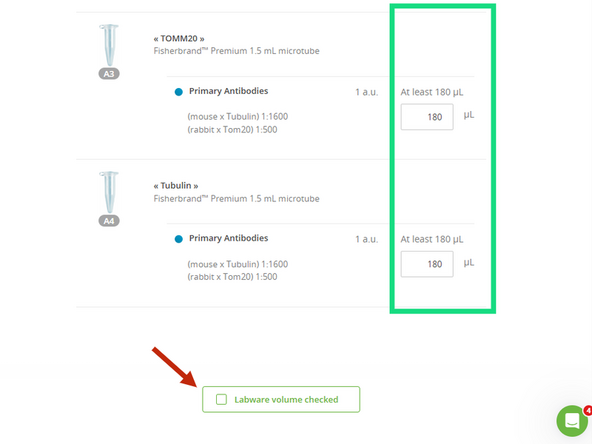
Verify Volumes: In the OneLab software, the "Bench preparation" screen will display the minimum required volume for each reagent. Visually confirm that the liquid in each of your tubes meets or exceeds this requirement.
-
Confirm: Once you have verified all volumes, click the "Labware volume checked" button in the software to proceed.
-
-
-
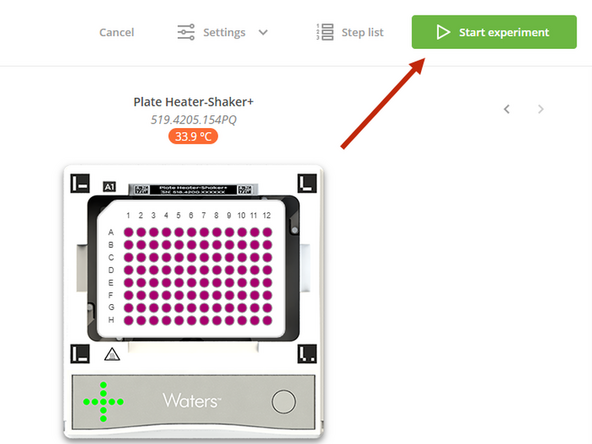
With the software customized and the deck physically set up and verified, you are ready to begin.
-
It is highly recommended to lower the laboratory window shades before starting. Too much ambient light can interfere with the robot's camera calibration.
-
From the OneLab interface, start the experiment.
-
The Andrew+ robot will now initiate its pre-run sequence. It will first perform system calibrations and use its camera to verify the correct placement of all labware on the deck. Once these verification checks are successfully completed, the robot will proceed to execute the entire immunolabeling protocol automatically.
-