Introduction
In this guide of the Center for Microscopy and Image Analysis we describe how to set up the environmental control for live cell experiments at the Visitron Spinning Disk microscope located at UZH Irchel, room Y23-F-14.
Please consider
- an equilibration time of 30 to 60min before starting the actual imaging experiment to assure stability.
- Use dishes or well plates suited for imaging. Preferably glass bottom.
- Make sure your media does not interfere with the imaging - e.g.use media without phenol red.
-
-
Switch on system according to the "Start-up" guide (Step 1 and 2). In brief:
-
Switch ON power strip [1] and wait until PC has started up.
-
Switch ON power strips [2] and [3] after PC has started up.
-
Check if all laser keys are turned ON (4).
-
Sign-in with your ZMB core credentials.
-
Start the "VisiView" software.
-
-
-
Find the Humidifier bottle and lid at the lower shelf of the rack. For use best to bring up to the top shelf, or right-hand-side of the microscope stand.
-
Fill the glass bottle with ddH2O. A container with ddH2O is provided at the system.
-
Carefully attach the Humidifiers lid to the glass bottle (due to all the cables and tubes the bottle needs to be screwed in).
-
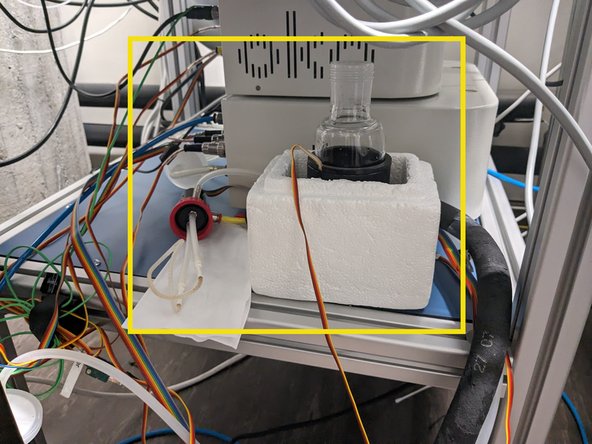
Place glass bottle into the heater (black cylinder).
-
Please keep heater and bottle inside the little styropor box in order to guarantee safe standing (as without the construct is a bit shaky).
-
Make sure the humidifier tube is connected (check also label).
-
No need to unplug this connection every time.
-
-
-
The CO2 gas bottle can be found on the right at the entrance of the room.
-
Open the corresponding wall mounted distribution valve ("Spinning Disc").
-
The valves might be already open due to usage on the ScanR system.
-
Gently open the main tap of the gas bottle.
-
As well as the small knob on the right.
-
Please DO NOT CHANGE the pressure control tap!
-
Open the "Air" supply valve located at the left hand side of the PC table (here shown in the open position).
-
-
-
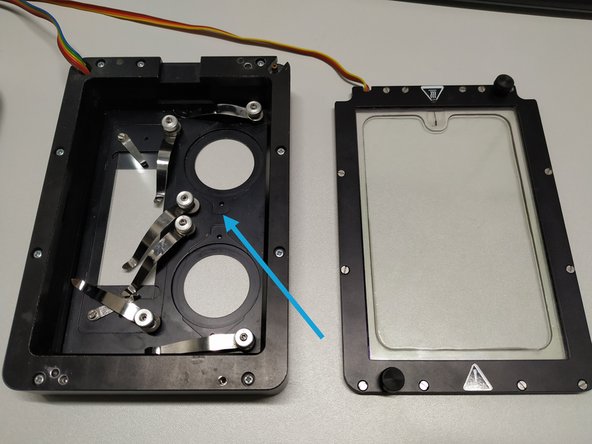
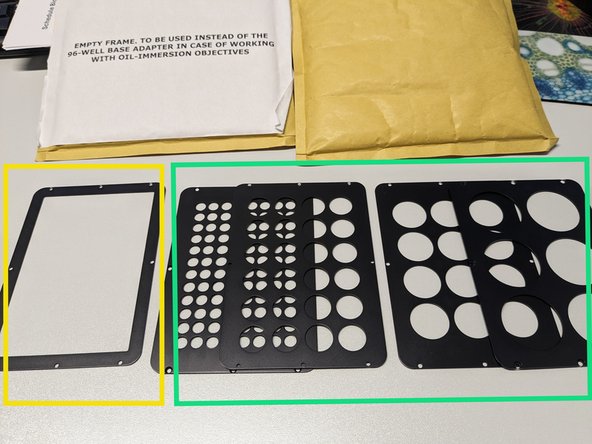
For the stage top heating chamber different adapters are available.
-
Empty Frame
-
Different well plate adapters.
-
Slide and 35mm dish adapter.
-
The adapters can be easily exchanged depending on your needs.
-
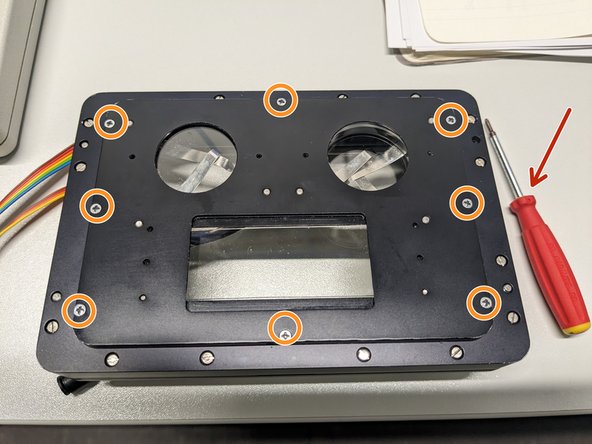
Find the appropriate tool/cross-head screwdriver (magnetic) in the blue toolbox (lowest shelf of the trolley).
-
Detach the 8 screws, exchange the adapter and tightly attach again the 8 screws. For easier handling the screws/screwdriver is magnetic.
-
Not all adapters are compatible with immersion objectives.
-
-
-
Make sure to have the 10x selected and objective turret is lowered.
-
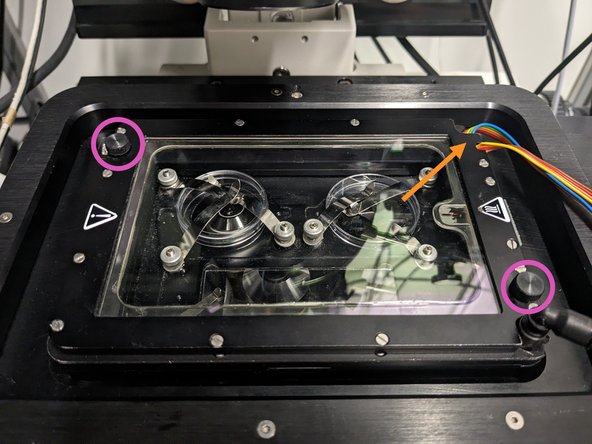
Insert the heating chamber into the stage, gently tightening with the little screw (arrow direction indicates how to tighten the screw).
-
Make sure the right hand side opening is closed. If the inlet/outlet is required for inserting any tubing the rubber can easily be removed and set aside.
-
Close the chamber by tightening the two black screws on the lid.
-
Make sure the chamber is fully closed to ensure accurate heating - cover the open spaces in the adapter while no sample is mounted.
-
For ease of handling assure that cabeling of chamber and lid is on the right hand side.
-
Attach the gas tubing to the heating chamber by simply pushing the black tube ending into the fitting. Pull to check if secure.
-
-
-
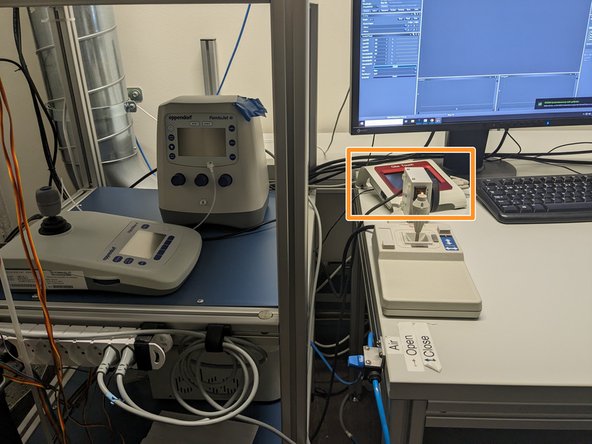
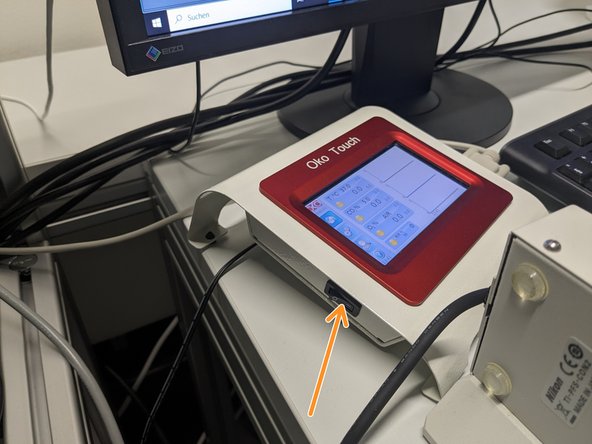
Switch on the "Oko Touch" (located at the PC table).
-
-
-
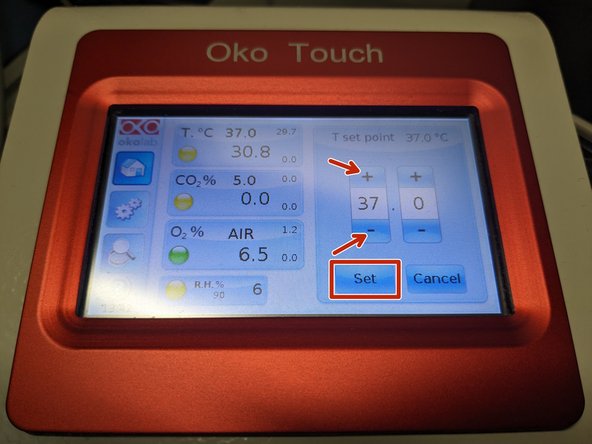
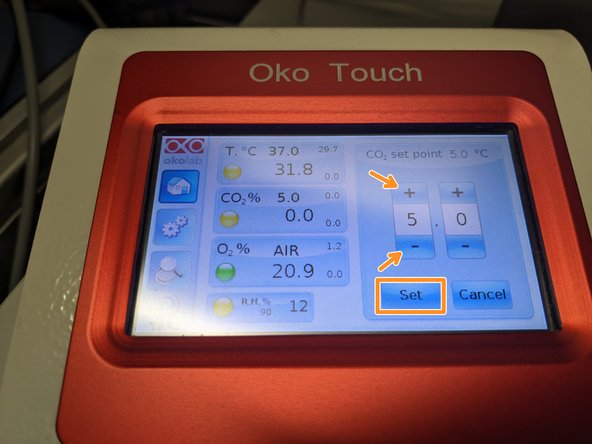
Set the desired temperature by clicking on the "T" tab. With "+" and "-" define your "T set point" and click "Set".
-
Set the desired CO2 level by clicking on the "CO2" tab. With "+" and "-" define your "CO2 set point" and click "Set".
-
If no CO2 is required enter "0" as set point. The CO2 gas bottle does not need to be opened.
-
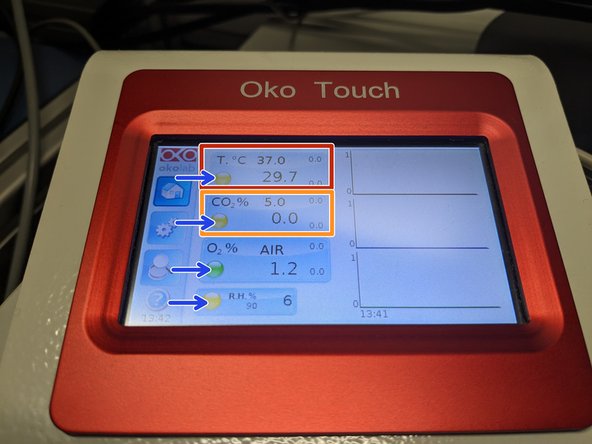
The colored lights/dots in each tab indicate the following:
-
GREEN - set-point value reached within tolerance.
-
YELLOW - start-up or transient period, system working to reach the set-point. No actions required.
-
ORANGE - value currently out of tolerance. Maybe please double-check (cable connections, if feeding air/gas tanks are closed or finished e.g.)
-
RED - there is something to fix (proper tubing, cable connections, gas supply. Please contact ZMB staff if problem persists.
-
-
-
Usually the same adapter is used by most of the users. For proper functioning it is mandatory to check on the adapter, and/or should be changed if another one is used.
-
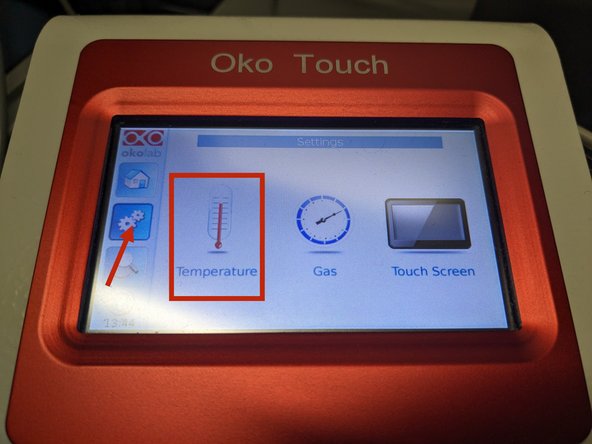
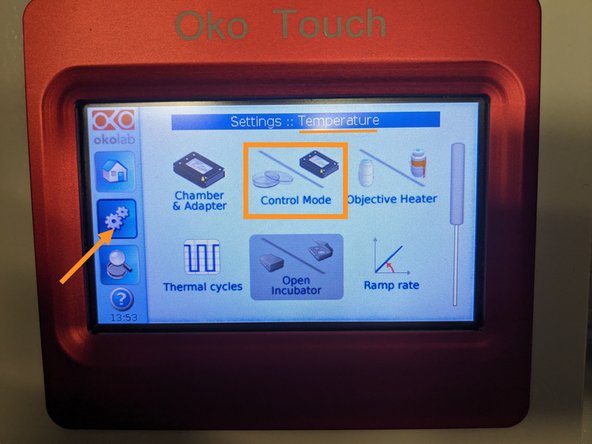
Go to "Settings" and choose "Temperature".
-
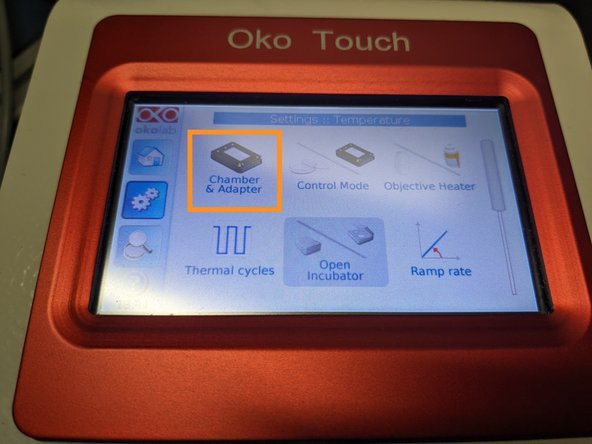
Select "Chamber & Adapter".
-
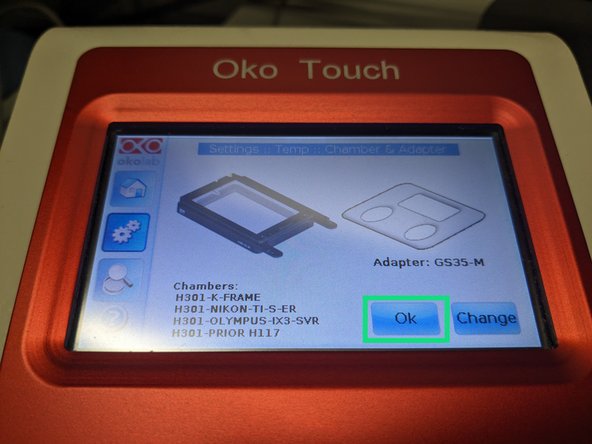
Click on "change" and the window "Chamber & Adapter Wizard 1/2" will open.
-
The correct chamber should be the 1/11.
-
Click "Next" to select on the inserted adapter.
-
-
-
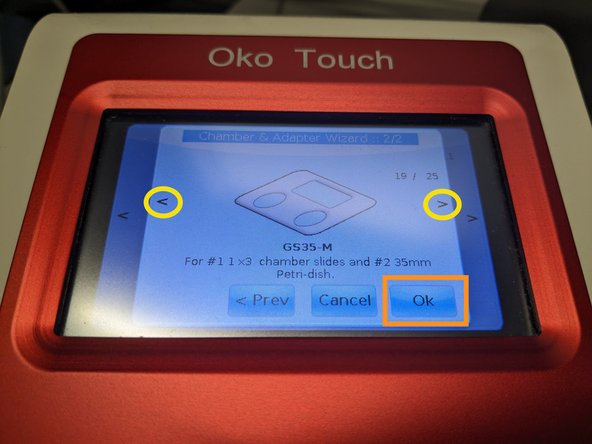
Toggle through the adapters until the one installed (usually installed "GS35-M" as depicted).
-
Click "Ok".
-
Click "Ok".
-
-
-
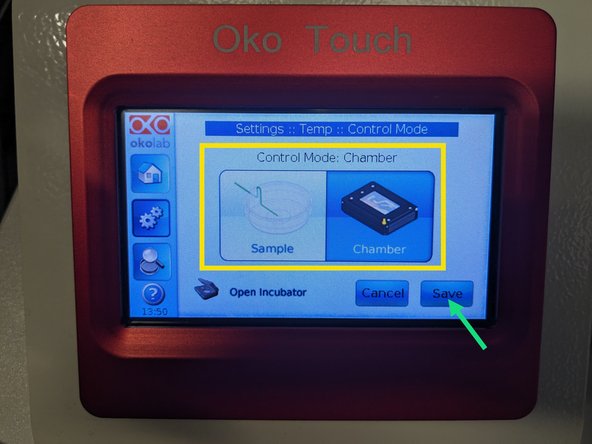
The temperature control can run in two different modalities: chamber or sample.
-
Within "Settings" --> "Temperature" select "Control Mode".
-
Select either "Camber" or "Sample" depending on how you would like to control the temperature during your experiment. Here "Chamber" is chosen.
-
"Chamber": here temperature of lid and base of incubation chamber is controlled. When selecting the chamber mode a calibration window will appear. Simply click "Use Factory".
-
"Sample": allows to directly control sample temperature. For this the thermocouple wire is required during the experiment which you stick into a separate petridish as reference. Please ask ZMB staff for further instructions if needed.
-
Click "Save".
-
-
-
To ensure accurate, stable imaging while using environmental control and an immersion objective it is recommended to use the available objective heaters.
-
The objective heater needs to be enabled within Okolab for proper functioning. Please be aware that this is a global setting. This should be always checked and adapted according to your setup (enable/disable).
-
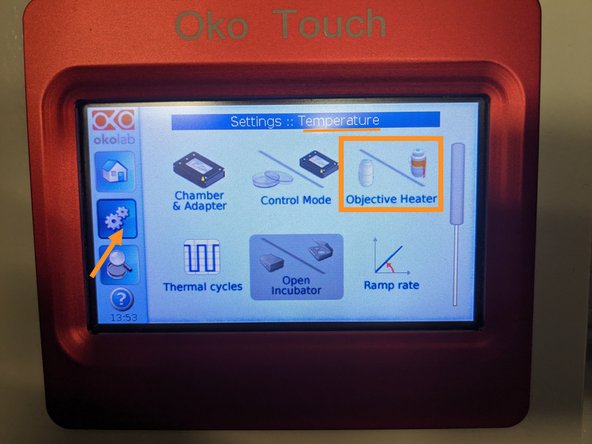
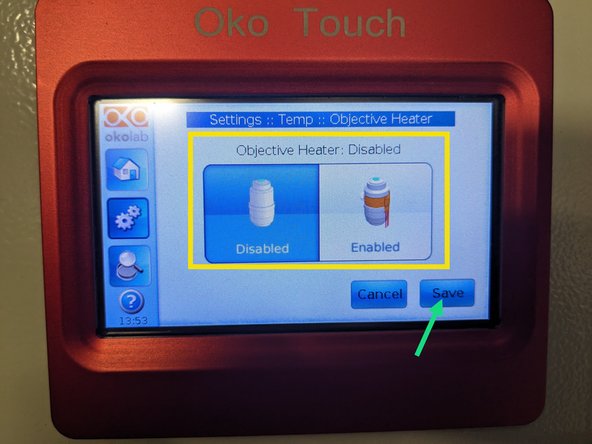
Within "Settings" --> "Temperature" select "Objective Heater".
-
Select whether you wanna "disable" or "enable" the Objective Heater depending on your experimental needs.
-
Click "Save".
-
-
-
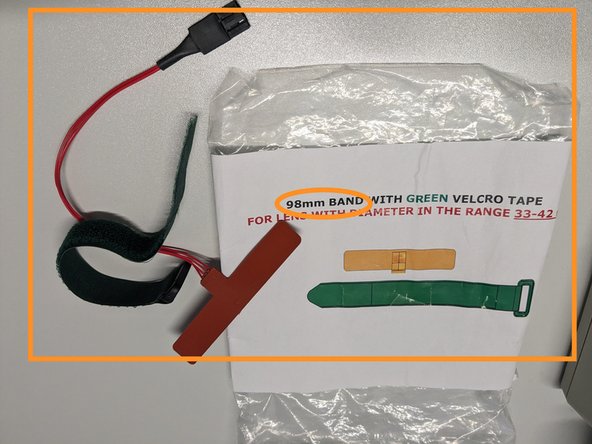
You will find different objective heaters available in the little drawer, depending on the objective used. Example shown here is for the high magnification objectives.
-
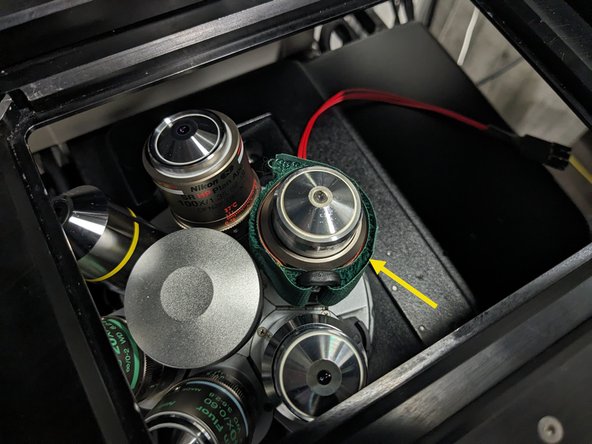
Tightly mount the objective heater on the objective you would like to use for the experiment. For this the stage insert is best to be removed for ease of access.
-
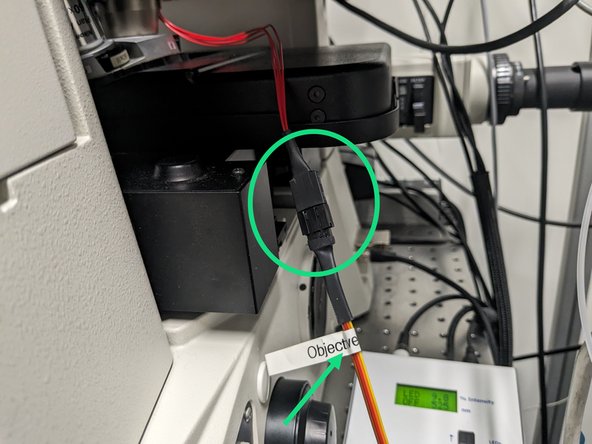
Attach the appropriate cable (labelled with Objective heater.
-
Mount stage insert again.
-
-
-
When done with your experiment please follow these mandatory steps to switch off:
-
Switch off OkoLab touch panel and remove your sample.
-
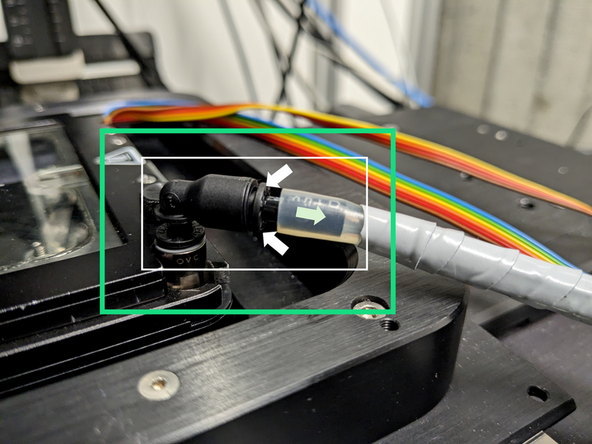
Unplug the tubing from the heating chamber by pushing the collect ring (white arrows) firmly against the face of the fitting. While holding this in position, gently pull the tube (green arrow). Place chamber safely aside.
-
Unscrew the humidifier tube from the humidifier bottle and empty water (please find the sink at the head of the room). Place bottle back into the heater and box, but keep open. The tube can be placed on a tissue just aside. Best to place all at the lower shelf.
-
No need to disconnect the cable from the humidifier tube.
-
Close "Air" and "CO2" valves.
-
If the wall mounted valve for the "ScanR" is open, please DO NOT close CO2 bottle valves as another experiment might be running.
-

![Switch ON power strip [1] and wait until PC has started up.](https://d3t0tbmlie281e.cloudfront.net/igi/zmb/UvSLURRMYbIfLl52.medium)
![Switch ON power strips [2] and [3] after PC has started up.](https://d3t0tbmlie281e.cloudfront.net/igi/zmb/6rJ2URRM2LIfLl52.medium)