Introduction
Set up the Thermo Scientific Talos 120 TEM for automated over night acquisition. This guide helps to adjust the microscope to the specific settings needed for data, that is used to train a DNA-fork classifier algorithm.
The microscope has to be well aligned to be used in this guide.
Parts
No parts specified.
-
-
Left screen with TEM User Interface and Flucam Viewer
-
Right screen with Maps software.
-
Support PC for data transfer and guide display.
-
Left control panel
-
Right control panel
-
Talos
-
Stage of the Talos
-
-
-
Click in order to see the pop-up menu.
-
Open the tab "Stage²" in the TEM user interface.
-
Reset the Stage.
-
-
-
Continue with Step 3 ("Insert the sample into the TEM holder"), if the TEM grid holder is not inserted in the microscope
-
Make sure you push with your finger against the white part/stage (see video) during all movements with the TEM holder.
-
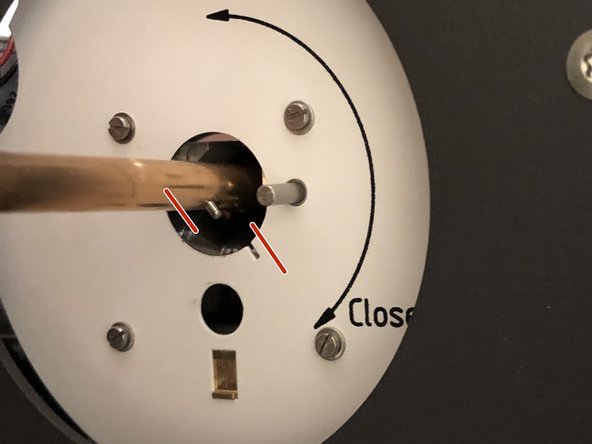
Gently pull the holder out until you feel a resistance and turn it clockwise until you feel a limit stop.
-
In this position the holder can stay, if you need to rearrange your hands.
-
Pull the holder out completely.
-
Do not tilt the holder during removal or insertion. An angle can lead to a vacuum failure of the system.
-
-
-
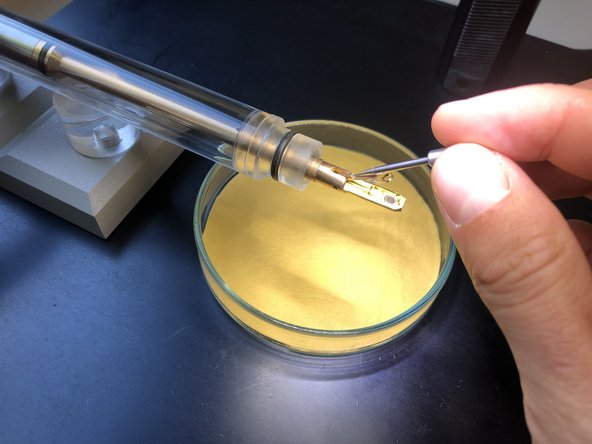
Use non magnetic forceps. Use a stereo microscope for better visibility.
-
Open the holder clamp with the supplied needle
-
Place the grid into the groove with the forceps.
-
You can position the grid by gentle tapping the finger against the transparent tube of the TEM holder
-
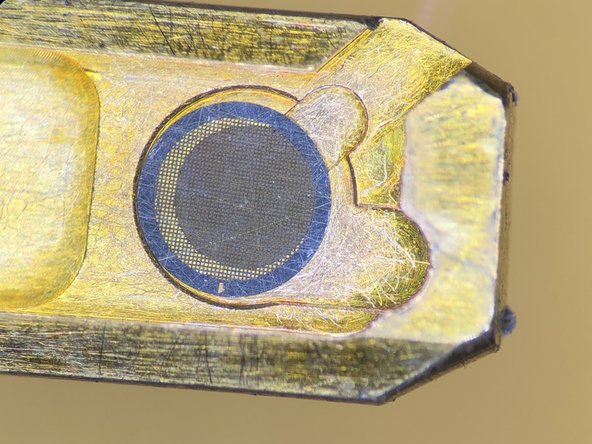
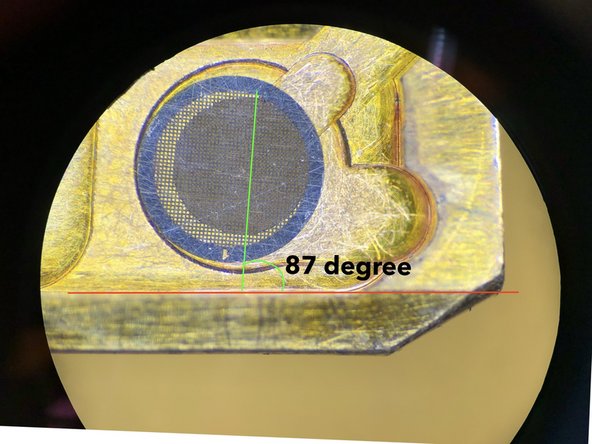
Orientate the grid bars as displayed. The precise angle is important for the later set up.
-
-
-
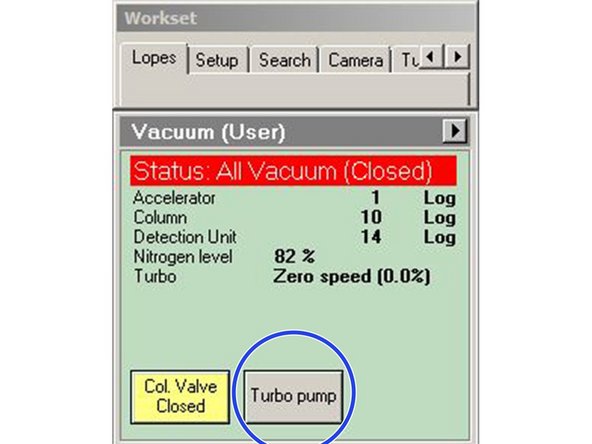
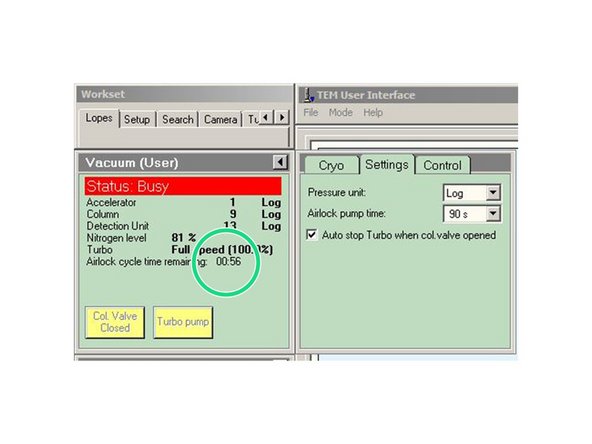
Press "Turbo Pump", if the button is grey. If it is already yellow continue with the next step.
-
This step starts up the turbo pump and shortens waiting time.
-
-
-
Align the small pin of the holder with the slit in the 5 o'clock position (during next step).
-
Make sure you handle the holder according to the video (next step).
-
-
-
Push the holder until you feel a resistance.
-
Use both hands to stabilize the holder during insertion. Only touch it on the silver part behind the O-ring.
-
-
-
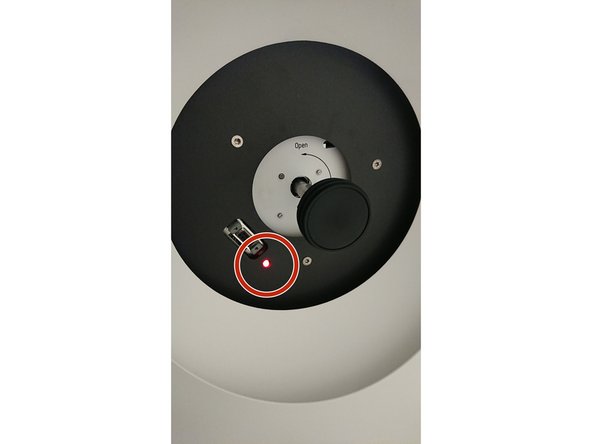
The red light is on until the evacuation of the airlock is finished. Only continue if the light disappeared.
-
The pumping takes two minutes. If the countdown in the left screen is over the light is still on for a few more seconds.
-
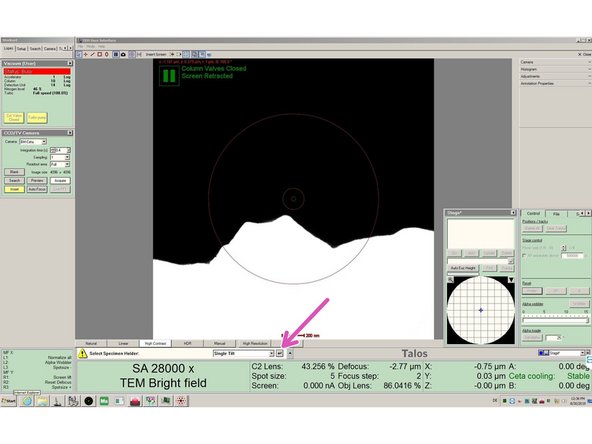
Confirm the Single Tilt specimen holder by clicking on the arrow.
-
-
-
Turn the holder counter clockwise, once the red light turned off.
-
-
-
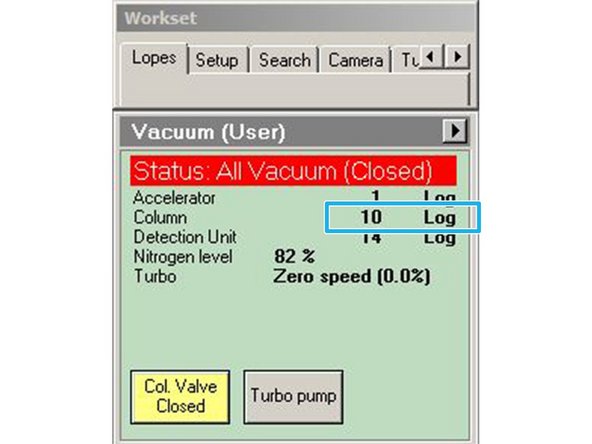
The vacuum in the column should go below Log 30 before you continue working.
-
If this is not the case within two minutes, go back to Step 2.
-
If the vacuum is still bad after another insertion of the Holder and the" Col. Valve Closed "button is disabled, ask for support.
-
-
-
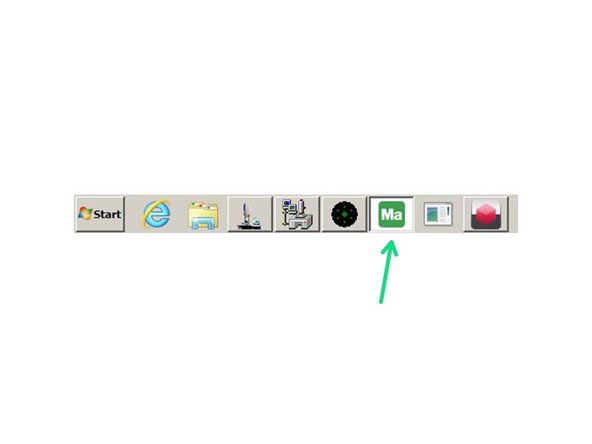
Open Maps from the icon on the taskbar, if not already open.
-
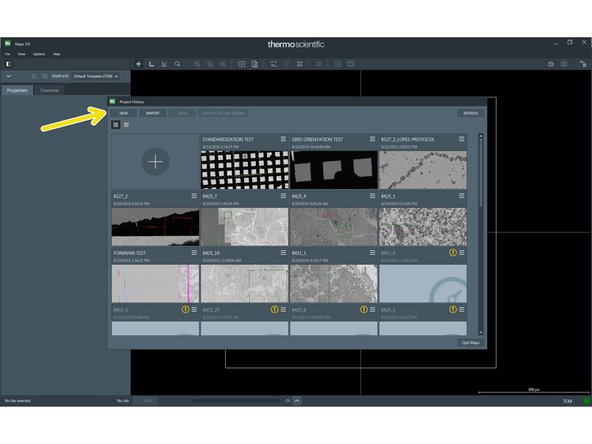
Generate "new project"
-
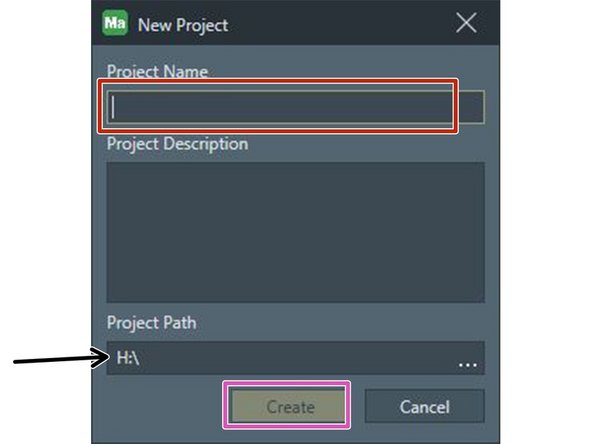
Type in you project name
-
Project Path should be set to "H:\"
-
Press „Create“
-
-
-
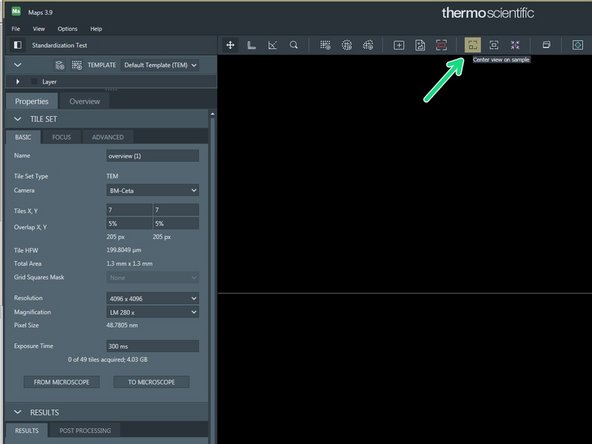
center view on sample
-
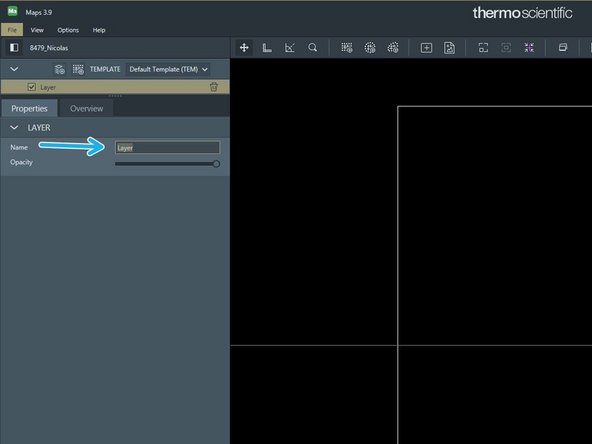
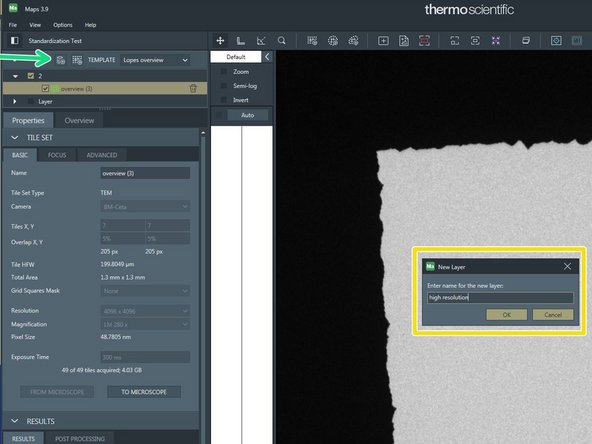
rename layer to „overview“
-
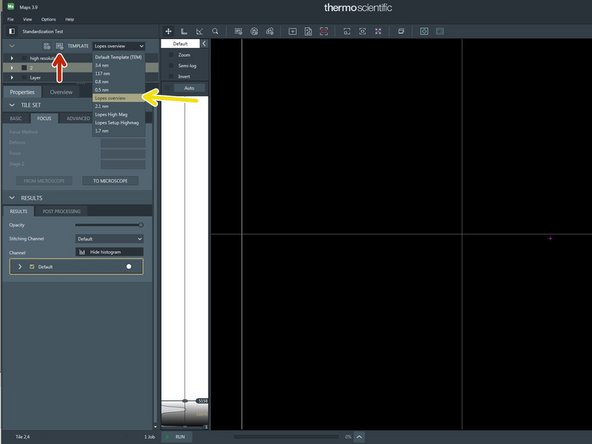
select template "Lopes overview"
-
add new tileset
-
-
-
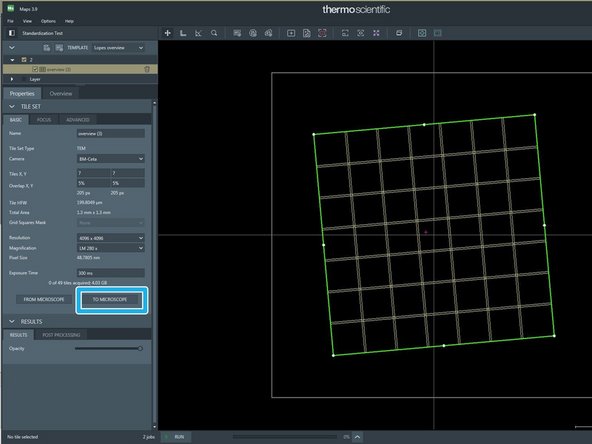
Click "to microscope"
-
-
-
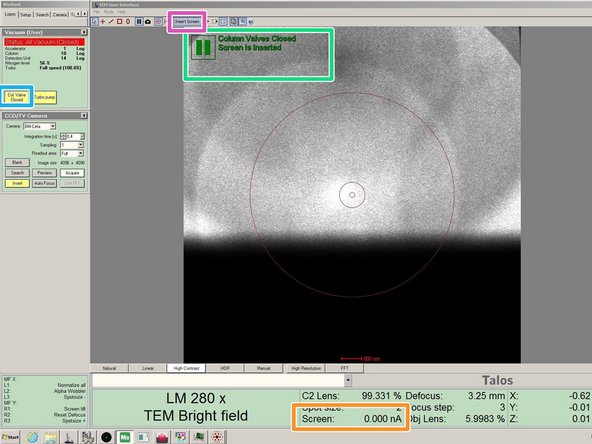
The Screen must be inserted to protect the main camera at this step.
-
If not inserted, insert screen.
-
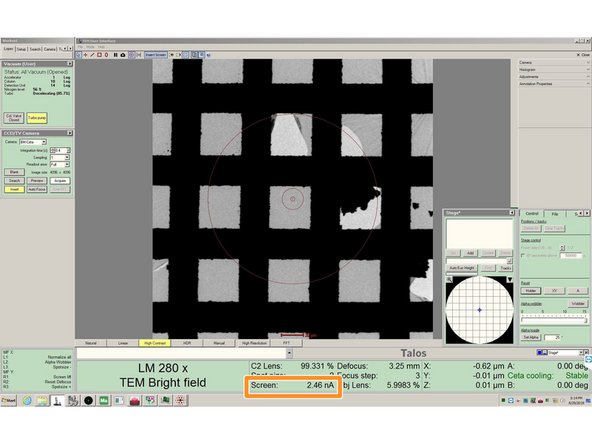
Open the column valves. By clicking on "Col. Valve Closed"
-
The screen current must be between 2.4 nA and 3.4 nA. If this is not the case see next step.
-
-
-
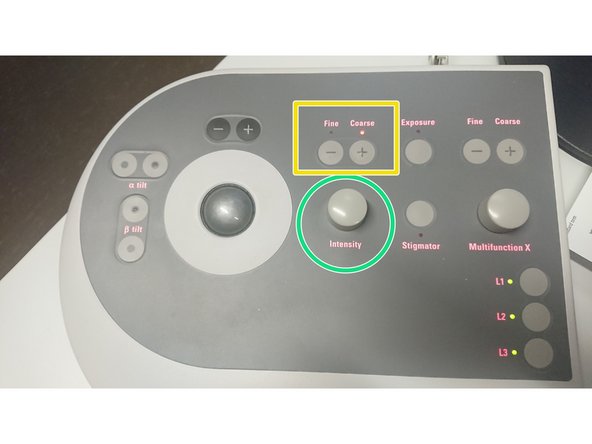
Skip this step if screen current is in range (2.4nA - 3.4nA)
-
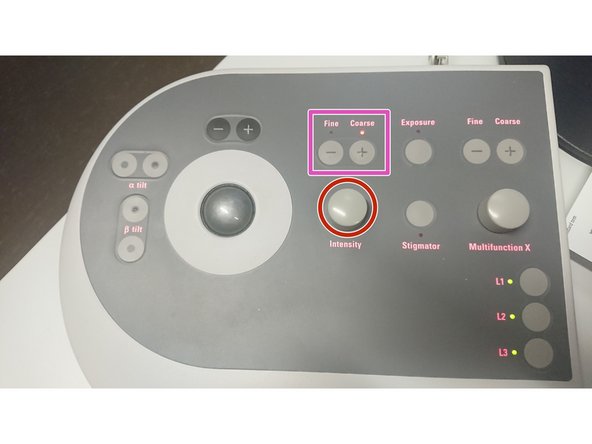
Use the intensity knob on the left panel.
-
Turn it counter clockwise to increase screen current.
-
Turn it clockwise to decrease screen current.
-
Use the "fine" and "course" to adjust sensitivity of the knob.
-
-
-
The microscope performs best, if the sample is set close to eucentric height.
-
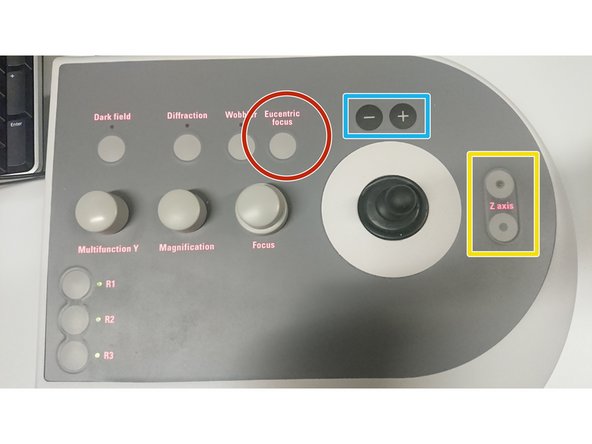
Press Eucentric focus on the right panel to reset the focus of the lenses.
-
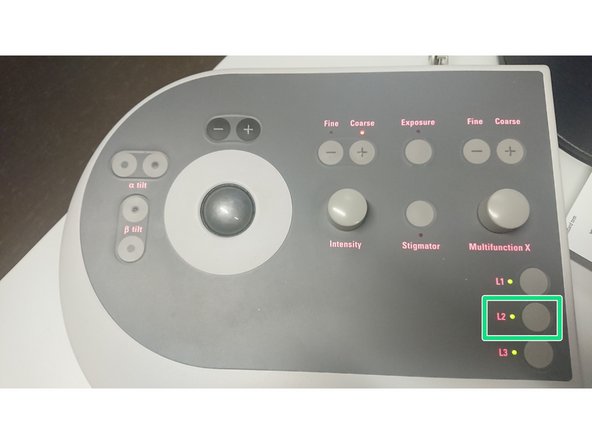
Press L2 (Alpha Wobbler) on the left control panel. The stage begins to tilt between +/-15°
-
Reduce the movement of the image in the Flu cam Viewer (left screen)
-
by changing the Z height with the Z axis button on the control panel
-
sensitivity can be adjusted by + and - buttons above the joystick
-
The Z-height is shown in the User Interface on the left Screen. Use it as an orientation. (Z-values are usually between -20 um and +20 um)
-
-
-
The image center moves to the sides.
-
The Z-height is shown in the User Interface on the left Screen. Use it as an orientation. (Z-values are usually between -20 um and +20 um)
-
-
-
The images stays centered.
-
The Z-height is shown in the User Interface on the left Screen. Use it as an orientation. (Z-values are usually between -20 um and +20 um)
-
Press L2 again to stop the Alpha Wobbler
-
-
-
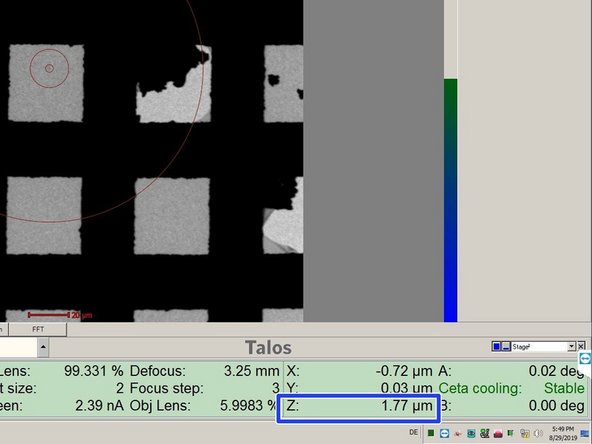
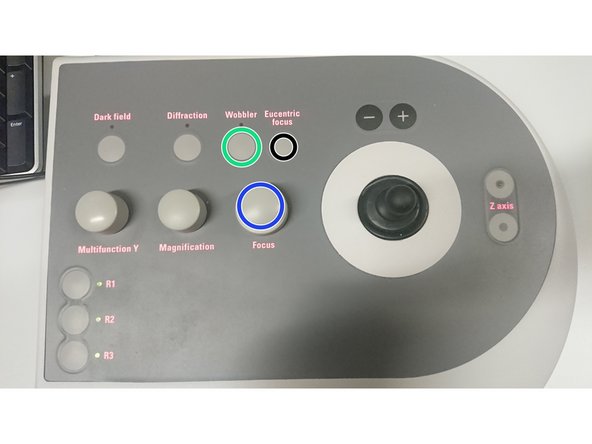
Press Wobbler on the right control panel
-
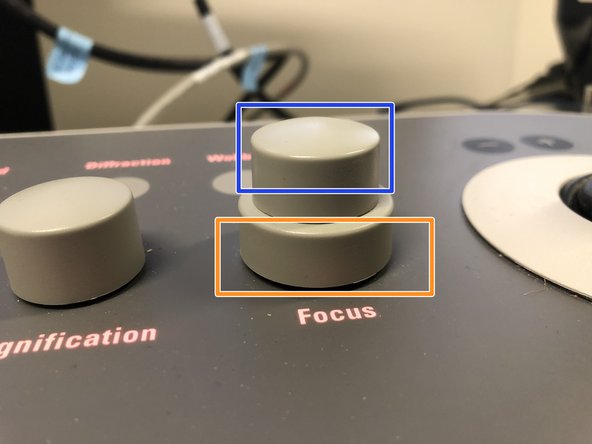
Turn the upper part of the Focus knob on the right panel to stop the image movement
-
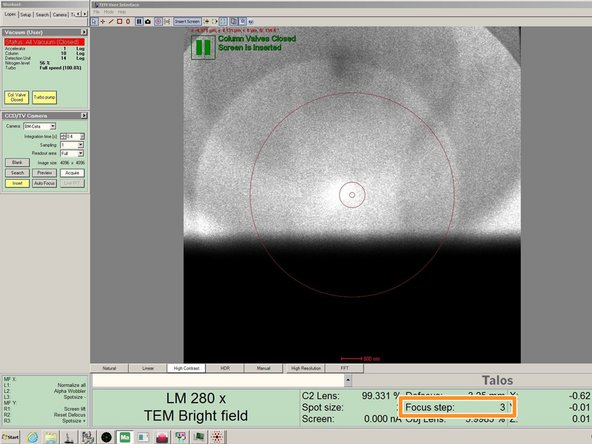
The sensitivity can be adjusted by the lower part of the button and the Focus step is shown in the user interface. Smaller numbers mean more sensitivity''
-
Use focus steps between 4 and 1
-
If you went to far off with the focus, press the button "Eucentric focus"
-
-
-
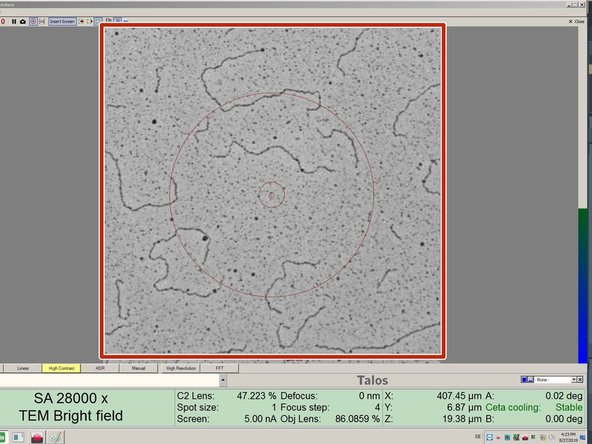
Example, where the images first moves a lot and does not move anymore, when the sample is focussed.
-
Press Wobbler (to stop) on the right control panel.
-
-
-
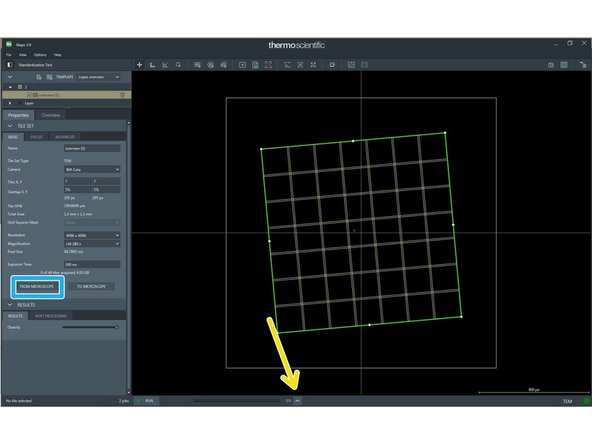
Import the values from the microscope to Maps with the button "from microscope" in the overview tileset in Maps
-
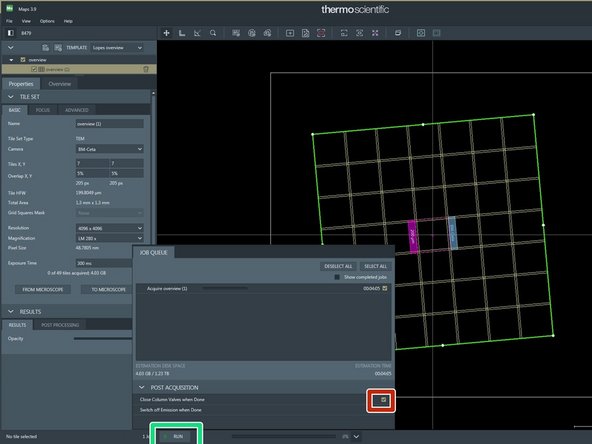
Click on the arrow to open the pop up menu with the job list.
-
Make sure the option "Close Column Valves when Done" is activated.
-
Press "Run" in Maps
-
Wait until job is finished! Before going over to the next step.
-
-
-
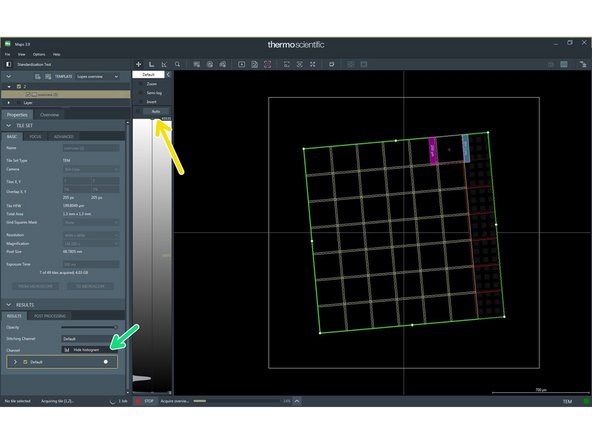
Go to Results tab, press Show histogram
-
Choose „''AUTO“'
-
Navigate with the mouse in Maps
-
Move the canvas by left clicking and pulling.
-
Use mouse wheel for zooming in and out.
-
Double click will move the stage.
-
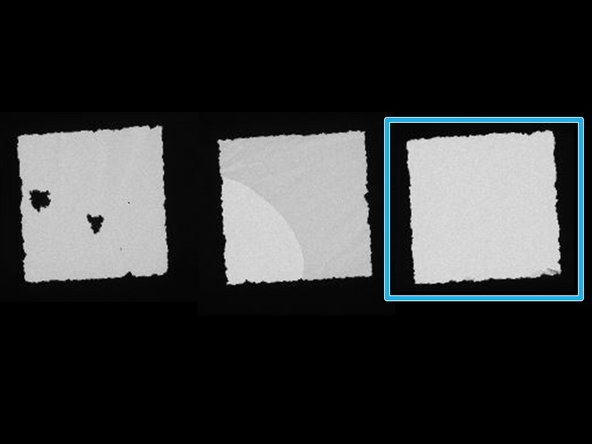
Search for a square with an intact support film and without wrinkles.
-
-
-
Center view on the Region of interest
-
Add a new Layer
-
Rename layer to highmag
-
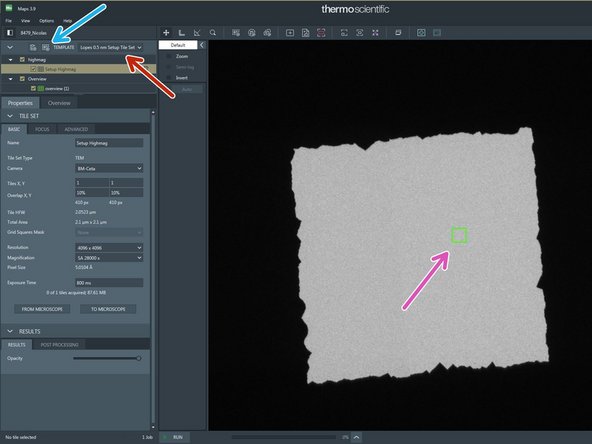
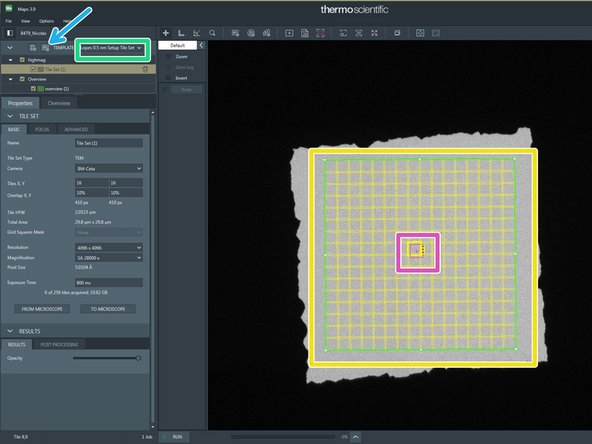
Choose "Lopes 0.5 nm Setup Tile Set"
-
Add tileset
-
Move the tile to the center of the square
-
-
-
Move the tile with mouse.
-
-
-
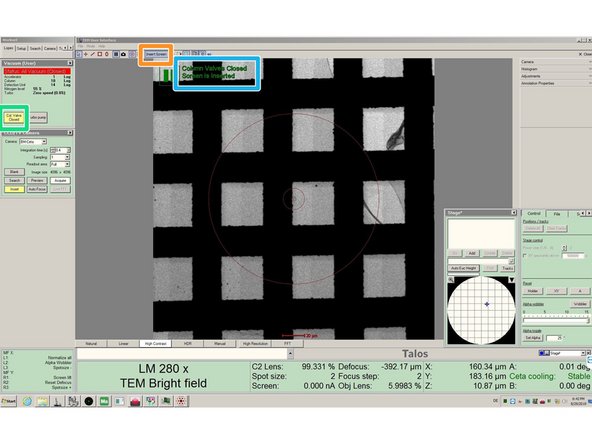
Press insert screen to insert the Flu screen (left screen)
-
"Screen is inserted"
-
Make sure column valves are opened. Otherwise click on "Col. Valve Closed"
-
-
-
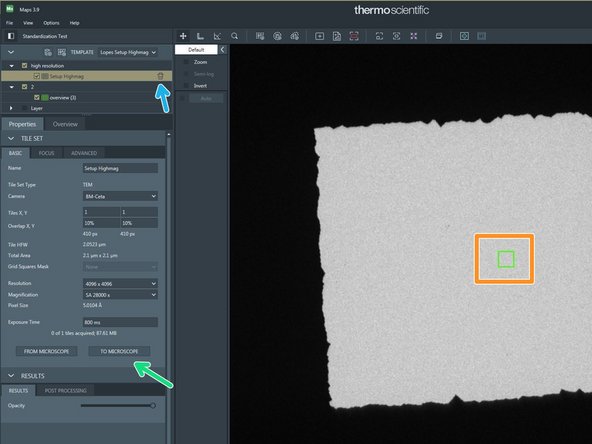
Press "to microscope" in the Setup Highmag tileset
-
Make sure the stage is positioned in your square of interest (double click moves the stage).
-
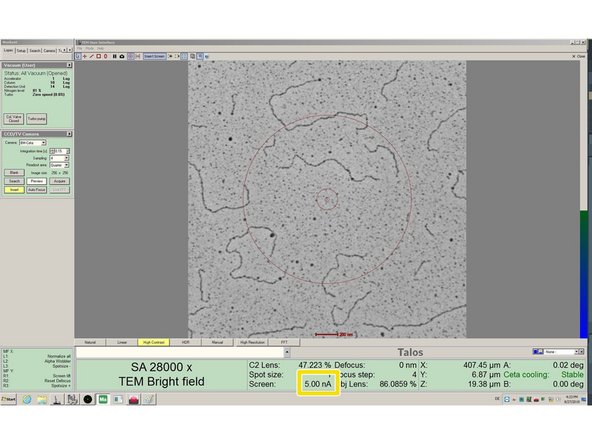
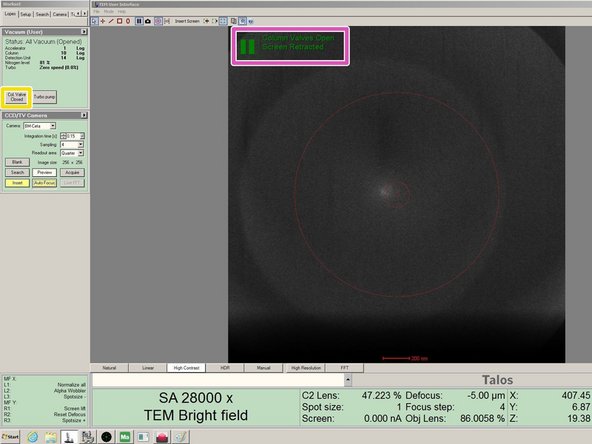
Check if the screen current is exactly 5 nA
-
Adjust screen current if necessary with the intensity knob on the left panel
-
Turning clockwise lowers the screen current, Turning counter clockwise focusses the beam and increases the screen current.
-
"Fine" and "course" adjust sensitivity of the intensity knob
-
Delete the Setup Highmag tileset in Maps
-
Do not click "to microscope" anymore. It will overwrite the settings you adjusted in the microscope
-
-
-
The microscope performs best, if the sample is set close to eucentric height
-
Press Eucentric focus on the right panel to reset the focus of the lenses.
-
Press L2 (Alpha Wobbler) on the left control panel.
-
Reduce the movement of the image in the Flu cam Viewer
-
by changing the Z height with the Z axis button on the control panel
-
sensitivity can be adjusted by + and - buttons above the joystick
-
The Z-height is shown in the User Interface on the left Screen. Use it as an orientation. (Z-values are usually between -20 um and +20 um)
-
press L2 again to stop the Alpha Wobbler
-
-
-
Make sure the Flu screen is inserted! Otherwise the camera can be damaged.
-
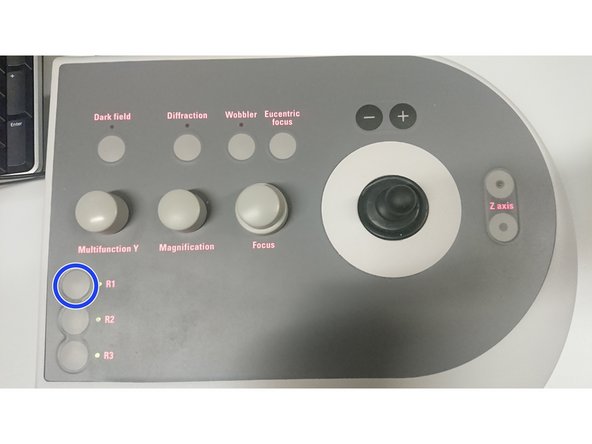
Press R1 on the right panel to insert the Flu screen (left screen)
-
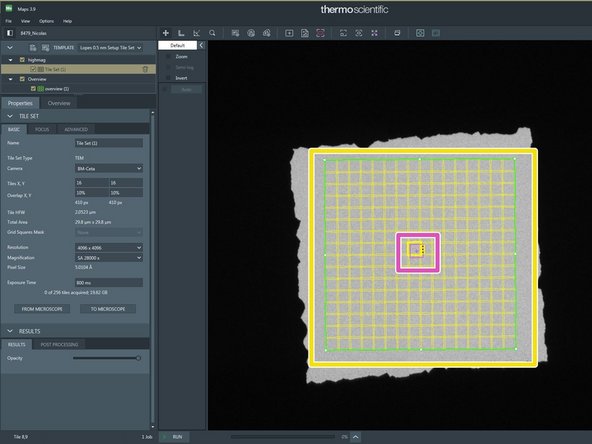
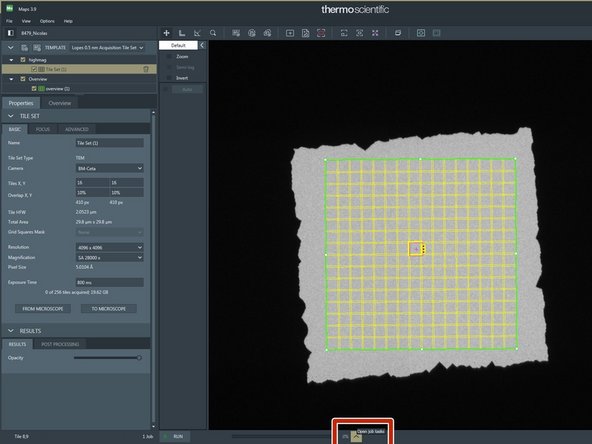
Choose in dropdown menu „ Lopes 0.5nm Acquisition Tile Set“.
-
Add "Tile Set"
-
Place the „Lopes 0.5nm Acquistion Tile Set“ in the grid square of interest.
-
Double click with the mouse, in order to move the stage (pink square in Maps) to your region of interest.
-
Judge in the live view on the left screen if the square has a good DNA quality.
-
-
-
Do this step until you find a square with good DNA quality.
-
Place the „Lopes 0.5nm Acquistion Tile Set“ in the next grid square of interest.
-
Double click with the mouse, in order to move the stage (pink square in Maps) to your region of interest.
-
Judge in the live view on the left screen if this square has a good DNA quality.
-
Repeat this step until you find a square with good quality
-
-
-
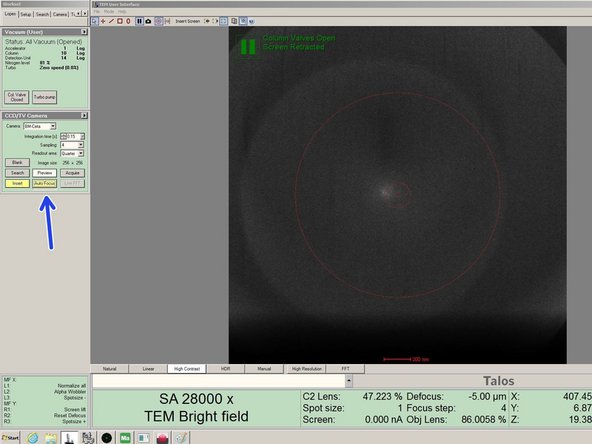
Click on "autofocus" (left screen) and wait until autofocus has finished (button turns grey again)
-
Click on "from microscope", when the autofocus has finished.
-
Go back to the step "Set up Acquisition Tile Sets" and repeat the steps you did for the first square for every square you want to be acquired in this project.
-
Continue, if you have set up enough squares.
-
The acquisition of one square takes around 45 min.
-
-
-
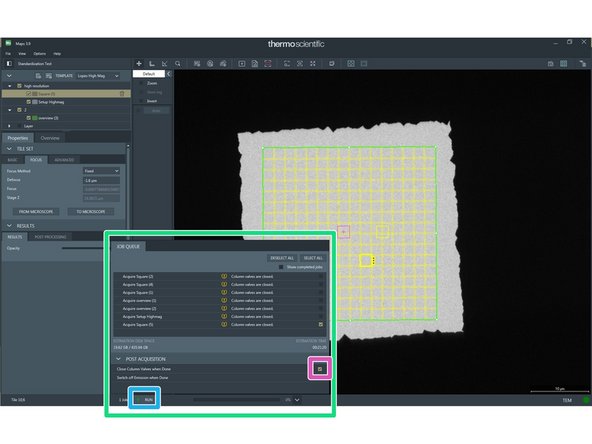
Open the pop up menu.
-
Check the job list and select only the squares you want to be acquired.
-
Make sure the option "Close Column Valves when Done" is activated
-
Press "Run"
-
Let the microscope acquire images over night.
-
-
-
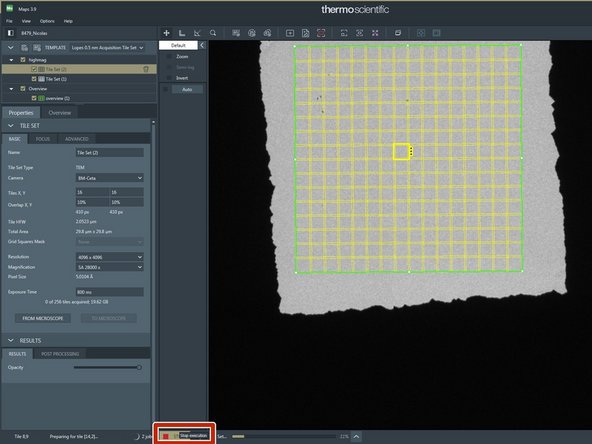
Stop the Maps Job, if it is still running.
-
Check if column valves are closed.
-
Close them, if they are open.
-
-
-
Gently pull the holder out until you feel a resistance and turn it clockwise.
-
In this position the holder can stay, if you need to rearrange your hands.
-
Pull the holder out completely.
-
Do not tilt the holder during removal or insertion. An angle can lead to a vacuum failure of the system.
-