Introduction
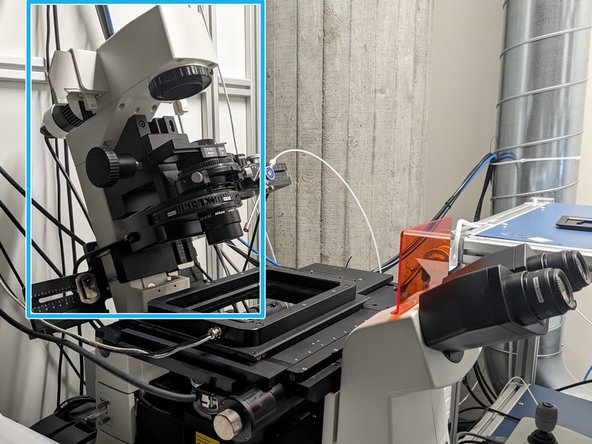
In this guide of the Center for Microscopy and Image Analysis we show how to start up the Visitron Spinning Disk hardware, located at Room Y23-F-14.
Please find more information about the system here.
-
-
The correct start up sequence is important for proper microscope function. Please carefully follow the next steps.
-
Switch ON power strip [1] and wait until PC has started up.
-
Power supply [1]: Monitors, PC and Airflow for CSU unit.
-
Switch ON power strips [2] and [3] after PC has started up.
-
Power supply [2]: Microscope, cooled LED for TL, cameras. Power supply [3]: Lasers, LEDs, Okolab, microinjection devices
-
Check if all laser keys are turned ON [4].
-
-
-
Sign-in with your ZMB core credentials.
-
Start the "VisiView" software by double clicking on the icon.
-
-
-
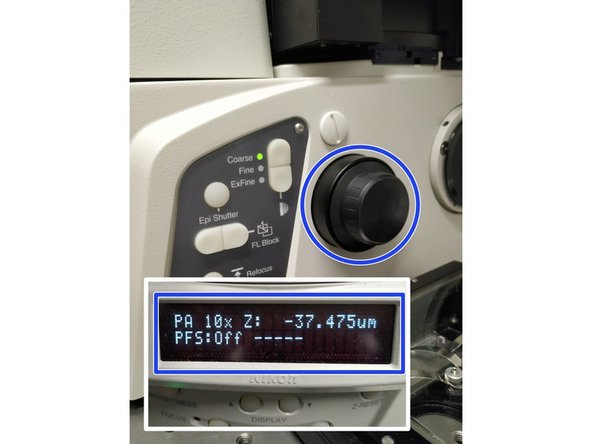
Lower the objectives by using the "Focus wheel" (check on the front panel if the "Z"-value decreases)
-
This is a mandatory step as it avoids possible collision of the stage and objective during exchange of inserts and/or samples.
-
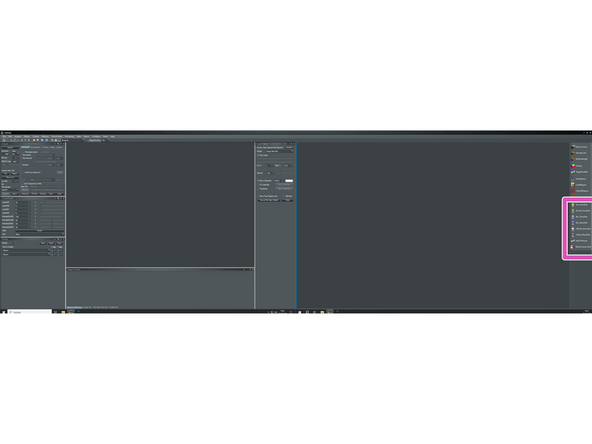
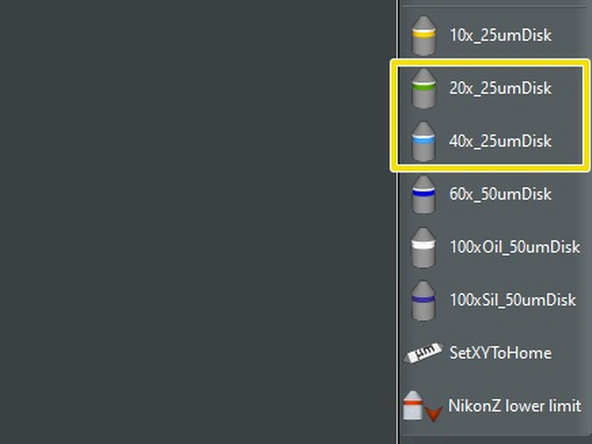
You can now toggle between objectives within the software (right hand side menu).
-
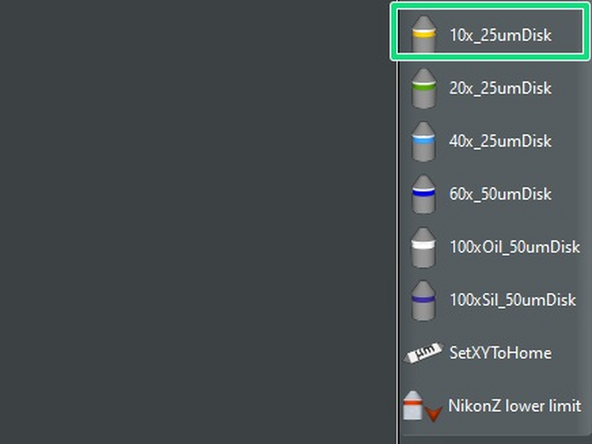
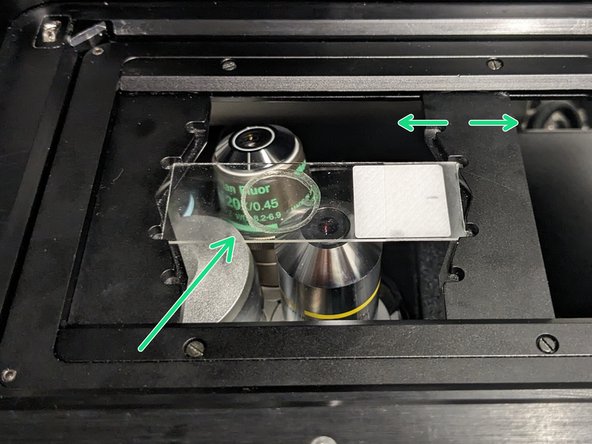
Select the 10x dry objective.
-
In order to facilitate the focusing it is recommended to start with the 10x dry objective.
-
-
-
Make sure the objective turret has been lowered before exchanging stage inserts.
-
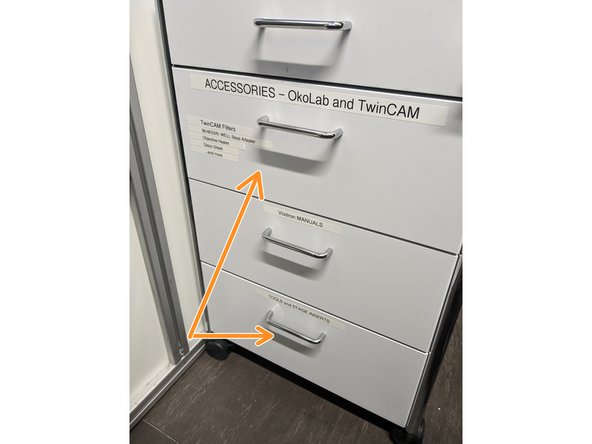
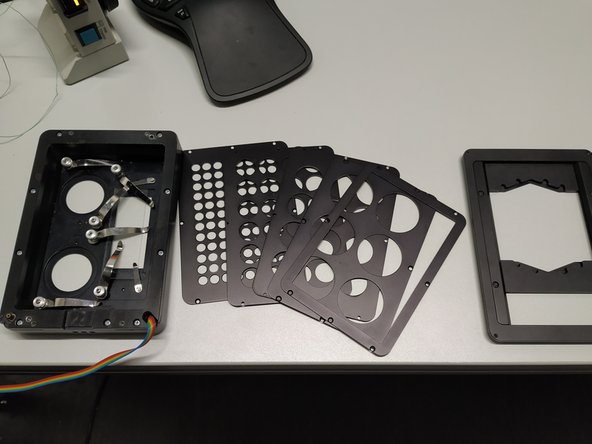
Stage inserts can be found in the drawer.
-
Available stage inserts: for environmental control (with associated inserts for slides, petri dishes and different well plates) and a universal holder.
-
Install the needed stage insert and tighten it with the little screw (arrow direction indicates how to tighten the screw).
-
-
-
Push the condensor arm of the microscope to the back.
-
Mount your sample on the stage.
-
If using the universial stage insert adjust the variable clamping range to properly fix your sample.
-
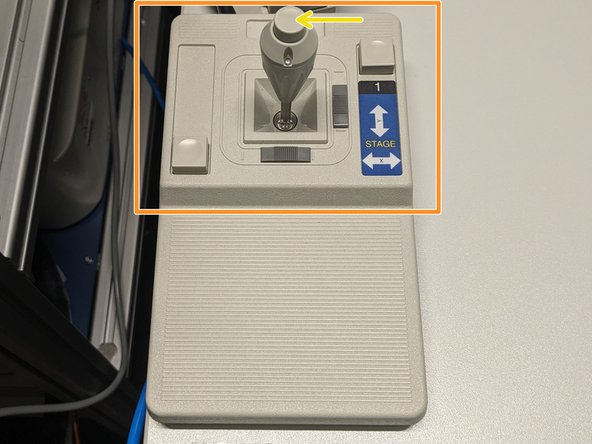
Move your sample above the objective with the help of the Joystick.
-
For fast movement simply press the button on the joystick while moving.
-
Bring back condenser arm to its straight position.
-
-
-
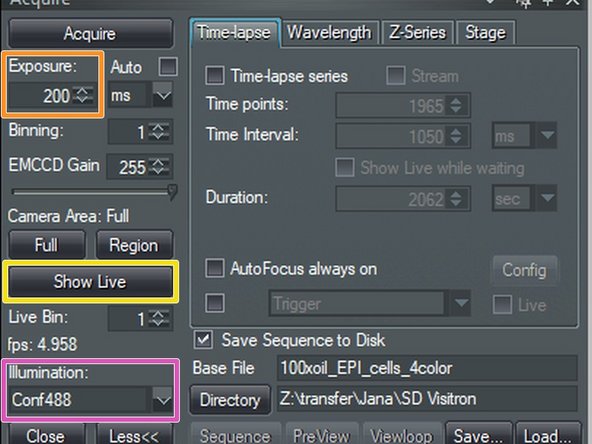
Within "VisiView" software choose the light source under "Illumination".
-
Set corresponding intensity in the "Control Panel" window with the slider.
-
Set "Exposure".
-
Click "Show Live".
-
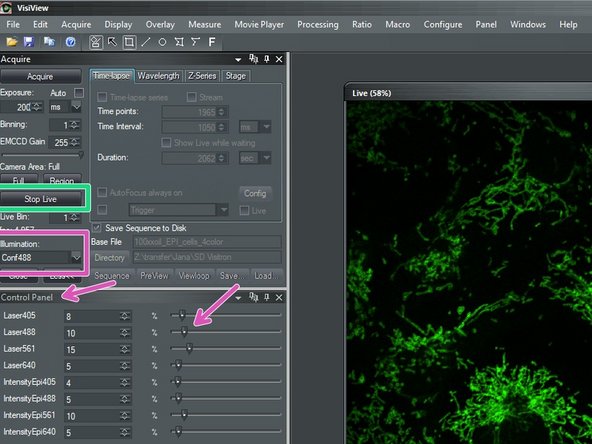
Focus your sample via the focus wheel on the microscope stand.
-
You can toggle in between "Coarse", "Fine" and "Exfine" mode for the focus.
-
Click "Stop Live" once you've focused.
-
The "Live" image will disappear.
-
-
-
For some objectives the correction collar has to be adjusted.
-
On the 20x and 40x dry the cover glass thickness needs to be adjusted (0 - 2 mm). Standard is usually 0.17 mm.
-
On the 20x MI (multi-immersion, Oil, Glycerin or Water) it needs to be set to the immersion media applied (Oil, G, W).
-
Please note, this objective is currently not installed. If required please inform the ZMB staff.
-
Please, DO NOT remove the objectives for adjustment. They can be easily accessed on the system.
-
-
-
After focusing you might want to switch to a higher magnification.
-
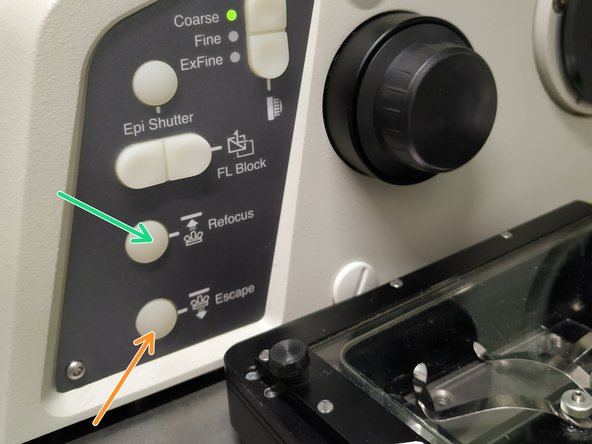
Press the "Escape" button and toggle to the appropriate objective via the software.
-
Check the correction collar and in case of immersion objective - apply the appropriate immersion liquid (either on the sample or directly to the objective).
-
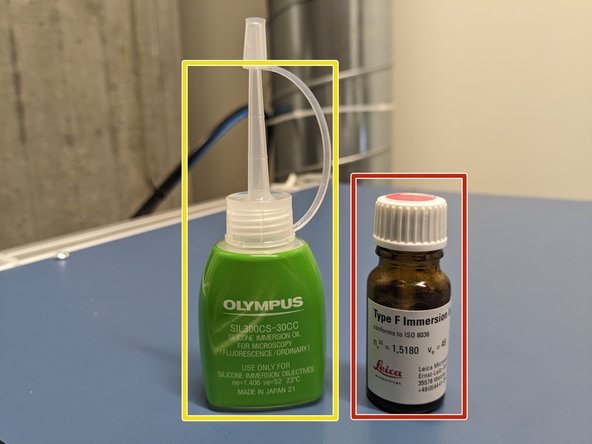
Oil objectives: "Type-F" immersion liquid.
-
Sil objectives: "SIL300CS" immersion liquid.
-
Press "Refocus" and focus your sample as described in the previous step.
-
-
-
For acquisition of multicolor images in 2D, 3D, live cell and/or at multi-positions refer to the corresponding guides.
-

![Switch ON power strip [1] and wait until PC has started up.](https://d3t0tbmlie281e.cloudfront.net/igi/zmb/DNVMU6RMGhCxoQUU.medium)
![Power supply [1]: Monitors, PC and Airflow for CSU unit.](https://d3t0tbmlie281e.cloudfront.net/igi/zmb/MOnBdEgOISGFgZSW.medium)