Introduction
In this guide of the Center for Microscopy and Image Analysis you will learn how to start-up and load slides on the Akoya Vectra Polaris widefield fluorescence microscope. You should have a basic understanding of light microscopy, specifically of histologically and fluorescently stained tissue samples.
-
-
The system should not be switched off by the users. If you find the system not powered on, please follow the steps below.
-
Press the main power switch.
-
Wait 30 s to power up the system before starting the imaging software.
-
-
-
Login with your Core login and password.
-
Start the Vectra Polaris software using the desktop link.
-
-
-
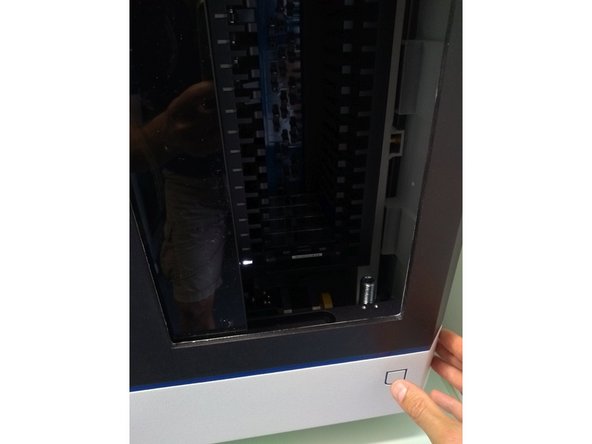
Move your hand in front of the door sensor to open the system door (the door also opens automatically after software start...).
-
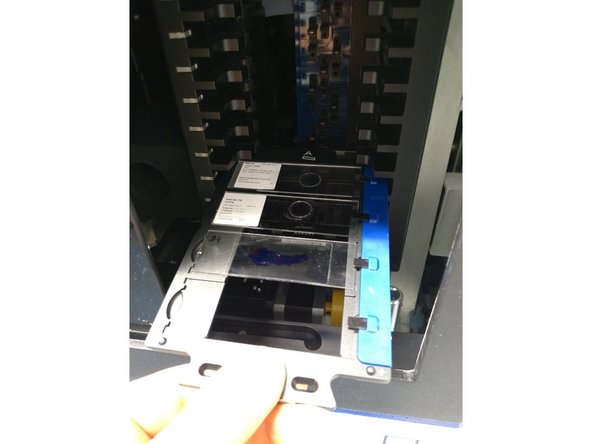
Remove the slide carrier by pulling the carrier handle.
-
Each slide carrier can hold up to 4 slides. Make sure you have unmounted sufficient carriers for your slides.
-
Please put slides in the labeled box inside the fridge of room WAD-K-126 in case the machine is still loaded from previous acquisition and you do not find enough free carriers for your experiment
-
-
-
Do not load damaged slides (cracks, broken coverslips...).
-
Slides should be free of debris, fingerprints and dust.
-
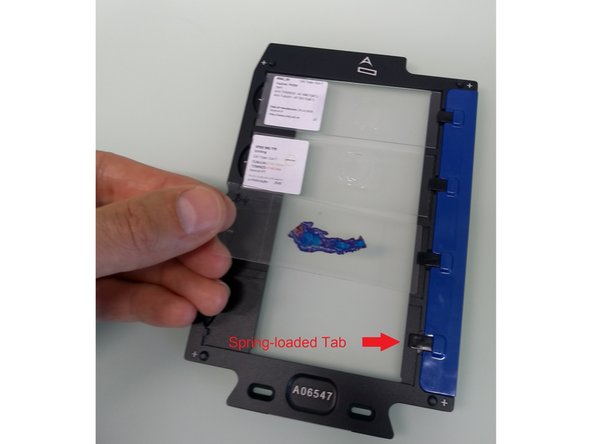
Place the slide carrier on table.
-
Hold the slide by the label and push the opposite end against the "spring-loaded tab". Carefully position the label end into the slide carrier (the tab will keep the slide in place).
-
Load up to four slides (they do not need to be contiguous).
-
-
-
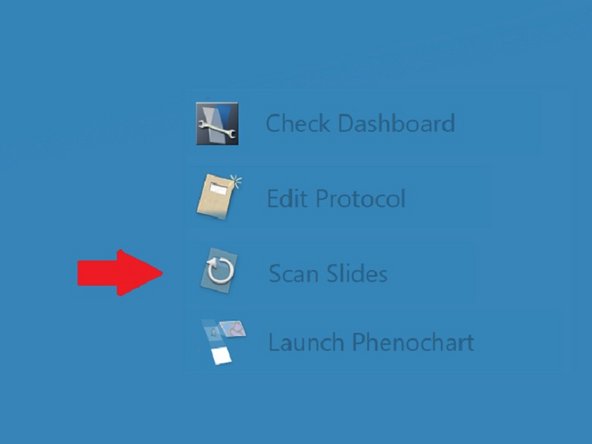
In Vectra Polaris software click on "Scan Slides".
-
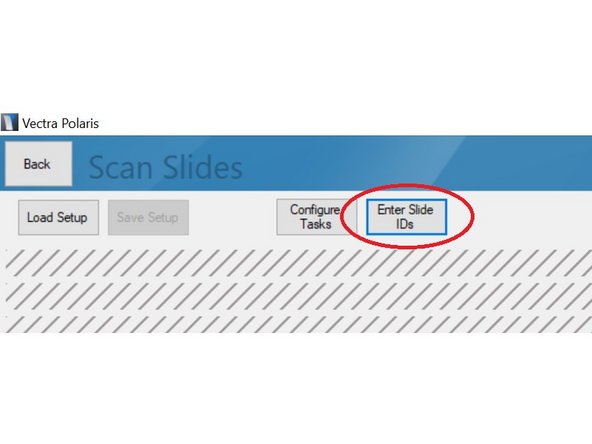
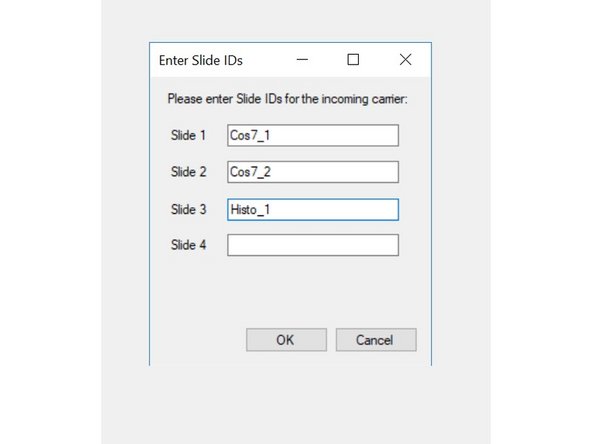
Click on "Enter Slide IDs" button.
-
Enter "Slide IDs" for the slides you have previously inserted in the carrier.
-
-
-
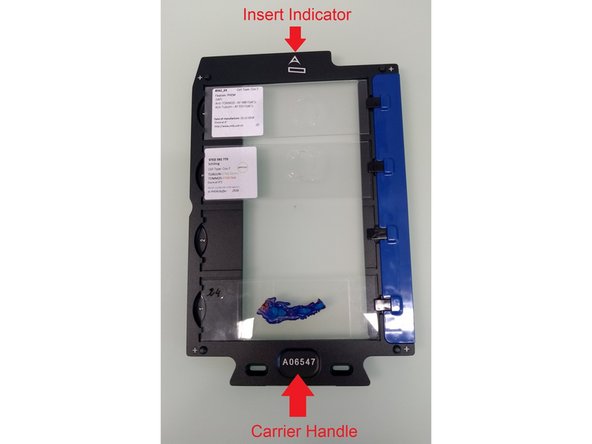
Hold carrier by the handle with the slice labels facing upwards.
-
Load the slide carrier with the insert indicator in front.
-
Halfway into the holder the carrier engages a roller which creates a small amount of friction. Push the carrier further until its fully seated and a click noise appears.
-
The slide carrier status light next to the slot should turn white. A red light indicates an incorrectly loaded slide. Remove carrier and retry.
-
Repeat procedure and load up to 20 carriers. Finally move your hand over door sensor to close the system door.
-
Slide carriers can also be loaded before launching the software. However, you will need to enter all slide IDs after launching the software which may be more error-prone than doing it sequentially.
-
Repeat steps 4-6 until you have loaded all slides you want to record.
-
Do not forget to unload your slides after recording. We have an emergency temporary slide depository in the fridge of room WAD-K-126 (box labelled "Akoya slides") if you do not manage to collect your slides before the next user starts.
-
-
-
Some users reported problems with the automated focus function when recording in Brightfield mode. In this case it may help to update the "Brightfield Reference"
-
Generate a reference slide using the same object holder, coverslip and embedding media as used for your samples. Ensure the slide is free of dust when loading.
-
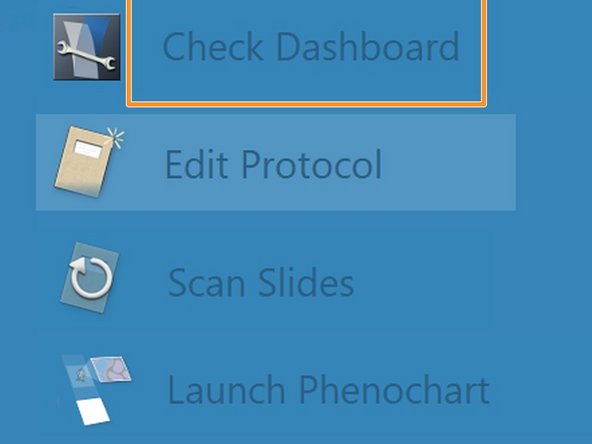
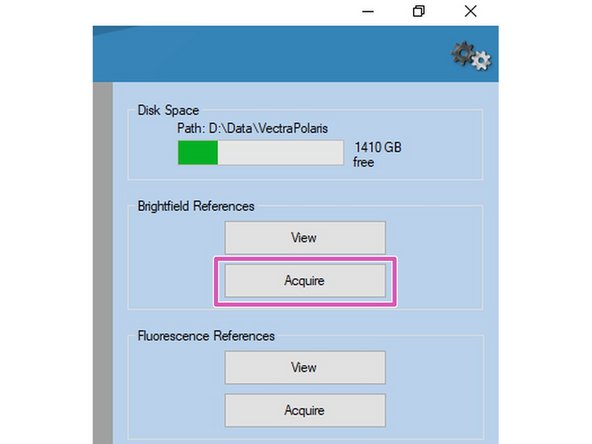
Load your reference slide in a slide carrier and click on "Check Dashboard" on the main screen.
-
Select "Acquire" under Brightfield References.
-
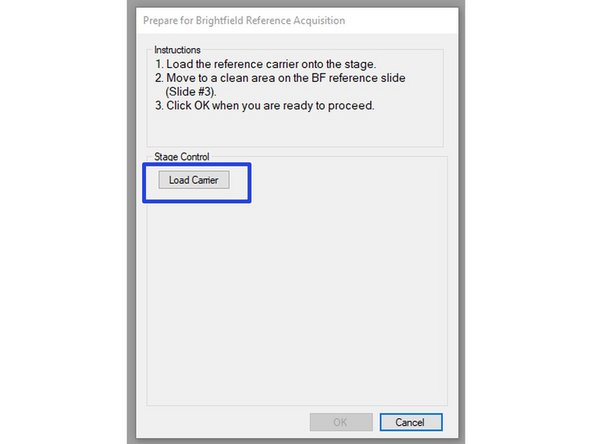
Load the reference slide using the Load Carrier button and follow instructions.
-