
Introduction
This guide describes the first steps to navigate the specimen and acquire an image using the Zeiss Gemini 450 SEM at the Center for Microscopy and Image Analysis, University of Zurich.
-
-
Bring the desired sample in position by clicking on the image in Stage Navigation window.
-
Use the Z-axis controller to bring the sample closer to the end of the SEM column (pole piece) of the microscope.
-
Keep a visual control of the distance between the sample and the end of the SEM column (pole piece).
-
-
-
For routine imaging applications the recommended distance varies between 2 to 5 mm. For EDX the recommended working distance is 12 mm.
-
In the lower panel: Double-click on "Signal A": a menu with the different detectors opens. Choose a detector (usually start with SE2).
-
Scanning will start, use the magnification and focus knobs to focuse image.
-
Once your sample is focused you can check the value of working distance (WD). That is the distance of your sample from the lens (pole piece).
-
A way to get the exact working distance is (for example for EDX):
-
Double-click on the value of the WD (you find it in the lower menu panel), type the value you need in mm. The image will appear out of focus.
-
Move the Z-axis using the controller until the image is in focus, then the sample is at the correct working distance.
-
While doing this keep a visual control of the distance between the sample and the lens pole to avoid collisions.
-
-
-
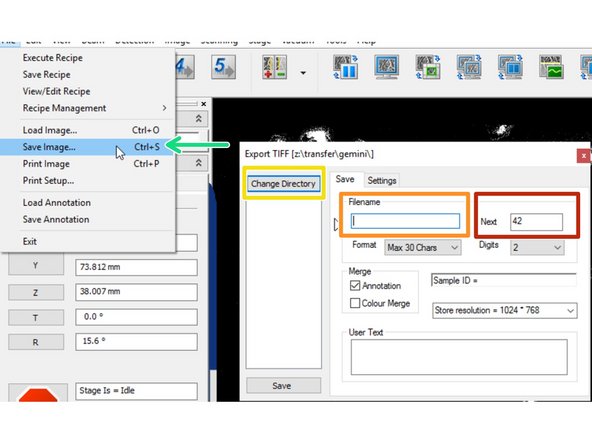
In File: Select "Save Image". Menu opens.
-
Select "change directory" and select the path: Files.core.uzh.ch(Z) Data/yourname.
-
Add a Filename.
-
Add a Number to the image.
-
For example: 01; this will generate consecutive numbers for following saved images. Set "Digit" to 2 for autonumbering between 1-99, 3 for 1-999 etc.
-
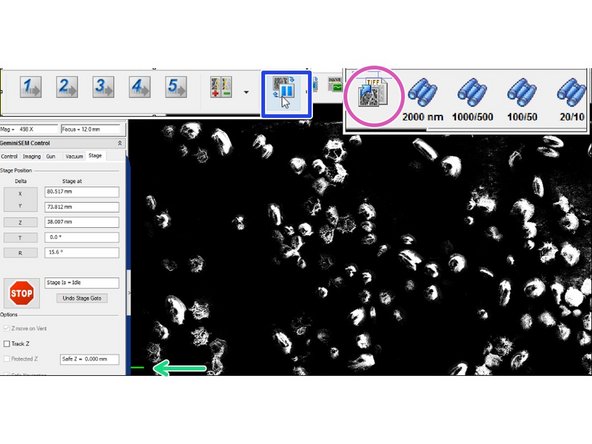
To save images press "Freeze" button, wait until the scan finishes. Visible by a green scanning position line on the left side.
-
Press the "TIFF" icon to save the image.
-


Cancel: I did not complete this guide.
2 other people completed this guide.
