-
-
Loging to microscope computer using SEMUser as user and password.
-
Start "SEM Operation" software
-
-
-
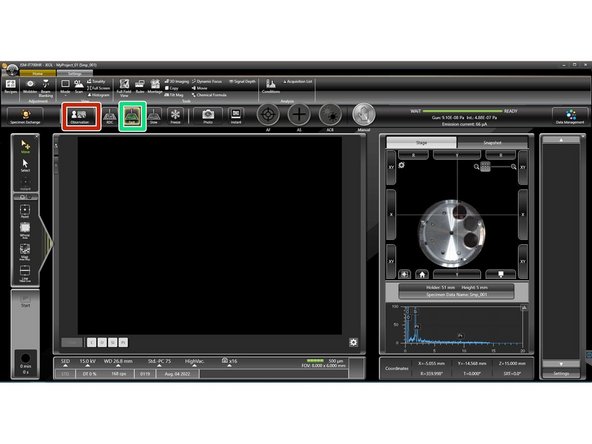
Press "Specimen exchange".
-
Activate "Specimen exchange" in the popup menu.
-
Activate "Move stage to exchange position" and confirm with "Yes (Y)"
-
-
-
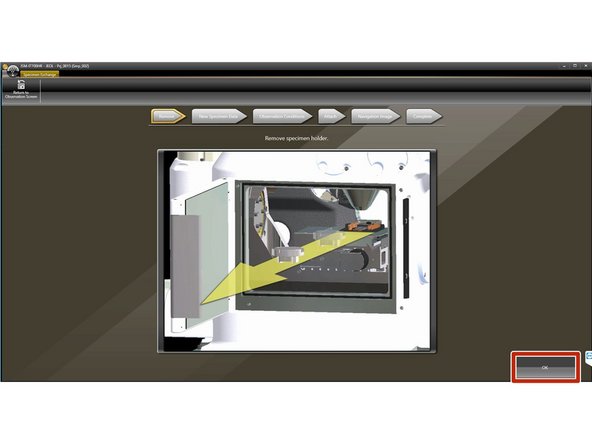
Open door of instrument using the handle on the right side.
-
Remove sample holder as indicated on the screen.
-
Press "OK"
-
-
-
Use regular stubs for Zeiss instruments.
-
Mount on regular Zeiss holder and attach with the screws.
-
Clip Zeiss holder into Jeol carrier. Only one orientation possible.
-
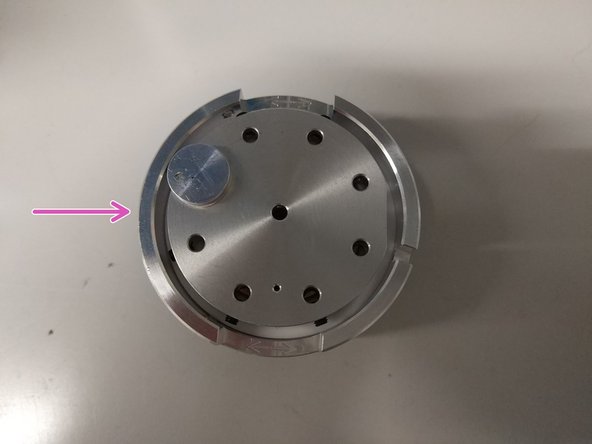
Holder assembly.
-
Measure height of the whole assembly with dedicated tool. Top of sample to bottom distance.
-
It is important to measure correctly.
-
-
-
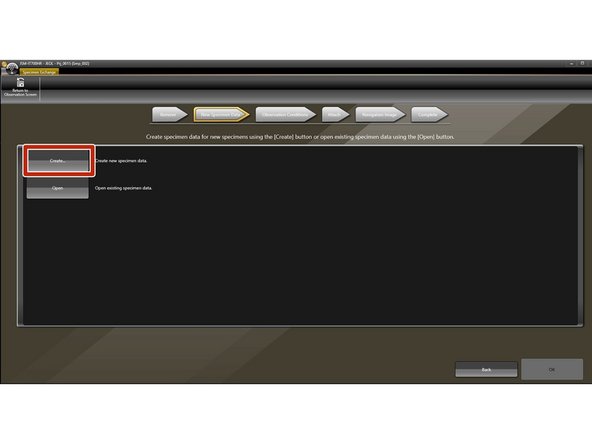
You must create a new file or open an existing one.
-
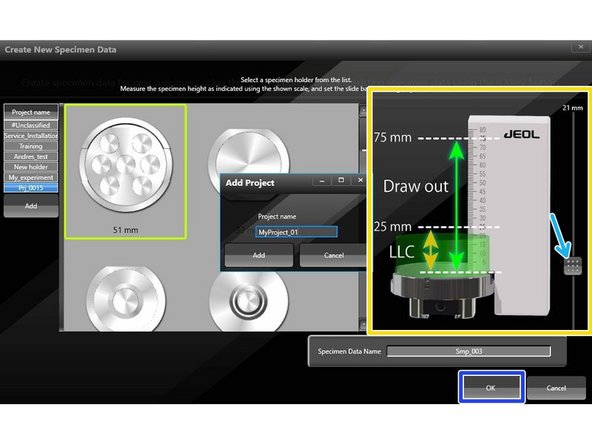
For creating, press "Create..."
-
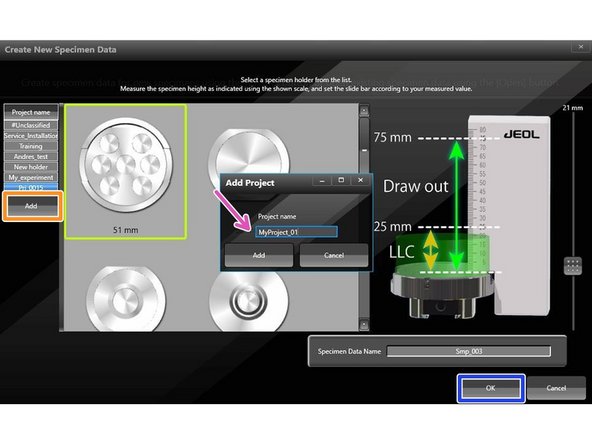
Select proper holder (bright green square: 51 mm).
-
Click "Add"
-
Insert name of choice and click "Add" in the popup window.
-
Adjust height measured in the previous step using the slider.
-
Make sure you select the correct height. If value is too low by mistake, the backscatter detector may be damaged.
-
Press "OK" and confirm.
-
-
-
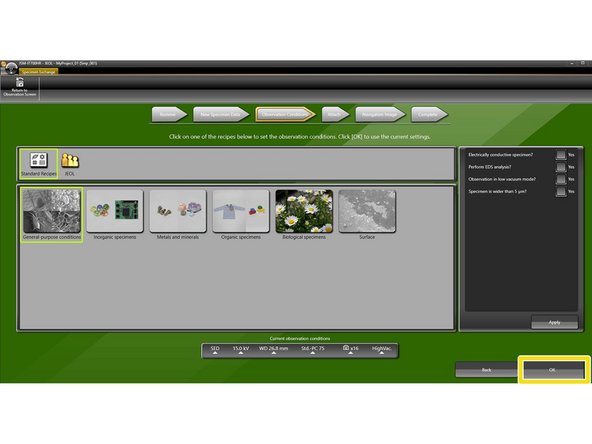
Select observation conditions.
-
Press "OK"
-
-
-
Insert sample holder into chamber as indicated on the screen.
-
Close door.
-
Press "EVAC" and confirm.
-
-
-
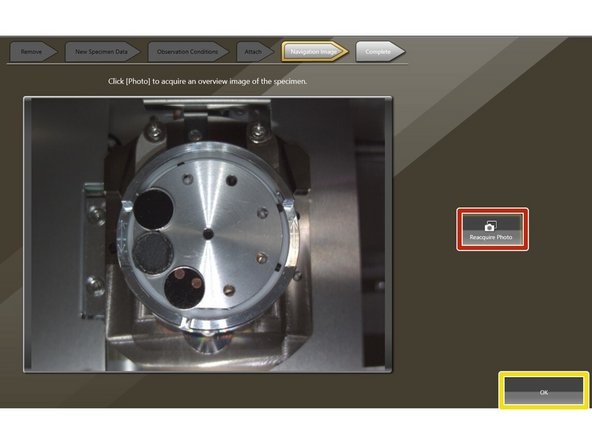
Press "Reacquire Photo"
-
Stage will move to camera position and acquire an image.
-
Pres "OK"
-
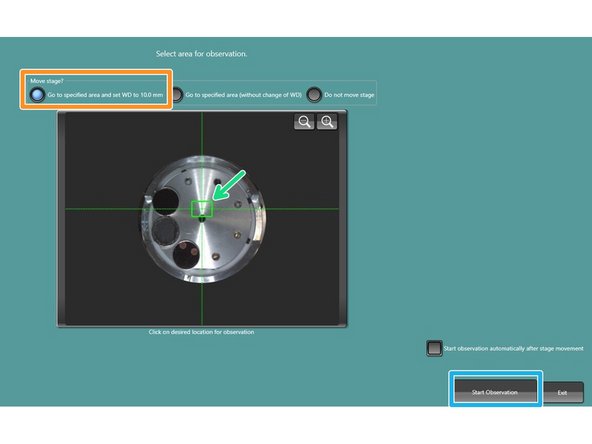
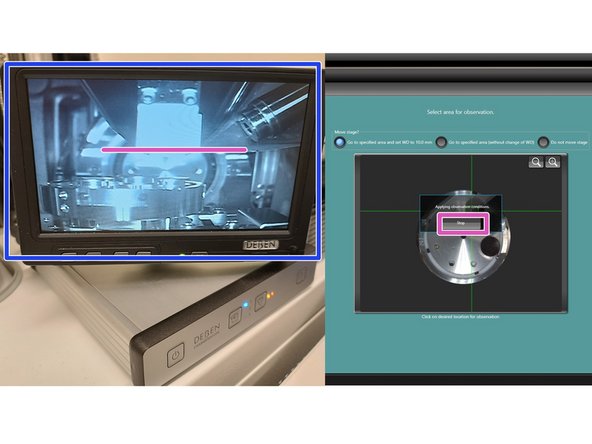
Select appropriate stage movement. In general "Go to specified area and set WD to 10.0 mm".
-
Select the region of interest by clicking on desired location.
-
Press "Start Observation".
-
Observe the stage movement using the chamber scope.
-
You may interrupt the stage movement if it moves too close towards the lens: purple line (only happens if height not measured properly).
-
-
-
Start imaging by clicking "Observation".
-
Electron beam will be turned on and column valve opens.
-
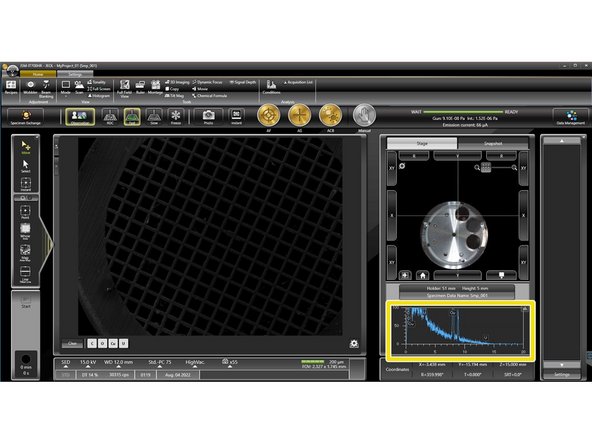
Press "Fast" to start scanning/unfreeze.
-
EDX system is always on and measures spectra on the go.
-