-
-
Start the laser(s) you would like to use by turning the key to "ON".
-
The 355nm laser is next to the monitor. While the others are bellow the microscope table.
-
Press the "Start" button when it turns red.
-
-
-
Switch on the controller box under the microscope table.
-
Optional: switch on the 405nm laser line by turning the key. Press the start button when it turns red.
-
Optional: switch on the 473nm laser lines by turning the key. Press the start button when it turns red.
-
-
-
Start CellSense
-
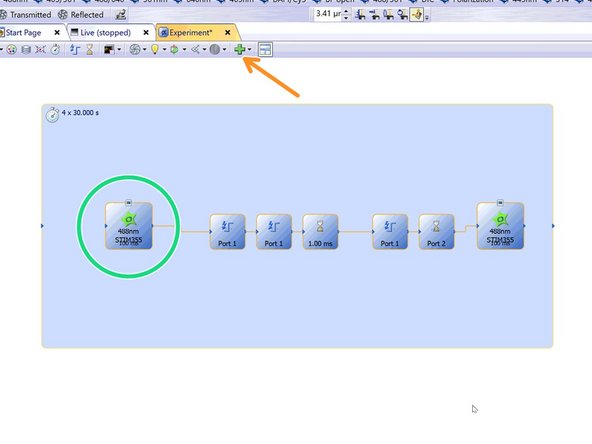
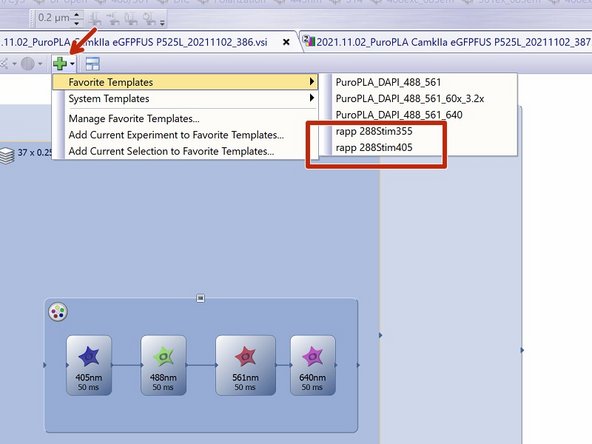
Optional: For a triggered experiment use a template from "Favorite Templates" --> eg. 488 Stim 355.
-
Otherwise choose and activate the appropriate observation method that includes "STIM" (e. 488nm STIM405).
-
In this example an image is taken before stimulation and one after.
-
-
-
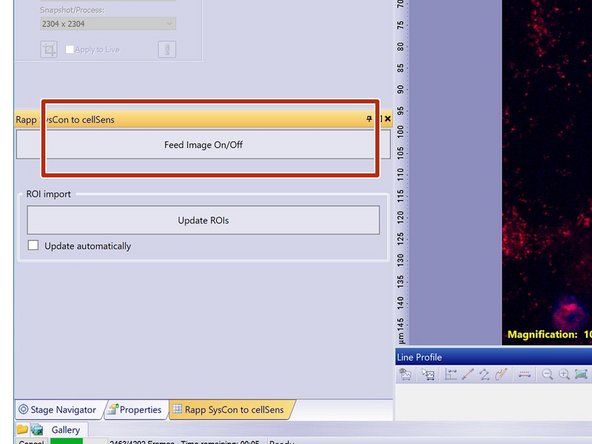
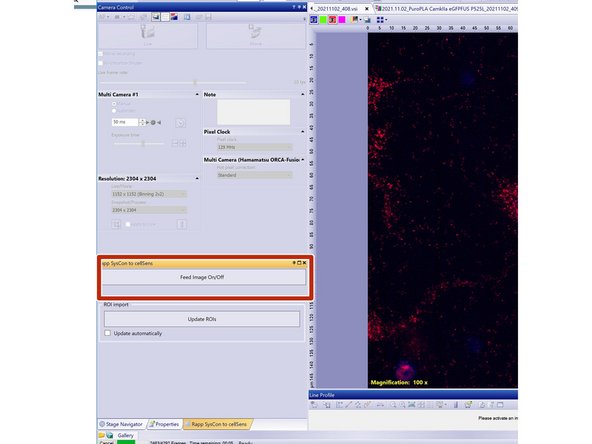
Localize and select the "Rapp SysCon to CellSens" tab.
-
"Rapp SysCon to CellSens"
-
Here you can activate the image feed to the SysCon software once it is opened.
-
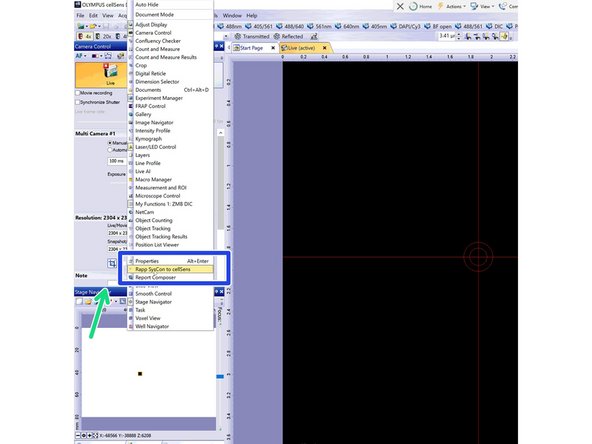
If the tab is not available in your profile, right click on the top of the "Stage Navigator" window.
-
Select the appropriate option - "Rapp SysCon to CellSens".
-
-
-
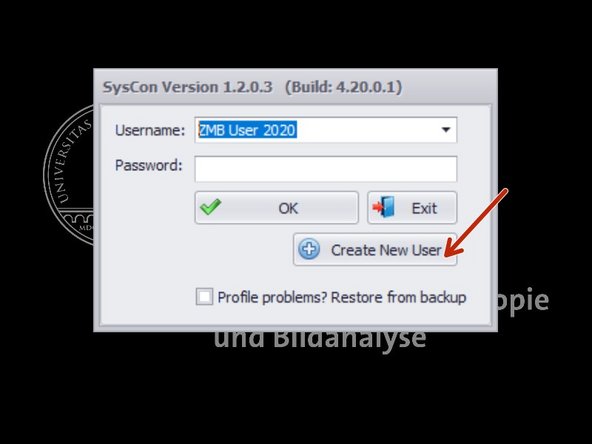
Start SysCon software.
-
Log in using your profile.
-
If you haven't created a profile yet, follow the next step.
-
-
-
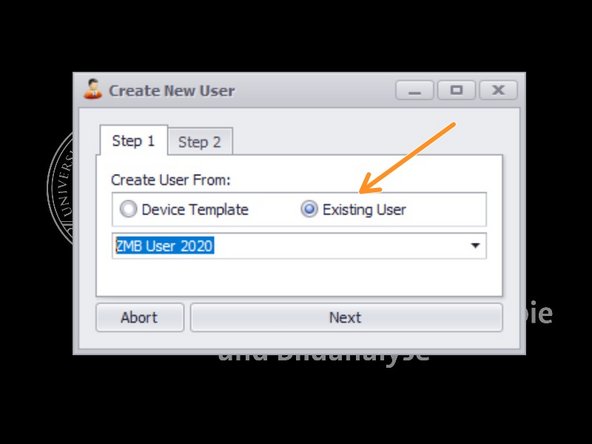
If this is your first log in, create your own user profile.
-
Choose "Existing user" - "ZMB User 2021".
-
Create a new user name.
-
-
-
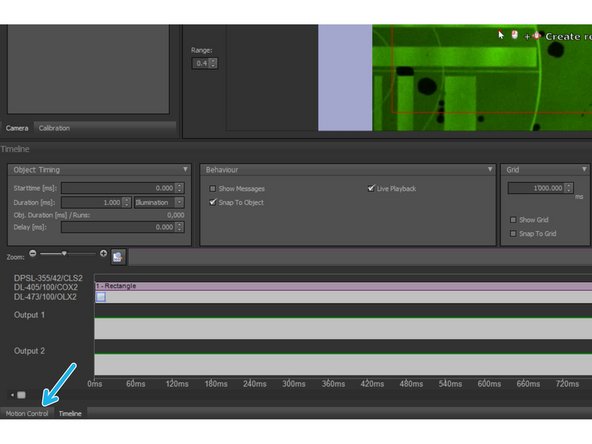
In SysCon: If you are using the 355nm laser you will need to calibrate the system.
-
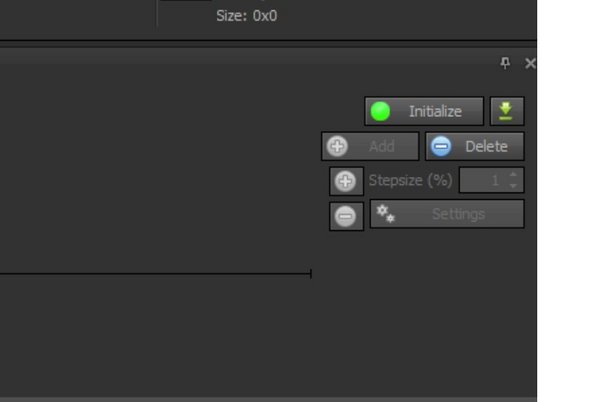
Choose the "Motion Control" option on the lower panel.
-
Press "Calibrate" on the right side of the Motion Control panel.
-
Once the Calibration is finished it will turn green.
-
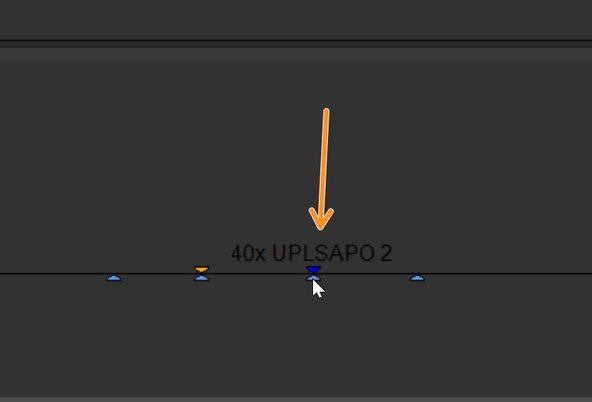
Choose the appropriate objective by hovering over it to display the description. Click on the appropriate one (on the image e.g 40x).
-
The system does not automatically detect the objective in use; instead, it shows the one from the previous session. Always adjust this setting before starting your experiment
-
-
-
In CellSense: Start Live mode using the appropriate Observation method e.g. "488 Stim 355".
-
In CellSense: start "Feed Image".
-
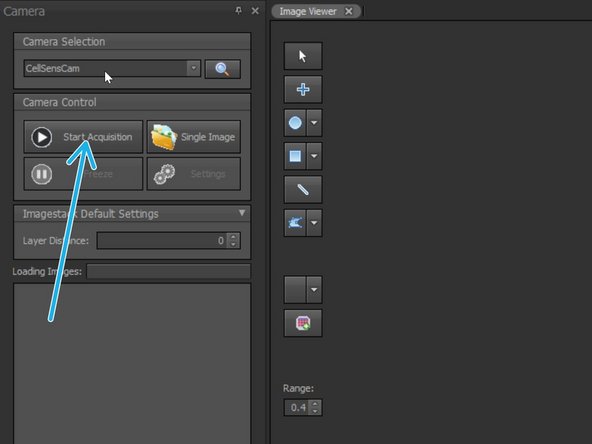
InSysCon: Start Acquisition.
-
-
-
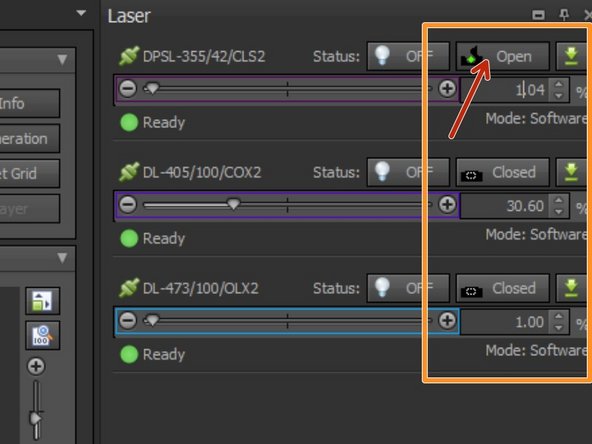
You can control laser intensities here. The 355nm laser line will be controlled in this panel, while the 405nm and 473nm can be modulated within the experiment/sequence.
-
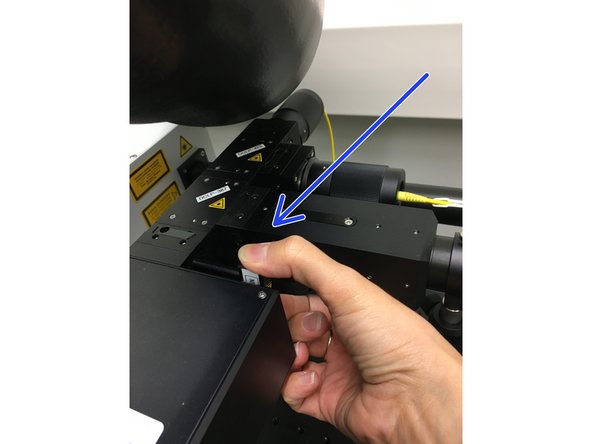
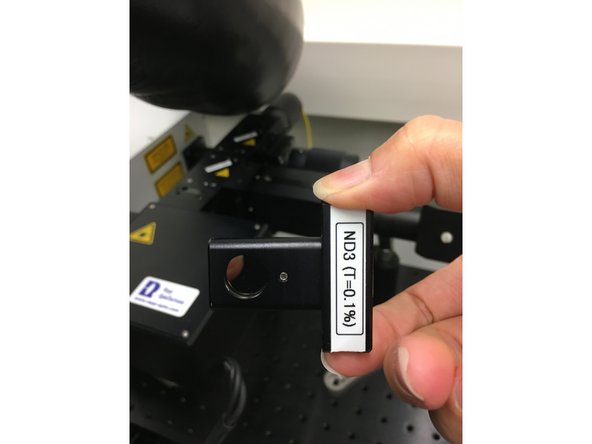
Additionally you can add / exchange or remove the ND-2 and ND-3 filters. Please make sure you check which filter is in position depending on the power outputs you need.
-
e.g. for ablation you should start with ND-2 inserted and remove it if you need higher powers to induce damage.
-
SysCon top right: Open the shutter of your laser of choice.
-
KEEP LASER STATUS OFF. This will be controlled by your experiment. Otherwise you will already start frying your sample!
-
-
-
Use the "Click And Fire" mode to test your settings or start your experiment.
-
Choose it under the UG 42 panel (lower right).
-
Choose the duration of the stimulation and appropriate light source.
-
355nm laser intensity has to be modulated under the Laser window or by adding/removing the ND filters (see previous step).
-
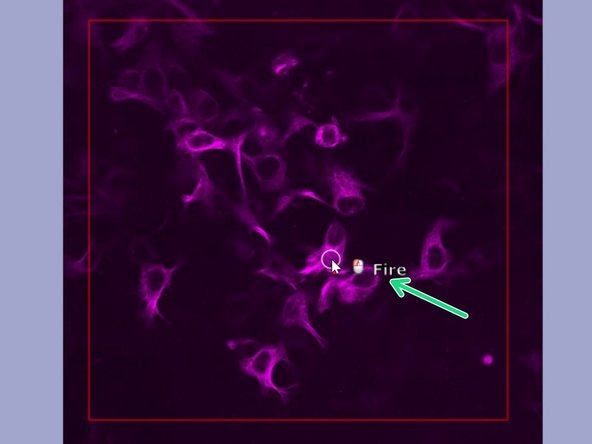
In the editor "Point" is pre-selected and appears as a circle in the "Live acquisition" image.
-
Aim at your region of interest and press left mouse button to "Fire".
-
-
-
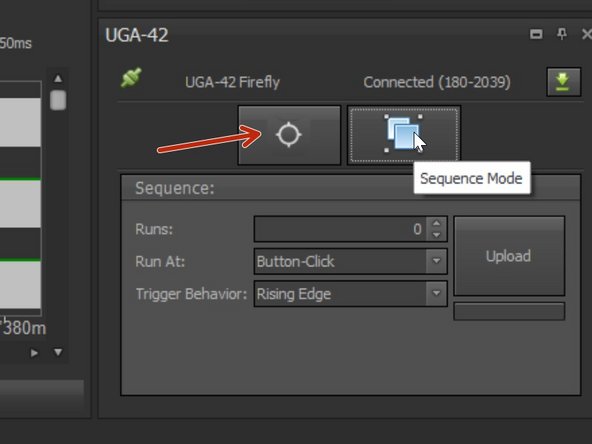
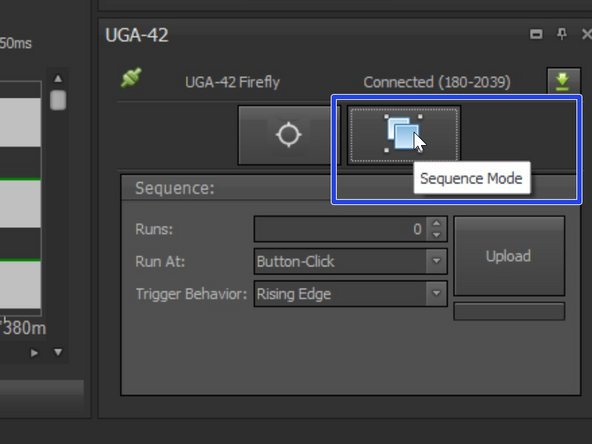
If you want to choose different shapes/patterns or define a (triggered) sequence choose "Sequence Mode" under the UGA-42 panel.
-
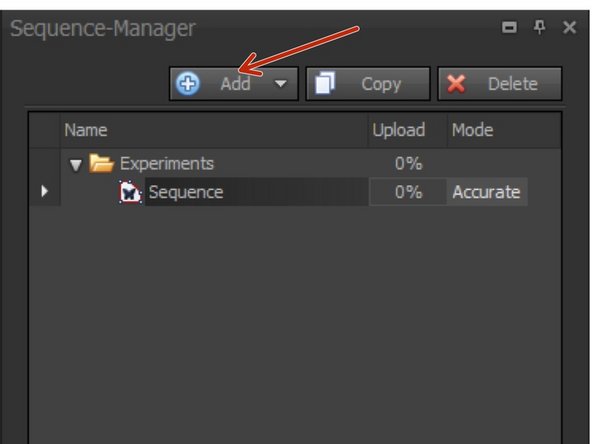
To create a new sequence choose "Add".
-
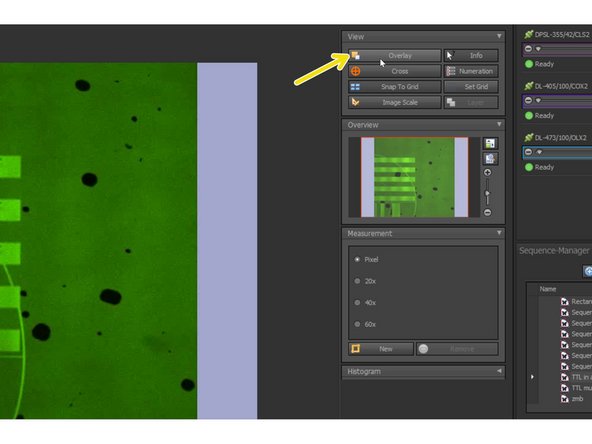
Make sure you have "Overlay" selected so you can visualize the inserted objects.
-
-
-
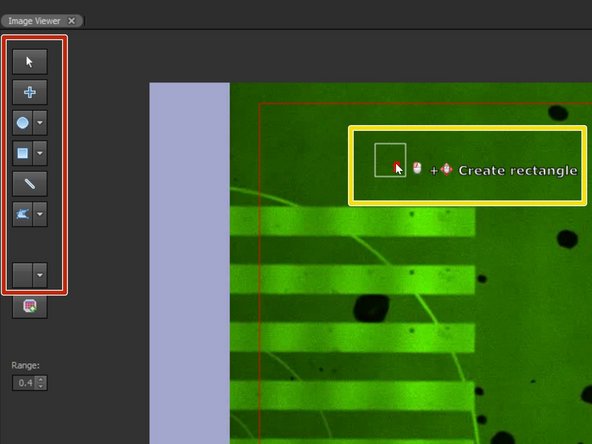
Select the desired geometrical object from the panel.
-
Click into the camera image to position the square. Keep the mouse button pressed to adjust the size.
-
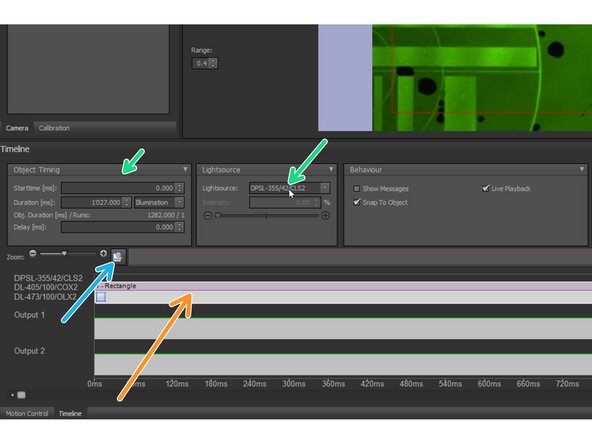
A corresponding item will appear in the timeline as a bar, after releasing the mouse button.
-
Use this button to fit the whole sequence into the timeline.
-
Select the object on the timeline to adjust the appropriate light source and exposure settings.
-
To create a new object repeat the previous points.
-
Further objects will appear in the timeline and can be moved as desired.
-
-
-
Make sure you have selected the apropriate observation method in CellSense and that the laser shutter is open.
-
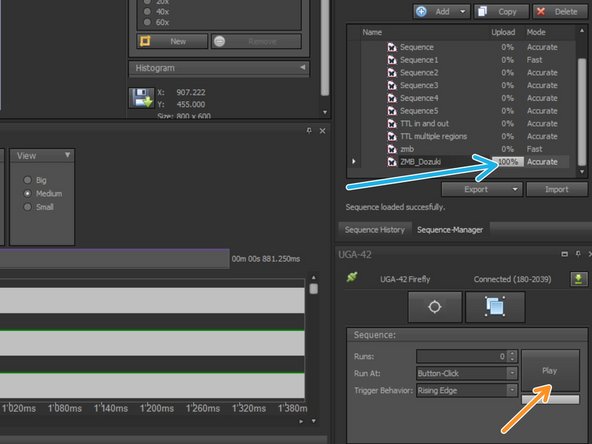
Upload the sequence.
-
You will see the progress bar now at "100%" in the sequence.
-
To play immediately your sequence choose "Button-Click".
-
Select the number of sequence cycles (Runs). If 0 it will loop until you click the stop button.
-
Play your sequence.
-
-
-
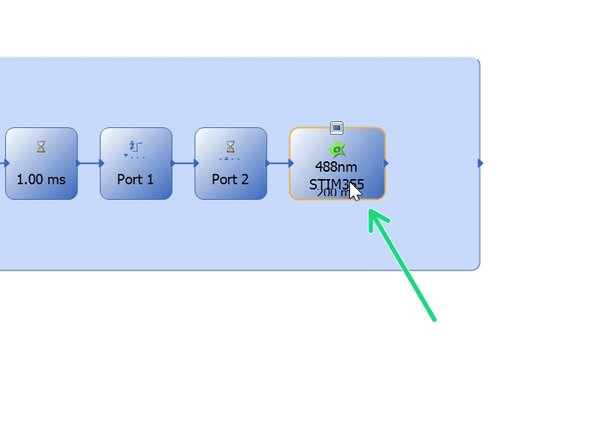
Define your sequence in CellSense including a TTL pulse .
-
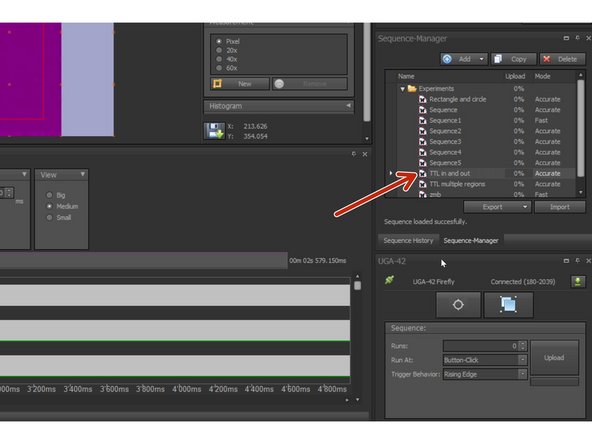
In SysCon: You can choose one of the available sequence templates as a starting point (e.g. TTL in and out) .
-
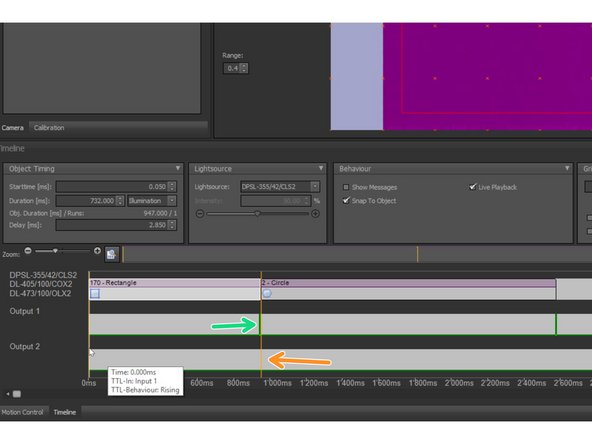
In SysCon: It is possible to create TTL pulses by right-clicking into one ’Output’ line on the timeline and choosing "Add TTL Pulse" from the context menu.
-
In SysCon: It is also possible to add TTL breakpoints via ’Add Breakpoint’ in the context menu.
-
These breakpoints can be positioned between objects in the timeline and appear as yellow vertical bars drawn over all timelines. The sequence will stop at each breakpoint until a TTL pulse is recognized at ’Input 1’ of the UGA 42 firefly.
-
In SysCon: Upload and run your sequence.
-
In CellSense: Start your experiment including a TTL pulse and wait option.
-
For more details please ask ou staff.
-