
-
-
When acquiring high resolution images, it can make sense to acquire an overview image of your sample at a lower magnification. This allows you to identify and navigate between your positions/regions of interest.
-
Choose the 4x objective (or another low magnification objective).
-
Choose the imaging setting you want to use for the overview (e.g BF, 640) and adjust it accordingly (laser intensity, exposure time) in the Live mode.
-
You can define the overview area on the Stage Navigator window (bottom left).
-
Click "Define Overview Area".
-
-
-
Move to the top left and bottom right as indicated in the pop up messages.
-
Click here to initiate the overview.
-
It is also possible to acquire a multichannel overview using the dropdown menu.
-
It won't be possible to add positions outside the overview.
-
You have the option tosave your overview here.
-
Here you can load the "Default Overview Area" or other previously saved overviews.
-
-
-
Select your objective of choice and define your imaging settings.
-
If you need further information on how to set up your imaging please refer to the appropriate guides:
-
Spinning disk mode: Multichannel + Z-stack acquisition
-
-
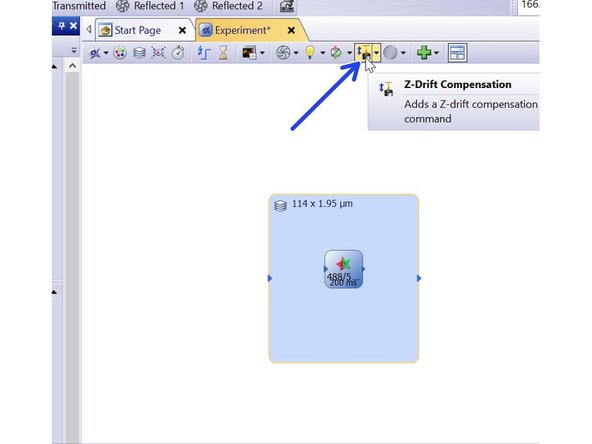
Add the hardware autofocus through a Z-Drift compensation command before your acquisition sequence.
-
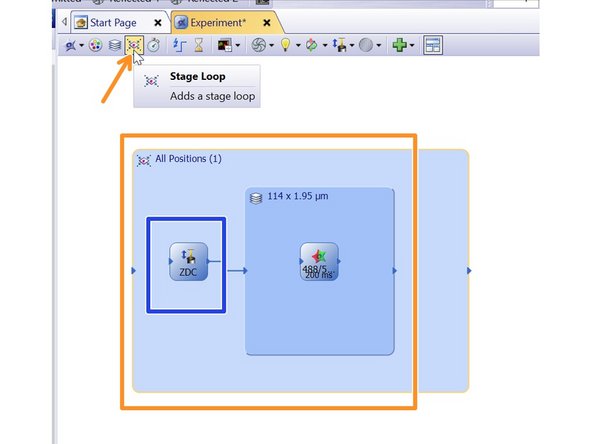
Add a Stage loop to define the positions you would like to image.
-
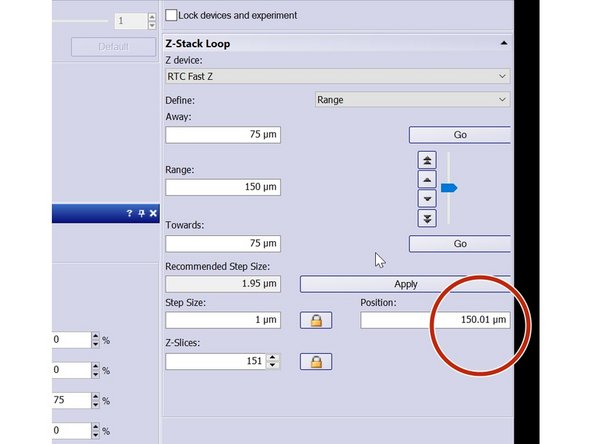
While using RTC Fast for z-stacks please make sure it is in the appropriate position (middle=150um) before starting to define positions.
-
-
-
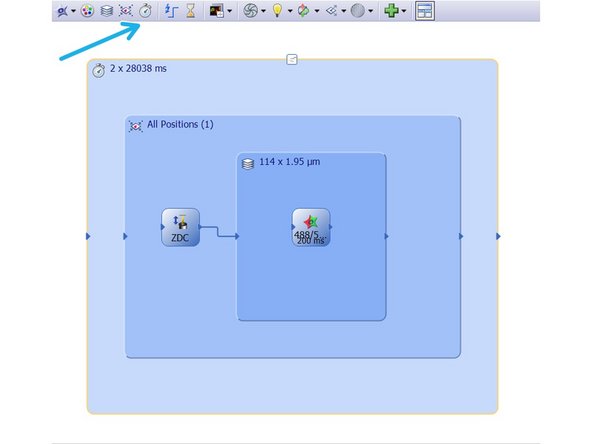
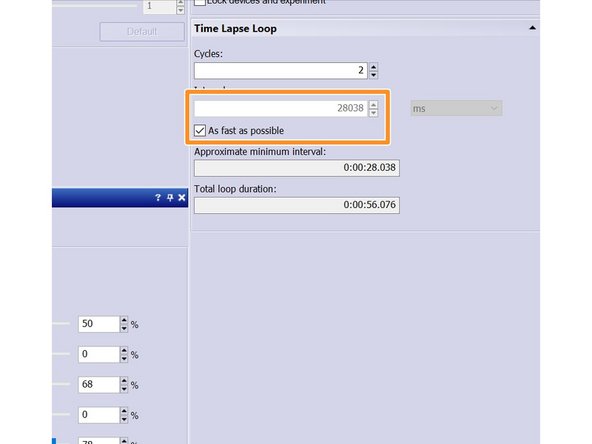
Additionally you can also add a time lapse command if you wish to loop through all positions.
-
Here you can define the time interval
-
Or choose the minimal possible time interval by checking the "As fast as possible" box.
-
-
-
Activate ZDC offset measurement when adding a new position.
-
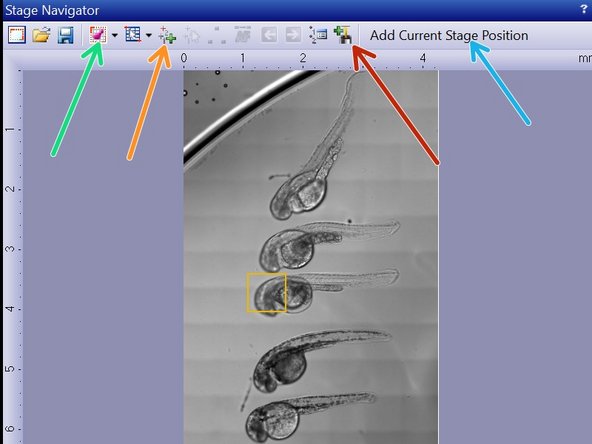
Go to your first position.
-
You can either add the current stage position here,
-
or add a select position directly in the overview.
-
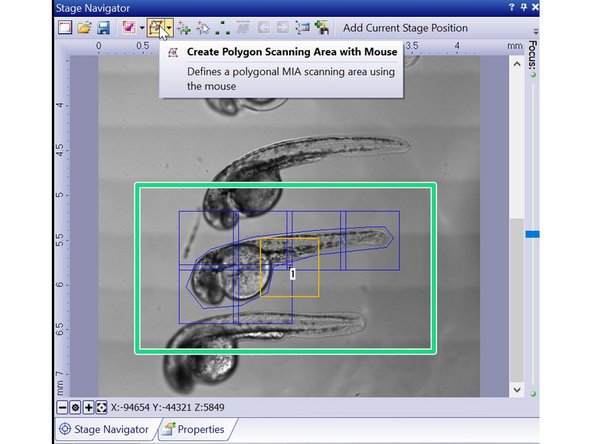
To create a stitched image of a larger area than your field of view you can acquire and generate a MIA (Multiple Image Alignment).
-
-
-
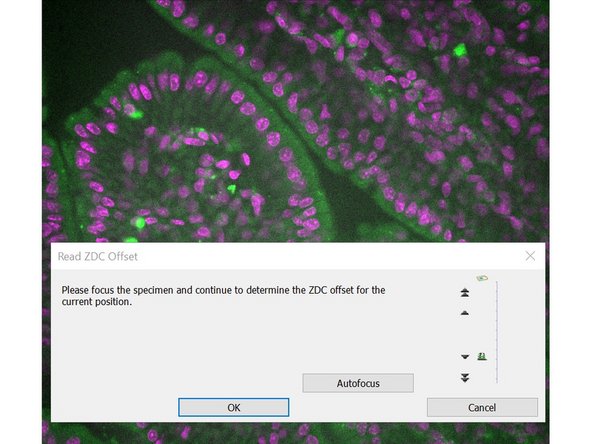
After adding a new position, focus your specimen.
-
In a MIA the central position will be used to assess the ZDC offset.
-
Click OK once you are satisfied with your focus.
-
You will hear a beep if the offset is successfully determined. If you hear 2 beeps, the measurement failed. Check for any air bubbles in immersion oil and repeat the measurement.
-
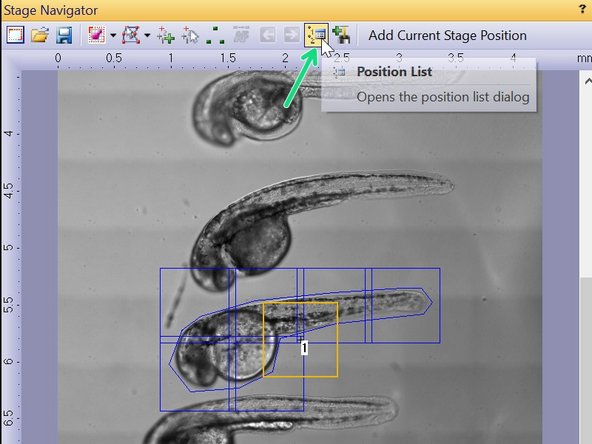
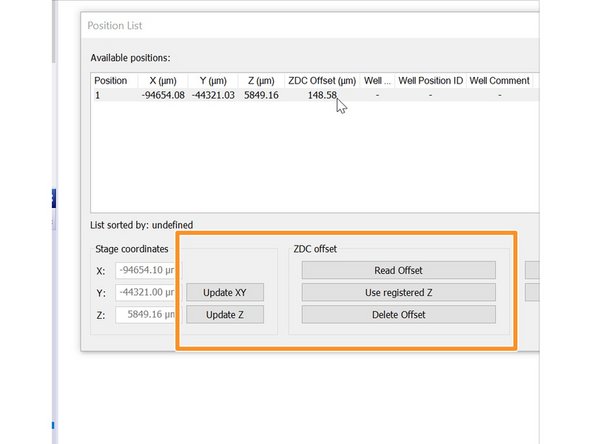
You can check the coordinates of your positions in the Position List.
-
Here you can also redefine xy or z coordinates as well as re define the ZDC offset.
-
-
-
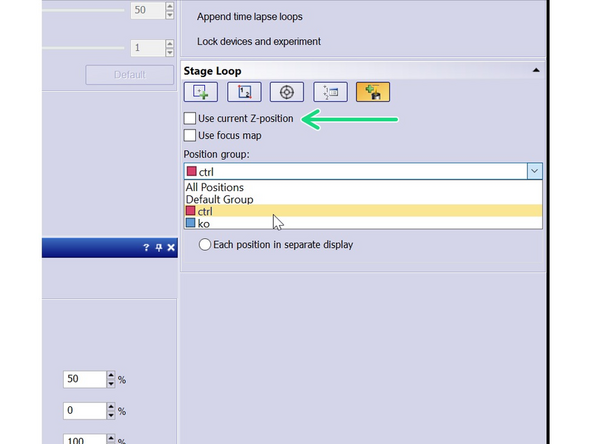
"Use current Z-position"
-
When selected: all Z-positions that you have set during the definition of the XY-positions and MIA scan areas are ignored. The images are acquired at the current microscope Z-position.
-
Recommended when using stage loop including ZDC. Make sure you are at the start position and in focus when starting the experiment.
-
When cleared: your software saves the current Z-position at each defined XY-position and at each defined MIA scan area. The saved Z-positions are used when acquiring the image.
-
-
-
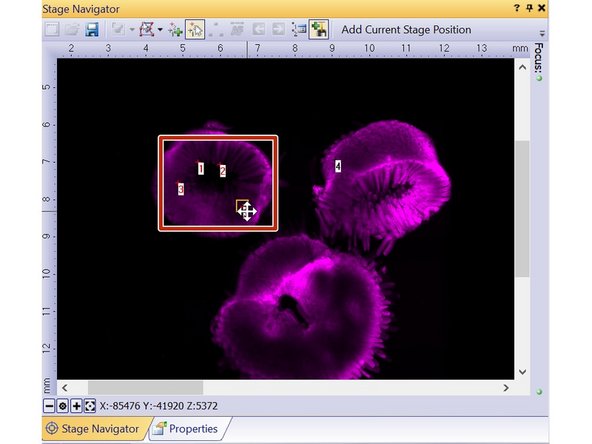
Once you've added all your positions you can group them (e.g. according to the imaging protocol you'd like to run on each group).
-
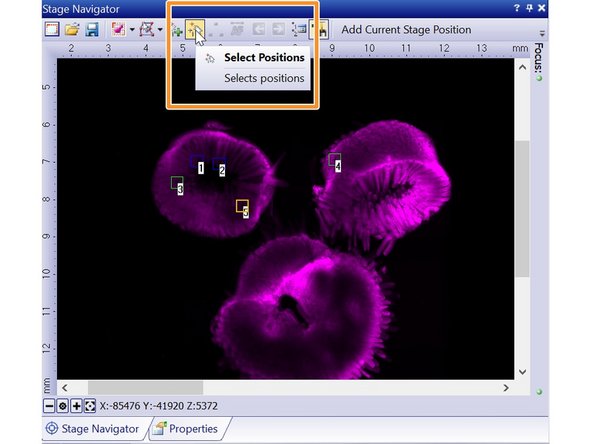
Use the arrow tool to select your positions (for multiple positions keep the shift key pressed while selecting the different positions)
-
Selected positions will be formatted in red.
-
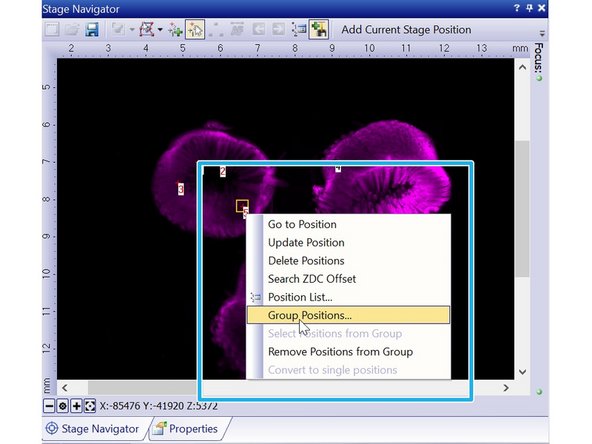
Hover over the selected position and right click. Select Group positions.
-
Name your new group.
-
-
-
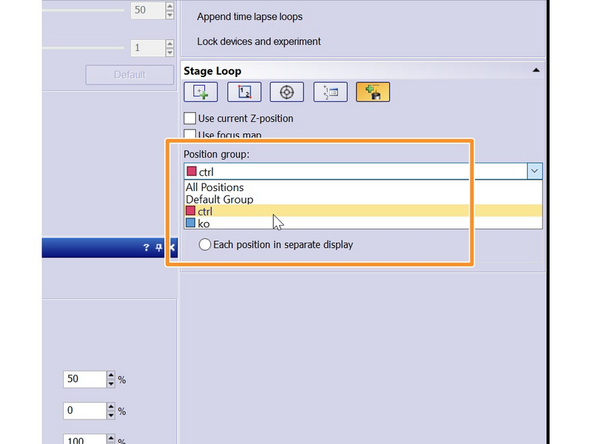
Click on the stage loop box.
-
You can now select (bottom right) if you want to image all your defined positions or just a restricted group .
-
-
-
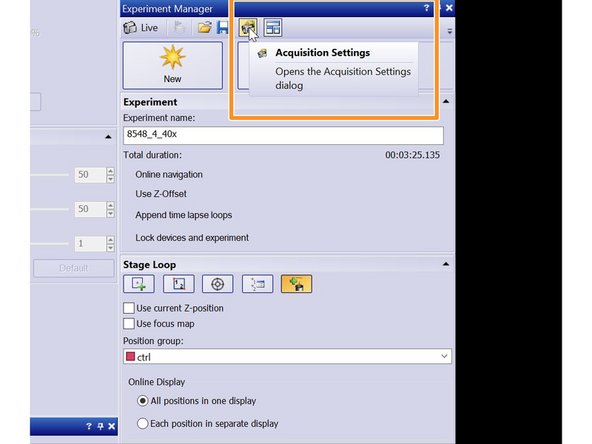
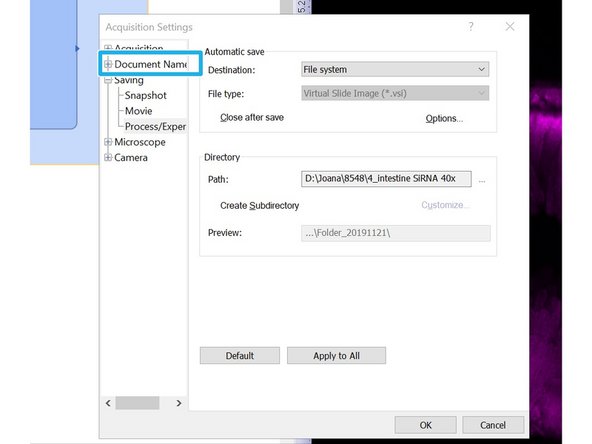
Under the Experiment Manager window you can redefine how you'd like to name your images.
-
Open Acquisition settings.
-
Chose "Document naming".
-
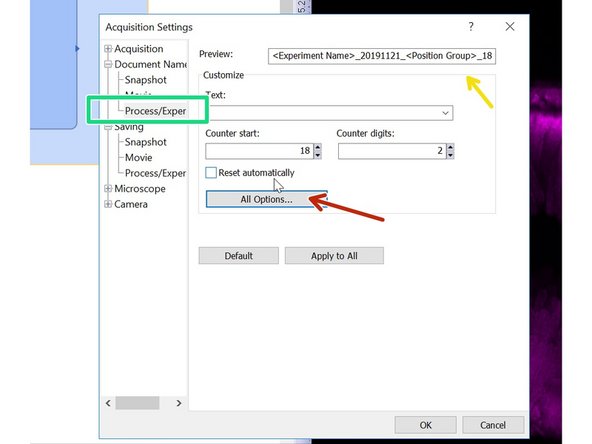
Choose Process/Experiment.
-
Here you can see how the naming is currently defined.
-
Here you can redefine the document naming.
-
-
-
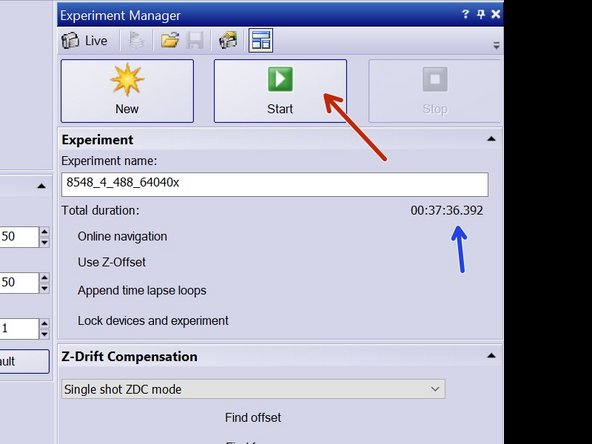
Here you can check what is the predicted total duration of your experiment.
-
You can now start your experiment!
-


Cancel: I did not complete this guide.
One other person completed this guide.
