-
-
Make sure the 4x objective is selected and in the lowest position. Otherwise:
-
Choose the 4x objective using the microscope touch panel.
-
Move the objective to the lowest position.
-
-
-
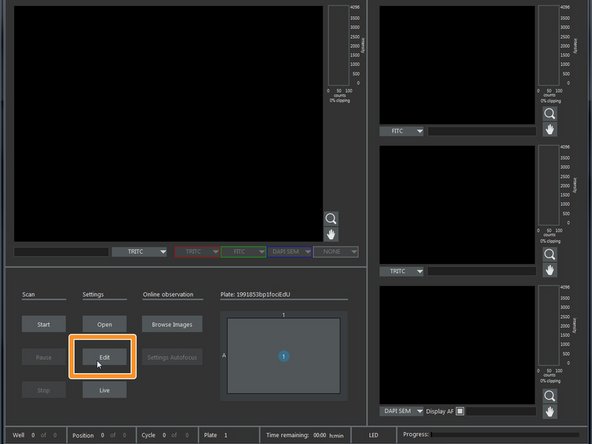
Start ScanR Acquisition software
-
-
-
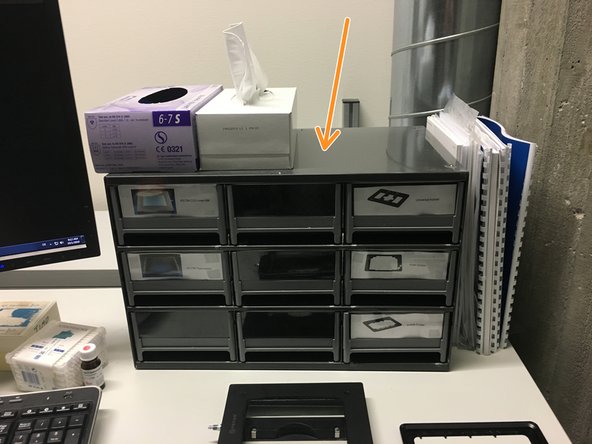
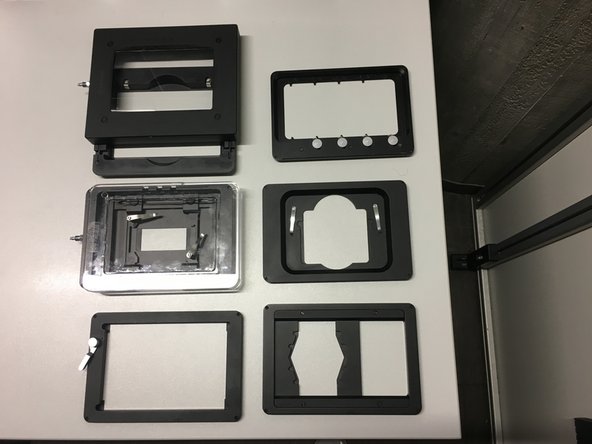
Choose and place the appropriate holder.
-
Several holders are available in the different drawers.
-
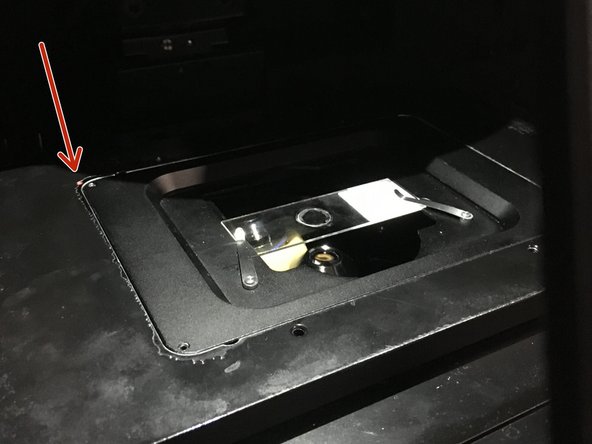
Mount your sample.
-
In an inverted microscope the coverslip should face the objective.
-
-
-
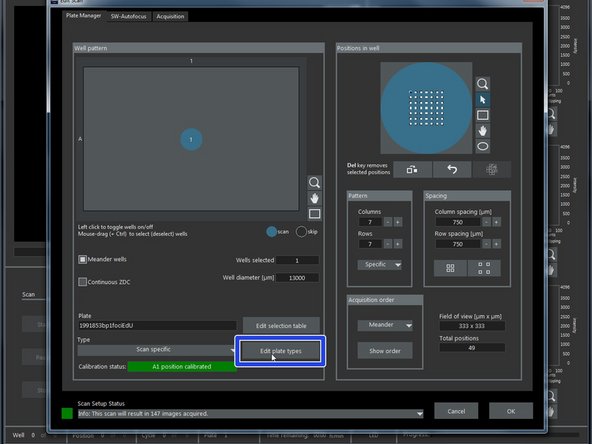
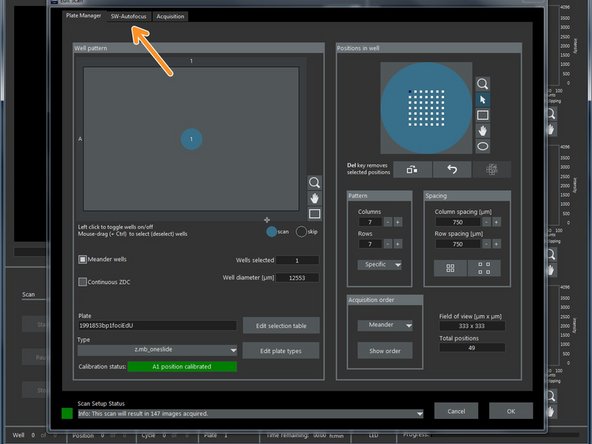
Select "Edit" to define your plate/slide
-
On the next pop up window select "Edit plate types".
-
-
-
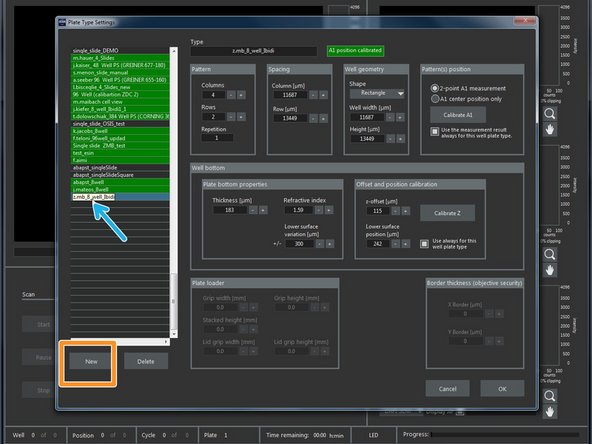
As a starting point you can use an existing template and adapt it according to your needs.
-
Chose a profile from the list that you would like to adapt, eg "z.mb_oneslide".
-
Create and rename your own profile by pressing "New".
-
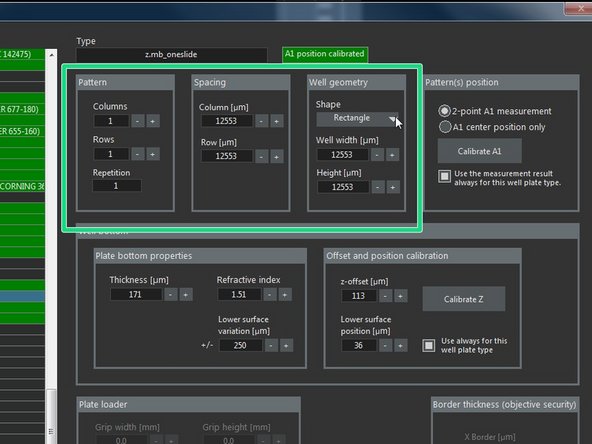
Here you can define the Pattern / Spacing and Geometry of your Wells.
-
-
-
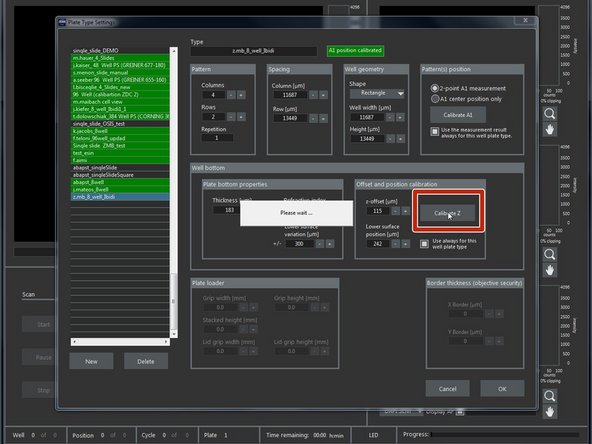
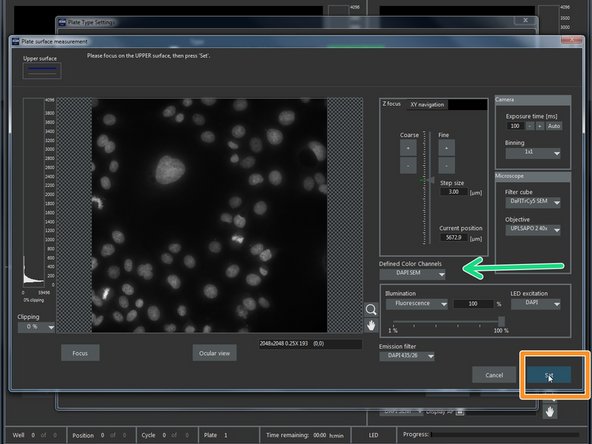
Press "Calibrate Z" to go to Live View.
-
Here you can change the "Defined Color Channels" (eg DAPI, etc).
-
Focus your sample using the microscope wheels and press "Set".
-
Press "Set" once you are satisfied.
-
-
-
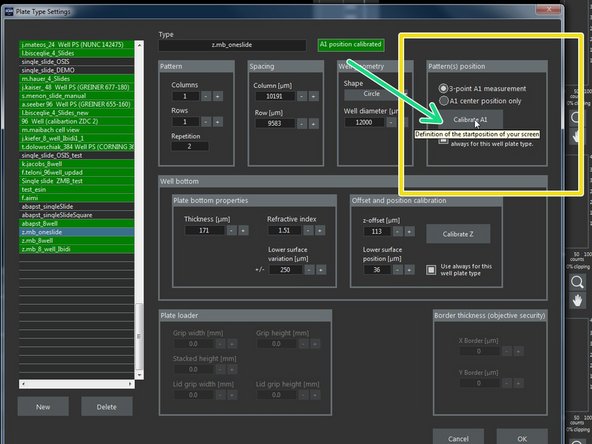
Calibrate positions ("Plate type settings" window) using:
-
"3-point A1 measurement" - triangulation method
-
"A1 center position" - only necessary to define the center of the coverslip/well
-
Press calibrate A1
-
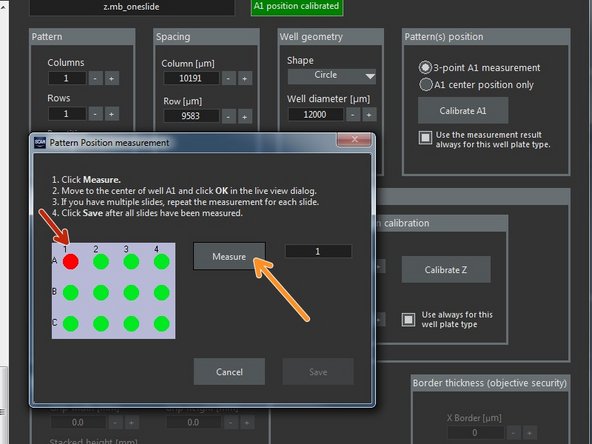
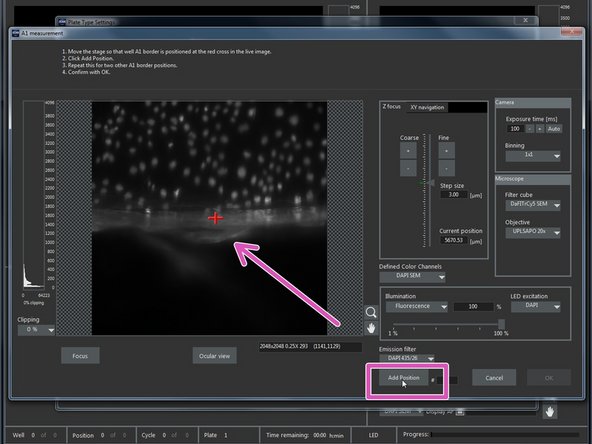
On the "Pattern Position measurement" window select which slide you want to measure.
-
Click "Measure" for Live view .
-
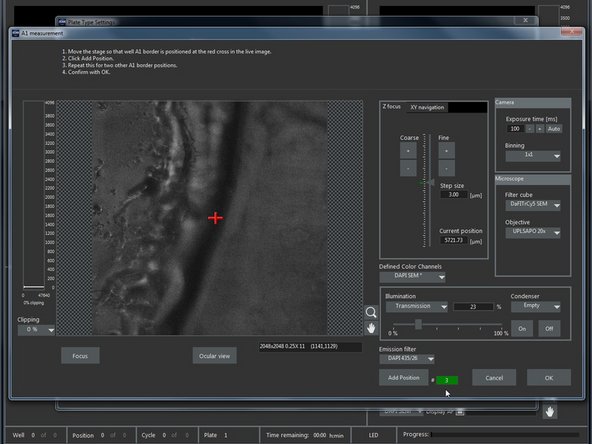
Move the stage so that the red cross is either at the center or at the edge of the slide, according to the chosen calibration strategy. Click "Add position".
-
-
-
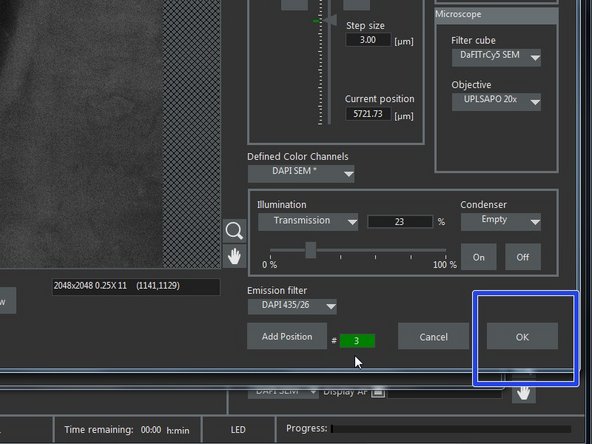
Repeat for the 2 other borders of A1 (if 3-point A1 measurement was chosen).
-
Confirm with "OK" ("A1 measurement" window).
-
-
-
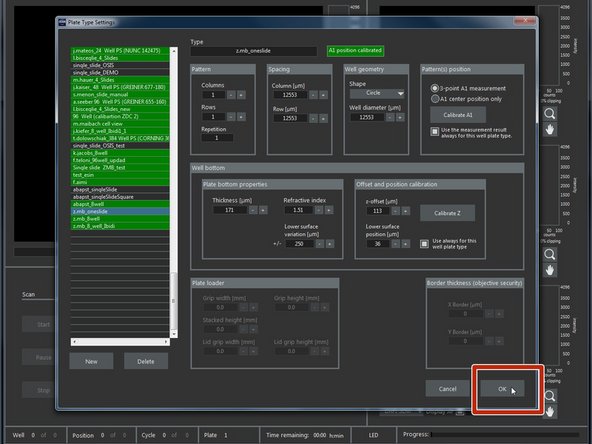
Once you are satisfied with your plate settings confirm with "OK".
-
-
-
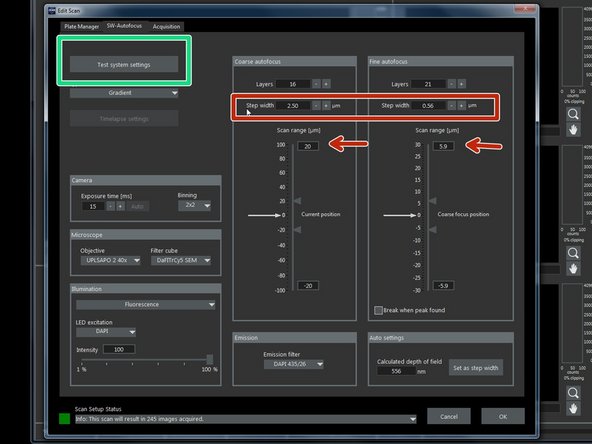
Back in the "Edit Scan" window go to the "SW-Autofocus" tab.
-
Click "Test system settings".
-
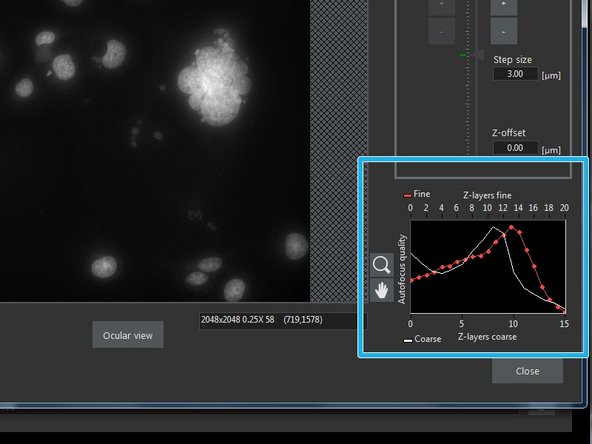
If the focus is not ideal adjust the step size and/or range accordingly.
-
SW-Autofocus settings can be optimized with the help of the autofocus quality graph.
-
Confirm your settings by clicking on "OK".
-
-
-
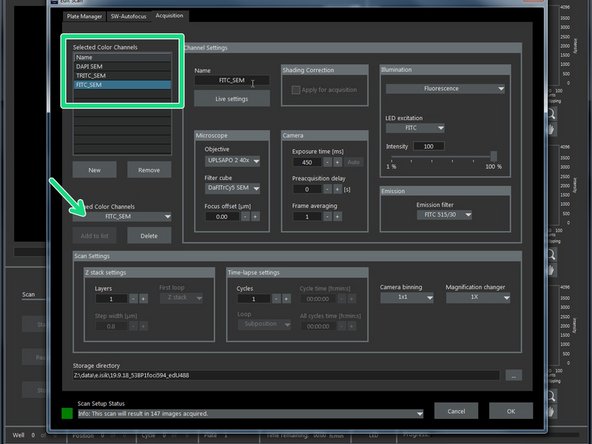
Back in the "Edit Scan" window go to the "Acquisition" tab.
-
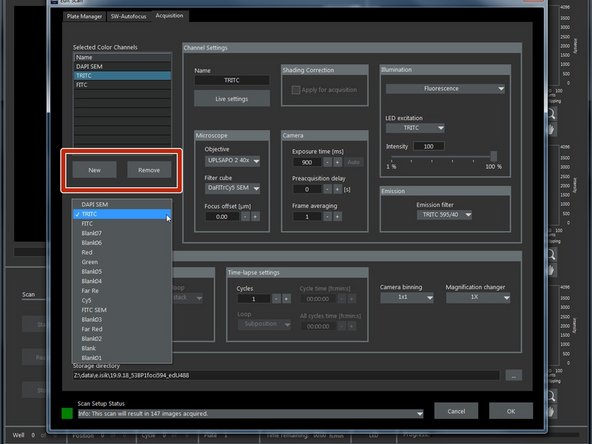
Here you can chose your channels for acquisition. (eg DAPI SEM, FITC SEM).
-
You can also create or remove channels accordingly.
-
-
-
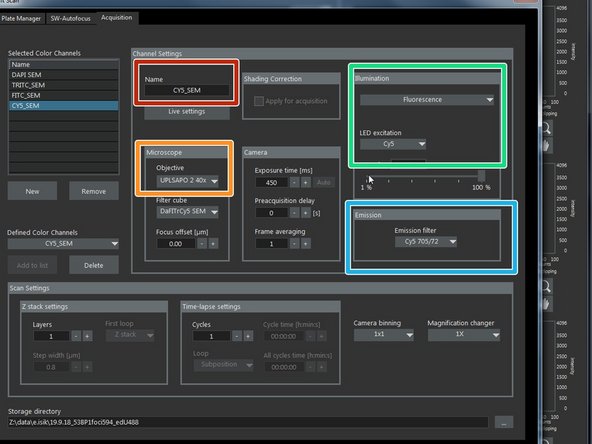
When using an existing or defining a new channel please confirm:
-
(Re)name here.
-
Objective of choice.
-
Correct ilumination type and LED excitation (eg Fluorescence and Cy5).
-
Correct emission filters (eg. Cy5 705/72).
-
-
-
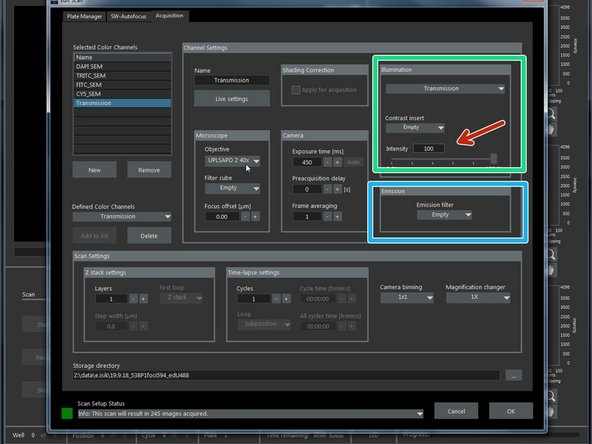
For transmission
-
In "Illumination" chose "Transmission".
-
In "Contrast insert" choose "Empty".
-
In "Emission" choose "Empty" Emission filter.
-
Decreasing the "Intensity" to 20 should avoid saturating the image.
-
-
-
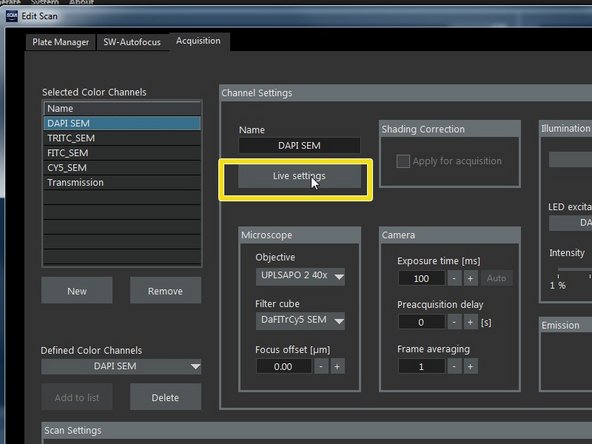
Press"Live settings" to check settings on Live view.
-
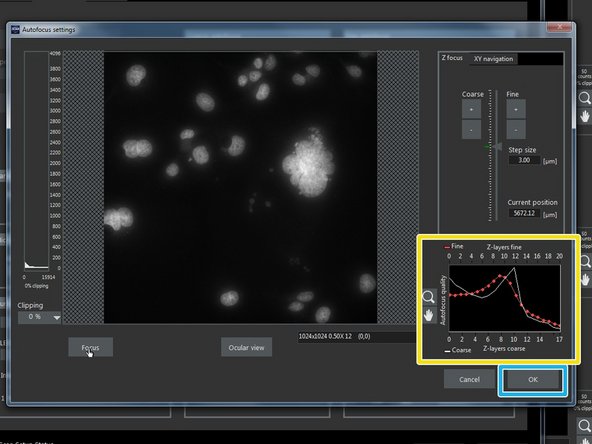
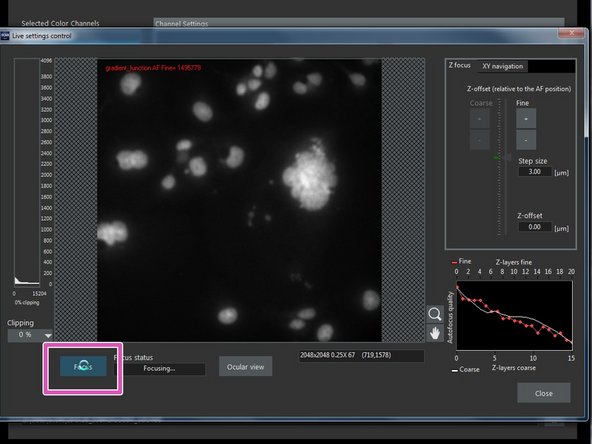
Press "Focus". The AF settings will now be applied.
-
SW-autofocus settings can be optimized with the help of the autofocus quality graph.
-
-
-
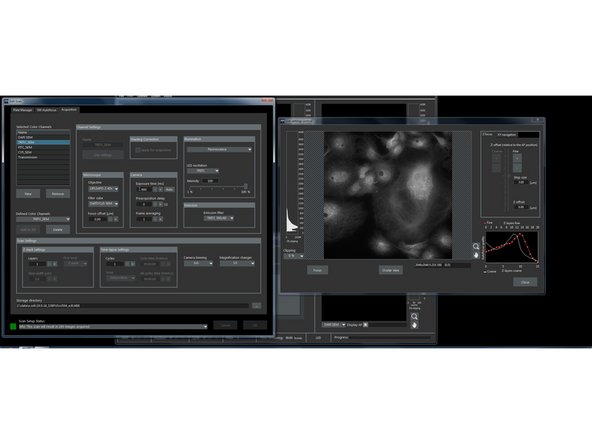
Move the Live settings window to the side so you can change between the different channels and adjust them accordingly.
-
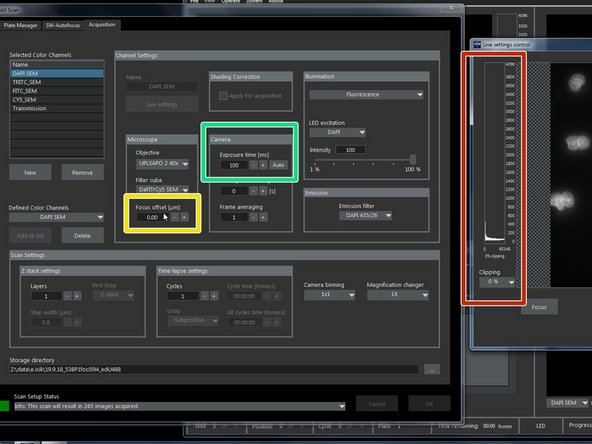
Adjust exposure time for each channel.
-
Make sure your image is not saturated - clipping should be 0%.
-
Check that "Focus offset" for each channel is on "0" .
-
-
-
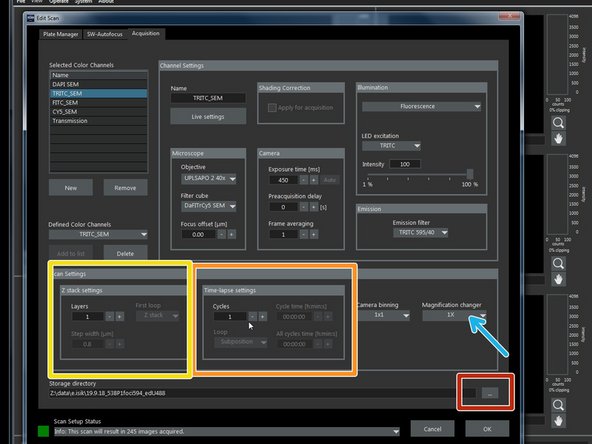
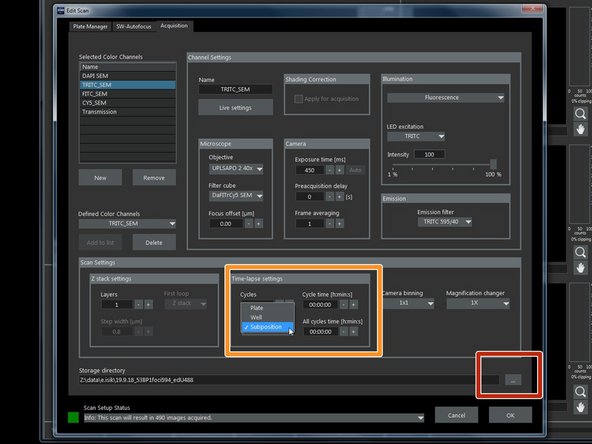
Here you can define a time lapse.
-
Here you can define z-stacks.
-
Here you can define the magnification changer.
-
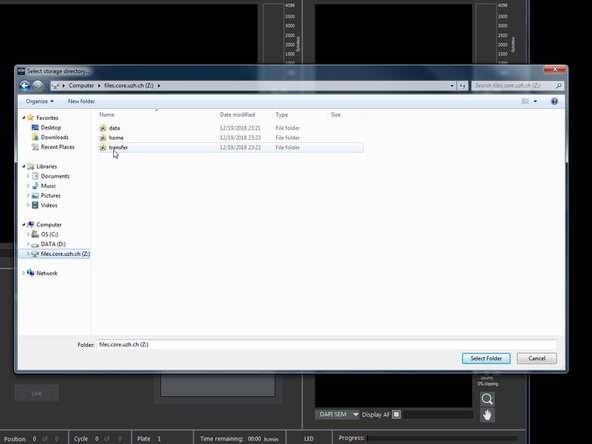
Define your destination folder here.
-
-
-
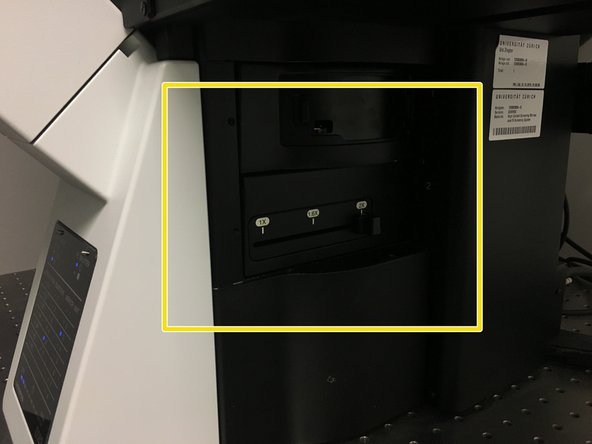
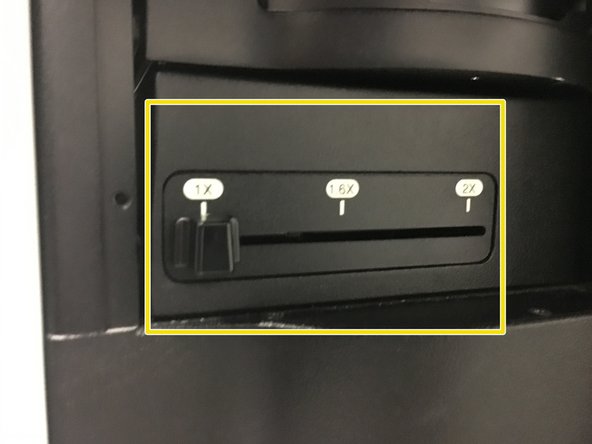
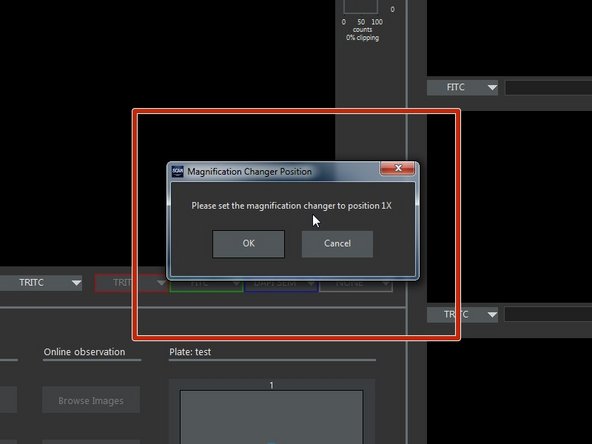
Make sure that the magnification changer on the right side of the microscope is correctly set. It should match the software settings.
-
Otherwise you will receive a message asking you to move it into the correct position.
-
-
-
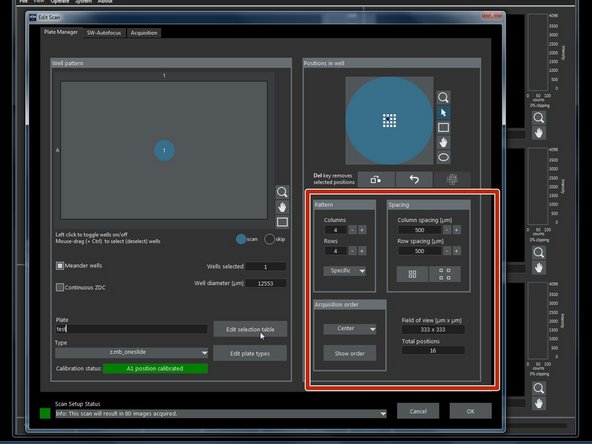
Choose your imaging pattern here.
-
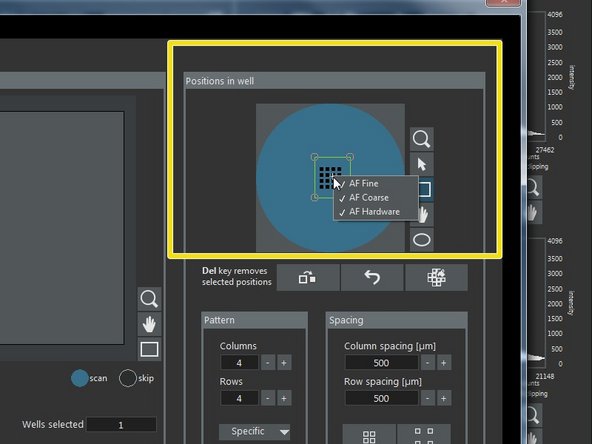
Finally choose the autofocus positions/pattern you would like to apply to each well.
-
Right click over defined positions.
-
To optimize and speed up acquisition we recommend that you include one position per well with the 3 options "AF Coarse", "AF Fine" and "AF Hardware".
-
For the remaining positions "AF Fine" might be sufficient, but this needs to be adjusted depending on the sample.
-
Increase the number of positions with "AF Coarse" and "AF Hardware" if necessary.
-
-
-
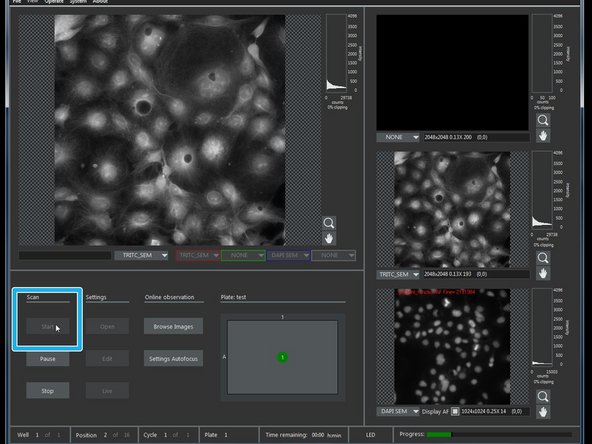
Start your scan.
-