-
-
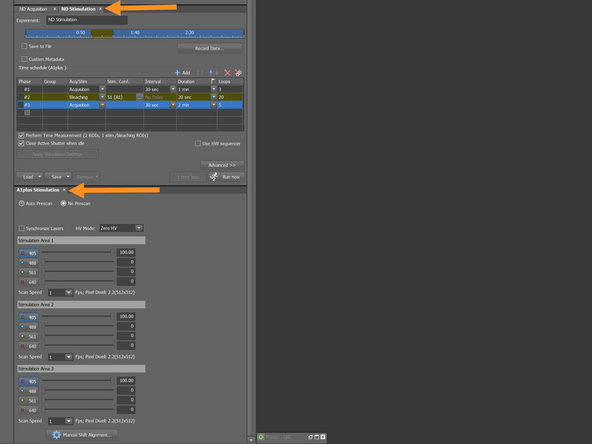
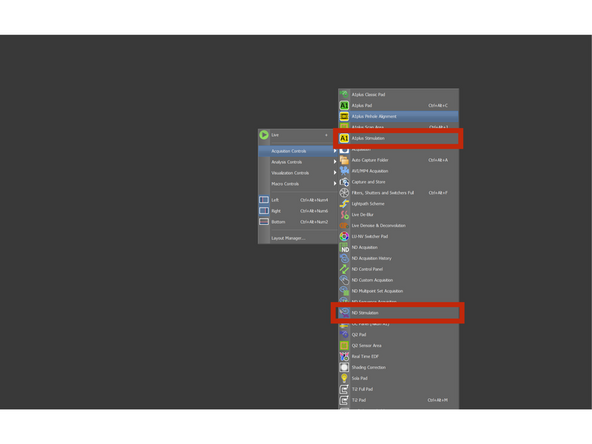
Rightclick in the SW and in the acquisition control open A1plus Stimulation and ND Stimulation panel
-
Dock it somewhere in the SW
-
-
-
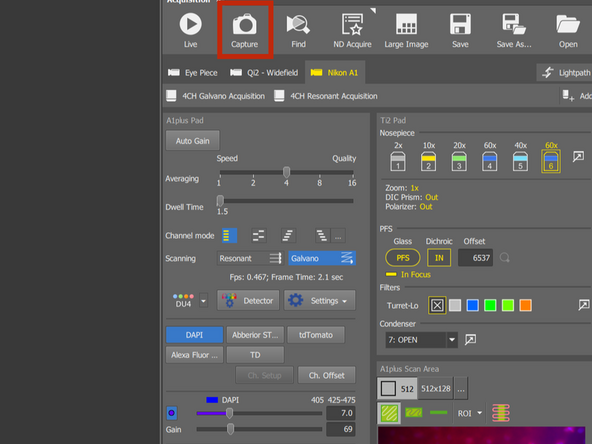
Optimize the laser pw and scanning parameters as usual.
-
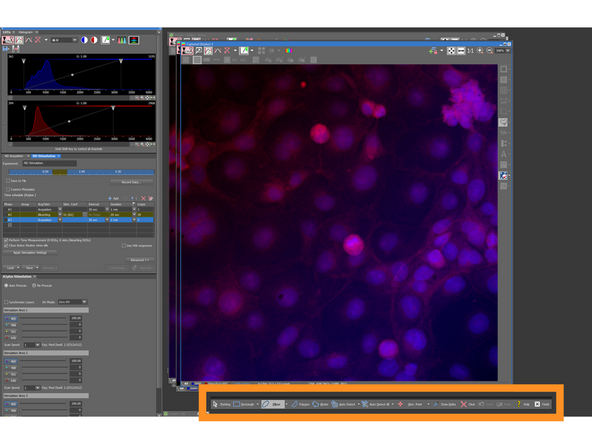
Capture image with those settings
-
press Ctrl+Shift+R to display ROI Editor to draw 3 ROI
-
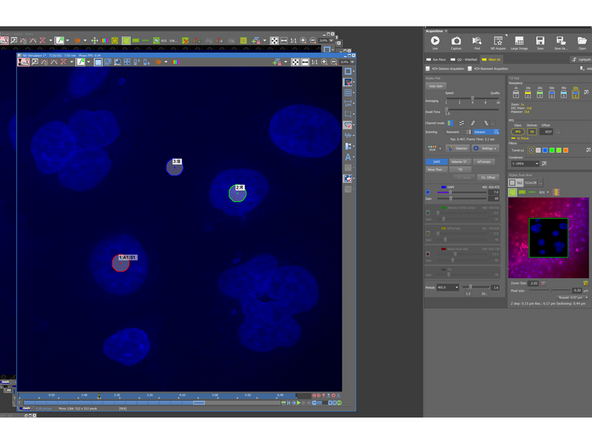
Draw a ROI of 1-3 um in diameter and then right-click and duplicate twice, so you have in the end three ROI
-
-
-
Should be small enough ~1-3 um. If too large, the diffusion won't be correct because your molecule will diffuse into the ROI, while bleaching will be still running.
-
Position in the area, where you want to bleach signal.
-
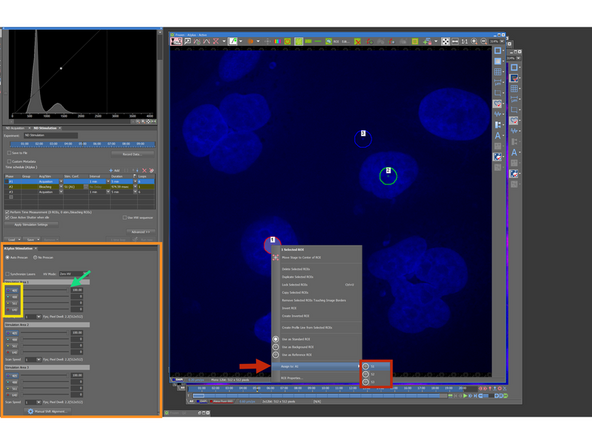
Rightclick on the ROI > Assign to: A1 > S1/S2/S3
-
Parameters of the Stimulation/Bleaching settings you can find in this window
-
Choose the wavelength for bleaching
-
Change the laser power - Aim for ~50–70% intensity loss. This typically requires several test runs and intensity measurements.
-
-
-
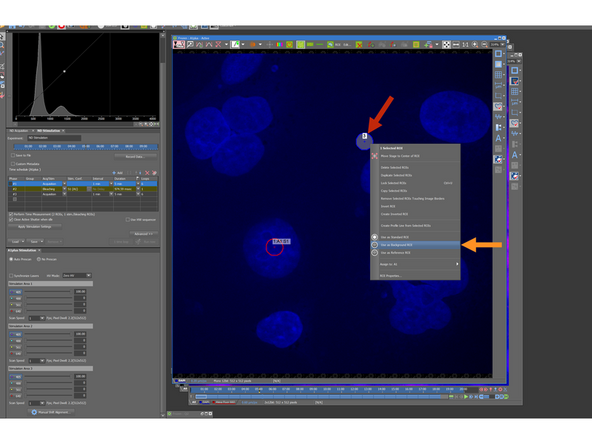
One of the ROI place where is only background signal
-
Right-click → Assign to Background.
-
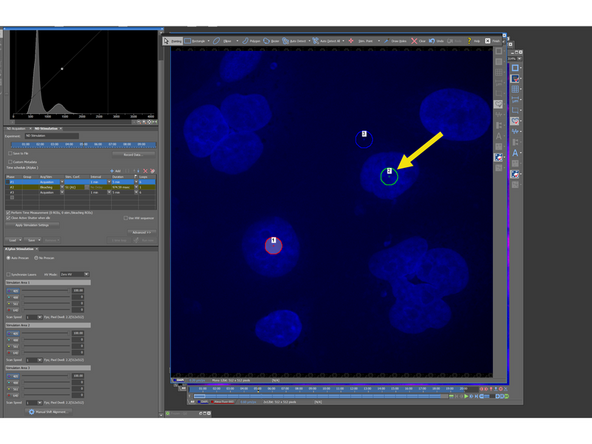
Last ROI will be placed in the region, where is your specific signal, but no bleaching will happen
-
Right-click → Assign to Reference.
-
The reference ROI should show minimal intensity drop during the experiment. If the reference curve shows bleaching, adjust imaging parameters
-
-
-
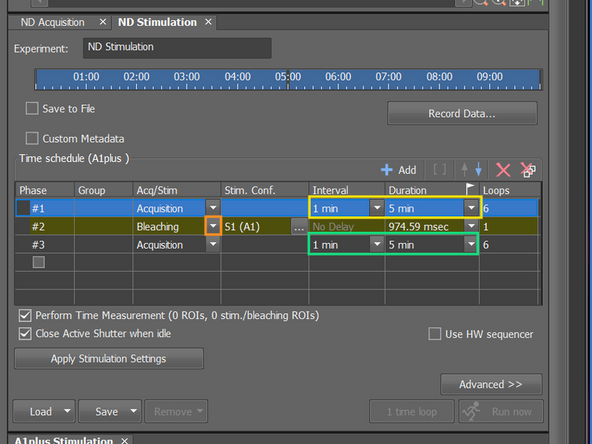
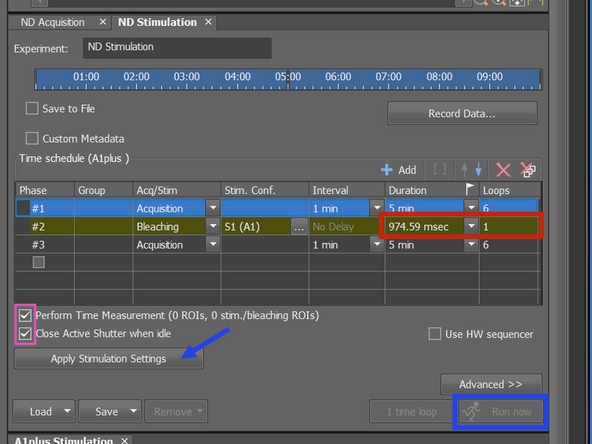
The acquisition consist of three phases: Pre-bleaching, Bleaching, Post-Bleaching (Recovery)
-
You can rename phase depending on whether you perform stimulation or bleaching.
-
Define the timelapse duration before bleaching and the interval between frames.
-
5-10 loops to measure the intensity before bleaching
-
Define the timelapse duration after bleaching, where signal recovery will be captured. Use the same interval as in Phase #1.
-
In the bleaching phase, you can use a very short duration (~100ms). SW redefines the duration, so the bleaching occurs only once
-
Check the relevant boxes to enable Time Measurement.
-
Click Apply Stimulation Settings, then proceed with Run.
-
-
-
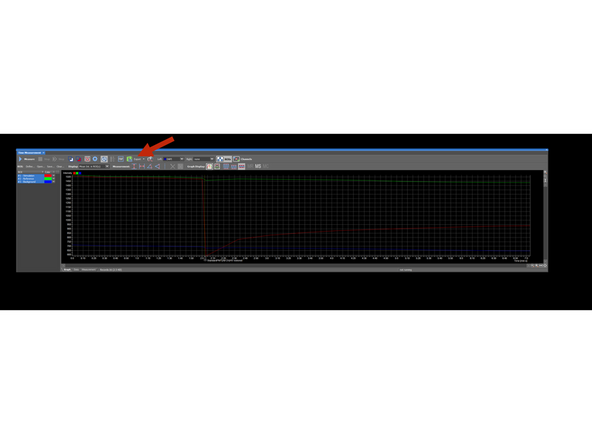
After the experiment, the Time Measurement window opens automatically, showing intensity curves for all ROIs.
-
You can export the data in the excel sheet here.
-
Reference ROI: Should have minimal drop of the intensity, otherwise you bleach already with your acquisition settings: If yes, you have to adjust them to avoid the bleaching or perform Reference correction during Data analysis
-
Background ROI: could be used to subtract all non-specific fluorescence and camera/detector noise and backgroud signal coming from the sample, so that only the true signal from your sample is analyzed.
-