Introduction
The Viventis LS2 is a double illumination, double detection light sheet microscope for optimal volumetric imaging of multiple large samples.
-
-
PC
-
Microscope and components:
-
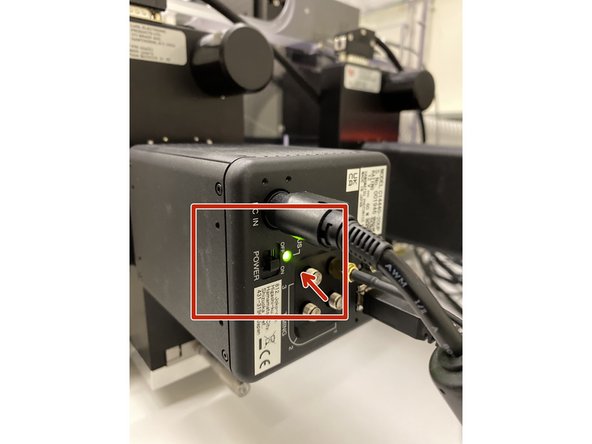
Cameras 1 and 2
-
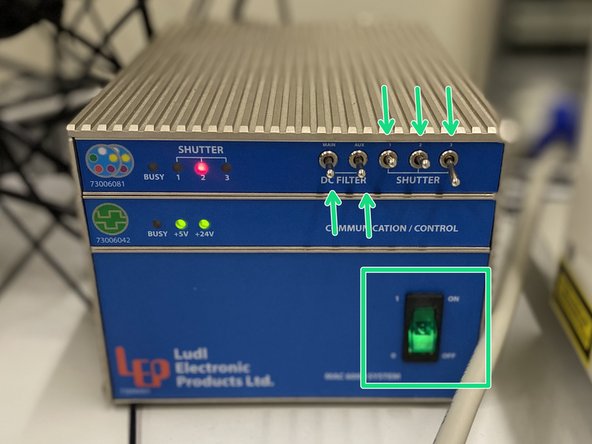
Shutter controller
-
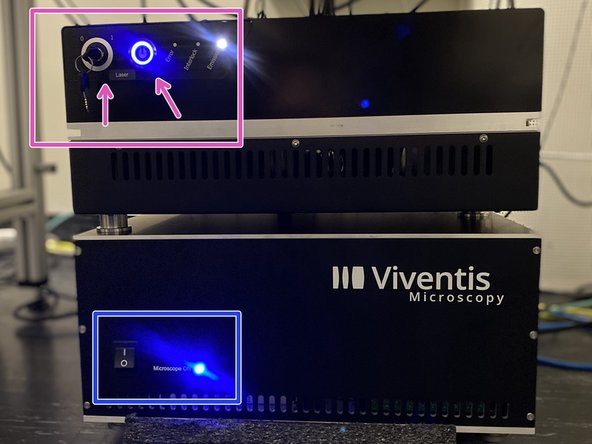
Laser
-
Microscope control box
-
Stage controller
-
Temperature and CO2 controllers (behind the microscope)
-
-
-
Turn on the PC, which is behind the monitor
-
Log in with your ZMB account
-
-
-
Soon all components, except for the microscope controller, will be plugged to a main power outlet. You should check that the following are as indicated:
-
Cameras 1 and 2 should be on. The Indicator LED light should be green.
-
Shutter controller should be turned on, and the knobs should be in the same configuration as in the image.
-
Turn on the laser - button and key clock-wise.
-
Microscope controller should be turned on last.
-
-
-
Fill the imaging chamber with MilliQ water until both detection objectives are submerged.
-
It is important that there are no air bubbles sticking to the objectives. Especially the detection lenses seem to adhere bubbles. Try to get rid of these before continuing. Bubbles can diffract the light sheet.
-
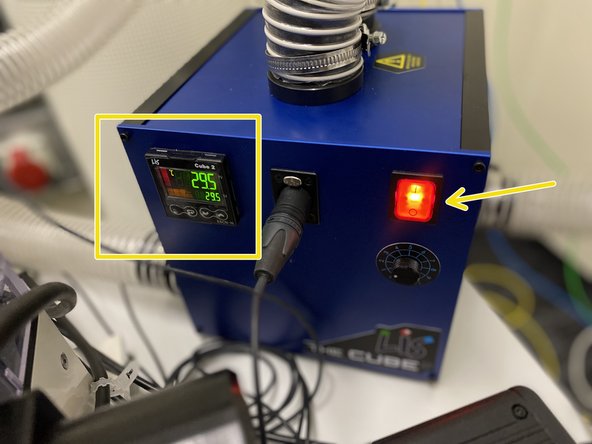
Turn on the CUBE temperature controller and adjust the temperature 2 degrees higher at the CUBE than what you intend as there is an offset.
-
Please plan UP TO 4 HOURS to let the temperature of the microscope stabilize.
-
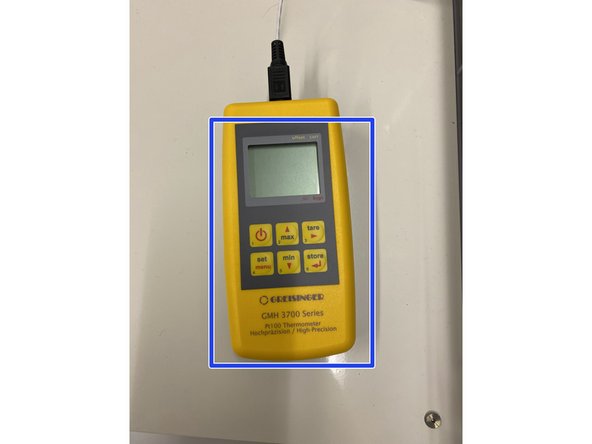
You can check the actual temperature inside the chamber on the yellow thermometer.
-
-
-
Make sure all components are booted and that there is water in the imaging chamber before you start the operating software of the LS2. Otherwise there will be an error.
-
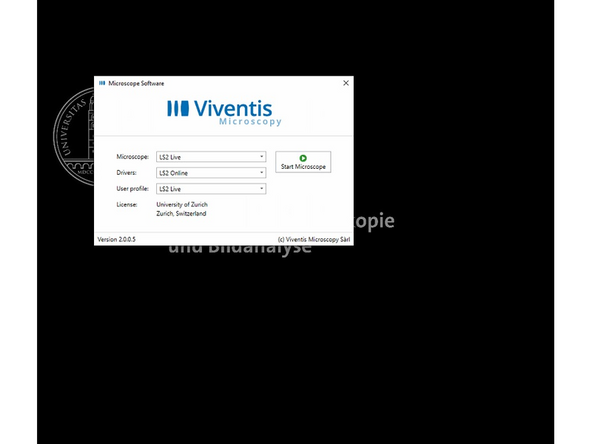
Start the microscope operating software.
-
Open this software if you need to control CO2 and Oxygen during your imaging.
-
Use the settings Microscope: LS2 Live, Drivers: LS Online and User Profile: LS2 Live.
-
Upon the first start up there will be a pop up window asking for stage initialization. You need to confirm it.
-
Sometimes this window is hidden behind the main window.
-
-
-
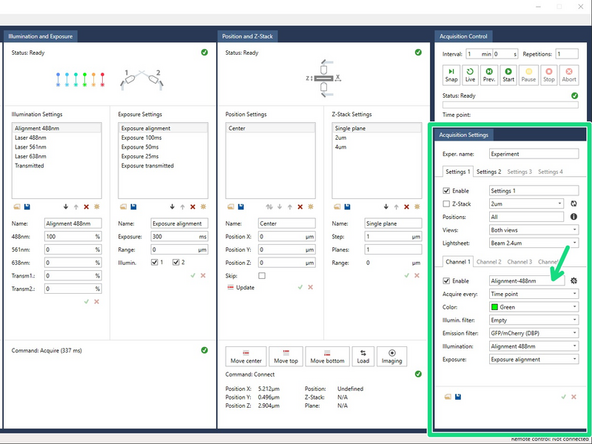
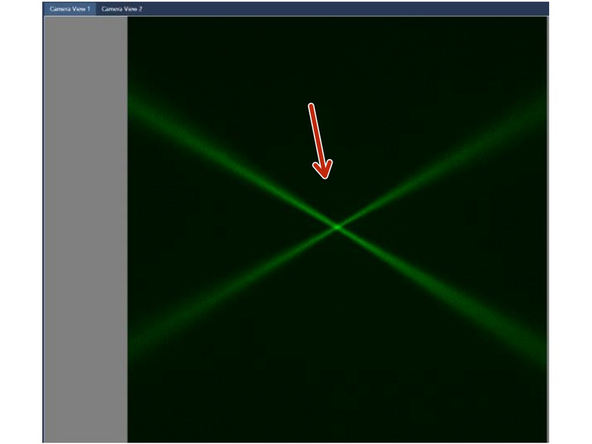
Take a snapshot (‘Snap’) of the 2µm beams, using the option ‘Alignment-488’ in the ‘Acquisition Settings’ panel.
-
These acquisition settings are already selected when the software starts (in Settings 1, Channel 1). They are:
-
Lightsheet ‘Beam 2µm’.
-
Illumination filter ‘Empty’.
-
Illumination ‘Alignment 488nm’ (laser 488nm at 100%).
-
Exposure ‘Exposure alignment’ (exposure 300 ms, range 0).
-
Check the ‘Camera’ window. The two beams could be de-focused but VISIBLE. If not visible, check that the laser combiner is switched ON with the security key turned to 1 and that water is present in the reservoir.
-
Check for bubbles on the objectives.
-
-
-
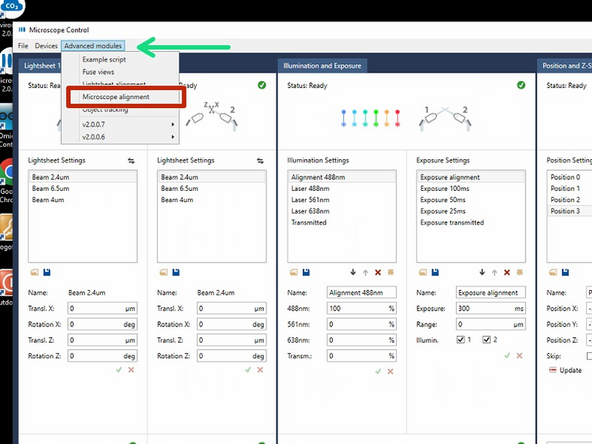
Go to the menu tab "Advanced modules".
-
Choose "Microscope alignment".
-
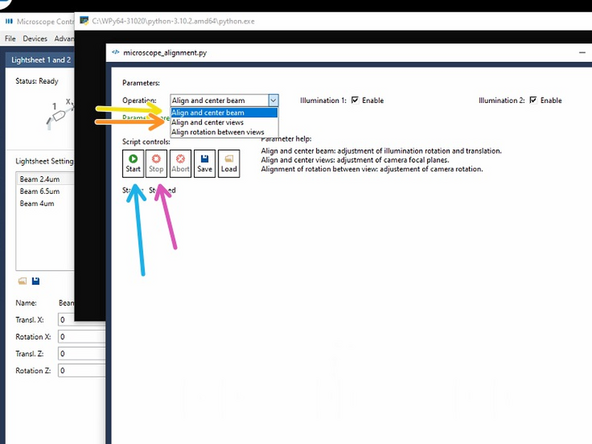
Choose "Align and center beam".
-
Click on "start", follow the instructions of the script.
-
Click on "Stop" when finished to confirm and save the adjustments.
-
Next go for "Align and Center views".
-
Click on "start", follow the instructions of the skript.
-
Click on "Stop" when finished to confirm and save the adjustments.
-
-
-
"Align and center beam" does adjust the rotation and translation of the laser beams of the two light-sheets in the focus of the detection objective of Camera View 1.
-
"Align and center views" does bring Camera View 2 in the same focus as Camera View 1.
-
"Align rotation between views" is referring to physically rotate the cameras. This can be very tedious to get right and is also not drifting. - Therefore this must not be adjusted by users.
-
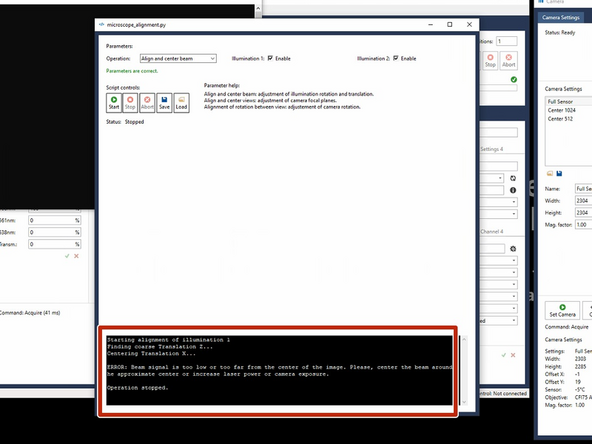
If this message appears- check if any air bubbles are impairing the beampath.
-
-
-
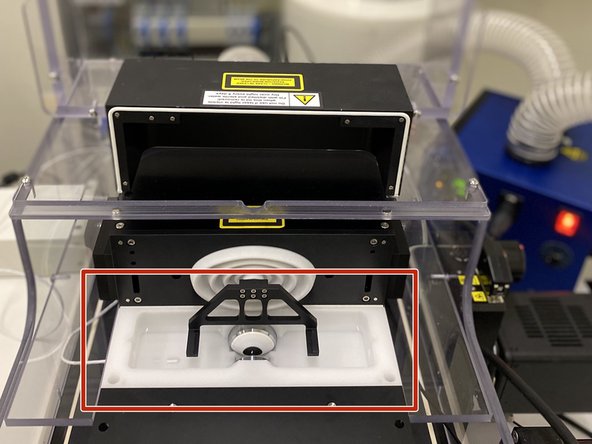
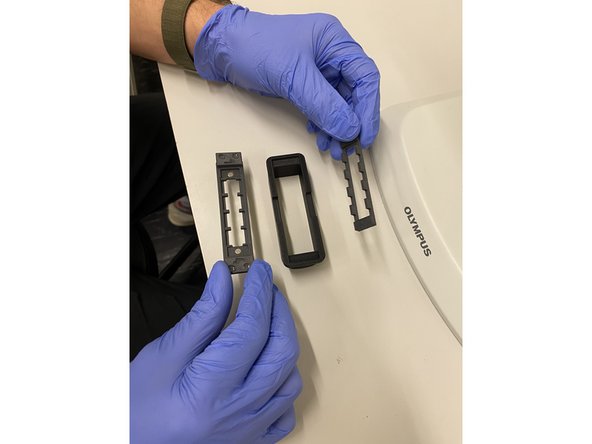
Choose the appropriate chambers for your sample.
-
Place the chamber on the magnetic chamber holder by removing the chamber holders top, and then securing it back again.
-
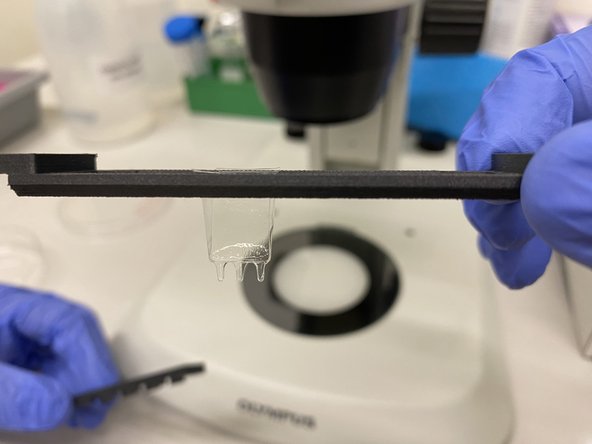
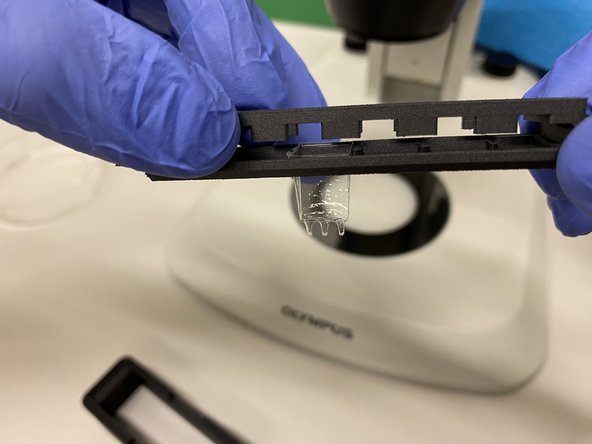
With the help of the macroscope load your sample(s) into the chamber. You can use the provided pipettes, ensuring that no bubbles are obstructing the view.
-
GENTLY place the holder inside of the imaging chamber, on top of the two black prawns.
-