Introduction
This guide covers how start up and perform fluorescence imaging at the Leica Thunder Widefield microscope located at the Center for Microscopy and Image Analysis, Irchel Campus, room Y42-H-91.
You will find more detailed information about the system setup here.
-
-
Usually all hardware components are turned on and also do not have to be turned off after the session. Sign in, when you start and log off, when you are finished.
-
Turn on the power supply on the two power strips under the table, if it was switched off.
-
Start PC, if it is off.
-
-
-
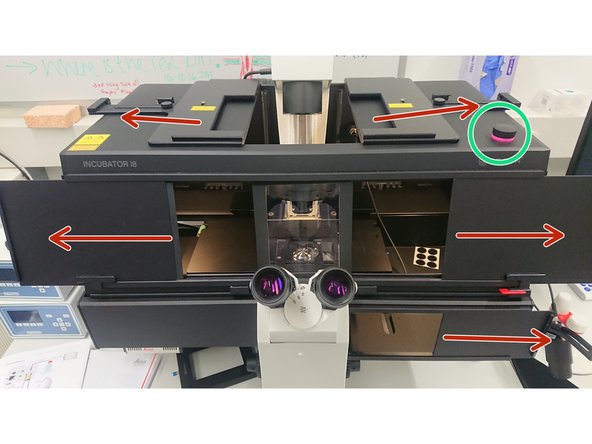
Temperature and CO2/O2 controller.
-
Microscope stand.
-
Stage controllers.
-
Gloves, tissues, immersion oil, ethanol.
-
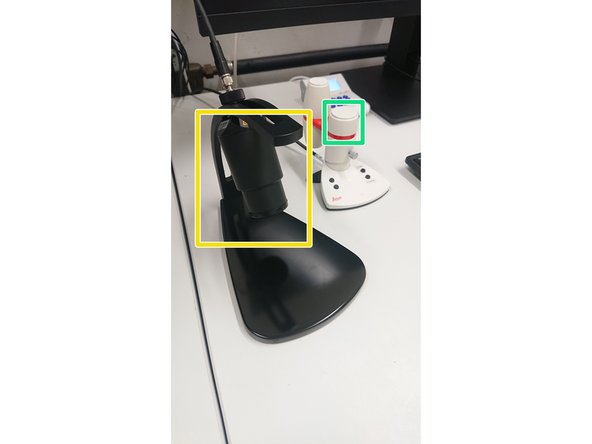
LED8 fluorescent light source.
-
Hardware control unit.
-
Fura illumination.
-
-
-
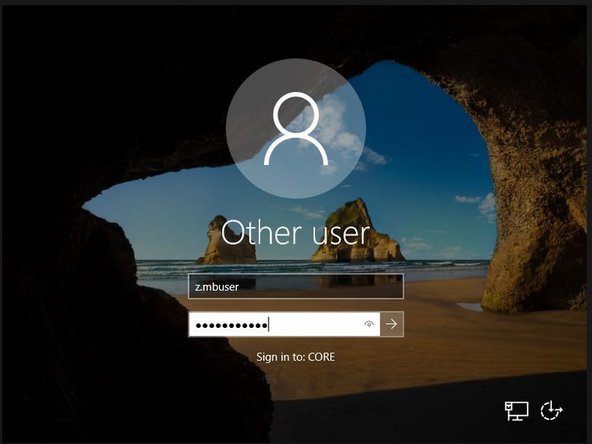
Click Ctrl+Alt+Del on the keyboard to be able to type in your credentials
-
Log in with your ZMB credentials
-
-
-
Log in with your ZMB credentials
-
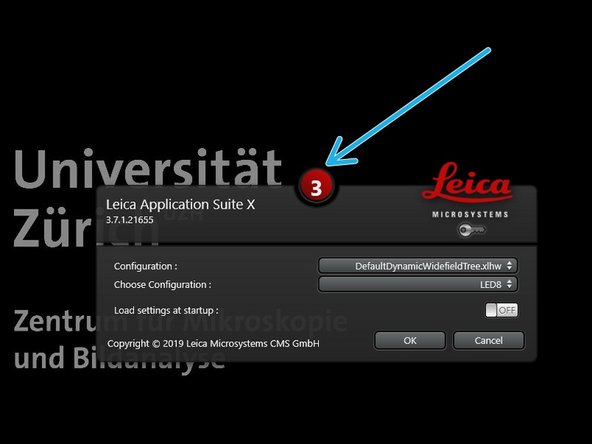
Start"LAS X" software.
-
Stop the countdown by clicking on it, if you want to change the configuration.
-
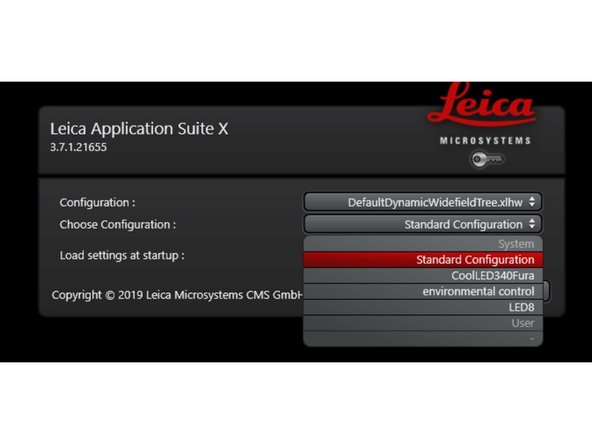
Choose the "Standard configuration" for fluorescence or brightfield imaging without environmental control.
-
-
-
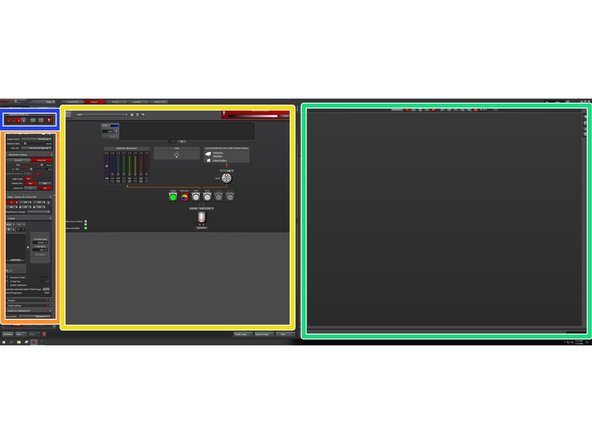
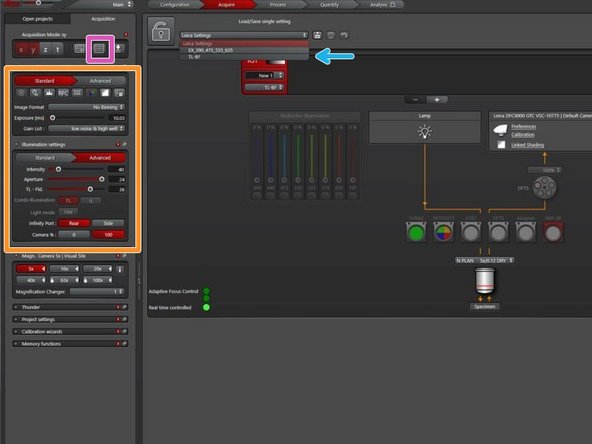
Acquisition settings
-
Beam path and camera settings.
-
Image display with lookup table tools.
-
X, Y, Z ,timelapse and autofocus (highspeed AF and AFC).
-
Active functions are displayed in red.
-
-
-
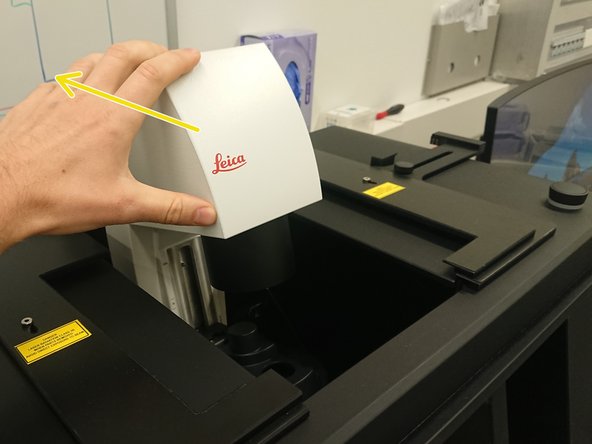
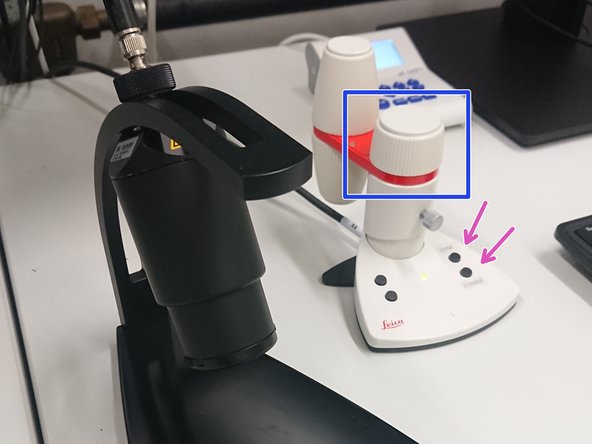
Open the front and top doors of the chamber to access the stage.
-
Turn on the chamber light. It will turn red when on.
-
Gently tilt back the transmitted light arm for easier access to the stage.
-
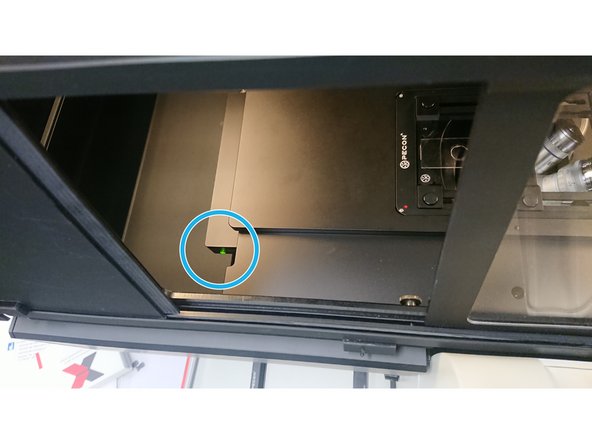
The green light should not be blinking.
-
The blinking light indicates, that the stage motors are not engaged. Engange/ disengage the stage by pressing the light.
-
-
-
Select the 5x objective to acquire an overview.
-
Bring the objective to the lowest position with the Z-controller (Turn it counter clockwise).
-
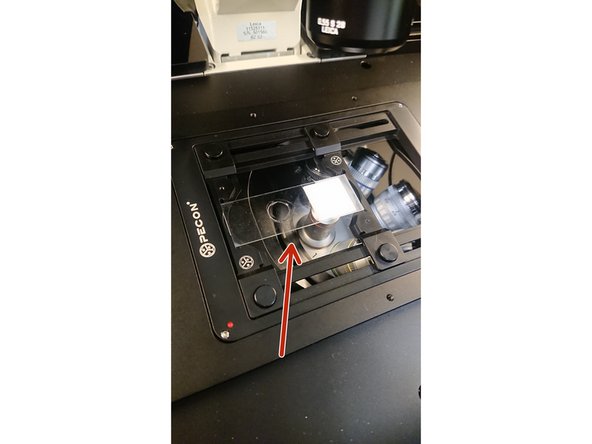
Mount sample in the respective holder/ stage insert.
-
Make sure your coverslip (thinner glass) is facing down (towards the objective).
-
Use the X /Y controller to center your sample over the objective.
-
-
-
Pull back the microscope arm.
-
Turn off the chamber illumination.
-
Close all the sliding doors again.
-
Choose "TL-BF" channel from the Leica settings.
-
Set the exposure to 10 ms and the "TL-FLD" number to 40.
-
Switch to the LAS X Navigator.
-
-
-
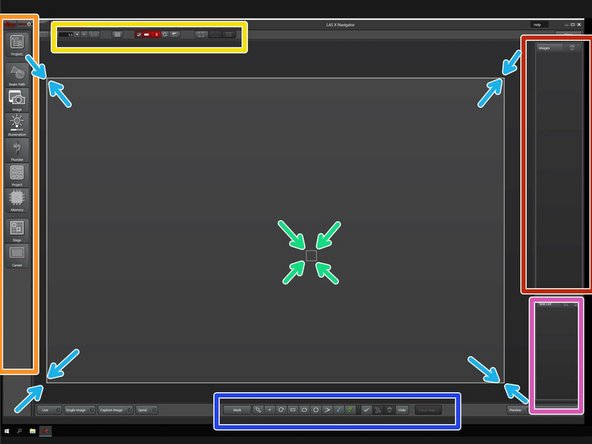
Microscope setting tabs.
-
Lookup table tools.
-
A large white box indicates the whole accessible are of the stage.
-
Stage position indicated by a white box.
-
Layers in the project.
-
Task List.
-
Shows the pipeline of imaging jobs.
-
Region selection tools and focus map settings.
-
-
-
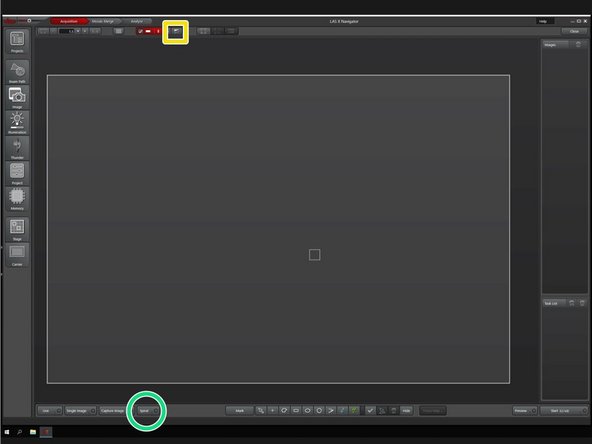
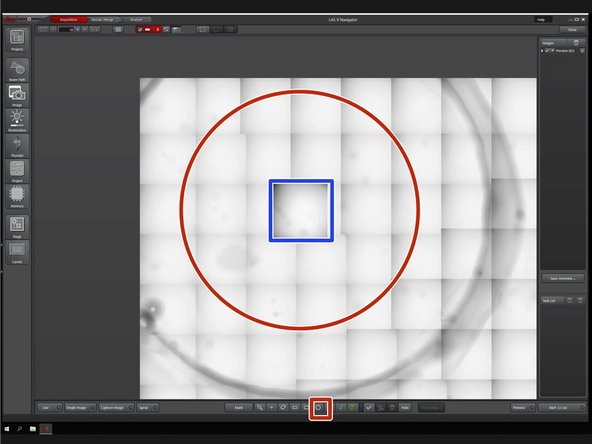
Generate a quick overview to get a first orientation in your sample with a spiral scan.
-
Click on autorange to get an automatic histogram adjustment.
-
Click on "Spiral" to start the scan.
-
Choose a tool to mark a region for a preview scan, e.g. a circle.
-
Zoom in the area of interest using the mouse wheel.
-
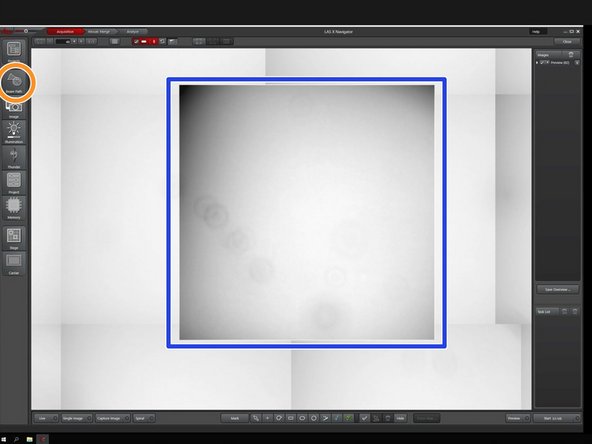
Open the "Beam Path" tab.
-
-
-
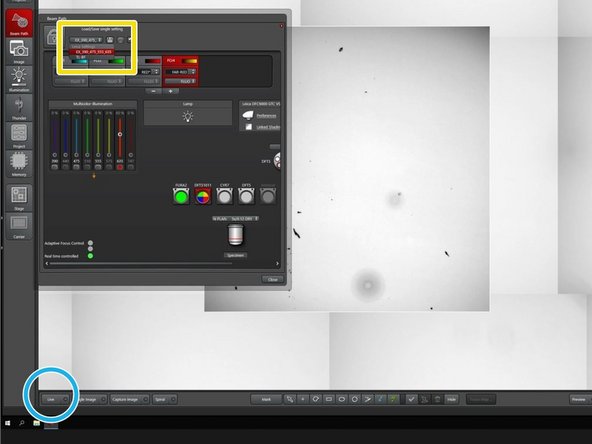
Choose a channel template, that fits to your staining, or make your own channel settings.
-
Choose a channel to generate an overview.
-
Go to "Live".
-
Focus using the Z-controller.
-
You can toggle between fine and course movements by clicking "Z fine" and "Z course" buttons.
-
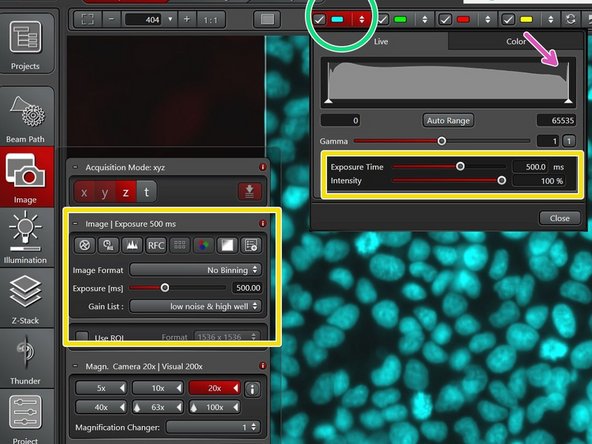
Click on each channel to access the current histogram. Adjust the brightness of the image by adjusting the intensity of the light source and the exposure time. Avoid clipping/saturation of your signal.
-
If you are acquiring at 16 bit the max values should be lower than 65535.
-
Start the preview with low intensity and short exposure time to prevent bleaching of your sample.
-
-
-
Click on each channel to access the current histogram.
-
Adjust the brightness of the image by adjusting the intensity of the light source and the exposure time.
-
Avoid clipping/saturation of your signal.
-
-
-
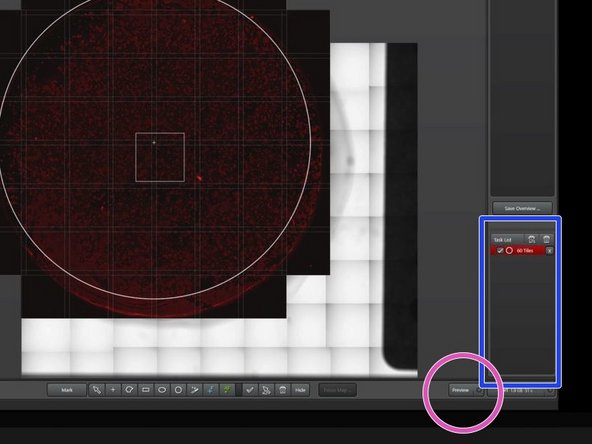
Make sure that only the previously chosen imaging region is ticked in the job list.
-
Click on "Preview" to quickly image your region of interest with the currently chosen channel (fast scan, lower quality).
-
You can also click on "Start" to record all channels and generate a high quality overview. In this case you should adjust intensity and exposure of all channels accordingly.
-
-
-
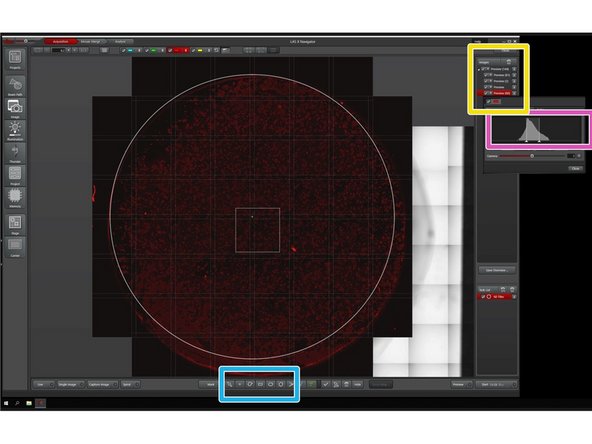
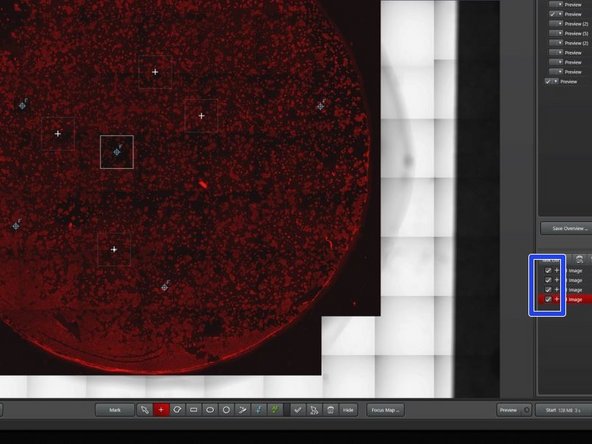
Navigate through the overview with the mouse.
-
Move the canvas by left clicking and pulling. Zoom in and out with the mouse wheel.
-
Adjust the histogram of your look up table for better visualization of your data.
-
Hide/show the different layers and previews by ticking/unticking the corresponding boxes.
-
Search for your region(s) of interest.
-
Mark your ROI with a selection tool of your choice (tilescan).
-
For single image acquision use the single image tool.
-
Activate "merge during acquisition" for tile scans, that you later want to display as one image.
-
-
-
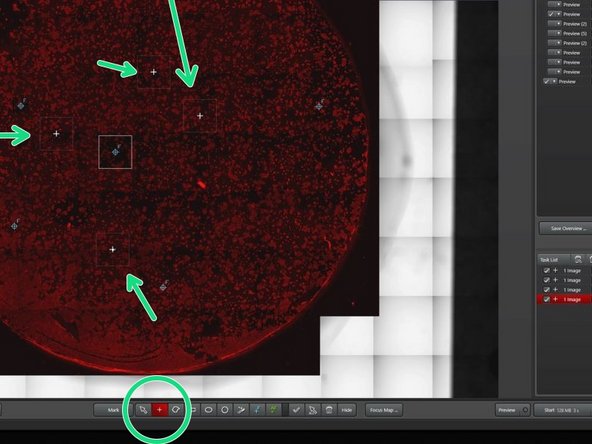
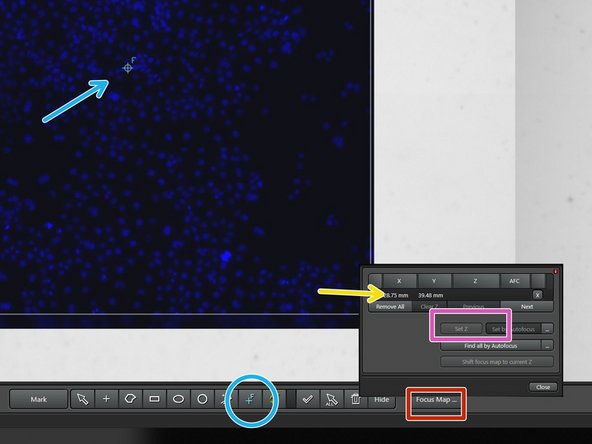
You can generate a focus map with multiple focus points, if your area of interest is big and the sample uneven.
-
Choose the tool Focus Map Point and place a point into your field of view.
-
Open the tab '''Focus Maps'.'
-
Choose your Focus Map Point
-
Focus the image and click on "Set Z", if the image is in focus.
-
Repeat the last four steps for all Focus Map Points.
-
-
-
Make sure that only the chosen imaging region(s) are ticked in the job list.
-
Press "Start" to acquire.
-
-
-
Check other guides for the topics:
-
How to change to a higher magnification.
-
How to set up brightfield imaging.
-
How to use autofocus.
-
How to acquire a Z-Stack.
-
How to perform a timelapse.
-
How to activate Live Cell control.
-
How to set up Autosaving.
-